
Related Manuals for Siemens SL400


Summary of Contents for Siemens SL400
- Page 1 SL400 - SL400 SL400 - SL400 GIGASET. INSPIRING CONVERSATION. GIGASET. INSPIRING CONVERSATION.
-
Page 2: Gigaset Sl400/Sl400A - Your High-Quality Accessory
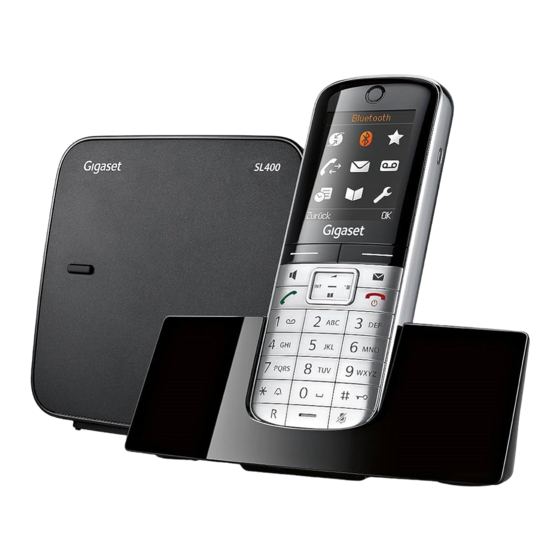
Congratulations, you are holding the slimmest and smallest Gigaset there has ever been. This phone sets new standards with its high-quality genuine metal frame and metal keypad, 1.8´´ TFT colour display and incorporated functions. Your Gigaset can do a lot more than just make calls: Bluetooth®... -
Page 3: Brief Overview
Brief overview 1 Display in idle status ¢ 2 Battery charge status ( ¢ page 17) 3 Display keys ( ¢ page 4) 4 Message key ( page 37) Access to call and message lists; Flashes: new message or new call 5 End call key, On/Off key End call, cancel function, go back one menu level (press briefly), back to idle status (press... -
Page 4: Display Symbols
Display symbols Display symbols The following symbols are displayed dependent on the settings and the operating status of your telephone: ¢ Signal strength i( page 54) ¢ or ECO Mode+ icon ¼ ( page 54) Answering machine activated (SL400A only) ¢... -
Page 5: Display Keys
Display symbols Other display symbols Information Please wait... Query Ð ¶ Û ¢ Room monitor activated Action failed Action complete page 60) ‰ À Á Switch from earpiece to Switch from handsfree to ¢ ¢ ¢ handsfree mode earpiece mode ‹... -
Page 6: Table Of Contents
Incoming SMS message list ..........36 Answering machine list (Gigaset SL400A only) ....... . 36 Call lists . - Page 7 SMS troubleshooting ............46 Operating the Gigaset SL400A base answering machine ... . 47 Operating via the handset .
- Page 8 Contents Defining handset settings ......... 64 Quick dialling numbers and functions .
-
Page 9: Safety Precautions
ƒ If you give your Gigaset to a third party, make sure you also give them the user guide. Remove faulty bases from use or have them repaired by our Service, as they could interfere with other wireless services. -
Page 10: First Steps
First steps Checking the package contents One Gigaset SL400/SL400A base One base cover stand One power adapter for the base One Gigaset handset One battery One battery cover One belt clip One charger One power adapter for the charger One phone cord... -
Page 11: Installing The Base And Charger
Please note: Never expose the telephone to the influence of heat sources, direct sunlight or other electrical devices. Protect your Gigaset from moisture, dust, corrosive liquids and fumes. -
Page 12: Connecting The Base
Connecting the base ¤ Connect power adapter phone jack to the base and place the cables in the cable recesses. ¤ Place the cover in the notches on the back of the base and click into place (not if mounting on the wall). ¤... -
Page 13: Connecting The Charger
Connecting the charger ¤ Connect the flat plug from the power adapter 1. ¤ Plug the power adapter into the plug socket 2. To disconnect the plug from the charger, press the release button disconnect the plug 4. -
Page 14: Setting Up The Handset For Use
Setting up the handset for use The display is protected by a plastic film. Please remove the protective film! Inserting the battery and closing the battery cover ¤ First insert battery with the con- tact surface facing down a. ¤ Then press the battery down- wards until it clicks into place. -
Page 15: Attaching The Belt Clip
To reopen the battery cover to replace the battery: ¤ Remove the belt clip (if attached). ¤ Insert your fingernail into the notch at the bottom of the casing and pull the battery cover upwards. To change the battery, insert your fingernail into the notch in the casing and pull the battery upwards. - Page 16 First battery charge and discharge The correct charge status can only be displayed once the battery is first fully charged and discharged. ¤ Place the handset in the charger for three hours. ¤ Once the battery is fully charged, remove the handset from the 3hour charger and do not...
-
Page 17: Setting The Date And Time
Setting the date and time Set the date and time so that the correct date and time can be assigned to incoming calls, and so that the alarm can be used. Please note Depending on your network provider, the date and time may be displayed auto- matically. - Page 18 ¤ Back Save §Save§ Press the key below on the dis- play screen to confirm your entry. Date/Time ‰ Saved The display shows Saved. You will hear a confirmation tone and the handset will automatically return to idle status. Display in idle status Once the phone is registered and the time set, the idle status is shown as in this Ã...
-
Page 19: Establishing The Mini Usb Connection
Connecting the USB data cable You can connect a standard USB data cable with a USB mini-B connector to syn- chronise your handset with a PC. To use this function, the Gigaset QuickSync soft- ¢ ware must be installed (... -
Page 20: What Would You Like To Do Next
What would you like to do next? Now you have successfully set up your Gigaset, you will certainly want to adapt it to your personal requirements. Use the following guide to quickly locate the most important subjects. If you are unfamiliar with menu-driven devices such as other Gigaset telephones, ¢... -
Page 21: Using The Phone
Using the phone Using the control key Below, the side of the control key that you must press in the respective operating situation is marked in black (top, bottom, right, left, centre), e.g., v for "press right on the control key" or w for "press the centre of the control key". -
Page 22: Using Keys On The Keypad
Using keys on the keypad c / Q / * etc. Press the matching key on the handset. Enter digits or letters. Correcting incorrect entries You can correct incorrect characters in the input fields by navigating to the incor- rect entry using the control key. You can then: Delete the character to the right of the cursor with the display key Ñ... -
Page 23: Activating/Deactivating The Handset
Press and hold the end call key again to switch the handset on. Please note When the handset is switched on or placed in the charger, an animation show- ing the Gigaset logo is displayed for several seconds. Activating/deactivating keypad lock Keypad lock prevents any inadvertent use of the phone. -
Page 24: Using This Guide
Using this guide The operating steps are shown in abbreviated form. Example: The illustration: Ï ¢ ¢ ¢ Eco Mode Eco Mode+ (³ = on) means: ¤ Press right on the control key v to open the main menu. ¤ Press right, left, down and up on Settings control key p to navigate to the... - Page 25 Eco Mode ³ Press down on the control key s ¤ Eco Mode ´ until the Eco Mode+ menu option Eco Mode+ appears on the display. Back Change ¤ §Change§ Press the display key activate/deactivate the function. Eco Mode ³ Eco Mode The change is effective immediately ³...
-
Page 26: Menu Overview
Menu overview Setting simplified or expert mode • • The menu view can be expanded (expert mode ) or simplified. Expert mode is the active default setting. Menu options that are only available in expert mode are marked with the icon. - Page 27 You have activated an SMS mailbox with a PIN or 2-3 mailboxes ¢ Mailbox New SMS page 39 ¢ Incoming page 42 ¢ Draft page 40 ¢ Mailbox 1 New SMS page 39 ¢ Mailbox 2 Incoming page 42 ¢ Mailbox 3 Draft page 40...
- Page 28 Ï Settings ¢ Date/Time page 16 ¢ Audio Settings Handset Volume page 67 ¢ Handsfree Profiles page 67 • ¢ Advisory Tones page 70 ¢ Silent Alert page 68 ¢ Ringtones (H/Set) • page 67 ¢ Music on Hold page 71 ¢...
-
Page 29: Making Calls
External calls are calls using the public tele- ¤ Pressing the handsfree key d. phone network. ¤ Enter the number and press the Gigaset SL400: press the display key talk key. §Accept§. ¤ Gigaset SL400A: press the display key Ô... -
Page 30: Using Calling Line Identification
Identification restricted) ( page 68). Ø«Ú Gigaset SL400 Using handsfree mode In handsfree mode, instead of holding the handset to your ear you can put it down, for example on the table in front of you. This 1234567890 allows others to participate in the call. -
Page 31: Switching To Mute
Press the handsfree key. (preselection) During a call and when listening to the answering machine (Gigaset SL400A only), You can store a call-by-call number (prese- activate or deactivate handsfree mode. lection number), which is automatically If you wish to place the handset in the... - Page 32 Saving or changing entries in the Permanently deactivating preselection lists preselection Ï ¢ ¢ ¢ Each of the two lists can contain 20 entries, Telephony Preselection ¢ each with 6 digits. Preselection No. Ñ Numbers may be prefixed according to the Press and hold the display key country in the "With Preselection"...
-
Page 33: Using The Directory And Lists
¢ Missed alarms list page 83.) Answering machine list Phone (Home):/Phone (Office):/Phone (Gigaset SL400A only) (Mobile): You can create a personalised directory for Enter a number in at least one of the your own handset. You can also send lists/ ¢... -
Page 34: Managing Directory Entries
Order of directory entries The following functions can be selected with q: Directory entries are generally sorted alpha- Display Number betically by surname. Spaces and digits take To edit or add to a saved number, or to Ó first priority. If only the first name was save it as a new entry, press after the entered in the directory, this is incorporated... -
Page 35: Another Handset
32). Entries with identical numbers are not overwritten on the receiving handset. Gigaset SL400A: Message playback is inter- The transfer is cancelled if the phone rupted during the number transfer from the rings or if the memory of the receiving answering machine list. - Page 36 Copying a number or e-mail Deactivating anniversaries ¢ s (Select entry) address from the directory §View§ §Edit§ In some operating situations, you can open Press the display keys one after the directory to copy a number or e-mail the other. address, for example.
-
Page 37: Redial List
Open menu. Calls recorded by the answering machine The following functions can be selected with (Ã, Gigaset SL400A only) You can view each type of call separately or Copy to Directory gain an overview of all calls. Each call record Copy an entry to the directory (page 32). -
Page 38: Opening Lists With The Message Key
Type of entry Icon New message... Press the talk key c to call the selected à ... in the answering machine list (Gigaset SL400A only) or on the net- caller back. work mailbox ™ §View§ Select the display key to access addi- ... -
Page 39: Missed Alarms List
After pressing the message key f, you Missed alarms list can see all lists containing messages and the network mailbox list. Missed (unacknowledged) appointments ¢ from the calendar ( page 55) and anniver- Lists containing new messages are at the top ¢... -
Page 40: Sending Sms (Text Messages)
Sending SMS Please note For instructions on entering text and (text messages) special characters, please see page 83. An SMS may contain up to 612 char- Your phone is delivered ready to send SMS acters. If there are more than 160 messages immediately. - Page 41 • SMS status report Draft SMS list Prerequisite: Your network provider sup- You can save an SMS in the draft SMS list, and ports this feature. edit and send it later. If you have activated the status report, you Saving an SMS in the draft SMS list ¤...
-
Page 42: Receiving An Sms
Deleting draft SMS list Sending SMS messages as a fax ¤ Open the draft message list and then: You can also send an SMS to a fax machine. §Options§ Open menu. Prerequisite: Your network provider sup- Delete All ports this feature. ¤... -
Page 43: Incoming
New SMS messages are signalled on all or delete the SMS with ¢ ¢ Ë Gigaset handsets by the icon on the dis- §Options§ §OK§ Delete Entry play, the flashing message key f and an After you have read a new SMS, it is given the advisory tone. -
Page 44: Sms With Vcard
Read the SMS and scroll to the telephone via SMS number. The digits are highlighted. You can be notified about missed calls or Ó new answering machine messages (Gigaset Press the display key. ¢ SL400A only) via SMS. Complete the entry ( page 34). -
Page 45: Using Sms Mailboxes
Using SMS mailboxes SMS PIN If necessary, enter 4-digit PIN. The general mailbox is the default setting. §Save§ Press the display key. Active mailboxes are marked with μ in the Anyone can access this mailbox and it can- not be protected by a PIN. You can set up mailbox list. -
Page 46: Setting Sms Centres
¤ CLIP evaluation of the SMS centre Find out about the services and special number is completed in your Gigaset. functions offered by your service pro- Depending on your PABX, you may have vider before you make a new applica-... -
Page 47: Activating/Deactivating Sms Function
Activating/deactivating SMS 4. No number or an invalid number is entered for the SMS centre set as the active send service function ¥ ¢ centre. Enter the number ( page 45). If you deactivate the SMS function, you can- You receive an incomplete SMS. not send or receive any SMS messages with ¥... -
Page 48: Operating The Gigaset Sl400A Base Answering Machine
• Operating the Mode: Select Answer & Record, Answer only or Gigaset SL400A base Alternating. If Alternating mode is selected: answering machine Record from: Enter hours/minutes for the start of You can access the answering machine via the period in 4-digit format. - Page 49 Cancel recording with a or §Back§ . Restart Once you have deleted your announcement, §OK§ the recording with the relevant pre-recorded announcement will be used again. After recording, the announcement is played back for you to check. You can re- Please note §New§...
-
Page 50: Deleting Messages
Stopping and controlling playback Copying a phone number from a message to the directory During message playback: Pause playback. Press 2 During playback or pause: ¢ §Options§ again to resume. Copy to Directory ¤ ¢ Complete the entry ( page 34). §Options§... -
Page 51: Activating/Deactivating Call Screening
• Diverting an external call to the Activating/deactivating answering machine call screening You can divert an incoming external call to During recording of a message, you can the answering machine, even if it is deacti- screen a call via the loudspeaker of regis- vated. -
Page 52: Resetting Fast Access For The Answering Machine Using Key 1
• Information about ring delay Resetting fast access for In Automatic mode, the following applies the answering machine using for ring delay: key 1 If there are no new messages, the answer- By default, key has been assigned for ing machine answers a call after 18 sec- onds. - Page 53 Calling the answering machine and Initiating ringback from the playing back messages answering machine with SMS and listening to messages Dial your own number. Prerequisite: You must have stored an SMS ¢ When you hear your announce- ment, press 9 and enter the notification number ( page 43).
-
Page 54: Using The Network Mailbox
. When a message is recorded, you receive a call from the network mailbox. If you have Gigaset SL400: Fast access is preset for the requested Calling Line Identification, the network mailbox. You only need to enter the network mailbox number is displayed. -
Page 55: Eco Dect
ECO DECT Status displays Display icon You are helping to protect the environment Reception strength: with your Gigaset SL400/SL400A. Ð i Ñ Ò – good to poor Reducing energy consumption (flashes) – no reception Ð white Eco Mode deactivated Your telephone has a power-saving adapter Ð... -
Page 56: Setting An Appointment (Calendar)
¤ Setting an appointment You can enter data in the following fields: Activation: (calendar) Select On or Off. Date: You can use your handset to remind yourself Enter day/month/year in 8-digit format. of up to 30 appointments. Anniversaries ¢ Time: page 35) entered in the directory are Enter hours/minutes in 4-digit format. -
Page 57: Displaying Missed Appointments, Anniversaries
You can either deactivate or answer an Displaying missed appointment reminder: appointments, anniversaries §§Off§§ Press the display key to deacti- vate the appointment reminder. Missed appointments/anniversaries ¢ page 35) are displayed in the Missed §SMS§ Press the display key to respond Alarms list if: to the appointment reminder You do not accept an appointment/anni-... -
Page 58: Setting The Alarm Clock
You can register up to six handsets to your clock and setting the wake-up time base. á ¢ ¢ Alarm Clock A Gigaset handset can be registered on up to ¤ four bases. You can enter data in the following fields: Activation: Manually registering Select On or Off. -
Page 59: Deregistering Handsets
Registering other handsets Changing the base You can register other Gigaset handsets and If your handset is registered to more than handsets for other devices with GAP func- one base, you can set it to a particular base tionality as follows. -
Page 60: Listening In To An External Call
Transferring a call to another handset §Conference§ Press the display key. All 3 participants are connected You can transfer an external call to another with each other. handset (connect). Open the list of handsets. Please note The external participant hears If only two handsets are registered, music on hold, if activated ¢... -
Page 61: Changing The Name Of A Handset
• Activating/deactivating Changing a handset's listening in internal number Ï ¢ ¢ ¢ Telephony Listening In A handset is automatically assigned the §Change§ Press to activate/deactivate the func- lowest free number when it is registered. If tion (³ = on). all slots are occupied, number 6 is overwrit- ten if this handset is in idle status. - Page 62 If you accept an incoming call, the room Sensitivity: monitor is suspended for the duration of the Select noise level sensitivity (Low or call, but the function remains activated. High). ¤ §Save§ Press to save the settings. If you deactivate then reactivate the hand- set, the room monitor remains activated.
-
Page 63: Using Bluetooth Devices
Deactivating the room monitor Using Bluetooth devices remotely Your Gigaset handset can communicate Prerequisites: The phone must support tone wirelessly via Bluetooth™ with other devices dialling and the room monitor should be set using this technology. for an external destination number. -
Page 64: Search For Headset
Registering Bluetooth devices Editing the list of known (trusted) devices The distance between the handset in Blue- tooth mode and the activated Bluetooth Open list ò ¢ ¢ device (headset or data device) should be no Known Devices more than 10 m. A corresponding icon appears next to each Please note device name in the list displayed:... -
Page 65: Defining Handset Settings
Rejecting/accepting an Defining handset unregistered Bluetooth device settings If a Bluetooth device that is not registered in the list of known devices tries to connect Your handset is preconfigured, but you can with the handset, you will be prompted on change the settings to suit your individual the display to enter the PIN for the Bluetooth requirements. -
Page 66: Changing The Display Language
Selecting numbers/changing an Changing the display assignment language Prerequisite: The digit key already has a You can view the display texts in different number assigned to it. languages. Ï When the handset is in idle status ¢ ¢ ¤ Language Press and hold the digit key: The current language is indicated by a Ø. -
Page 67: Setting Keypad Illumination
Ï ¢ ¢ ¢ Selection: Display + Keypad Display Select screensaver or Backlight §View§ Press the display key. The active The current setting is displayed. ¤ screensaver is displayed. You can enter data in the following fields: Select screensaver and press In Charger §OK§... -
Page 68: Changing The Handsfree/Earpiece Volume
Changing the handsfree/ Setting a handsfree profile earpiece volume In idle status, you can set various handsfree profiles to optimally adapt your phone to You can set the loudspeaker volume for your environment. handsfree mode and the earpiece volume to Profile 1 five different levels. - Page 69 Setting volume/melodies Activating/deactivating the ringtone for unknown calls In idle status: Ï ¢ ¢ You can set your phone not to ring for calls Audio Settings ¢ where Calling Line Identification has been Ringtones (H/Set) ¢ restricted. The call will only be signalled on Volume/Melodies the display.
-
Page 70: Using The Resource Directory
Activating/deactivating the alert Playing back sounds/viewing caller tone pictures É ¢ ¢ In place of the ringtone, you can activate an Resource Directory ¢ alert tone. When you receive a call, you will Screensavers / Caller Pictures / hear a short tone ("Beep") instead of the Sounds (select entry) ringtone. -
Page 71: Activating/Deactivating Advisory Tones
Setting the base phone. Some of these numbers are already preset. Ï ¢ ¢ ¢ The base settings are carried out using a reg- Telephony Area Codes istered Gigaset handset. Check that the (pre)set area code is correct. -
Page 72: Activating/Deactivating Music On Hold
¢ ¢ Audio Settings PIN known only to you. ¢ Music on Hold Gigaset SL400A: Setting a system PIN facili- §Change§ Press to activate or deactivate the tates remote operation of the answering ¢ music on hold (³ = on). -
Page 73: Connecting The Base To The Pabx
• Connecting the base to Saving an access code (outside line code) the PABX Prerequisite: You may have to enter an The following settings are only necessary if access code in front of the number for exter- your PABX requires them; see the PABX user nal calls in your PABX, e.g., "0". -
Page 74: Switching Temporarily To Tone Dialling (Dtmf)
Change pause after recall key Switching temporarily to tone dialling (DTMF) You can change the length of the pause if your PABX requires this (refer to the user guide for your PABX). If your PABX still operates with pulse dialling (PD), but you need tone dialling for a con- Open the main menu. -
Page 75: Customer Service & Assistance
Customer Service & Assistance Customer Service & Assistance You have questions? As a Gigaset customer, you can take advantage of our comprehensive serv- ice offerings. You can find help quickly in this User Manual and in the service pages of our Gigaset online portal. -
Page 76: Authorisation
Country-specific requirements have been enable Calling Line Identification (CLI). taken into consideration. You hear an error tone when keying an input. We, Gigaset Communications GmbH, ¥ Action has failed/invalid input. declare that this device meets the essential Repeat the operation. -
Page 77: Warranty
Customer Service & Assistance Warranty... - Page 78 Customer Service & Assistance...
- Page 79 Customer Service & Assistance Customer Service Hotline Kuwait : 0 6522458737 6522458738...
- Page 80 Customer Service & Assistance...
- Page 81 Customer Service & Assistance...
-
Page 82: Protecting Our Environment
All electrical and electronic equipment must statement be disposed of separately from general household waste using the sites designated We, Gigaset Communications GmbH, bear by local authorities. social responsibility and are actively com- mitted to a better world. Our ideas, technol-... -
Page 83: Specifications
Transmission power 10 mW, average power development, the list of recommended bat- per channel teries in the FAQ section of the Gigaset Cus- Range Up to 300 m outdoors, tomer Care pages is regularly updated: up to 50 m indoors www.gigaset.com/customercare... -
Page 84: Writing And Editing Text
Customer Service & Assistance Writing and editing text Writing an SMS/names ¤ Enter the individual letters/characters by The following rules apply when writing text: Each key between Q and O is pressing the corresponding key. The characters assigned to the key are assigned several letters and characters. -
Page 85: Accessing Additional Functions Via The Pc Interface
¤ ¢ To enable your handset to communicate Select [Settings] [Device properties] with the PC, the "Gigaset QuickSync" pro- to open the [Device] tab. gram must be installed on your PC (free to ¤ Click on [Firmware update]. download at www.gigaset.com/gigasetSL400). - Page 86 If the update procedure fails or your phone does not work properly following the update, repeat the update procedure as fol- lows: ¤ Close the "Gigaset QuickSync" program on the PC. ¤ Remove the USB data cable from the tel- ephone.
-
Page 87: Accessories
Accessories Gigaset handsets Upgrade your Gigaset to a cordless PABX: Gigaset SL400 handset Genuine metal frame and keypad High-quality keypad illumination 1.8´´ TFT colour display Bluetooth® and mini USB Directory for up to 500 vCards Talk/standby time of up to 14h/230h... - Page 88 Gigaset C59H handset Social life management with room monitor and birthday reminders Individual programming of ringtones with 6 VIP-groups High-quality keypad with illumination 1.8´´ TFT colour display Directory for up to 150 vCards Talk/standby time of up to 12h/180h, standard batteries...
- Page 89 Room monitor SMS with up to 640 characters www.gigaset.com/gigasete49h Gigaset repeater The Gigaset repeater can be used to increase the reception range between your Gigaset handset and the base. www.gigaset.com/gigasetrepeater All accessories and batteries are available from your phone retailer.
-
Page 90: Mounting The Base On The Wall
Mounting the base on the wall 48 mm approx. 2.5... -
Page 91: Index
Index Appointment/anniversary ..... . display missed ......Appointments . - Page 92 ....Connecting the headset ... . . Consultation call (internal) ......Calendar .
- Page 93 Display ......backlight Handset ..changing display language .
- Page 94 Icon Language ............alarm clock display .
- Page 95 ............Messages Paging key .
- Page 96 SMS centre ....changing number ....Saving (access code) .