Table of Contents
Advertisement
Quick Links
Advertisement
Table of Contents

Related Manuals for Philips RSAT 2


Summary of Contents for Philips RSAT 2
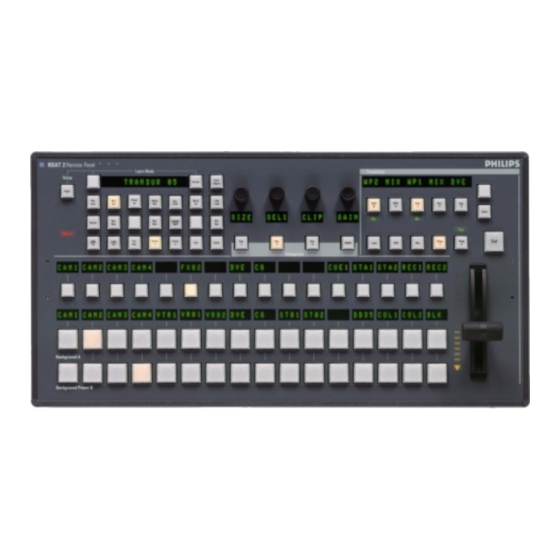
- Page 1 Remote Control Panel RSAT 2 Customer‘s Manual...
- Page 2 Published by BTS Media Solutions GmbH Brunnenweg 9 D-64331 Weiterstadt, Germany P.O. Box 1165 Tel: +49 (0) 6155-870-0 Fax: +49 (0) 6155-870-300 Web Sites Internet: www.thomsonbroadcast.com www.imagingsystems.de Intranet: www.weiterstadt.thmulti.com Trademarks All product names mentioned in this manual are the trademarks of their respective owners. Copyrights Information in this document is subject to change without notice.
-
Page 3: Revision Report
Revision Report Remote Panel RSAT 2 Customer’s Manual Documentation Order Number RU 0065, 000 351 763 000 Before reading the entire manual, please check for any supplements at the end of the manual. Item Date Serial Pages Volume/Contents Remarks affected 07.2000... -
Page 4: Table Of Contents
Remote Panel RSAT2 Contents CONTENTS Page Revision Report General 1.1 Application examples 1.2 Control and display elements Technical Data Installation and Start-up 3.1 Safety Instructions 3.2 Mounting the Remote Control Panel RSAT2 3.3 Rack Mounting 3.4 Connecting to the DD35 control panel 3.5 Port re-configuration RS-422 / RS-232 Operation 4.1 How to start the Satellite Panel... - Page 5 Contents Remote Panel RSAT2 Operating Instructions - Rev. 1 / 11.2001...
-
Page 6: General
Remote Control Panel RSAT2 1. General GENERAL The remote control panel RSAT2 is used for copying button functions of the DD35 main operation panels for control of mixer functions from another workplace. Connected to DD35 main panel via RS-422 cable which can be ordered optionally. When the learn mode is applied single button functions also the built in Digipots and the Fader can be trained with functions of the DD35 main panel –... - Page 7 1. General Remote Control Panel RSAT1 The programmable memory of the RSAT2 is part of the DD35. Thus the program- med function set for the RSAT2 buttons can be switched from application to appli- cation. More complex button sequences can be achieved by programmed recall of macro buttons of the DD35 main panel.
-
Page 8: Technical Data
Remote Control Panel RSAT2 2. Technical Data TECHNICAL DATA Mechanics Width: 240 mm, Length: 464 mm, Depth: 115 mm Weight: 5 kg Desk cut out: 441 x 217 mm Optional 19” Mounting frame 100 V – 240 V $10 %, autosense Voltage supply Line voltage: Line current:... - Page 9 2. Technical Data Remote Control Panel RSAT2 Operating Instructions - Rev. 1 / 11.2001...
-
Page 10: Installation And Startup
Remote Control Panel RSAT2 3. Installation and Startup INSTALLATION AND STARTUP SAFETY INSTRUCTIONS Caution! These instructions are for use by qualified personnel only. To reduce the risk of electric shock, do not perform any installation other than that contained in the Operating Instructions unless you are qualified to do so. - Page 11 3. Installation and Startup Remote Control Panel RSAT2 DESK MOUNTING Cut-out dimensions: 441 x 217 mm Fig. 2: Panel cut out Unpack the RSAT2 panel and remove the panel module from the mounting box. The locking mechanism can be removed by the two release tools delivered in the accessory pack.
- Page 12 Remote Control Panel RSAT2 3. Installation and Startup 25.8 114.5 482.6 19” Mounting Frame 465.1 All dimensions are [ mm ] Fig. 3: Mechanicak dimensions Operating Instructions - Rev. 1 / 11.2001...
-
Page 13: Rack Mounting
3. Installation and Startup Remote Control Panel RSAT2 RACK MOUNTING Caution: Mounting the RSAT panel has only be done by qualified service personnel being informed about the dangers involved! Fig. 4: 19” mounting frame for RSAT2 remote control panel with mounting accessories Mounting the 19”... - Page 14 Remote Control Panel RSAT2 3. Installation and Startup Fig. 6: Mounting the RSAT2 case Put in the RSAT2 case into the 19” frame and fasten it with 6 screws (see acces- sories). Connect the cable and put in the RSAT2 module in the case. By pressing, the module engages independently.
-
Page 15: Connecting To The Dd35 Control Panel
3. Installation and Startup Remote Control Panel RSAT2 CONNECTING TO THE DD35 CONTROL PANEL Attention: The EMC regulations require the use of properly shielded cables in the instal- lation of the device or the system. Suitable cables can be ordered from Philips Broadcast. -
Page 16: Port Re-Configuration Rs-422 / Rs-232
Remote Control Panel RSAT2 3. Installation and Startup PORT RE-CONFIGURATION RS-422 / RS-232 In case the RSAT2 panel shall be used in connection with a PC, the port can be configurated as RS-232. For this a RS-232 cable is nesseccary. Demount the panel module. - Page 17 3. Installation and Startup Remote Control Panel RSAT2 Operating Instructions - Rev. 1 / 11.2001...
-
Page 18: Operation
Remote Control Panel RSAT2 4. Operation OPERATION HOW TO START THE REMOTE PANEL To start the protocol for the panel use the sidepanel menu. Step into the Install / Panel / Satpanel menu and select the port number and the type of the protocol. Fig. -
Page 19: How To Learn A New Function
4. Operation Remote Control Panel RSAT2 HOW TO LEARN A NEW FUNCTION The learn mode is activated by pressing the two buttons left and right of the big (16 character) display simultaneously. Press the buttons simulaneously Fig. 11: Learn mode buttons L e a r n i n g . -
Page 20: What Can Be Learned
Remote Control Panel RSAT2 4. Operation 4.2.2 Learning digipots Turn simultaneously two digipots, one on the panel, the other one on the control panel. Keep in mind that the space between the digipots on the panel is very narrow so you probably might have turned more than one digipot (“fat fingers” problem) and the result of the learning is not what you have expected (the last digipots “wins”). -
Page 21: Loading And Saving Setups
4. Operation Remote Control Panel RSAT2 LOADING AND SAVING SETUPS Laden und Speichern erfolgt in Setup–Menü Speichern: RSAT Save User Löschen: RSAT Kill User Ausführen: RSAT Macro User Currently there is no menu on the SidePanel, so you have to enter some com- mands from the VxWorks shell. - Page 22 Remote Control Panel RSAT2 4. Operation The setup files are special text files, which can be “understood” by the VxWorks shell interpreter. This means you can alternatively load setups by running them as shell script (by typing < /flash/appdisk/mstrmemo.sat, for example). But this is not recommended due to the long time it usually takes for interpreting the scripts (so you better use the SatPanelLoadLearned command).
- Page 23 4. Operation Remote Control Panel RSAT2 Operating Instructions - Rev. 1 / 11.2001...
- Page 24 Remote Control Panel RSAT2 4. Operation RSAT2 MACROS AND CONTROL PANEL M/E DELEGATION When using the supplied exemplary makros, consider the following: the makros have been programmed for the switcher type DD35-4. When using the makros for the new switcher types DD35-2 and DD35-3 or in connection with the M/E delega- tion, pay attention to the assignment of the M/E designation of the makro to the phy- sical M/E of the control panel.
- Page 25 4. Operation Remote Control Panel RSAT2 Operating Instructions - Rev. 1 / 11.2001...
- Page 26 Remote Control Panel RSAT2 4. Operation Special button assignment not assigned Key1 Key2 Auto Auto Auto Key1 Key2 fixed assignment Fig. 12: Spezial button assignment Operating Instructions - Rev. 1 / 11.2001...
-
Page 27: Setup / Tests
5. Setup / Test Remot Control Panel RSAT2 SETUP / TEST Button Button Button B101 B102 B100 Fig. 13: Satrting Setup/Test mode Starting the Setup / Test mode: Simultaneously press the button B100+B101+B102 (see RSAT2–Layout). Release the button B100 at least, but within 2,5 seconds. The display shows: SETUP / TESTS-MENU The right top display shows the software version (e.g.) - Page 28 Remote Control Panel RSAT2 5. Setup / Test Test: All Keys Test: All Lamps Test: All Displays Exit Setup-/Test-Menu The individual tests are self-explaining. The display requests the user to per- form further operational steps. With the menu item Exit Menu, the normal operation mode is recalled. The menu–item “Telegram Delay”...
-
Page 29: Annex
6. Annex Remot Control Panel RSAT2 ANNEX CODES OF THE OPERATING ELEMENTS Name Range LED’s Lgxx (g=1...6, xx=00...24) Buttons and Bgxx (g=0...6, xx=00...28) LED’s Display Dgxx (g=1...5, xx=00...16) DigiPot Pgxx (g=2, xx=00...03) Fader Fgxx (g=0, xx=00) Operating Instructions - Rev. 1 / 11.2001... -
Page 30: Default Macros
Remot Control Panel RSAT2 6. Annex DEFAULT MACROS 6.2.1 2PP_32ML.SAT Cursor Auto Adjust Left Digit Right Limit Menu Bord Mask Mask Fade Over Down Limit Couple Matte Split Cancel Enter Pattn Pattn Wipe Wipe Loop Auto MaKE Shift Shift Key 1 Key 2 Auto Auto... - Page 31 6. Annex Remot Control Panel RSAT2 6.2.2 2PP_24ML.SAT Cursor Auto Adjust Left Digit Right Limit Menu Bord Mask Mask Fade Over Down Limit Couple Matte Split Cancel Enter Pattn Pattn Wipe Wipe Loop Auto MaKE Key 1 Key 2 Key 3 Auto Auto Auto...
- Page 32 Remot Control Panel RSAT2 6. Annex 6.2.3 2M3_32ML.SAT Cursor Auto Adjust Left Digit Right Limit Menu Bord Mask Mask Fade Over Down Limit Couple Matte Split Cancel Enter Pattn Pattn Wipe Wipe Loop Auto MaKE Shift Shift Key 1 Key 2 Auto Auto Auto...
- Page 33 6. Annex Remot Control Panel RSAT2 6.2.4 2M3_24ML.SAT Cursor Auto Adjust Left Digit Right Limit Menu Bord Mask Mask Fade Over Down Limit Couple Matte Split Cancel Enter Pattn Pattn Wipe Wipe Loop Auto MaKE Key 2 Key 3 Key 1 Auto Auto Auto...
- Page 34 Remot Control Panel RSAT2 6. Annex 6.2.5 2M2_32ML.SAT Cursor Auto Adjust Left Digit Right Limit Menu Bord Mask Mask Fade Over Down Limit Couple Matte Split Cancel Enter Pattn Pattn Wipe Wipe Loop Auto MaKE Shift Shift Key 1 Key 2 Auto Auto Auto...
- Page 35 6. Annex Remot Control Panel RSAT2 6.2.6 2M2_24ML.SAT Cursor Auto Adjust Left Digit Right Limit Menu Bord Mask Mask Fade Over Down Limit Couple Matte Split Cancel Enter Pattn Pattn Wipe Wipe Loop Auto MaKE Shift Shift Key 1 Key 2 Auto Auto Auto...
- Page 36 Remot Control Panel RSAT2 6. Annex 6.2.7 2M1_32ML.SAT Cursor Auto Adjust Left Digit Right Limit Menu Bord Mask Mask Fade Over Down Limit Couple Matte Split Cancel Enter Pattn Pattn Wipe Wipe Loop Auto MaKE Shift Shift Key 1 Key 2 Auto Auto Auto...
- Page 37 6. Annex Remot Control Panel RSAT2 6.2.8 2M1_24ML.SAT Cursor Auto Adjust Left Digit Right Limit Menu Bord Mask Mask Fade Over Down Limit Couple Matte Split Cancel Enter Pattn Pattn Wipe Wipe Loop Auto MaKE Shift Shift Key 1 Key 2 Auto Auto Auto...
- Page 38 Remot Control Panel RSAT2 6. Annex 6.2.9 2_PP_32.SAT Auto Cursor Adjust Limit Digit Mask Mask Bord Over Fade Limit Couple Matte Split Pattn Pattn Wipe Wipe Loop Auto MaKE Shift Shift Key 1 Key 2 Auto Auto Auto Shift Key 1 Key 2 Operating Instructions - Rev.
- Page 39 6. Annex Remot Control Panel RSAT2 6.2.10 2_PP_24.SAT Auto Cursor Adjust Limit Digit Mask Mask Bord Over Fade Limit Couple Matte Split Pattn Pattn Wipe Wipe Loop Auto MaKE Shift Shift Key 1 Key 2 Auto Auto Auto Shift Key 1 Key 2 Operating Instructions - Rev.
- Page 40 Remot Control Panel RSAT2 6. Annex 6.2.11 2_ME3_32.SAT Auto Cursor Adjust Limit Digit Mask Mask Bord Over Fade Limit Couple Matte Split Pattn Pattn Wipe Wipe Loop Auto MaKE Shift Shift Key 1 Key 2 Auto Auto Auto Shift Key 1 Key 2 Operating Instructions - Rev.
- Page 41 6. Annex Remot Control Panel RSAT2 6.2.12 2_ME3_24.SAT Auto Cursor Adjust Limit Digit Mask Mask Bord Over Fade Limit Couple Matte Split Pattn Pattn Wipe Wipe Loop Auto MaKE Shift Shift Key 1 Key 2 Auto Auto Auto Shift Key 1 Key 2 Operating Instructions - Rev.
- Page 42 Remot Control Panel RSAT2 6. Annex 6.2.13 2_ME2_32.SAT Auto Cursor Adjust Limit Digit Mask Mask Bord Over Fade Limit Couple Matte Split Pattn Pattn Wipe Wipe Loop Auto MaKE Shift Shift Key 1 Key 2 Auto Auto Auto Shift Key 1 Key 2 Operating Instructions - Rev.
- Page 43 6. Annex Remot Control Panel RSAT2 6.2.14 2_ME2_24.SAT Auto Cursor Adjust Limit Digit Mask Mask Bord Over Fade Limit Couple Matte Split Pattn Pattn Wipe Wipe Loop Auto MaKE Shift Shift Key 1 Key 2 Auto Auto Auto Shift Key 1 Key 2 Operating Instructions - Rev.
- Page 44 Remot Control Panel RSAT2 6. Annex 6.2.15 2_ME1_32.SAT Auto Cursor Adjust Limit Digit Mask Mask Bord Over Fade Limit Couple Matte Split Pattn Pattn Wipe Wipe Loop Auto MaKE Shift Shift Key 1 Key 2 Auto Auto Auto Shift Key 1 Key 2 Operating Instructions - Rev.
- Page 45 6. Annex Remot Control Panel RSAT2 6.2.16 2_ME1_24.SAT Auto Cursor Adjust Limit Digit Mask Mask Bord Over Fade Limit Couple Matte Split Pattn Pattn Wipe Wipe Loop Auto MaKE Shift Shift Key 1 Key 2 Auto Auto Auto Shift Key 1 Key 2 Operating Instructions - Rev.