
Related Manuals for Motorola CD201


Summary of Contents for Motorola CD201
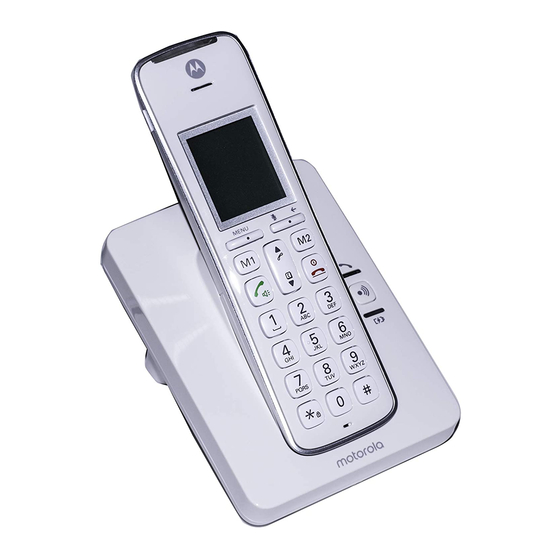
- Page 1 Motorola CD2 Digital Cordless Phone For CD201, CD202, CD203 and CD204 Warning Use only rechargeable batteries.
- Page 2 Welcome... to your new Motorola CD2 Digital Cordless Phone! • All handsets fully cordless for locating anywhere within range. • 100 Name and number phonebook. • Copy phonebook entries between other handsets. • Caller Display shows you who's calling and see details of the last 50 callers in a Calls list.* •...
- Page 3 This User Guide provides you with all the information you need to get the most from your phone. Before you make your first call you will need to set up your phone. Follow the simple instructions in `Getting Started', on the next few pages.
-
Page 4: Table Of Contents
1. Getting started ..........6 Edit an entry ............19 Delete an entry ..........19 2. Getting to know your phone ......9 Delete all entries..........19 4.10 Copy phonebook to another handset ....20 3. Using the phone..........14 4.11 To assign a Direct Memory call number ..20 Make a call............ - Page 5 7. Personal settings ......... 25 Easy call............30 8.4.1 Switch easy call on/off ......30 Handset tones ..........25 8.4.2 Set the easy call number ....... 30 7.1.1 Ring volume ........... 25 8.4.3 Dial an easy number ......31 7.1.2 Ring melody ........... 25 Registration .............
-
Page 6: Getting Started
1. Getting started out of range of the base. Move back within in range. The handset will automatically re-connect to the base. WARNING Setting up Do not place your CD2 in the bathroom or other humid areas. IMPORTANT Location The base station must be plugged into the mains power at all times. - Page 7 Plug the mains power cable with the clear connector into the 3. Place the handset on the charger to charge for at least socket marked on the underside of the base and plug 24 hours. When the handset is fully charged the the other end into the mains power wall socket and switch icon will indicate that it is fully charged.
-
Page 8: Date And Time
Note that new batteries do not reach full capacity until they You can still make and receive calls without first selecting have been in normal use for several days. your country and network operator, however the Welcome screen will re-appear until you have configured your phone To keep your batteries in the best condition, leave the country settings. -
Page 9: Getting To Know Your Phone
2. Getting to know your phone Ringer Indicator LED Flashes to indicate new event, e.g. voicemail, TAM and Overview of your handset ringing. Earpiece Redial / Scroll right / Clear / Mute Open the redial list. Scroll to the right. Delete characters on screen when entering names and numbers. -
Page 10: Handset Display
# / Ringer off / Pause Direct Memory keys Press and hold to switch handset ringer on or off. Press to call pre-stored number directly. When dialling or storing a number, press and hold to Menu key enter a pause (P). Enter the main menu. -
Page 11: Display Icons
Display icons Handset ringer is off. On when the line is in use. Flashes when there is an incoming call. Steady when the handset is registered and within range of the base. Flashes when the handset is Flashes when you have new voicemail out of range or searching for base. -
Page 12: Overview Of The Base
Overview of the base 2. Press again to cancel the paging call or press any key on the handset to stop the paging call. C Charge Red Light ON whenever the handset is placed on the base. Navigating the menus The basic steps of navigating through the menu and on- screen options. -
Page 13: Menu Map
Menu map PHONEBOOK CLOCK/ALARM PERSONAL SET ADVANCED SET NEW ENTRY DATE & TIME HANDSET TONE RECALL TIME LIST ENTRY SET ALARM RING VOLUME DIAL MODE <NAME> ALARM TONE CALL BARRING RING MELODY EDIT ENTRY EASY CALL GROUP MELODY REGISTRATION DELETE ENTRY KEY TONE SELECT BASE DELETE ALL... -
Page 14: Using The Phone
3. Using the phone entries starting with A. Pressing again will show the entries starting with B, etc... Make a call Call from the calls list < 1. Press NOTE 2. Dial the telephone number. You need to subscribe to your network’s Caller Line Identification service to be able to see the caller’s number in Pre-dial the calls list. -
Page 15: Adjust Volume
Amplification NOTE If you have subscribed to your Network’s Caller Identity The CD2 comes with a dedicated Amplification button which service and assigned a VIP Group to the caller’s number, the allows you to boost the earpiece volume. caller’s details are displayed before the phone starts ringing To switch the amplification feature On: (see “Store an entry”... -
Page 16: End A Call
3.10 End a call • If more than two handsets are registered to the base, 2345* > their numbers are displayed, e.g. . Enter the number 1. Press of the handset you want to call or press to ring all After you hang up, the duration the phone is off-hook is handsets. -
Page 17: Three-Party Conference Call
4. Phonebook 3.12.3 Three-party conference call 1. During an external call, press The CD2 handset phonebook can store up to 100 names Your caller is put on hold. and numbers. 2. Enter the number of the handset you want to call or NOTE press to ring all handsets. -
Page 18: Entering Names
5. Enter a number. Press to save. Press To enter a space press NO GROUP GROUP A select and press to confirm. Press to delete a character or press and hold > to delete all characters. 6. Press to return to standby. NOTE Character map You can assign individual contacts to specific groups of your... -
Page 19: View An Entry
Edit an entry 1. When storing a number, press and hold until the display shows P. You can then continue storing the 1. Press phone number. 2. Scroll to the entry you want to edit and press EDIT ENTRY is dsplayed. Press again. -
Page 20: Copy Phonebook To Another Handset
CONFIRM? Key 1 Key 2 3. Display shows . Press 3. Scroll ) or ) then press > 4. Press to return to standby. Key1 4. Display shows . Press to confirm. 4.10 Copy phonebook to another handset 5. Press to select to assign the fast call number 1. -
Page 21: Caller Display And Calls List
5. Caller display and Calls list When you have missed calls (incoming calls that you haven’t answered) the icon will be displayed in the display on all If you have subscribed to Caller Line Identification (CLI), and handsets registered to the base. provided the identity of the caller is not withheld, the number If one handset is used to view the calls log, the icon on the of the caller will be displayed together with the date and time... -
Page 22: Dial From The Calls List
5.1.2 Dial from the calls list 5.1.4 Save a number from the calls list to the phonebook 1. Press to open the Calls list. 1. Press then . The most recent call is displayed. The most recent call is displayed. 2. -
Page 23: Delete Entire Calls List
5.1.6 Delete entire calls list 5.2.3 Copy a redial number to the phonebook 1. Press . The most recent call is displayed. 1. Press and scroll to the entry you want. 2. Scroll to the number you want. 2. Press DELETE ALL 3. -
Page 24: Clock & Alarm
6. Clock & Alarm Set alarm CLOCK/ALARM 1. Press , scroll and press If you subscribe to your network’s Caller Identification service, SET ALARM 2. Scroll and press the time on your CD2 may be set automatically each time you receive a call, depending on your network provider. -
Page 25: Personal Settings
7. Personal settings 3. Press to select the ringtone. A sample of the ringtone is played. Handset tones 4. Press to confirm. WARNING > 5. Press to return to standby. When the phone is ringing, avoid holding the earpiece too close to your ear as it may damage your hearing. -
Page 26: Key Tones On/Off
Base ringer 7.1.4 Key tones on/off When you press a key on the handset you hear a beep. You 7.2.1 Ring volume can switch these beeps on or off. Choose from: Ringer Off, Low, Medium, High. PERSONAL SET 1. Press , scroll and press NOTE... -
Page 27: Handset Name
5. Press to confirm. 4. Press to confirm. > > 6. Press to return to standby. 5. Press to return to standby. Handset name Auto hang up Personalise your handset, with a name or location for With Auto hang up switched on, you can end a call just by example Peter or Bedroom. -
Page 28: Room Monitor On/Off
Room Monitor on/off Backlight on/off PERSONAL SET Leave one handset in a room and use another handset to 1. Press , scroll and press hear sounds in that room. PERSONAL SET 1. Press , scroll and press BACKLIGHT 2. Scroll . -
Page 29: Advanced Settings
8. Advanced settings TONE PULSE 3. Press to select 4. Press to confirm. This setting is useful to access certain network and PABX/ > 5. Press to return to standby. switchboard services. 8.2.1 Temporarily switch from Pulse to Tone Recall time dialling The default CD2 recall time is suitable for your country and 1. -
Page 30: Set A Number To Be Barred
5. Press to select . Press 3. Enter the master PIN (default setting 0000) and press confirm. > MODE is displayed. Press then press 6. Press to return to standby. You can now set the select . Press to confirm. number. -
Page 31: Dial An Easy Number
8.4.3 Dial an easy number At the handset: When an easy call number has been stored and the easy call ADVANCED SET 1. Press and scroll and press > setting switched on, press any key (apart from ), to dial a number. -
Page 32: Unregister A Handset
SELECT BASE is displayed. Press 2. Scroll . Press The available bases are displayed with the current base 3. Enter the current 4 digit master PIN and press number flashing. (Default setting 0000). 4. Enter the number of the base you want – 1,2,3 or 4 and 4. -
Page 33: Default Settings
8.11 Default settings 8.12 Auto prefix Handset name Handset You can set the CD2 to detect a dialling number and replace it with another number. The number to be detected can be Key tone up to 5 digits long. It can be replaced with a number up to 10 First ring digits. -
Page 34: Intrusion
ADVANCED SET 8.15 ECO mode 1. Press , scroll and press SEL. COUNTRY To reduce the level of power emissions, you can select low 2. Scroll . Press power or ECO mode. When the ECO mode is set to , the 3. -
Page 35: Help
9. Help No ring tone • The ring tone is deactivated. icon is not scrolling when the handset is • Increase the volume. placed on the base Caller Line Identification (CLI) service does not • Bad battery contact – move the handset slightly work •... -
Page 36: General Information
10. General information 6. Unplug this product from the wall outlet before cleaning. Do not use liquid cleaners or aerosol cleaners. Use a IMPORTANT damp cloth for cleaning. This equipment is not designed for making emergency 7. Do not disassemble this product. If service or repair telephone calls when the power fails. -
Page 37: Installation Guidelines
Installation Guidelines 10. To avoid interference to nearby appliances, do not place the base of the phone on or near a TV, microwave oven, 1. Read and understand all instructions and save them for or VCR. future reference. 2. Follow all warnings and instructions marked on the Battery Safety Instructions product. -
Page 38: Product Disposal Instructions
• Never use household polish as this will damage the out trashbin label on the product (or the package in some product. Never use a dry cloth as this may cause a static cases). As defined by the WEEE directive, this crossed- shock. - Page 39 What Other Limitations Are There? Warranty ANY IMPLIED WARRANTIES, INCLUDING WITHOUT LIMITATION THE IMPLIED WARRANTIES OF Thank you for purchasing this Motorola branded product MERCHANTABILITY AND FITNESS FOR A PARTICULAR manufactured under license by Suncorp Technologies PURPOSE, SHALL BE LIMITED TO THE DURATION OF...
- Page 40 Accessory to abnormal usage or conditions; or (d) other acts Consumer Products One (1) year from the date of the which are not the fault of Motorola or SUNCORP products original purchase by the first TECHNOLOGIES LTD., are excluded from coverage.
-
Page 41: Connecting To A Switchboard
How to Obtain Warranty Service or Other 4 is exceeded, the telephones may not ring. With different Information? telephone types there is no guarantee of ringing, even when the REN is less than 4. To obtain service or information, please call: (65) 68412668. Any additional handsets and chargers that you register have Email: support@alcom.com.sg a REN of 0. - Page 42 You may also need to enter a pause when storing international numbers or charge card numbers. Recall You may need to use the recall function if you are connected to a switchboard/PABX (Private Automatic Branch Exchange), contact your PABX supplier for further information.
- Page 43 General information...
- Page 44 General information...
- Page 45 General information...
- Page 46 Manufactured, distributed or sold by Suncorp Technologies Ltd. , official licensee for this product. MOTOROLA and the Stylized M Logo are trademarks or registered trademarks of Motorola Trademark Holdings, LLC. and are used under license. All other trademarks are the property of their respective owners.