Table of Contents
Advertisement
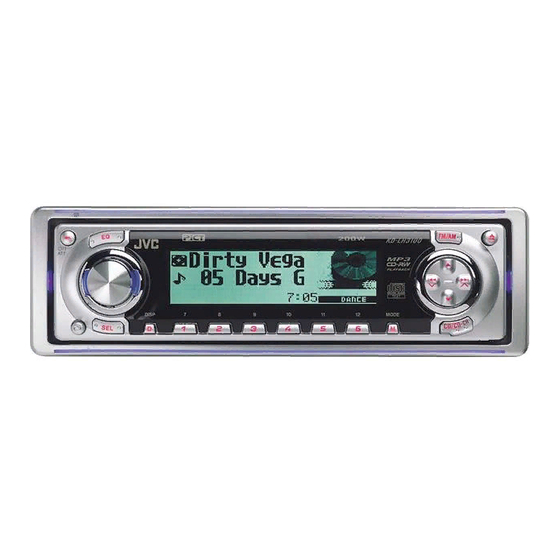
CD RECEIVER
RECEPTOR CON CD
RECEPTEUR CD
• This unit is equipped with the display demonstration. To cancel it, see page 8.
• Esta unidad está equipada con demostración en la pantalla. Para cancelarla, consulte la página 8.
• Cet appareil est équipé d'une fonction de démonstration des affichages. Pour l'annuler, référez-
vous à la page 8.
For installation and connections, refer to the separate manual.
Para la instalación y las conexiones, refiérase al manual separado.
Pour l'installation et les raccordements, se référer au manuel séparé.
ATT
SOUND
U
F
R
SOURCE
D
VOL
VOL
ATT
SOUND
U
R
F
SOURCE
D
VOL
VOL
INSTRUCTIONS
MANUAL DE INSTRUCCIONES
MANUEL D'INSTRUCTIONS
KD-LH3150/KD-LH3100
KD-LH3150/KD-LH3100
KD-LH3150/KD-LH3100
For customer Use:
Enter below the Model No. and
Serial No. which are located on
the top or bottom of the cabinet.
Retain this information for
future reference.
Model No.
Serial No.
KD-LH3150
KD-LH3150
KD-LH3100
KD-LH3100
GET0147-001A
[J/C]
Advertisement
Chapters
Table of Contents

Related Manuals for JVC KD-LH3100


Summary of Contents for JVC KD-LH3100
- Page 1 à la page 8. For installation and connections, refer to the separate manual. Para la instalación y las conexiones, refiérase al manual separado. Pour l’installation et les raccordements, se référer au manuel séparé. MANUEL D’INSTRUCTIONS KD-LH3150/KD-LH3100 KD-LH3150/KD-LH3100 KD-LH3150/KD-LH3100 SOUND SOURCE...
-
Page 2: How To Reset Your Unit
INFORMATION (For U.S.A.) This equipment has been tested and found to comply with the limits for a Class B digital device, pursuant to Part 15 of the FCC Rules. These limits are designed to provide reasonable protection against harmful interference in a residential installation. This equipment generates, uses, and can radiate radio frequency energy and, if not installed and used in accordance with the instructions, may cause harmful interference to radio communications. -
Page 3: Table Of Contents
Thank you for purchasing a JVC product. Please read all instructions carefully before operation, to ensure your complete understanding and to obtain the best possible performance from the unit. CONTENTS How to reset your unit ... LOCATION OF THE BUTTONS ... 4 Control panel ... -
Page 4: Location Of The Buttons
Number buttons t M (MODE) button y Remote sensor u For KD-LH3150: CD/CD-CH (CD changer) (LINE) button For KD-LH3100: CD/CD-CH (CD changer) button , 5/∞, and control dial) enter the corresponding control mode, then Time countdown indicator For KD-LH3150... -
Page 5: Remote Controller
Remote controller SOUND SOURCE 1 • Turns on the unit if pressed when the unit is turned off. • Turns off the unit if pressed and held for a few seconds. • Drops the volume level in a moment if pressed briefly. -
Page 6: Preparing The Remote Controller
Preparing the remote controller Before using the remote controller: • Aim the remote controller directly at the remote sensor on the main unit. Make sure there is no obstacle in between. Remote sensor • Do not expose the remote sensor to strong light (direct sunlight or artificial lighting). -
Page 7: Basic Operations
CD changer (CD-CH), or external component (LINE-IN) For KD-LH3150: • Press CD/CD-CH (LINE) repeatedly. LINE-IN For KD-LH3100: • Press CD/CD-CH repeatedly. (or LINE-IN* If there is no disc in the loading slot, you cannot select “CD” as the source, “No Disc”... -
Page 8: Canceling The Display Demonstration
To drop the volume in a moment Press briefly while listening to any source. “ATT” starts flashing on the display, and the volume level will drop in a moment. To resume the previous volume level, press the button briefly again. •... -
Page 9: Setting The Clock
Setting the clock You can also set the clock system to either 24 hours or 12 hours. Press and hold SEL (select) for more than 2 seconds so that one of the PSM items appears on the display. (PSM: see pages 39 and 40.) The next-step-operation buttons start flashing. -
Page 10: Radio Operations
RADIO OPERATIONS Listening to the radio You can use either automatic searching or manual searching to tune in to a particular station. Searching a station automatically: Auto search Select the band (FM1 – 3, AM). Each time you press the button, the band changes as follows: Selected band appears. - Page 11 Tune in to a station you want while “Manual Search” is flashing. To tune in to stations of higher frequencies To tune in to stations of lower frequencies • If you release your finger from the button, the manual mode automatically turns off after about 5 seconds.
-
Page 12: Storing Stations In Memory
Storing stations in memory You can use one of the following two methods to store broadcasting stations in memory. • Automatic preset of FM stations: SSM (Strong- station Sequential Memory) • Manual preset of both FM and AM stations FM station automatic preset: SSM You can preset 6 local FM stations in each FM band (FM1, FM2, and FM3). -
Page 13: Tuning In To A Preset Station
Press and hold the number button (in this example, 1) for more than 2 seconds. The display pattern automatically changes to the small animation display (see page 14). The preset number flashes for about 5 seconds, then the previous display pattern resumes. -
Page 14: Changing The Display Pattern
Press and hold 5 (up) or ∞ (down) until the preset station list for the current band (FM1, FM2, FM3, or AM) appears on the display. The current station will be highlighted on the display. Notes: • You can show the other FM band preset station lists (FM1, FM2, or FM3) by pressing 5 (up) or ∞... -
Page 15: Cd Operations
Note on One-Touch Operation: When a CD is already in the loading slot, pressing CD/CD-CH (LINE) (for KD-LH3150) or CD/CD-CH (for KD-LH3100) turns on the unit and starts playback automatically. Insert a CD into the loading slot. The unit turns on, draws the CD and starts playback automatically. -
Page 16: Locating A Track Or A Particular Portion On A Cd
To stop play and eject the CD Press 0. CD play stops and the control panel flips down. The CD automatically ejects from the loading slot. The source changes to the previously selected source. • If you change the source or turn the power off, CD play also stops (without ejecting the CD). -
Page 17: Selecting Cd Playback Modes
To go to a track quickly Press M (MODE) while playing a CD. “Mode” appears on the display. The next-step-operation buttons start flashing. See page 33 for this function. Press 5 (up) or ∞ (down) while “Mode” is still on the display. To skip 10 tracks* forwards to the last track To skip 10 tracks* backwards... - Page 18 To play back tracks repeatedly (Track Repeat Play) You can play back the current track repeatedly. Press M (MODE) while playing a CD. “Mode” appears on the display. The next-step-operation buttons start flashing. Press number button 2 to select “Repeat Track”...
-
Page 19: Prohibiting Disc Ejection
To cancel the prohibition and unlock the disc While pressing CD/CD-CH (LINE) (for KD-LH3150) or CD/CD-CH (for KD-LH3100), press and hold again for more than 2 seconds. “Eject OK” flashes on the display for about 5 seconds, and the disc is unlocked. -
Page 20: Mp3 Introduction
MP3 INTRODUCTION What is MP3? MP3 is an abbreviation of Motion Picture Experts Group (or MPEG) Audio Layer 3. MP3 is simply a file format with a data compression ratio of 1:10 (128 Kbps*). That means, by using MP3 format, one CD-R or CD-RW can contain 10 times as much data volume as a regular CD can. - Page 21 MP3 folder/file configuration : Root ROOT : Folders : MP3 files Note: There is no limit on the number of the hierarchy levels (nested folders). However, up to 8 hierarchy levels is recommended for stable operations. MP3 playback/search order • The numbers in circles below the MP3 files ( the MP3 files.
-
Page 22: Mp3 Operations
Open the control panel. Note on One-Touch Operation: When a disc is already in the loading slot, pressing CD/CD-CH (LINE) (for KD-LH3150) or CD/CD-CH (for KD-LH3100) turns on the unit and starts playback automatically. Insert an MP3 disc into the loading slot. -
Page 23: Locating A File Or A Particular Portion On An Mp3 Disc
What is ImageLink? When an MP3 folder includes an image <jml> file edited by Image Converter (supplied in the CD-ROM), you can show the image on the display while the files in the folder are played back. • While reading an image <jml> file, no sounds come out (the preset image of a coffee cup is shown on the display during this period). - Page 24 Press 5 (up) or ∞ (down) while “Mode” is still on the display. To skip 10 files* forwards to the last file To skip 10 files* backwards to the first file * The first time you press 5 (up) or ∞ (down) button, the file skips to the nearest higher or lower file with a file number of multiple ten (ex.
-
Page 25: Selecting A Folder And A File Using The Name Lists
Selecting a folder and a file using the name lists You can show the folder name and file name lists on the display while playing an MP3 disc. Then, select a folder or a file you want to start playback with. Selecting a folder and start playback Press and hold 5 (up) or ∞... -
Page 26: Selecting Mp3 Playback Modes
Selecting MP3 playback modes To play back files at random (Random Play) You can play back all files of the current folder or all files on the MP3 disc at random. Press M (MODE) while playing an MP3 disc. “Mode” appears on the display. The next-step-operation buttons start flashing. -
Page 27: Changing The Display Pattern
Press number button 1 repeatedly while “Mode” is still on the display. Ex.: When you select “Intro Track” Each time you press the button, the intro scan mode changes as follows: Intro Track Intro Folder Intro Off Active Plays the beginnings Mode indicator (15 seconds) of... -
Page 28: Sound Adjustments
SOUND ADJUSTMENTS Adjusting the sound You can set the speaker output balance, subwoofer output level, and input level of each source. • There is a time limit in doing the following procedure. If the setting is canceled before you finish, start from step 1 again. Select the item you want to adjust. -
Page 29: Selecting Preset Sound Modes (Ieq: Intelligent Equalizer)
• To adjust the input level of each source —Vol Adj: This setting is required for each source except FM. Before making an adjustment select an appropriate source for which you want to make an adjustment. Once you have adjusted it, it is memorized, and you will not need to adjust the volume level each time you change the source. -
Page 30: Storing Your Own Sound Modes
Press the number button to select the sound mode you want. • This unit has two sound mode selection screens. To move to the other screen, press 5 (up) or ∞ (down). Ex.: When you press number button 1 to select “Country”... -
Page 31: Activating The Level Meter
Press 5 (up) or ∞ (down) to adjust the level of the selected band within the range of –05 to +05. Repeat steps 1) and 2) to adjust the other frequency bands. Store the adjustment you made. The confirmation message appears—whether you want to store the adjustment. -
Page 32: Graphic Displays
What is Image Converter? Image Converter is a JVC’s original software to produce customize images to be shown on your JVC Car Audio. Here is a basic procedure to make a CD-R including still images (pictures) and animations... -
Page 33: Downloading Images And Animations
Downloading images and animations Before starting the following procedure, prepare a CD-ROM including still images (pictures) and animations (movies). • The supplied Image Converter CD-ROM includes sample images and animations, so you can use this disc as your first trial. IMPORTANT: •... - Page 34 Select (highlight) one of the listed items for which you want to download a file. • PowerOn : Opening screen To download an animation to be shown after the unit is turned on. (You can store only one animation consisting of a maximum of 30 frames.) •...
-
Page 35: Deleting Unwanted Files
Select (highlight) a file you want to download. The file name appears, and the unit will ask you “Download OK?” If it is OK, press number button 1 to start downloading. Downloading starts, and “Downloading...” appears on the display. If it is over, the file name list appears again. - Page 36 To delete the files stored for “PowerOn,” “PowerOff,” “Picture (all stored images at a time),” and “Movie” Press M (MODE) while playing any source. “Mode” appears on the display. The next-step-operation buttons start flashing. Press number button 6 to show the download selection screen.
-
Page 37: Activating The Downloaded Images And Animations
To delete more files, repeat from steps Press D (DISP) to resume the source indication screen. Activating the downloaded images and animations Activating the animations stored for opening and ending screens After the unit turns on or before the unit turns off, you can see preset animations on the display. - Page 38 Press number button 1 to select “MOVIE”—Movie category of the PSM settings. The “Graphics” setting screen appears on the display. Select “UserMovie,” “UserSlide,” or “UserPict.” Ex.: When you select • UserMovie: Your edited animation stored in “Movie” is activated as your graphic screen.
-
Page 39: Other Main Functions
Changing the general settings (PSM) You can change the items listed on the table below and on page 40 by using the PSM (Preferred Setting Mode) control. • The PSM items are grouped into six categories—MOVIE, CLOCK, DISP (display), TUNER, AUDIO, and COLOR. Basic Procedure Press and hold SEL (select) for more than 2 seconds so that one of the... -
Page 40: User
User color selection Green Blue TrimIllum Trim illumination Displayed only when “Dimmer” is set to “Time Set.” Only for KD-LH3100: Not displayed when the current source is “CD-CH” or “LINE-IN.” Factory-preset Selectable values/items 1 – 12 00 – 59 12Hours... - Page 41 To show the graphics on the display— Graphics You can change the graphics shown on the display. These graphics appear if no operation is done for about 20 seconds (except for “ImageLink”). • All Demo: Display demonstration (animation) appears (see page 8). •...
- Page 42 • Off: Deactivates the key-touch tone. To select the external component to use —Ext Input (Only for KD-LH3100) You can connect the external component to the CD changer jack on the rear using the Line Input Adapter KS-U57 (not supplied).
-
Page 43: Selecting The Dimmer Mode
Selecting the dimmer mode You can dim the display at night automatically or as you set the timer. Note: Auto Dimmer equipped with this unit may not work correctly on some vehicles, particularly on those having a control dial for dimming. In this case, select any other than “Auto.”... -
Page 44: Changing The Display Color
Changing the display color You can set the display color using the PSM control. You can select your favorite color for each source (or for all sources). You can also create your own colors, and set them as the display color. Setting the desired color for each source Once you have set the color for each source (or for all sources), the display illuminates in the... - Page 45 Creating your own color—User You can create your own colors—“Day” and “Night,” and select them as the display color for any desired source. • Day: Can be used as your user color during the day time (while the headlights are turned off).
-
Page 46: Assigning Names To The Sources
Select a character. Move the cursor to the next (or previous) character position. Repeat steps 3 to 5 until you finish (For KD-LH3100) entering the name. Finish the procedure while the last selected character is flashing. To erase the entered characters Insert spaces using the same procedure described above. -
Page 47: Detaching The Control Panel
Detaching the control panel You can detach the control panel when leaving the car. When detaching or attaching the control panel, be careful not to damage the connectors on the back of the control panel and on the panel holder. Detaching the control panel Before detaching the control panel, be sure to turn off the power. -
Page 48: Cd Changer Operations
CD CHANGER OPERATIONS We recommend that you use the JVC MP3- compatible CD changer with your unit. By using this CD changer, you can play back your original CD-Rs (Recordable) and CD-RWs (Rewritable) recorded either in audio CD format or in MP3 format. - Page 49 Current track and elapsed playing time Notes: • When you press CD/CD-CH (LINE) (for KD-LH3150) or CD/CD-CH (for KD-LH3100), the power automatically comes on. You do not have to press to turn on the power. • If you change the source, CD changer play also stops.
- Page 50 This operation is only possible when using JVC MP3-compatible CD changer (CH-X1500). To go to a track/file quickly Press M (MODE) while playing a disc. “Mode” appears on the display. The next-step-operation buttons start flashing. See page 33 for this function.
-
Page 51: Selecting A Disc/Folder/Track Using The Name Lists
Selecting a disc/folder/track using the name lists If you forget what discs are loaded in the CD changer, you can show the disc name list and select a disc in the list shown on the display. • The display can show only six names at a time. While playing a disc, press and hold 5 (up) or ∞... -
Page 52: Selecting The Playback Modes
Selecting the playback modes To play back tracks/files at random (Random Play) Press M (MODE) during play. “Mode” appears on the display. The next-step-operation buttons start flashing. Press number button 3 repeatedly while “Mode” is still on the display. Ex.: When you select “Random Disc” while playing an MP3 disc Each time you press the button, random play mode changes as follows:... - Page 53 To play back tracks/files repeatedly (Repeat Play) Press M (MODE) during play. “Mode” appears on the display. The next-step-operation buttons start flashing. Press number button 2 repeatedly while “Mode” is still on the display. Ex.: When you select “Repeat Track” while playing an MP3 disc Each time you press the button, repeat play mode changes as follows:...
- Page 54 To play back only intros (Intro Scan) Press M (MODE) during play. “Mode” appears on the display. The next-step-operation buttons start flashing. Press number button 1 repeatedly while “Mode” is still on the display. Ex.: When you select “Intro Track” while playing an MP3 disc Each time you press the button, intro scan mode changes as follows:...
-
Page 55: External Component Operations
Each time you press the button, the source changes as described on page 7. Note on One-Touch Operation: When you press CD/CD-CH (LINE) (for KD- LH3150) or CD/CD-CH (for KD-LH3100), the power automatically comes on. You do not have to press to turn on the power. -
Page 56: Additional Information
ADDITIONAL INFORMATION Sound modes (preset frequency level settings) The list below shows the preset frequency level settings for each sound mode. • You can adjust the preset sound modes temporarily. However, your temporary adjustments will be reset when you select another sound mode. Sound Mode 60 Hz... -
Page 57: Troubleshooting
Unlock the disc. (See page 19.) While holding CD/CD-CH (LINE) (for KD-LH3150) or CD/CD-CH (for KD-LH3100), press SEL for more than 2 seconds to eject the disc. Stop playback while driving on rough roads. - Page 58 Symptoms • Disc cannot be played back. • “Unplayable File” appears and files skip. • Noise is generated. • A longer readout time is required (“File Check” keeps flashing on the display). • Files cannot be played back as you have intended them to play.
- Page 59 Symptoms • Download does not seem to finish. • Animation does not move. • “Movie” category settings in the PSM do not take effect. • “No Disc” flashes on the display. • “No Magazine” flashes on the display. • “Reset 08” flashes on the display.
-
Page 60: Maintenance
MAINTENANCE Handling discs This unit has been designed to reproduce CDs, CD-Rs (Recordable), CD-RWs (Rewritable), and CD Texts. • This unit is also compatible with MP3 discs. How to handle discs When removing a disc from its case, press down the center holder of the case and lift the disc out, holding it by the edges. -
Page 61: Specifications
Signal-to-Noise Ratio: 70 dB Line-In Level/Impedance: KD-LH3150: 1.5 V/20 kΩ load Line-Out Level/Impedance: KD-LH3150: 4.0 V/20 kΩ load (full scale) KD-LH3100: 2.0 V/20 kΩ load (full scale) Output Impedance: 1 kΩ TUNER SECTION Frequency Range: 87.5 MHz to 107.9 MHz... - Page 62 US RESIDENTS ONLY Having TROUBLE with operation? Please reset your unit Refer to page of How to Reset Still having trouble?? USA ONLY Call 1-800-252-5722 http://www.jvc.com We can help you! EN, SP, FR 0303KKSMDTJEIN © 2003 VICTOR COMPANY OF JAPAN, LIMITED...
-
Page 63: Localizacion De Averias
Si tiene alguna pregunta o necesita información acerca de las herramientas para instalación, consulte con su concesionario de JVC de equipos de audio para automóviles o a una compañía que suministra tales herramientas. Antes de instalar: Pulse (soltar panel de control) para separar el panel de control si ya está... -
Page 64: Electrical Connections
This unit is designed to operate on 12 V DC, NEGATIVE ground electrical systems. If your vehicle does not have this system, a voltage inverter is required, which can be purchased at JVC car audio dealer. • Replace the fuse with one of the specified rating. If the fuse blows frequently, consult your JVC car audio dealer. - Page 65 Conecte el cable de antena. Por último, conecte a la unidad el cableado preformado. We recommend you to connect the JVC MP3-compatible CD changer. You can also connect other CH-X series CD changers (except CH-X99 and CH-X100). • You cannot use the KD-MK series CD changers with this unit.
- Page 66 Subwoofer (SUB WOOFER OUT) / Subwoofer (Salida de SUBWOOFER) / Caisson de grave (Sortie de caisson de grave) Only for KD-LH3150/KD-LH3100/KD-LH1150 / Solo para KD-LH3150/KD-LH3100/KD-LH1150 / Seulement pour le KD-LH3150/KD-LH3100/KD-LH1150 You can connect a subwoofer through an amplifier to reinforce the bass.