Table of Contents
Advertisement
Available languages
Available languages
INSTRUCTIONS
MANUAL DE INSTRUCCIONES
MEMORY CAMERA
VIDEOCÁMARA CON MEMORIA
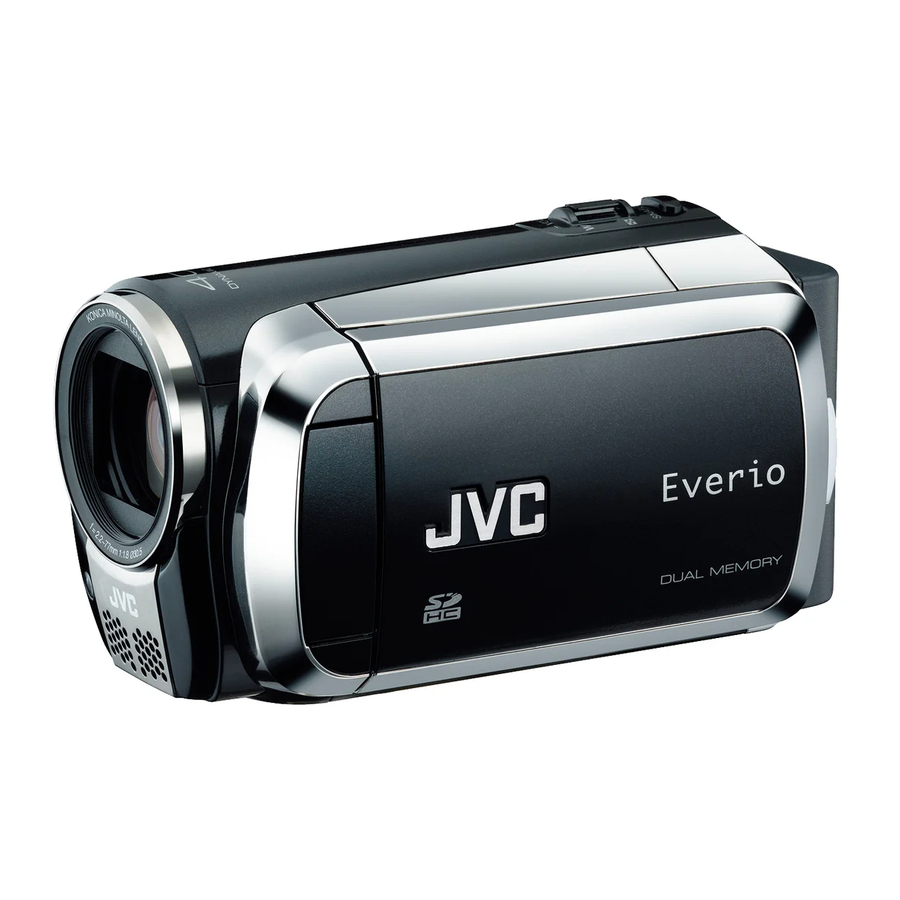
GZ-MS130
Please read the instruction manual prior to
connecting or operating this product.
Por favor, lea el manual de instrucciones
antes de conectar u operar este producto.
For more details on the
operations, refer to the
GUIDEBOOK in the supplied
CD-ROM.
Para obtener más
información sobre las
operaciones, consulte la
GUÍA incluida en el CD-ROM
suministrado.
U
LYT2019-001B-M
EN
Dear Customer
Thank you for purchasing
this memory camera. Before
use, please read the safety
information and precautions
contained in pages 2 and 3 to
ensure safe use of this product.
For Future Reference:
Enter the Model No. (located
on the bottom of the memory
camera) and Serial No. (located
on the battery pack mount of the
camcorder) below.
Model No.
Serial No.
Apreciado cliente
Muchas gracias por haber
adquirido esta videocamara con
memoria. Antes de usarla, lea la
informacion de seguridad y las
precauciones contenidas en las
paginas 2 y 3 para garantizar un
uso seguro de este producto.
Para futuras consultas:
Escriba a continuación el número de
modelo (ubicado en la parte inferior
de la videocámara) y el número de
serie (ubicado en el compartimiento
de la batería de la videocámara).
Número de modelo
Número de serie
ENGLISH
ESPANOL
SP
Advertisement
Chapters
Table of Contents

Related Manuals for JVC Everio GZ-MS130


Summary of Contents for JVC Everio GZ-MS130
- Page 1 For Future Reference: Enter the Model No. (located on the bottom of the memory camera) and Serial No. (located on the battery pack mount of the camcorder) below. Model No. Serial No. Apreciado cliente Muchas gracias por haber adquirido esta videocamara con memoria.
-
Page 2: Safety Precautions
It could tip over, causing serious damage to the camcorder. CAUTION! Connecting cables (Audio/Video, S-Video, etc.) to the camcorder and leaving it on top of the TV is not recommended, as tripping on the cables will cause the camcorder to fall, resulting in damage. CAUTION: The mains plug shall remain readily operable. - Page 3 If this symbol is shown, it is only valid in the European Union. Remember that this camcorder is intended for private consumer use only. Any commercial use without proper permission is prohibited. (Even if you record an event such...
-
Page 4: Grip Adjustment
CAUTION Be sure to use JVC battery packs. If you use any other battery packs besides JVC battery packs, safety and performance can not be guaranteed. Grip Adjustment Adjust the strap and fasten. -
Page 5: Turn On The Camcorder
Date/Time Setting Open the LCD monitor to turn on the camcorder Power Button LCD monitor Select [YES] within 10 seconds Slide your finger up and down on the sensor. Then touch OK SET DATE/TIME! • When the message disappears, press the... -
Page 6: Video Recording
Video recording CAUTION Before recording an important scene, it is recommended to conduct a trial recording. Slide the mode switch to select ! (video) mode S elect recording mode PLAY/REC The mode changes when you press the button. Start recording Press the START/ STOP button to start recording, and press... -
Page 7: Playing Back
To view files on TV ( pg. 25) It is recommended to copy your important recorded data to a DVD or other recording media for storage. JVC will not be responsible for any lost data. CAUTION Don’t forget to make copies after recording! •... -
Page 8: Table Of Contents
Contents GETTING STARTED Index ... 10 Accessories ... 12 Attaching the core filter ... 12 Preparing the Remote Control ... 12 Indications on LCD Monitor ... 13 Necessary Settings before Use ... 15 Charging the Battery Pack ... 15 Other Settings ... 16 Date/Time Setting ... -
Page 9: Read This First
Be sure to use the JVC BN-VF808U/VF815U/ VF823U battery packs. This product includes patented and other proprietary technology and is made to be used with the JVC battery and not with other batteries. JVC cannot guarantee safety or performance of this product when it is operated by other batteries. -
Page 10: Getting Started
Index EN10 NOTE • The LCD monitor can rotate 270°. • Be careful not to cover 4, 5, 7 and 8 during shooting. - Page 11 Camcorder ! Touch Sensor # OK Button $ MENU Button % Power (1) Button & SD Card Slot ( pg. 18) ( EXPORT Button ) AV Connector * UPLOAD Button ( pg. 36) + PLAY/REC Button ( pg. 19, 20, 22, 23)
-
Page 12: Accessories
The core filter reduces interference caused when connecting to other devices. Release the stopper. To be connected to the camcorder Preparing the Remote Control A battery is included inside the remote control at the time of purchase. Remove the insulation sheet before use. -
Page 13: Indications On Lcd Monitor
Indications on LCD Monitor During both Video and Still Image Recording 1/4000 NOV. 1. 2009 ! Selected Operation Mode Indicator pg. 24) : Auto Mode : Manual Mode # Effect Mode Indicator $ Tele Macro Mode Indicator % LED Light Indicator ( pg. - Page 14 Indications on LCD Monitor (Continued) During Video Playback NOV. 1. 2009 ! Mode Indicator # Playlist Playback Indicator (Appears when playing back a playlist.) $ Video Quality: (ULTRA FINE), (NORMAL), (ECONOMY) % Counter & Playback Mode : Playback : Pause : Forward Search : Reverse Search : Forward Slow-Motion...
-
Page 15: Necessary Settings Before Use
BN-VF823U To detach the battery pack AC Adapter NOTE To AC Outlet • You can also use the camcorder with just (110V to 240V) the AC adapter. • The actual recording time may shorten depending on the recording environment, such as when recording scenes with fast moving subject. -
Page 16: Other Settings
Touch MENU. Select [DISPLAY SETTINGS]. Select [CLOCK ADJUST]. Select [CLOCK SETTING]. Select the city closest to the area where you use the camcorder. Selected area is highlighted Principal city of the selected area Time difference to Select [ON] if daylight saving time is effective. -
Page 17: Language Setting
To return to the previous screen Select To quit the screen Select [QUIT] Tripod Mounting Align the camcorder stud hole with the tripod stud, and the mounting socket with the screw, and then rotate the camcorder clockwise to mount it to the tripod. > >... -
Page 18: Using An Sd Card
Clipped Edge It is recommended to copy your important recorded data to a DVD or other recording media for storage. JVC will not be responsible for any lost data. MEDIA SETTINGS REC MEDIA FOR VIDEO REC MEDIA FOR IMAGE... -
Page 19: Recording/Playback
The video recording mode is automatically selected when you turn off the camcorder and then on again. • If the camcorder is not operated for 5 minutes while the power is on, it turns itself off automatically to conserve power. •... -
Page 20: Still Image Recording
• DIS (Digital Image Stabilizer) does not function during still image recording. • If the camcorder is not operated for 5 minutes while the power is on, it turns itself off automatically to conserve power. EN20 Press the PLAY/REC button to select recording mode. -
Page 21: Zooming
Zooming Preparation: • Slide the mode switch to select mode. • Press the PLAY/REC button to select recording mode. Zoom out W: Wide angle You can also zoom out/zoom in by selecting [W] or [T] on the LCD monitor. (On-screen zoom control). -
Page 22: Playing Back Files
Playing Back Files Video Playback Slide the mode switch to select (video) mode. To move to the previous or next page Touch [ or [ ] for over a second. To play back a few seconds from each select scene of the recorded videos DIGEST Touch [ Operations during Video Playback... -
Page 23: Still Image Playback
Still Image Playback Slide the mode switch to select (still image) mode. To move to the previous or next page Touch [ ] or [ ] for over a second. To delete a still image Select To change the number of thumbnails (6 thumbnails/20 thumbnails) Move the zoom lever to [T] or [W]. -
Page 24: Manual Recording
Manual Recording Manual recording mode enables you to set the focus and screen brightness etc. manually. Change to Manual Recording Mode Preparation: • Slide the mode switch to select mode. • Press the PLAY/REC button to select recording mode. Select [A/M] twice. To return to the auto recording mode Select [A/M] so that the appears. -
Page 25: Viewing Files On Tv
Viewing Files on TV This camcorder is designed to be used with NTSC-type color television signals. It cannot be used with a television of a different standard. Connection with TV To connect using the AV connector. Preparation: Turn off all units. -
Page 26: Managing Files
Managing Files CAUTION Do not remove the recording medium or perform any other operation (such as turning off the power) while accessing files. Also, be sure to use the provided AC adapter, as the data on the recording medium may be corrupted if the battery becomes exhausted during operation. -
Page 27: Copying
You can dub video files recorded on this camcorder onto DVD discs. NOTE It is recommended to use the JVC DVD burner (CU-VD50/CU-VD3). When using CU-VD20 or CU-VD40, the recording time may take approx. 2 times longer than the time that is described in the instruction manual of DVD burner. - Page 28 Copying Files (Continued) Backup All Files Preparation: • Connect the camcorder to the DVD burner. • Slide the mode switch to select Select [CREATE FROM ALL]. Select the desired menu. • [ALL SCENES]: All files in the recording medium are copied.
-
Page 29: Creating A Dvd Using A Pc
Creating a DVD using a PC Please read the “JVC SOFTWARE LICENCE AGREEMENT” in the CD-ROM instruction before you install software. You can copy the data from the camcorder and create a DVD using a PC. Q Installing the software to the PC... - Page 30 Open the LCD monitor to turn on the camcorder. Select [BACK UP]. EN30 Connector Connector To disconnect the camcorder from the 1) Right-click the icon (Safely Remove USB Connector 2) Follow the on-screen instructions and USB MENU NOTE CREATE DVD UPLOAD It takes time to backup many videos.
- Page 31 S Making User Lists to Arrange the Files You can make a user list of a certain subject (such as Travel, Athletic meet) and put the files related to the subject into the user list. Preparation: Make backup on the PC. Double-click icon and open the calendar.
- Page 32 Copying Files (Continued) T Copying Files to a DVD Preparation: Use a recordable DVD disc (It is recommended to use a DVD-R disc.) Select the user list and click [Create Disc]. Click [Select files individually] and click [Next]. To add all the files onto DVD discs, click [Select all files displayed], then go to step 4.
- Page 33 Customer Support Information Use of this software is authorized according to the terms of the software licence. When contacting the nearest JVC office or agency in your country (refer to the JVC Worldwide Service Network at http://www.jvc-victor.co.jp/english/worldmap/index-e.html) about this software, please have the following information ready.
-
Page 34: Dubbing Files To A Vcr/Dvd Recorder
Open the LCD monitor to turn on the camcorder. Set the VCR/DVD recorder to its AUX input mode. Check that the images from the camcorder are input correctly to the VCR/DVD recorder. Play back playlists on the camcorder. 1) Touch MENU. -
Page 35: Using With A Portable Media Player
2) Select [YES]. Transferring the Files to PC mode. Preparation: Install iTunes http://www.apple.com/itunes/ Connect the camcorder to the PC with the USB cable. Select [EXPORT TO LIBRARY]. All the files with the export setting turned on are transferred to PC. mode. -
Page 36: Uploading Files To Websites
EN36 Uploading Files For detalis on uploading files, refer to the operation guide of MediaBrowser in the CD- ROM. Connect the camcorder to the PC with the USB cable. mode. Select [UPLOAD]. Cannot upload the file to YouTube™ • You need your YouTube™ account to upload files to YouTube™. -
Page 37: Changing The Menu Settings
Fully charge the battery pack, run it down, and then recharge it again. • If the camcorder is used for long periods of time in high or low temperatures, or if the battery pack is repeatedly charged, the amount of remaining battery may not be displayed correctly. - Page 38 Cannot export the file ® to iTunes To reset the camcorder when it does not operate normally ! Close the LCD monitor and remove the power supply (battery pack or AC adapter) from the camcorder, then reattach it. # Execute [FACTORY PRESET].
-
Page 39: Warning Indications
Set the clock. If the message still appears after setting the clock, the battery for the clock has been depleted. Consult your nearest JVC dealer. • Be sure to use JVC battery packs. • Select [OK] and select [YES] to perform formatting. •... -
Page 40: Specifications
Specifications Camcorder For general Power supply DC 11 V (Using AC adapter) DC 7.2 V (Using battery pack) Power consumption Approx. 1.8 W* * When the LED light is off and the monitor backlight is set to [STANDARD] mode. Dimensions (W x H x D) 54.5 mm x 65 mm x 112.5 mm... -
Page 41: Remote Control
Remote Control Power supply DC 3 V Battery life Approx. 1 year (depending on the frequency of use) Operating distance Within 5 m (16.4 ft) Operating temperature 0°C to 40°C (32 F° to 104° F) Approximate recording time (for video) Recording medium 256 MB 512 MB... -
Page 42: Cautions
LCD Monitor • To prevent damage to the LCD monitor, DO ... push it strongly or apply any shocks..place the camcorder with LCD monitor on the bottom. • To prolong service life ... avoid rubbing it with coarse cloth. - Page 43 Changes or modifications not approved by JVC could void the user’s authority to operate the equipment. This equipment has been tested and found to comply with the limits for a Class B digital device, pursuant to Part 15 of the FCC Rules.
-
Page 44: Terms
Terms AC Adapter ... 15, 42 AV Connection ... 25, 34 Backlight Compensation ... 24 Battery Pack ... 15, 42 Built-In Memory ... 18, 39 CD-ROM ... 12, 29 Clock Adjust ... 16 Date/Time Setting ... 16 Daylight Saving Time ... 16 Deleting Files ... - Page 45 Memo...
-
Page 46: Precauciones De Seguridad
Precauciones de seguridad ADVERTENCIA: PARA EVITAR RIESGO DE INCENDIOS O ELECTROCUCIONES, NO EXPONGA ESTE APARATO A LA LLUVIA O HUMEDAD. NOTA: • La placa de valores nominales y la precaución de seguridad se encuentran en la parte inferior y/o en la parte posterior de la unidad principal. •... - Page 47 INSTRUCCIONES IMPORTANTES DE SEGURIDAD 1. Lea estas instrucciones. 2. Conserve estas instrucciones. 3. Preste atención a las advertencias. 4. Siga todas las instrucciones. 5. No utilice este aparato cerca del agua. 6. Limpie sólo con paño seco. 7. No bloquee ninguna abertura de ventilación. Instale de acuerdo con las instrucciones del fabricante.
-
Page 48: Ajuste De La Correa De Mano
PRECAUCIÓN Asegúrese de utilizar baterías de JVC. Si se utilizan baterías no pertenecientes a la marca JVC, no se podrá garantizar la seguridad ni el rendimiento. Ajuste de la correa de mano Ajuste la correa y aprietela. • No tire de la correa cuando abra el cierre. - Page 49 Ajuste de la fecha/hora Abra la pantalla de LCD para encender la videocámara. Botón de alimentación Pantalla LCD Seleccione [SÍ] antes de que transcurran 10 segundos Deslice el dedo hacia arriba y hacia abajo sobre el sensor. A continuación, toque OK ¡AJUSTE FECHA/HORA! SÍ...
- Page 50 Grabación de vídeo PRECAUCIÓN Antes de grabar una escena importante, es recomendable llevar a cabo una grabación de prueba. Deslice el interruptor de modo para seleccionar el modo ! (vídeo). Seleccione el modo de grabación PLAY/REC El modo cambiará cuando pulse el botón.
- Page 51 Para visualizar archivos en el televisor ( Es recomendable que efectúe una copia de sus datos grabados importantes en un DVD u otro soporte de grabación para el almacenamiento. JVC no se hará responsable de la pérdida de sus datos.
- Page 52 Contenido PREPARATIVOS Índice ... 10 Accesorios ... 12 Colocación del filtro de ferrita ... 12 Preparación del mando a distancia ... 12 Indicaciones en la pantalla LCD... 13 Ajustes preliminares necesarios ... 15 Carga de la batería ... 15 Otros ajustes ... 16 Ajuste de la fecha/hora ...
- Page 53 VF815U/VF823U. Este producto incorpora tecnologia patentada y otras tecnologias de marca, y esta hecho para utilizarse con la bateria JVC y ninguna otra. JVC no puede garantizar la seguridad o el rendimiento de este producto si se utiliza con otras baterias.
-
Page 54: Índice
Índice SP10 NOTA • La pantalla LCD puede girar 270°. • Procure no tapar 4, 5, 7 y 8 durante la filmación. - Page 55 Videocámara ! Sensor táctil # Botón OK $ Botón MENU % Botón de alimentación (1) & Ranura para tarjetas SD ( ( Botón EXPORT ) Conector de AV * Botón UPLOAD ( p. 36) + Botón PLAY/REC ( p. 19, 20, 22, 23) , Selector de modo [ - Botón DIRECT DVD ( p.
-
Page 56: Accesorios
Accesorios Adaptador de CA AP-V20U/AP-V14U* Cable USB NOTA Asegúrese de utilizar los cables suministrados para las conexiones. No utilice ningún otro cable. * El modelo AP-V14U no se menciona en la GUÍA incluida en el CD-ROM suministrado. Colocación del filtro de ferrita El filtro de ferrita reduce las interferencias causadas al conectarlo a otros dispositivos. -
Page 57: Indicaciones En La Pantalla Lcd
Indicaciones en la pantalla LCD Durante la grabación de vídeo e imágenes fijas 1/4000 NOV. 1. 2009 ! Indicador del modo de funcionamiento seleccionado ( p. 24) : Modo automático : Modo manual # Indicador de modo de efectos especiales $ Indicador de modo telemacro % Indicador de luz LED ( pg. - Page 58 Indicaciones en la pantalla LCD Durante la reproducción de vídeo NOV. 1. 2009 ! Indicador de modo # Indicador de reproducción de lista de reproducción (Aparece al reproducir una lista de reproducción.) $ Calidad de vídeo: (ULTRAFINA), (NORMAL), (ECONÓMICA) % Contador &...
-
Page 59: Ajustes Preliminares Necesarios
Ajustes preliminares necesarios Carga de la batería Cierre la pantalla de LCD para apagar la videocámara. Coloque la batería y, a continuación, conecte el adaptador de ca. • Con la marca “ ” (flecha) de la batería apuntando en la dirección correcta, deslice la batería hasta que quede encajada en su sitio. -
Page 60: Otros Ajustes
Otros ajustes Ajuste de la fecha/hora Abra la pantalla de LCD para encender la videocámara. Toque MENÚ. Seleccione [CONFIG. PANTALLA]. Seleccione [AJUS.RELOJ]. Seleccione [CONF. RELOJ]. Seleccione la ciudad que se encuentre situada más cerca del área en la que vaya a utilizar la videocámara. Se selecciona el área resaltada Ciudad principal del área seleccionada... -
Page 61: Ajuste Del Idioma
Ajuste del idioma El idioma en el que se muestra la información de la pantalla puede cambiarse. Abra la pantalla de LCD para encender la videocámara. Toque MENÚ. Seleccione [CONFIG. PANTALLA]. VÍDEO SIN VIENTO CAMB AUTO MEDIO GRAB CONFIG. PANTALLA CONFIG. -
Page 62: Utilización De Una Tarjeta Sd
Borde recortado Es recomendable que efectúe una copia de sus datos grabados importantes en un DVD u otro soporte de grabación para el almacenamiento. JVC no se hará responsable de la pérdida de sus datos. CONFIG. MEDIOS REC MEDIA FOR... -
Page 63: Grabación De Archivos
Grabación de archivos Grabación de vídeo Deslice el interruptor de modo para seleccionar el modo (video). Para detener la grabación Pulse el botón START/STOP de nuevo. Para visualizar la última escena grabada Seleccione mientras la grabación se encuentra en modo de pausa. Si selecciona durante la reproducción, se elimina la escena... -
Page 64: Grabación De Imágenes Fijas
Grabación de archivos (continuación) Grabación de imágenes fijas Deslice el interruptor de modo para seleccionar el modo (imagen fija). Para visualizar la última imagen grabada Seleccione tras tomar la fotografía.Si selecciona $ durante la reproducción, se elimina la imagen. Para cambiar la calidad de la imagen Cambie los ajustes en [CALIDAD DE IMAGEN]. -
Page 65: Uso Del Zoom
Uso del zoom Preparativos: • Deslice el interruptor de modo para seleccionar el modo • Pulse el botón PLAY/REC para seleccionar el modo de grabación. Reducción W: Gran angular Tambien puede reducir/ampliar seleccionando [W] o [T] en la pantalla LCD. (Control de zoom en pantalla). -
Page 66: Reproducción De Archivos
Reproducción de archivos Reproducción de vídeo Deslice el selector de modo para seleccionar el modo (video). Para moverse a la página anterior o a la siguiente Toque [ ] durante más de un segundo. Para reproducir unos segundos de cada escena seleccionada de los vídeos grabados DIGEST Toque [... -
Page 67: Reproducción De Imágenes Fijas
Reproducción de imágenes fijas Deslice el selector de modo para seleccionar el modo (imágenes fijas). Para moverse a la página anterior o a la siguiente Toque [ ] o [ ] durante más de un segundo. Para eliminar una imagen fija Seleccione Para cambiar el número de miniaturas (6 miniaturas/20 miniaturas) -
Page 68: Grabación Manual
Grabación manual El modo de grabación manual permite ajustar manualmente el enfoque, el brillo de la pantalla, etc. Cambio al modo de grabación manual Preparativos: • Deslice el interruptor de modo para seleccionar el modo • Pulse el botón PLAY/REC para seleccionar el modo de grabación. -
Page 69: Televisor
Visualización de archivos en el televisor Esta camara esta disenada para ser utilizada con senales de television en color tipo NTSC. Nose puede usar con un televisor de otra norma. Conexión con un televisor Para efectuar la conexión mediante el conector de AV. -
Page 70: Gestión De Archivos
Gestión de archivos PRECAUCIÓN No desconecte el soporte de grabación ni lleve a cabo ninguna otra operación (como desactivar la alimentación) mientras se accede a los archivos. Asimismo, asegúrese de utilizar el adaptador de alimentación de ca suministrado, ya que es posible que los datos del soporte de grabación se dañen si la batería se agota durante el funcionamiento. -
Page 71: Copia De Archivos
Es recomendable que efectúe una copia de sus datos grabados importantes en un DVD u otro soporte de grabación para el almacenamiento. JVC no se hará responsable de la pérdida de sus datos. Tipos de copia y dispositivos conectables Grabadora de DVD... - Page 72 Copia de archivos (continuación) Copia de seguridad de todos los archivos Preparativos: • Conecte la videocámara a la grabadora de DVD. • Deslice el interruptor de modo para seleccionar el modo Seleccione [SELECC. ENTRE TODO]. Seleccione el menú que desee. •...
- Page 73 Creación de discos DVD mediante un ordenador Lea, por favor, “Convenio de licencia del software de JVC” de las instrucciones del CD- ROM antes de instalar el software. Es posible copiar los datos de la videocámara y crear un DVD utilizando un PC.
- Page 74 Copia de archivos (continuación) R Realización de una copia de seguridad en el ordenador Preparativos: • Instale el software en el ordenador. • Asegurese de que dispone de suficiente espacio libre en el disco duro del PC HDD. • Cierre el monitor LCD para apagar la videocámara.
- Page 75 S Realización de listas de usuarios para ordenar los archivos Es posible efectuar una lista de usuarios de un determinado asunto (por ejemplo, de un viaje, una competición de atletismo) y colocar los archivos relacionados con el asunto en la lista de usuarios.
- Page 76 Copia de archivos (continuación) T Copia de archivos en un disco DVD Preparativos: Utilice un disco DVD en el que se pueda grabar (es recomendable utilizar discos DVD-R). Seleccione la lista de usuarios y haga clic en [Crear disco]. Haga clic en [Selecciona los archivos individualmente] y haga clic en [Proximo].
- Page 77 El uso de este software está autorizado de acuerdo con las condiciones de la licencia del software. Cuando se ponga en contacto con la oficina o agencia de JVC más cercana de su país (consulte la Red de servicios internacional JVC en http://www.jvc-victor.co.jp/english/worldmap/index-e.html) para hacer consultas sobre este software, tenga a mano la siguiente información.
-
Page 78: Copia De Archivos En Una Grabadora De Video/Dvd
Copia de archivos (continuación) Copia de archivos en uns grabadora de vídeo/DVD Preparativos: • Crear una lista de reproducción. • Apague todas las unidades. Para efectuar la conexión mediante los conectores de AV (copia analógica) Conector de AV Cable AV Grabadora de vídeo o de Conector de AV... -
Page 79: Utilización Con Un Reproductor Multimedia A Portátil
Utilización con un reproductor multimedia portátil Activación del modo de exportación Es posible transferir vídeos grabados fácilmente en el modo de exportación a iTunes ® . Todos los archivos que dispongan del ajuste de exportación activado se transferirán al ordenador. Para obtener más información acerca de la transferencia, consulte el manual de instrucciones del software MediaBrowser contenido en el CD-ROM. -
Page 80: Carga De Archivos A Sitios Web
Carga de archivos a sitios web Activación del modo de carga You Tube=website:http://www.youtube.com/ Es posible cargar el archivo en sitios web para compartir vídeo (You Tube rápida después de efectuar la grabación. Para obtener más información acerca de YouTube™, visite el sitio web de YouTube™: http://www.youtube.com/ Preparativos: •... -
Page 81: Cambio De Las Configuraciones De Menús
Si las soluciones indicadas en el diagrama no permiten solucionar el problema, póngase en contacto con el distribuidor de JVC más cercano o con el centro de asistencia técnica de JVC para obtener instrucciones. Consulte asimismo las preguntas más frecuentes acerca de los nuevos productos en el sitio web de JVC. - Page 82 Solución de problemas (continuación) Problema La grabación no puede realizarse. La grabación se detiene automáticamente. El sonido o el vídeo se interrumpen. No es posible encontrar un vídeo grabado/ imagen. El indicador no parpadea durante la carga de la batería. No se puede cargar el archivo en YouTube™...
-
Page 83: Indicaciones De Advertencia
• Permite ajustar el reloj. Si el mensaje sigue apareciendo después de ajustar el reloj, significa que la batería de este se ha agotado. Consulte con su distribuidor de JVC más cercano. • Asegúrese de utilizar baterías de JVC. •... -
Page 84: Especificaciones
Especificaciones Videocámara Aspectos generales Fuente de alimentación eléctrica CC 11 V (con adaptador de CA) CC 7,2 V (con batería) Consumo eléctrico Aproximadamente 1.8 W* * Cuando la luz LED está apagada y la luz de fondo de la pantalla está ajustada en modo de [ESTÁNDAR]. -
Page 85: Mando A Distancia
Mando a distancia Fuente de alimentación eléctrica DC 3 V Vida útil de la batería Aproximadamente 1 año (en función de la frecuencia de uso) Distancia de funcionamiento Hasta 5 m Temperatura de funcionamiento 0°C a 40°C Tiempo de grabación aproximado (para vídeo) Soporte de grabación 256 MB 512 MB... -
Page 86: Precauciones
CA que no sea de la serie American National Standard C73, emplee un enchufe adaptador de CA, denominado “Siemens Plug”, como el mostrado. Consulte con su distribuidor JVC más cercano para obtener este enchufe adaptador. Baterías La batería suministrada es una batería de iones... - Page 87 Los cambios o modificaciones no aprobados por JVC podrian anular la autoridad del usuario para utilizar el equipo. Este equipo ha sido examinado y cumple con los límites de dispositivos digitales Clase B, segun el Apartado 15 de la reglamentacion FCC.
-
Page 88: Términos
Términos Adaptador de CA ... 15, 42 Ajuste de la fecha/hora ... 16 Ajuste del idioma ... 17 Ajuste del reloj ... 16 Batería ... 15, 42 Cable USB ... 27, 30 Carga de archivos ... 36 Carga restante de la batería ... 21 CD-ROM ...