
Related Manuals for LG PQRCVCL0Q


Summary of Contents for LG PQRCVCL0Q
-
Page 1: Installation Manual
OWNER’S & INSTALLATION MANUAL SIMPLE WIRED REMOTE CONTROLLER Please read this manual carefully before operating your set and retain it for future reference. Models : PQRCVCL0Q PQRCVCL0QW www.lg.com P/NO : MFL62862002... -
Page 2: Table Of Contents
Simple Wired Remote Controller Ownerʼs & Installation Manual TABLE OF CONTENTS n Safety Precautions..............3 n Part Description ..............4 Simple Wired Remote Controller...............4 n Installation Instruction............5~6 Group control....................7 Installer setting – How to enter installer setting mode ......8 Installer setting – Test Run Mode .............9 Installer setting –... -
Page 3: Safety Precautions
Safety Precaution Safety Precaution • The installation requires expert skills, and it should be installed by the service center or other shops specialized in the installation and recognized by our company. • For all the problems arising after installation by someone who has no relevant qualifications, our company will not provide free service. -
Page 4: Part Description
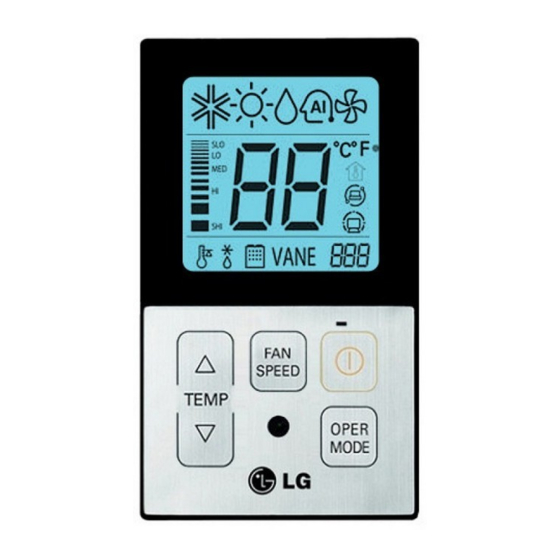
Part Description Part Description Simple Wired Remote Controller 1. Operation Display Panel 2. Temperature Control Button 3. Fan Speed Button 4. On/Off Button 5. Operation Mode select Button SPEED TEMP OPER MODE Each function will be shown on the display panel for three seconds or so when the power is applied at first. Accessory Connecting Cable (1EA) Fixing Screw (2EA) -
Page 5: Installation Instruction
Installation instruction Installation instruction 1. Please fix tightly using provided screw after placing remote controller setup board on the place where you like to setup. - Please set it up not to bend because poor setup could take place if setup board bends. Please set up remote controller board fit to the reclamation box if there is a reclamation box. - Page 6 Installation instruction 3. Please connect indoor unit and remote controller using connection cable. Please check if connector is normally connected. Indoor SPEED TEMP Unit side OPER MODE Connecting cable 4. Please use extension cable if the distance between wired remote controller and indoor unit is more than 10m.
-
Page 7: Group Control
Installation instruction Group control 1. When installing more than 2 units of air conditioner to one wired remote controller, please connect as the right figure. Signal wire • If it is not event communication indoor unit, set the unit as slave. •... -
Page 8: Installer Setting -How To Enter Installer Setting Mode
Installation instruction Installer Setting -How to enter installer setting mode CAUTION Installer setting mode is to set the detail function of the remote controller. If the installer setting mode is not set correctly, it can cause problems to the product, user injury or property damage. -
Page 9: Installer Setting -Test Run Mode
Installation instruction Installer Setting -Test Run Mode After installing the product, you must run a Test Run mode. For details related to this operation, refer to the product manual. OPER When pressing the button and MODE button simultaneously for more than 3 seconds, the system will be entered into the installer setting mode. -
Page 10: Installer Setting - Setting Address Of Central Control
Installation instruction Installer Setting - Setting Address of Central Control It's the function to use for connecting central control. Please refer to central controller manual for the details OPER When pressing the button and MODE button simultaneously for more than 3 seconds, the system will be entered into the installer setting mode. -
Page 11: Installer Setting -E.s.p
Installation instruction Installer Setting -E.S.P. This is the function that decides the strength of the wind for each wind level and because this function is to make the installation easier. • If you set ESP incorrectly, the air conditioner may malfunction. •... -
Page 12: Installer Setting -Thermistor
Installation instruction Installer Setting -Thermistor This is the function to select the temperature sensor to judge the room temperature. OPER When pressing the button and MODE button simultaneously for more than 3 seconds, the system will be entered into the installer setting mode. - After entering into the installer setting mode, select the thermistor sensor setting code value by pressing the... -
Page 13: Installer Setting -Ceiling Height Selection
Installation instruction Installer Setting -Ceiling Height Selection This function is to adjust FAN Airflow rate according to ceiling height (For ceiling type product) OPER When pressing the button and MODE button simultaneously for more than 3 seconds, the system will be entered into the installer setting mode. -
Page 14: Installer Setting -Static Pressure Setting
Installation instruction Installer Setting -Static Pressure Setting This function is applied to only duct type. Setting this in other cases will cause malfunction. OPER When pressing the button and MODE button simultaneously for more than 3 seconds, the system will be entered into the installer setting mode. -
Page 15: Installer Setting-Remote Controller Master/Slave Setup
Installation instruction Installer Setting-Remote Controller Master/Slave Setup It is a function for settings in group control, or 2-remote controller control. OPER When pressing the button and MODE button simultaneously for more than 3 seconds, the system will be entered into the installer setting mode. -
Page 16: Installer Setting - Celsius/Fahrenheit
Installation instruction Installer Setting-Celsius / Fahrenheit Switching This function is used for switching the display between Celsius and Fahrenheit. (Optimized only for U.S.A) OPER When pressing the button and MODE button simultaneously for more than 3 seconds, the system will be entered into the installer setting mode. -
Page 17: Owners Instruction
Owner's instruction Owner's instruction Standard Operation - Cooling Mode It cools the room by comfortable and clean wind. Cooling operation will begin if you press button. Press the temperature button and set the desired room temperature lower than the current room temperature. A click of the button will increase the desired temperature by 1°C or 2°F. -
Page 18: Standard Operation - Heating Mode
Owner's instruction Standard Operation - Heating Mode It supplies warm wind to the indoor If you want to set the heating operation, press the button. And press the OPER MODE button. Set the desired room temperature higher than the current room temperature. A click of the button will increase the desired temperature by 1°C or 2°F. -
Page 19: Standard Operation - Auto Operation Mode
Owner's instruction Standard Operation - Auto Operation Mode After operating the product by pressing button, set up the auto operation by pressing the button. OPER MODE “Auto Change Over Mode” – Heat pump model only When desired the set temperature is higher than the room temperature during the auto operation =>... -
Page 20: Standard Operation - Dehumidification Mode
Owner's instruction Standard Operation - Dehumidification Mode It removes humidity while air-cooling weakly. After operating the product by pressing button, set up the dry (Dehumidification) by pressing the OPER MODE button. When the dry operation is selected, “dh” will be shown on the display window as shown on the left side. -
Page 21: Standard Operation - Fan Mode
Owner's instruction Standard Operation - Fan Mode It blows the air as it is in the indoor, not the cold wind. After operating the product by pressing button, set up the fan operation by pressing the button. OPER MODE When the dry operation is selected, “Fn” will be shown on the display window as shown on the left side. -
Page 22: Function Setting - Fan Speed Selection
Owner's instruction Function Setting - Fan Speed Selection It blows the air as it is in the indoor, not the cold wind. Select the proper fan speed which you want by pressing the button on the remote controller. - If you press the button, the fan speed SPEED will change in the order of [SLo→Lo→Med→... -
Page 23: Function Setting - Room Temperature Check
Owner's instruction Function Setting - Room Temperature Check When prssing the button of the remote SPEED controller Adjustment section for approx. 3 seconds, the room Temperature will be indicated for about 5 seconds Before resuming to the previous display panel. In the case of the room temperature display, the room Temperature can be different in accordance with the Setting of the remote... -
Page 24: Function Setting - Child Lock
Owner's instruction Function setting - Child Lock It is the function to use preventing children or others from careless using. During the operation, when pressing the button and button for approx. 3 seconds, SPEED the ‘Child Lock’ Function can be used. - At the time of initial setting of the ‘Child Lock’, the ‘CL’... -
Page 25: Function Setting - Auto Swing
Owner's instruction Function setting - Auto Swing This function is to adjust angle at which airflow is blow out. During the operation, when pressing the OPER MODE button and button for approx. 3 seconds, the ‘Auto Swing’ function can be During the operation of the ‘Auto Swing’... -
Page 26: Function Setting - Vane Angle Control
Owner's instruction Function setting - Vane Angle Control This function is to adjust angle at which airflow is blow out. OPER When pressing the button for approx. 3 MODE seconds during the operation, the vane angle control setting function can be used. Initial ‘vane1’... -
Page 27: Different Mode Drive
Owner's instruction Different mode drive Different mode drive is a phenomenon taking place when indoor units' drive mode is different in the case that a few indoor units are set up at one AHU. (Different mode drive doesn't show up at cooling exclusive model.) If one indoor unit operate heating mode while several indoor units are operating cooling mode, outdoor segment and cooling segment... -
Page 28: Checkups Before Reporting Breakdown
Owner's instruction Checkups before reporting breakdown Please first check the items below for product's defects before consulting to service center. Symptoms Check-up Management • Is air-conditioner's power on? • Please check up circuit breaker. • Please check up wire remote controller's setup condition.