Table of Contents
Advertisement
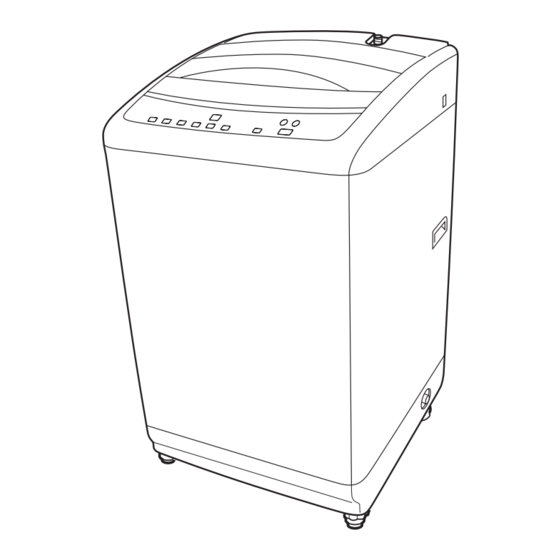
Fully Automatic Washing Machine
Operating Instructions
Model No.
Thank you very much for purchasing Panasonic Washing Machine.
Before operating this washing machine, please read these instructions completely, paying
special attentions to Safety & General Precautions.
W9901-7FWF0
PHAT0808-0
Printed in Thailand
NA-F90T1 80T1_EN.indd 1
9/9/08 5:28:51 PM
Advertisement
Table of Contents

Related Manuals for Panasonic NA-F90T1


Summary of Contents for Panasonic NA-F90T1
-
Page 1: Operating Instructions
Fully Automatic Washing Machine Operating Instructions Model No. Thank you very much for purchasing Panasonic Washing Machine. Before operating this washing machine, please read these instructions completely, paying special attentions to Safety & General Precautions. W9901-7FWF0 PHAT0808-0 Printed in Thailand NA-F90T1 80T1_EN.indd 1... -
Page 2: Table Of Contents
Install Washing Machine Horizontally Connect the water supply hose Changing the position of the drain hose Connect external drain water hose Bottom Cover Installation Instruction Troubleshooting Error Indication Specifi cation NA-F90T1 80T1_EN.indd 2 NA-F90T1 80T1_EN.indd 2 9/17/08 9:44:29 AM 9/17/08 9:44:29 AM... -
Page 3: Safety & General Precautions
fi re due to overheating. • Be sure to ask your dealer about grounding work. • Never use a damaged power cord. NA-F90T1 80T1_EN.indd 3 NA-F90T1 80T1_EN.indd 3 9/17/08 9:44:32 AM 9/17/08 9:44:32 AM... - Page 4 Do not use water with temperature above 50°C. irregular vibration during the • The plastic parts will become deform, resulting spin cycle. in set breakdown. NA-F90T1 80T1_EN.indd 4 NA-F90T1 80T1_EN.indd 4 9/17/08 9:44:39 AM 9/17/08 9:44:39 AM...
-
Page 5: Name Of Parts
Connect the water supply hose. Turn on the faucet. Plug power cord into socket outlet. Insert the drain hose to drain. NA-F90T1 80T1_EN.indd 5 NA-F90T1 80T1_EN.indd 5 9/17/08 9:44:44 AM 9/17/08 9:44:44 AM... -
Page 6: Determining Load And Detergent Levels With The Quick Indication
Some laundry detergents have their own prescribed methods of use. Please read the instructions to your laundry detergent. • When a large quantity of suds is produced, use less detergent or switch to a low-suds detergent. NA-F90T1 80T1_EN.indd 6 NA-F90T1 80T1_EN.indd 6 9/17/08 9:44:46 AM... -
Page 7: How To Use Liquid Detergent
Softener is easy to get hard, so do not leave it in the Softener Compartment for many hours (12 hours or longer). w Dilute the concentrated softener with the same volume of water only when using the wash with the programmable time. Concentrated softener Water NA-F90T1 80T1_EN.indd 7 NA-F90T1 80T1_EN.indd 7 9/17/08 9:44:54 AM 9/17/08 9:44:54 AM... -
Page 8: How To Use Powdered Synthetic Detergents
NA-F90T1 80T1_EN.indd 8 NA-F90T1 80T1_EN.indd 8 9/17/08 9:44:59 AM 9/17/08 9:44:59 AM... -
Page 9: Operations Panel
NA-F90T1 80T1_EN.indd 9 NA-F90T1 80T1_EN.indd 9 9/17/08 9:45:02 AM 9/17/08 9:45:02 AM... -
Page 10: Normal Course
Add softener. See page 7 for details. selected water level. See page 6 for details. The buzzer lets you know when the washing is finished. NA-F90T1 80T1_EN.indd 10 NA-F90T1 80T1_EN.indd 10 9/17/08 9:45:05 AM 9/17/08 9:45:05 AM... -
Page 11: Hyper Speedy Course
See page 6 for details. Add softener. See page 7 for details. The buzzer lets you know when the washing is finished. NA-F90T1 80T1_EN.indd 11 NA-F90T1 80T1_EN.indd 11 9/17/08 9:45:08 AM 9/17/08 9:45:08 AM... -
Page 12: Delicate Course
Add softener. See page 7 for details. selected water level. See page 6 for details. The buzzer lets you know when the washing is finished. NA-F90T1 80T1_EN.indd 12 NA-F90T1 80T1_EN.indd 12 9/17/08 9:45:12 AM 9/17/08 9:45:12 AM... -
Page 13: Clean White Course
Add softener. See page 7 for details. The buzzer lets you know when the washing is finished. After soaking process is completed, it will automatically continue with “NORMAL” Course. NA-F90T1 80T1_EN.indd 13 NA-F90T1 80T1_EN.indd 13 9/17/08 9:45:16 AM 9/17/08 9:45:16 AM... -
Page 14: Reserve Program
To check the contents of the programming timer, Add softener. See page 7 for details. keep pressing [RESERVE] button. The buzzer lets you know when the washing is finished. NA-F90T1 80T1_EN.indd 14 NA-F90T1 80T1_EN.indd 14 9/17/08 9:45:20 AM 9/17/08 9:45:20 AM... -
Page 15: Child Lock Program
• Repeat step 1 to activate the end buzzer. Four times beep sound indicates the end buzzer has been activated. • When the power cord is unplugged or a power outage occurs, the last setting of the end buzzer will be remained. NA-F90T1 80T1_EN.indd 15 NA-F90T1 80T1_EN.indd 15 9/17/08 9:45:24 AM 9/17/08 9:45:24 AM... -
Page 16: Choosing Your Own Laundry Setting
• Frequency for care : Once a month ambient conditions. • Operation will be continued for 2 and a half hours. NA-F90T1 80T1_EN.indd 16 NA-F90T1 80T1_EN.indd 16 9/17/08 9:45:28 AM 9/17/08 9:45:28 AM... -
Page 17: Maintenance: Tub Dry
Do not apply water directly. The fl oor could get wet. Do not use cleanser, paint benzine, alcohol, kerosene, etc. Follow any instructions that come with a chemically treated cloth. NA-F90T1 80T1_EN.indd 17 NA-F90T1 80T1_EN.indd 17 9/17/08 9:45:32 AM 9/17/08 9:45:32 AM... -
Page 18: Please Observe The Following Instructions
Cautions on parts If the supply power cord is damaged. It must be replaced by Service Center or a similarly qualifi ed person in order to avoid a hazard. NA-F90T1 80T1_EN.indd 18 NA-F90T1 80T1_EN.indd 18 9/17/08 9:45:36 AM 9/17/08 9:45:36 AM... -
Page 19: How To Install
When the bubble is a little out of mark Loosen Tighten Front side Adjustable leg Adjust using adjustable leg To lower To raise (Bottom view) Check the machine for unsteadiness and tightens the adjustable leg knob. NA-F90T1 80T1_EN.indd 19 NA-F90T1 80T1_EN.indd 19 9/17/08 9:45:43 AM 9/17/08 9:45:43 AM... -
Page 20: Connect The Water Supply Hose
Do not put hose tip under the water Below 10 cm. Over 10 cm Good Example 3 m max. Install the machine 10 cm or more away from the wall. NA-F90T1 80T1_EN.indd 20 NA-F90T1 80T1_EN.indd 20 9/17/08 9:45:47 AM 9/17/08 9:45:47 AM... -
Page 21: Changing The Position Of The Drain Hose
2. Insert the Bottom Cover to the Base. (Figure 2) 3. Fasten the 2 screws of the Bottom Cover to the Base. (Figure 3) Screws Bottom Cover Base Figure 1 Figure 2 Figure 3 NA-F90T1 80T1_EN.indd 21 NA-F90T1 80T1_EN.indd 21 9/17/08 9:45:50 AM 9/17/08 9:45:50 AM... -
Page 22: Troubleshooting
In this case, [POWER ON] and [START/HOLD] buttons need to be pressed again after electricity is restored. Then the machine will resume operation automatically from beginning of the stopped process. NA-F90T1 80T1_EN.indd 22 NA-F90T1 80T1_EN.indd 22 9/17/08 9:45:53 AM 9/17/08 9:45:53 AM... -
Page 23: Error Indication
9.0 kg 8.0 kg Length of power cord (Approx. 1.6 m) W x L x H 643 x 637 x 1010 (mm) Net weight 41 kg 41 kg NA-F90T1 80T1_EN.indd 23 NA-F90T1 80T1_EN.indd 23 9/17/08 9:45:56 AM 9/17/08 9:45:56 AM... - Page 24 NA-F90T1 80T1_EN.indd 24 NA-F90T1 80T1_EN.indd 24 9/17/08 9:45:59 AM 9/17/08 9:45:59 AM...