Silvercrest SMW 900 EDS B2 Operating Instructions Manual
Stainless steel microwave smw 900 eds b2
Hide thumbs
Also See for SMW 900 EDS B2:
- Operating instructions manual (134 pages) ,
- Operating manual (2 pages) ,
- Brief informations (2 pages)

Related Manuals for Silvercrest SMW 900 EDS B2


Summary of Contents for Silvercrest SMW 900 EDS B2
- Page 1 STAINLESS STEEL MICROWAVE SMW 900 EDS B2 STAINLESS STEEL MICROWAVE EDELSTAHL-MIKROWELLE Operating instructions Bedienungsanleitung IAN 73194...
- Page 2 Before reading, unfold the page containing the illustrations and familiarise yourself with all functions of the device. Klappen Sie vor dem Lesen die Seite mit den Abbildungen aus und machen Sie sich anschließend mit allen Funktionen des Gerätes vertraut. GB / IE Operating instructions Page DE / AT / CH...
-
Page 4: Table Of Contents
INDEX PAGE Introduction Intended Usage Scope of delivery Appliance description Technical details Important safety instructions Before you begin Basic principles of microwave cookery..................7 Use suitable cookware........................7 Commissioning Installation of the appliance......................8 Preparing the appliance ........................9 Place the turntable inside.........................9 Operation Setting the Clock..........................9 Standby mode ..........................10 Setting the kitchen timer .......................10... - Page 5 Defrosting Defrosting by weight........................19 Defrosting by time ..........................20 Recipes Meat patty ............................20 Baking frozen ready-made bread rolls ..................20 Potato gratin ...........................21 Muffins ............................21 Cleaning and Care Troubleshooting Disposal Warranty and Service Importer - 2 -...
-
Page 6: Introduction
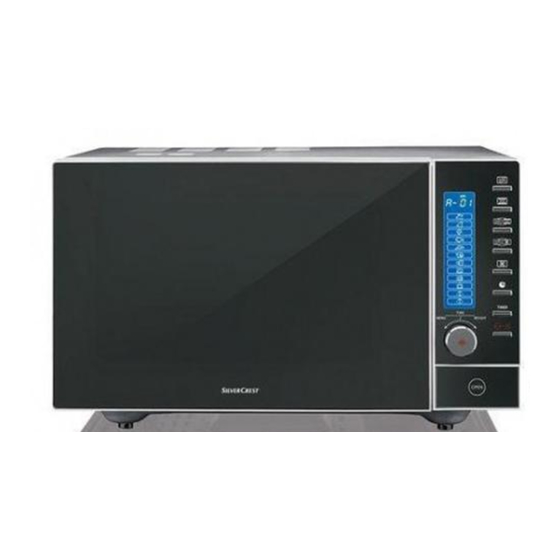
Stainless Steel Appliance description Microwave Figure A: 1 Display Introduction 2 Door opener button 3 Turntable 4 Rollers Congratulations on the purchase of your new ap- 5 Ventilation slot pliance. You have decided to purchase a high-quality pro- duct. The operating instructions are a constituent Figure B: 6 Microwave button of this product. -
Page 7: Important Safety Instructions
Important safety instructions • This appliance is not intended for use by individuals (including children) with restricted physical, physio- Carefully read these safety and operating instructions logical or intellectual abilities or deficiences in experience and/or knowledge unless they are before the first use and preserve them for future re- supervised by a person responsible for their ference. - Page 8 Risk of fire • People fitted with a heart pacemaker should consult their doctor about the possible risks of • NEVER leave the microwave oven unattended using a microwave oven before taking one into if you are heating foodstuffs packed in plastics use.
- Page 9 Attention! Appliance Damage! Safety tips • Do not use the microwave oven when it is empty. • To minimize the risk of fire in the microwave: The only exception is for the initial commissioning When heating food in plastic or paper containers, (see chapter "Commissioning").
-
Page 10: Before You Begin
Before you begin Earthing information/correct installation This appliance must be earthed. This appliance is to be connected only to a correctly earthed power Basic principles of microwave cookery socket. An individual circuit, solely for the connec- tion of the microwave oven, is recommended. •... -
Page 11: Commissioning
Risk of fire! • When using the microwave for heating do not use products made of recycled paper. These NEVER use the grill stand or other metallic objects can contain minute fragments of metal, which when you are using the appliance in the microwave mode or in the combination cooking process. -
Page 12: Preparing The Appliance
Press the Grill button 7 • Install the appliance as far away as possible • . "Gr 1" will from radios and televisions. The operation of appear in the display. Turn the rotary knob r the microwave oven can cause malfunctions of •... -
Page 13: Standby Mode
Press the Start/quick start button r 2. Select the required mode (Hr 24 or Hr 12) by turning the rotary knob r and then confirm The appliance emits an acoustic signal. The your selection by pressing the Start/quick start countdown begins. After approx. 3 seconds button r the current time is shown once again. -
Page 14: Interrupt/Cancel Cooking Or Defrosting Processes
Selecting the operation level Interrupt/cancel cooking or defrosting Press the Microwave button 6 . "900" processes (900 W power) appears in the display 1. Press the Stop button e • , once in order Now set the required power level using the rotary knob r to interrupt a cooking or defrosting process. -
Page 15: Grill Function
Quick start 1 3 grill functions are available: When in standby mode, turn the rotary knob r • "Top heat" grill function (Gr 1): to the right and set the required cooking period. With this function, the heat only comes from Start the cooking process with 900 W power by above. -
Page 16: Combination Cooking Process "Grill
Combination cooking process "Grill" • Combination 4 (C 4): This function combines the grill function and the For Combination 4, the microwave power is normal microwave operation. During the combination 55% and the grill power is 45% of the cooking mode, a certain amount of time for cooking and the time. -
Page 17: Convection Operation
Convection operation Convection operation with preheating When cooking with convection, hot air circulates in You can also preheat your microwave before you the cooking compartment. Convection is especially start a cooking process: recommended for cooking souffles or crunchy foods. Select the required temperature by pressing the Convection button 0 You can set a temperature of between 110°C and and use the rotary... -
Page 18: Combination Cooking Process "Convection
Auto menu Combination cooking process "Convection" This function combines the convection function For foods to be prepared in automatic menu mode, with the normal microwave operation. With this, it is not necessary to enter the cooking time or power for example, meat is juicy and tender but still crisp. setting. - Page 19 Dis- Confirm your selection by pressing the Symbol Food Weight play Start/quick start button r Turn the rotary knob r to set the weight, and then confirm this by pressing the A-01 Beef 200 - 1400g Start/quick start button r The cooking process is started and the calculated time will countdown backwards.
- Page 20 Microwave Note A-09 Beverages operation with If the meal is not completely cooked after the auto- 900 W power matic menu has finished, proceed as follows: Microwave • Use the cooking process stated in the table for A-10 Entrees operation with re-cooking.
-
Page 21: Baking Pizza
Example 2: • "P-02" for refrigerated pizza, temperature To heat 300 ml water, proceed as follows: approx. 5°, weight 150g–450g ("P-02" Turn the rotary knob r appears in the display 1). to the left (when in standby mode) until "A-09" appears in the •... -
Page 22: Defrosting
Defrosting The following weights can be set: "d-01"/ / "beef" 100 - 1800g Defrosting by weight "d-02"/ / "pork" 100 - 1800g Note: "d-03"/ / "poultry" 100 - 1800g Always place the food to be defrosted on dishes suitable for use in a microwave oven. Never place it directly on the turntable 3! "d-04"/ / "fish"... -
Page 23: Defrosting By Time
Recipes Defrosting by time Note: Meat patty Always place the food to be defrosted on dishes • Use around 125 g of minced beef to form suitable for use in a microwave oven. Never place it directly on the turntable 3! each patty (diameter approx. -
Page 24: Potato Gratin
Potato gratin Muffins Ingredients Ingredients • 750 g waxy potatoes, peeled This recipe yields 10 to 20 muffins. • 300 g cream • 100 g grated cheese with a fat content of 25% • Baking margarine (80% fat content) or salted to 30 % fat in dry matter. -
Page 25: Cleaning And Care
Cleaning and Care • Regularly eliminate odours. Place a deep micro- wave bowl with a cup of water and the juice Risk of injury! and peel of a lemon into the microwave oven. Heat it up for 5 minutes. Wipe off thoroughly Before cleaning, switch the microwave oven off and and rub dry with a cloth. -
Page 26: Disposal
Disposal The display 1 indicates "E01" and signal tones sound. • The microwave is overheated. Terminate the cur- Do not dispose of this appliance in your rent programme immediately. Remove the plug normal domestic waste. This product is from the mains power socket, open the microwa- subject to the provisions of European ve door and allow the appliance to cool down. -
Page 27: Importer
The warranty period is not extended by repairs ef- fected under warranty. This applies also to replaced and repaired parts. Damages or defects discovered after purchase are to be reported directly after un- packing, at the latest two days after the purchase date. - Page 28 INHALTSVERZEICHNIS SEITE Einleitung Bestimmungsgemäßer Gebrauch Lieferumfang Gerätebeschreibung Technische Daten Wichtige Sicherheitshinweise Bevor Sie beginnen Grundprinzipien beim Kochen in der Mikrowelle ..............31 Geeignetes Kochgeschirr verwenden..................31 Erste Inbetriebnahme Gerät aufstellen..........................32 Gerät vorbereiten...........................33 Drehteller einsetzen ........................33 Bedienen Uhr einstellen..........................33 Standby-Modus ..........................34 Küchentimer einstellen ........................34 Kindersicherung..........................34 Abfragefunktionen..........................34 Gar- oder Auftauvorgänge unterbrechen/abbrechen ...............35...
- Page 29 Auftauen Auftauen nach Gewicht.........................43 Auftauen nach Zeit ........................44 Rezepte Frikadellen ............................44 Aufbacken von Tiefkühlfertigbrötchen ..................44 Kartoffelgratin..........................45 Muffins ............................45 Reinigung und Pflege Fehlerbehebung Entsorgen Garantie und Service Importeur - 26 -...
-
Page 30: Einleitung
Edelstahl-Mikrowelle Gerätebeschreibung Abbildung A: Einleitung 1 Display 2 Taste Türöffner 3 Drehteller Herzlichen Glückwunsch zum Kauf Ihres neuen 4 Rollen Gerätes. 5 Lüftungsschlitze Sie haben sich damit für ein hochwertiges Produkt entschieden. Die Bedienungsanleitung ist Bestand- teil dieses Produkts. Sie enthält wichtige Hinweise Abbildung B: 6 Taste Mikrowelle für Sicherheit, Gebrauch und Entsorgung. -
Page 31: Wichtige Sicherheitshinweise
Wichtige Sicherheitshinweise • Dieses Gerät ist nicht dafür bestimmt, durch Per- sonen (einschließlich Kinder) mit eingeschränk- ten physischen, sensorischen oder geistigen Fä- Lesen Sie die Sicherheitshinweise und die higkeiten oder mangels Erfahrung und/oder Bedienungsanleitung vor der ersten Verwendung mangels Wissen benutzt zu werden, es sei denn, aufmerksam durch und heben Sie diese für den spä- sie werden durch eine für ihre Sicherheit zustän- teren Gebrauch auf. - Page 32 Brandgefahr • Achten Sie darauf, dass der Netzstecker immer gut zu erreichen ist, damit Sie diesen im Notfall • Lassen Sie die Mikrowelle nie unbeaufsichtigt, schnell vom Stromnetz trennen können. wenn Sie Lebensmittel in Plastik- oder Papierver- packungen erhitzen. • Personen, die einen Herzschrittmacher tragen, sollten sich vor Inbetriebnahme der Mikrowelle, •...
- Page 33 Achtung! Geräteschäden! Sicherheitstipps • Betreiben Sie die Mikrowelle nicht im Leer- • Um das Brandrisiko in der Mikrowelle zu zustand. Ausgenommen ist die erste Inbetrieb- minimieren: Behalten Sie, wenn Sie Speisen nahme (siehe Kapitel „Erste Inbetriebnahme“). in Kunststoff- oder Papierbehältern erhitzen, die Mikrowelle immer im Auge, da sich die Ma- •...
-
Page 34: Bevor Sie Beginnen
Bevor Sie beginnen Erdungshinweise/ordnungsgemäße Installation Das vorliegende Gerät muss geerdet sein. Dieses Grundprinzipien beim Kochen in der Gerät ist nur an eine vorschriftsmäßig geerdete Mikrowelle Steckdose anzuschließen. Es wird empfohlen, einen eigenen Stromkreis zu verwenden, der nur • Ordnen Sie die Speisen wohlbedacht an. die Mikrowelle versorgt. -
Page 35: Erste Inbetriebnahme
Brandgefahr! • Verwenden Sie beim Erhitzen in der Mikro- welle keine Erzeugnisse aus Recyclingpapier. Benutzen Sie niemals den Grillständer oder andere Diese können winzige Metallfragmente enthal- metallische Gegenstände, wenn Sie die Mikrowelle im Mikrowellenbetrieb oder im Kombinations- ten, die Funken und/oder Brände erzeugen Garvorgang verwenden. -
Page 36: Gerät Vorbereiten
Drücken Sie die Taste Grill 7 • Stellen Sie das Gerät möglichst weit entfernt • . Im Display von Radio- und Fernsehgeräten auf. Der erscheint “Gr 1”. Drehen Sie den Drehregler r Betrieb der Mikrowelle kann Störungen des • , bis “Gr Radio- oder Fernsehempfangs hervorrufen. -
Page 37: Standby-Modus
2. Wählen Sie durch Drehen am Drehregler r Drücken Sie die Taste Start/Schnellstart r den gewünschten Modus (Hr 24 oder Hr . Ein Signalton ertönt. Die Zeit zählt 12) und bestätigen Sie Ihre Auswahl durch rückwärts herunter. Nach ca. 3 Sekunden wird Drücken auf die Taste Start/Schnellstart r die normale Uhrzeit wieder angezeigt. -
Page 38: Gar- Oder Auftauvorgänge Unterbrechen/Abbrechen
Gar- oder Auftauvorgänge Leistung auswählen unterbrechen/abbrechen Drücken Sie die Taste Mikrowelle 6 . Im Drücken Sie einmal die Taste Stop e Display 1 erscheint “900” (900 Watt • um einen Gar- oder Auftauvorgang zu unterbre- Leistung). Stellen Sie mit Hilfe des Drehreglers r chen. -
Page 39: Grill-Funktion
Schnellstart 1 Drehen Sie im Standby-Modus den Drehregler r Es stehen Ihnen 3 Grill-Funktionen zur Verfügung: nach rechts und stellen Sie die gewünschte • Grill-Funktion „Oberhitze“ (Gr 1): Dauer des Garens ein. Starten Sie den Garvorgang Die Hitze kommt bei dieser Funktion nur von mit 900 W Leistung durch Drücken der Taste oben. -
Page 40: Kombinations-Garvorgang „Grill
Kombinations-Garvorgang „Grill“ • Kombination 4 (C 4): Diese Funktion vereint die Grill-Funktion mit dem Bei der Kombination 4 beträgt die Mikrowellen- normalen Mikrowellenbetrieb. Während des Kom- leistung 55 % und die Grill-Leistung 45 % der binationsvorgangs wird eine bestimmte Zeit für Garzeit. -
Page 41: Heißluftbetrieb
Heißluftbetrieb Heißluftbetrieb mit Vorheizen Beim Garen mit Heißluft zirkuliert heiße Luft im Gar- Sie können Ihre Mikrowelle auch vorheizen, bevor raum. Heißluft ist besonders zum Zubereiten von Sie einen Garvorgang starten: Aufläufen oder knusprigen Lebensmitteln zu empfeh- Wählen Sie die gewünschte Temperatur, indem Sie die Taste Heißluft 0 len. -
Page 42: Kombinations-Garvorgang „Heißluft
Automatik-Menü Kombinations-Garvorgang „Heißluft“ Diese Funktion vereint die Heißluft-Funktion mit dem normalen Mikrowellenbetrieb. Dadurch wird zum Für Speisen, die im Automatik-Menümodus zuberei- Beispiel Fleisch saftig, zart und trotzdem knusprig. tet werden sollen, ist es nicht notwendig, die Dauer des Garvorgangs und die Leistungsstufe einzuge- Brandgefahr! ben. - Page 43 Dis- Lebens- Bestätigen Sie Ihre Auswahl durch Drücken der Symbol Gewicht play mittel Taste Start/Schnellstart r Stellen Sie das Gewicht mit Hilfe des Drehre- glers r ein und bestätigen Sie dieses A-01 Rind 200 - 1400g durch Drücken der Taste Start/Schnellstart r Der Garvorgang wird gestartet und die errechnete A-02 Schwein...
- Page 44 Mikrowellenbe- Hinweis A-09 Getränke trieb mit 900 W Wenn das Gericht nach dem Beenden des Automa- Leistung tik-Menüs nicht richtig durchgegart ist, garen Sie es Mikrowellenbe- wie folgt nach: A-10 Vorspeise trieb mit 900 W • Benutzen Sie zum Nachgaren den in der Tabel- Leistung le angegebene Garvorgang.
-
Page 45: Pizza Backen
Anwendungsbeispiel 2: • „P-02“ für gekühlte Pizza, Gehen Sie wie folgt vor, wenn Sie 300 ml Wasser Temperatur ca. 5 Grad, erhitzen wollen: Gewicht 150 g–450 g Drehen Sie den Drehregler r („P-02“ erscheint im Display 1). (im Stand- by-Betrieb) langsam nach links, bis „A-09“ im •... -
Page 46: Auftauen Nach Gewicht
Auftauen Es lassen sich folgende Gewichte einstellen: „d-01“/ / „Rind“ 100 - 1800g Auftauen nach Gewicht „d-02“/ / „Schwein“ 100 - 1800g Hinweis: „d-03“/ / „Geflügel“ 100 - 1800g Legen Sie die aufzutauenden Lebensmittel immer auf für Mikrowellen geeignetes Geschirr. Niemals direkt auf den Drehteller 3! „d-04“/ / „Fisch“... -
Page 47: Auftauen Nach Zeit
Rezepte Auftauen nach Zeit Hinweis: Frikadellen Legen Sie die aufzutauenden Lebensmittel immer auf • Formen Sie je ca. 125g Rinderhackfleisch zu für Mikrowellen geeignetes Geschirr. Niemals direkt auf den Drehteller 3! einer Frikadelle (Durchmesser ca. 75mm, Höhe ca. 35mm). Drehen Sie im Standby-Modus den Drehregler •... - Page 48 Kartoffelgratin Muffins Zutaten Zutaten • 750 g festkochende geschälte Kartoffeln Das Rezept ergibt ca. 10 bis 20 Muffins. • 300 g Sahne • 100 g geriebener Käse mit einem Fettgehalt von • Backmargarine (80% Fettgehalt) oder gesalzene 25% bis 30 % Fett i. Tr. Butter •...
-
Page 49: Reinigung Und Pflege
Reinigung und Pflege • Sollte sich in oder um die Außenseite der Tür Dunst ablagern, wischen Sie ihn mit einem wei- Verletzungsgefahr! chen Tuch ab. Hierzu kommt es, wenn die Mikrowelle unter hohen Feuchtigkeitsbedingun- Schalten Sie vor dem Säubern die Mikrowelle ab gen betrieben wird. - Page 50 Entsorgen Der Drehteller 3 erzeugt beim Drehen laute Geräusche. Der Drehteller 3 liegt nicht richtig auf der • Werfen Sie das Gerät keinesfalls in den Achse. Legen Sie den Drehteller 3 korrekt in normalen Hausmüll. Dieses Produkt den Garraum ein. unterliegt der europäischen Richtlinie Die kleinen Rollen 4 und/oder der Boden des •...
- Page 51 Garantie und Service Service Deutschland Tel.: 01805 772 033 (0,14 EUR/Min. aus dem dt. Sie erhalten auf dieses Gerät 3 Jahre Garantie ab Festnetz, Mobilfunk max. 0,42 EUR/Min.) Kaufdatum. Das Gerät wurde sorgfältig produziert E-Mail: kompernass@lidl.de IAN 73194 und vor Anlieferung gewissenhaft geprüft. Bitte bewahren Sie den Kassenbon als Nachweis für den Kauf auf.
- Page 52 KOMPERNASS GMBH BURGSTRASSE 21 44867 BOCHUM DEUTSCHLAND / GERMANY www.kompernass.com Last Information Update · Stand der Informationen: 03 / 2013 · Ident.-No.: SMW900EDSB2012013-3 IAN 73194...