Table of Contents
Advertisement
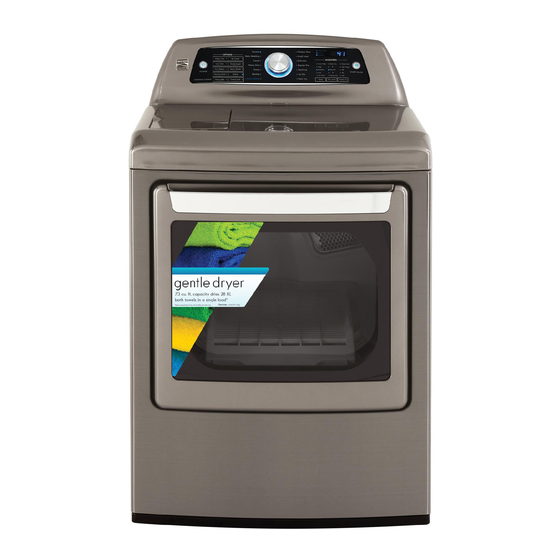
Quick Links
Advertisement
Table of Contents

Related Manuals for Kenmore 796.7162#


Summary of Contents for Kenmore 796.7162#
- Page 1 Use & Care Guide Manual de Uso y Cuidado English / Español Model/Modelo: 796.6162#, 796.7162# Kenmore Elite ® Dryer Secadora # = color number, numero de color P/N MFL67652507 Sears Brand Management Corporation Hoff man Estates, IL 60179 U.S.A. www.kenmore.com www.sears.com...
-
Page 2: Table Of Contents
PROTECTION AGREEMENTS TABLE OF CONTENTS IMPORTANT SAFETY INSTRUCTIONS ....3-6 Master Protection Agreements GROUNDING REQUIREMENTS ........4 Congratulations on making a smart purchase. Your new FEATURES AND BENEFITS Kenmore product is designed and manufactured for ® Key Parts and Components ........7 years of dependable operation. -
Page 3: Important Safety Instructions
IMPORTANT SAFETY INSTRUCTIONS READ ALL INSTRUCTIONS BEFORE USE Your safety and the safety of others is very important. We have provided many important safety messages in this manual and on your appliance. Always read and obey all safety messages. This is the safety alert symbol. This symbol alerts you to potential hazards that can kill or hurt you and others. -
Page 4: Grounding Requirements
IMPORTANT SAFETY INSTRUCTIONS BASIC SAFETY PRECAUTIONS WARNING: To reduce the risk of fi re, electric shock, or injury to persons when using this appliance, follow basic precautions, including the following: • Do not allow children to play on or in the dryer. Close •... -
Page 5: Safety Instructions For Installation
IMPORTANT SAFETY INSTRUCTIONS SAFETY INSTRUCTIONS FOR INSTALLATION WARNING: To reduce the risk of fi re, electric shock, or injury to persons when using this appliance, follow basic precautions, including the following: • Properly ground dryer to conform with all governing •... - Page 6 IMPORTANT SAFETY INSTRUCTIONS SAFETY INSTRUCTIONS FOR STEAM FUNCTIONS WARNING: To reduce the risk of fi re, electric shock, or injury to persons when using this appliance, follow basic precautions, including the following: • Do not open the dryer door during steam cycles. •...
-
Page 7: Features And Benefits
FEATURES AND BENEFITS KEY PARTS AND COMPONENTS There are several important components that are A E B referenced in this manual. EASY-TO-USE CONTROL PANEL Rotate the cycle selector knob to select the desired dry cycle. Add cycle options or adjust settings with the touch of a button. -
Page 8: Installation Instructions
INSTALLATION INSTRUCTIONS KEY DIMENSIONS AND SPECIFICATIONS Description Dryer Dryer (Gas and Electric) Electrical Requirements Refer to the rating label Gas Requirements* NG: 4–10.5 inches WC Gas Requirements* LP: 8–13 inches WC Dimensions 27 in. (W) X 29.4 in. (D) X 45 in. (H), 50 ¼ in. (D with door open) 68.6 cm (W) X 73.4 cm (D) X 114.1 cm (H), 127.5 cm (D with door open) Net Weight Electric : 133.8 lb. -
Page 9: Gas Dryers
INSTALLATION INSTRUCTIONS GAS DRYERS GAS REQUIREMENTS (GAS MODELS ONLY) WARNING: To reduce the risk of fi re, electric shock, or injury to persons when using this appliance, follow basic precautions, including the following: • Gas supply requirements: As shipped from the •... -
Page 10: Connecting The Gas Supply
INSTALLATION INSTRUCTIONS GAS DRYERS (continued) WARNING: To reduce the risk of fi re, electric shock, or injury to persons when using this appliance, follow basic precautions, including the following: • Installation and service must be performed by a • If necessary, the correct nozzle (for the LP nozzle kit, qualifi... -
Page 11: Electric Dryers
INSTALLATION INSTRUCTIONS ELECTRIC DRYERS ELECTRICAL REQUIREMENTS Electrical Requirements for Electric Models Only WARNING: To help prevent fi re, electrical shock, serious injury, or death, the wiring and grounding must conform to the latest edition of WARNING: the National Electrical Code, ANSI/NFPA 70 and all To reduce the risk of applicable local regulations. -
Page 12: Connecting Electric Dryers
INSTALLATION INSTRUCTIONS ELECTRIC DRYERS (continued) CONNECTING ELECTRIC DRYERS WARNING: Grounding through the neutral conductor is prohibited Connect the power cord to the terminal block. Each for: (1) new branch-circuit installations, (2) mobile colored wire should be connected to the same color homes, (3) recreational vehicles, and (4) areas where screw. -
Page 13: Venting The Dryer
INSTALLATION INSTRUCTIONS VENTING THE DRYER IMPORTANT! CHECK YOUR EXHAUST SYSTEM FOR PROBLEMS The most common cause of dryer problems is poor exhaust venting. Before installing your new dryer, check the items listed below to make sure you get the best possible performance. This can save you time and money by reducing cycle times and increasing energy effi... - Page 14 INSTALLATION INSTRUCTIONS INSTALLATION INSTRUCTIONS VENTING THE DRYER (continued) Routing and Connecting Ductwork Follow the guidelines below to maximize dryer Correct Venting performance and reduce lint buildup and condensation in the ductwork. NOTE: Transition duct and fi ttings are NOT included and must be purchased separately.
-
Page 15: Leveling The Dryer
INSTALLATION INSTRUCTIONS LEVELING THE DRYER WARNING: Position the dryer in the fi nal location. Place a level • Wear gloves during installation. across the top of the dryer. • Failure to follow these instructions can result in injury. All four leveling feet must rest solidly on the fl oor. To ensure that the dryer provides optimal drying Gently push on the top corners of the dryer to make performance, it must be level. -
Page 16: Reversing The Door Swing
INSTALLATION INSTRUCTIONS INSTALLATION INSTRUCTIONS REVERSING THE DOOR WARNING: THE DRYER DOOR IS VERY LARGE AND HEAVY. Failure to follow the instructions below can result in damage to the dryer, property damage or personal injury. Hinge assembly Hole cap Cover cap Remove the four screws securing the hinges to the Open the door and remove the two plastic hole door frame. -
Page 17: Final Installation Check
INSTALLATION INSTRUCTIONS INSTALLATION INSTRUCTIONS FINAL INSTALLATION CHECK Testing Dryer Heating Once you have completed the installation of the dryer and it is in its fi nal location, confi rm proper operation with the following steps and tests. Close the dryer door. Is gas turned on? (Gas models only) Press the POWER button to turn the dryer on. -
Page 18: How To Use
HOW TO USE WARNING: To reduce the risk of fi re, electric shock, or injury to persons, read this entire manual, including the Important Safety Instructions, before operating this dryer. CONTROL PANEL FEATURES POWER (ON/OFF) BUTTON CYCLE MODIFIER BUTTONS Press to turn the dryer ON. Press again to turn the Use these buttons to adjust the settings for the dryer OFF. -
Page 19: Operating The Dryer
HOW TO USE OPERATING THE DRYER LOAD THE DRYER Load the dryer with the wet laundry from the washer. If the load is extra large, you may need to divide it into smaller loads for proper performance and fabric care. CLEAN THE LINT FILTER If the lint fi... -
Page 20: Cycle Guide
HOW TO USE CYCLE GUIDE The cycle guide below shows the available options and recommended fabric types for AUTO DRY cycles. *NOTE: The default time and actual time will vary depending on the size of the load and moisture content. Auto Dry Cycles AUTO DRY cycles utilize a sensor that detects moisture levels in the clothes and adjusts the drying time as needed to ensure superior results. -
Page 21: Cycle Guide
HOW TO USE CYCLE GUIDE The cycle guide below shows the available options and recommended fabric types for TIMED DRY cycles. Timed Dry Cycles Use Timed Dry cycles to select a specifi c amount of drying time and the drying temperature. When a TIMED DRY cycle is selected, the display shows the actual time remaining in your cycle. -
Page 22: Sorting Loads
HOW TO USE WARNING: To reduce the risk of fi re, electric shock, or injury to persons, read this entire manual, including the Important Safety Instructions, before operating this dryer. SORTING LOADS LOADING THE DRYER WARNING: Fabric Care Labels To reduce the risk of fi re, Most articles of clothing feature fabric care labels that electric shock, or injury to persons when using this include instructions for proper care. -
Page 23: Time And Status Display
HOW TO USE TIME AND STATUS DISPLAY The Time and Status Display shows the cycle time, cycle progress, and vent status. When the dryer is turned on, the display will illuminate. TIME DISPLAY CYCLE STATUS INDICATORS When a cycle is selected, the display will indicate This portion of the display shows which stage of the the default time for that cycle including selected drying cycle is currently under way (DRYING... -
Page 24: Cycle Modifi Er Buttons
HOW TO USE CYCLE MODIFIER BUTTONS Each cycle has default settings that are selected NOTE: To protect your garments, not every dry level, automatically. You may also customize these settings temperature, or option is available with every cycle. using the cycle modifi er buttons. AUTO DRY cycles are designed to properly care for specifi... -
Page 25: Cycle Options And Special Features
HOW TO USE CYCLE OPTIONS AND SPECIAL FEATURES Your dryer features several additional cycle options and special features to meet your individual needs. To recall a MY CYCLE: MORE TIME Use the MORE TIME/LESS TIME buttons Press the POWER button to turn on the dryer. to increase or decrease the selected drying time in 1-minute increments. -
Page 26: Steam Features
HOW TO USE STEAM FEATURES WARNING: • Do not open the dryer door during Steam Cycles. IMPORTANT NOTES ABOUT STEAM FUNCTIONS: Steam can cause severe burns. • Steam may not be clearly visible during the steam • Do not fi ll the steam feeder with gasoline, dry cleaning functions. -
Page 27: Filling The Steam Feeder
HOW TO USE STEAM FEATURES (continued) Filling the Steam Feeder: Water Stea ONLY Feeder Feeder Lever Pull out the drawer. Fill the steam feeder with ordinary tap water to the MAX line or until the water touches the fi lter screen. Place the steam feeder in the drawer;... -
Page 28: User Maintenance Instructions
USER MAINTENANCE INSTRUCTIONS WARNING: To reduce the risk of fi re, electric shock, or injury to persons, read this entire manual, including the Important Safety Instructions, before operating this dryer. • Unplug the dryer or turn the power off before cleaning to avoid the risk of electric shock. Failure to follow this warning can cause serious injury, fi... -
Page 29: Maintaining The Exhaust System
USER MAINTENANCE INSTRUCTIONS MAINTAINING THE EXHAUST SYSTEM The most common cause of dryer problems is poor exhaust venting. Poor exhaust venting may result from the following conditions: • DIRTY OR DAMAGED EXHAUST DUCTS • WRONG VENT MATERIAL • RESTRICTED OR DAMAGED VENT HOOD •... -
Page 30: Kenmore Connect ® System
Kenmore Connect System ™ Should you experience any problems with your If you experience problems with your dryer, call dryer, it has the capability of transmitting data via 1-800-4-MY-HOME ® . Only use the Kenmore Connect your telephone to the Kenmore Connect Team. This System feature when instructed to do so by the gives you the capability of speaking directly to our Kenmore Connect Team. -
Page 31: Troubleshooting Guide
TROUBLESHOOTING GUIDE BEFORE CALLING FOR SERVICE Problem Possible Cause Solutions *CHECK VENT indicator Exhaust system is too long or has Install a shorter or straighter duct run. See the is blinking too many turns/restrictions. Installation Instructions for details. Partial blockage of the ductwork Ductwork should be checked/cleaned immediately. - Page 32 TROUBLESHOOTING GUIDE BEFORE CALLING FOR SERVICE (continued) Problem Possible Cause Solutions Clothes take too long to dry Exhaust ducts are blocked, dirty, or Confi rm that the exhaust duct is properly duct run is too long. confi gured and free of debris, lint, and obstructions.
-
Page 33: Before Calling For Service
TROUBLESHOOTING GUIDE BEFORE CALLING FOR SERVICE (continued) Problem Possible Cause Solutions Error code: tE1 Temperature sensor failure. Turn off the dryer and call for service. or tE2 Display shows Power cord is connected White (N) and red (L2) wires on power cord. Check power cord incorrectly. -
Page 34: Warranty
WARRANTY Kenmore Elite Limited Warranty When installed, operated and maintained according to all supplied instructions, if this appliance fails due to a defect in material and workmanship within one year from the date of purchase, call 1-800-4-MY- HOME® to arrange for free repair. - Page 36 Get it fixed, at your home or ours! Your Home For troubleshooting, product manuals and expert advice: www.managemylife.com For repair – in your home – of all major brand appliances, lawn and garden equipment, or heating and cooling systems, no matter who made it, no matter who sold it! For the replacement parts, accessories and owner’s manuals that you need to do-it-yourself.