Table of Contents
Advertisement
Service
Manual
BRIDGEABLE POWER AMPLIFIER
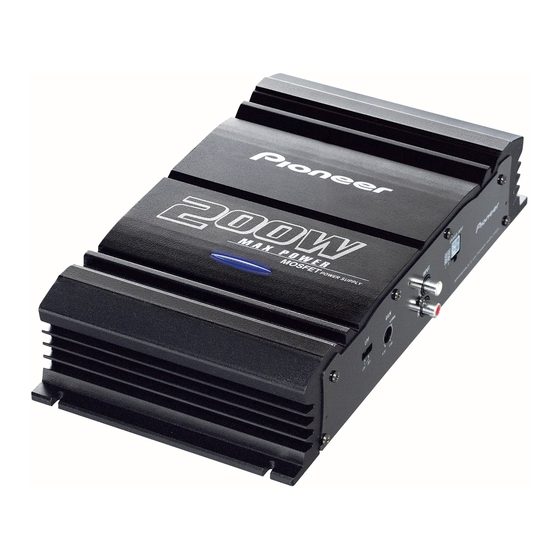
GM-3000T
GM-3000T
GM-3000T
For details, refer to "Important symbols for good services".
PIONEER CORPORATION
PIONEER ELECTRONICS (USA) INC.
PIONEER EUROPE NV
Haven 1087 Keetberglaan 1, 9120 Melsele, Belgium
PIONEER ELECTRONICS ASIACENTRE PTE.LTD. 253 Alexandra Road, #04-01, Singapore 159936
C PIONEER CORPORATION 2004
GM-3000T/X1H/EW
/X1H/UC
/X1H/ES
4-1, Meguro 1-Chome, Meguro-ku, Tokyo 153-8654, Japan
P.O.Box 1760, Long Beach, CA 90801-1760 U.S.A.
/X1H/EW
K-ZZB. JUNE 2004 Printed in Japan
ORDER NO.
CRT3239
Advertisement
Table of Contents

Related Manuals for Pioneer GM-3000T


Summary of Contents for Pioneer GM-3000T
-
Page 1: Service Manual
PIONEER ELECTRONICS (USA) INC. P.O.Box 1760, Long Beach, CA 90801-1760 U.S.A. PIONEER EUROPE NV Haven 1087 Keetberglaan 1, 9120 Melsele, Belgium PIONEER ELECTRONICS ASIACENTRE PTE.LTD. 253 Alexandra Road, #04-01, Singapore 159936 C PIONEER CORPORATION 2004 K-ZZB. JUNE 2004 Printed in Japan... -
Page 2: Safety Information
By following the instructions in this manual, be sure to apply the prescribed grease or glue to proper portions by the appropriate amount.For replacement parts or tools, the prescribed ones should be used. GM-3000T/X1H/EW... -
Page 3: Table Of Contents
• Specifications and the design are subject to possible modification without notice due to improvements. *Average current drawn • The average current drawn is nearly the maximum current drawn by this unit when an audio signal is input. Use this value when working out total current drawn by multiple power amplifiers. GM-3000T/X1H/EW... -
Page 4: Exploded Views And Parts List
2. EXPLODED VIEWS AND PARTS LIST 2.1 PACKING GM-3000T/X1H/EW... -
Page 5: Gm-3000T/X1H/Ew
- For the applying amount of lubricants or glue, follow the instructions in this manual. ( In the case of no amount instructions, apply as you think it appropriate.) - PACKING SECTION PARTS LIST Part No. Mark No. Description GM-3000T/X1H/EW GM-3000T/X1H/UC GM-3000T/X1H/ES 1 Cord Assy HDE0036... -
Page 6: Exterior
2.2 EXTERIOR GM-3000T/X1H/EW... -
Page 7: Gm-3000T/X1H/Ew
24 Spacer HNV0016 25 Fuse (20A) HEK0020 26 Connector(CN904) HKM1077 27 Terminal(CN901) HKE0036 28 Terminal(CN905) HKE0037 29 Terminal(CN906) HKE0037 30 Pin Jack(CN801) HKB0001 31 Holder HNC0082 32 Screw PPZ30P100SAD 33 Terminal(CN903) VNF1084 34 Light Pipe Unit HXA0322 35 Screw PPZ30P120FZK GM-3000T/X1H/EW... -
Page 8: Schematic Diagram
3. SCHEMATIC DIAGRAM 3.1 OVERALL CONNECTION DIAGRAM Note: When ordering service parts, be sure to refer to " EXPLODED VIEWS AND PARTS LIST" or "ELECTRICAL PARTS LIST". GM-3000T/X1H/EW... -
Page 9: Gm-3000T/X1H/Ew
Therefore, when replacing, be sure to use parts of discrete resistors. are expressed as : identical designation. Symbol indicates a capacitor. No differentiation is made between chip capacitors and 0.022 R022 discrete capacitors. AMP UNIT > GM-3000T/X1H/EW... -
Page 10: Pcb Connection Diagram
1.The parts mounted on this PCB include all necessary parts for several destination. For further information for respective destinations, be sure to check with the schematic dia- gram. 2.Viewpoint of PCB diagrams FUSE Capacitor Connector SIDE A SIDE B Chip Part P.C.Board GM-3000T/X1H/EW... -
Page 11: Gm-3000T/X1H/Ew
SIDE A GM-3000T/X1H/EW... -
Page 12: Gm-3000T/X1H/Ew
AMP UNIT GM-3000T/X1H/EW... -
Page 13: Gm-3000T/X1H/Ew
SIDE B GM-3000T/X1H/EW... -
Page 14: Electrical Parts List
Transistor 2SD1864 RD1/4PU222J RD1/4PU473J Transistor 2SB1243 RD1/4PU473J Transistor DTC114TK 0.22 CCN1013 Transistor 2SC2412K Diode 1SS133 0.22 CCN1013 Diode 1SS133 0.22 CCN1013 0.22 CCN1013 Diode 1SS133 RD1/2PM100J Diode HZS7L(A2) RS1/10S103J Diode 1SS133 DB1112H RS1/10S103J Diode ERA15-02VH RS1/10S222J RS1/10S910J RS1/10S511J RS1/10S223J GM-3000T/X1H/EW... - Page 15 RS1/10S223J CCSQCH101J50 RS1/10S223J CCSQCH101J50 RS1/10S472J CKSQYB274K16 RD1/4PU101J RD1/4PU221J CKSQYB154K16 CEAT101M10 RD1/4PU152J CCSQSL680J50 RD1/2PM681J CFTNA224J50 RS1/10S471J CFTNA224J50 RS1/10S471J RS1/10S223J CCSQCH220J50 CCPUSL330J50 CCPUSL330J50 RS1/10S223J RN1/10SE2201D CCSQCH220J50 RN1/10SE2201D CFTLA223J50 RN1/10SE2201D RN1/10SE2201D CFTLA333J50 CCSQCH101J50 RS1/10S104J CCSQCH101J50 RS1/10S104J 220µF/10V CCH1036 RN1/10SE2201D CKSQYB103K50 RN1/10SE2201D RN1/10SE2201D GM-3000T/X1H/EW...
-
Page 16: Adjustment
CKSQYB471K50 2200µF/35V HCH0003 CKSQYB471K50 2200µF/35V HCH0003 CEAT100M16 CEAT101M35 CEAT100M16 CEAT101M35 CKSQYB472K50 CEAT100M50 CKSQYB472K50 CEAT100M50 CCSQCH271J50 CKSQYB473K50 CCSQCH271J50 CKSQYB473K50 CCSQCH271J50 CEAT470M16 CCSQCH271J50 CEAT470M16 CKSQYB103K50 CFTNA564J50 CKSQYB103K50 CEAT100M16 CEAT100M16 6. ADJUSTMENT There is no information to be shown in this chapter. GM-3000T/X1H/EW... -
Page 17: General Information
Remove the six screws and then remove the Panel. Remove the screw. Panel Remove the six screws and then remove the Panel. Remove the ten screws. Remove the nine screws and then remove the Amp Unit. Amp Unit Panel Fig.2 GM-3000T/X1H/EW... -
Page 18: Connector Function Description
7.1.2 CONNECTOR FUNCTION DESCRIPTION GM-3000T/X1H/EW... -
Page 19: Operations
8. OPERATIONS GM-3000T/X1H/EW...