Dell PowerEdge C2100 Hardware Owner's Manual
Servers
Hide thumbs
Also See for PowerEdge C2100:
- Getting started (129 pages) ,
- Getting started manual (119 pages) ,
- Manual (84 pages)
Table of Contents
Advertisement
Quick Links
Advertisement
Table of Contents
Troubleshooting

Related Manuals for Dell PowerEdge C2100

Summary of Contents for Dell PowerEdge C2100
- Page 1 Dell™ PowerEdge™ C2100 Systems Hardware Owner’s Manual Regulatory Model FS12-TY...
- Page 2 A WARNING indicates a potential for property damage, personal injury, or death. ____________________ © 2013 Dell Inc. All rights reserved. Trademarks used in this text: Dell™ and the DELL logo are trademarks of Dell Inc. Regulatory Model FS12-TY 2013 - 11 Rev. A02...
-
Page 5: Table Of Contents
Contents About Your System ....Accessing System Features During Startup ..Front-Panel Features and Indicators . - Page 6 Main Screen ....AMIBIOS Settings ....Processor Settings .
- Page 7 Installing a Hard-Drive Carrier ... Removing a Hard Drive From a Hard-Drive Carrier ....Installing a Hard Drive Into a Hard-Drive Carrier .
- Page 8 Expansion-Card Riser and Expansion Card ..Removing the Expansion-Card Riser ..Installing the Expansion-Card Riser ..Removing the Expansion Card .
- Page 9 Cooling Fans ..... . . Removing a Cooling Fan Assembly ..Installing the Cooling Fan Assembly .
- Page 10 Troubleshooting a NIC ....Troubleshooting a Wet System ... . . Troubleshooting a Damaged System .
-
Page 11: Contents
..... . Contacting Dell ..... - Page 12 Contents...
-
Page 13: About Your System
Starts Preboot eXecution Environment (PXE) boot. <Ctrl><C> Enters the SAS Configuration Utility. For more information, see the SAS adapter documentation at support.dell.com/manuals. <Ctrl><R> Enters the RAID configuration utility. For more information, see the documentation for your SAS RAID card at support.dell.com/manuals. -
Page 14: Front-Panel Features And Indicators
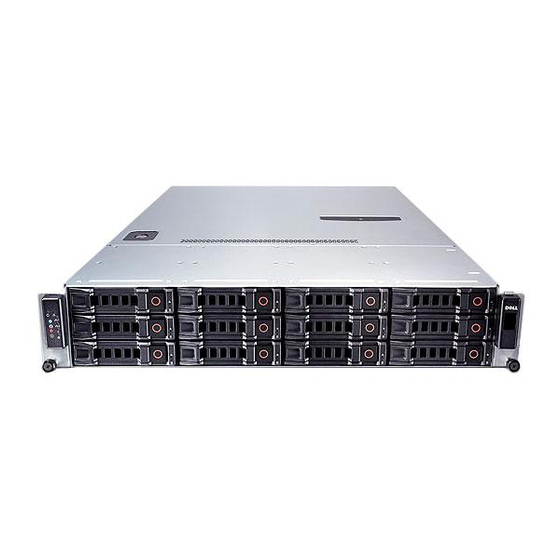
Front-Panel Features and Indicators Figure 1-1. Front-Panel Features and Indicators Item Indicator, Button, Icon Description or Connector Fault LED Displays status errors and is controlled by the Baseboard Management Controller (iBMC). Blinks amber in the event of a non- critical failure, such as fan, voltage or temperature state. - Page 15 Item Indicator, Button, Icon Description or Connector LCD panel Provides system ID, status information, and system error messages. The LCD lights blue during normal system operation. The LCD lights amber when the system needs attention, and the LCD panel displays an error code followed by descriptive text.
-
Page 16: Hard-Drive Indicator Patterns
Item Indicator, Button, Icon Description or Connector Power-on indicator The power-on indicator lights when the system power is on. NOTE: When powering on the system, the video monitor can take from several seconds to over 2 minutes to display an image, depending on the amount of memory installed in the system. - Page 17 Table 1-1. Hard Drive Indicators—On-Board SATA Ports Drive-Status Indicator/Drive-Activity Indicator Condition Off/Off No drive Steady green/Off Drive online (no access) Steady green/Off Drive is present or in idle stage Steady green/Blinks green Drive access Table 1-2. Hard Drive Indicators—SAS/SATA Add-on Cards Drive-Status Indicator/Drive-Activity Indicator Condition Off/Off...
-
Page 18: Back-Panel Features And Indicators
Back-Panel Features and Indicators Figure 1-3. Back-Panel Features and Indicators 11 10 Item Indicator, Button, or Icon Description Connector Slot cover for power Your system comes with one single supply 2 power supply or a set of redundant power supplies. PCIe card slots cover Accommodate an x8 half-length and a full height card. -
Page 19: Nic Indicator Codes
Item Indicator, Button, or Icon Description Connector USB connectors (2) Connect USB devices to the system. The ports are USB 2.0-compliant. Video connector Connects a VGA display to the system. Serial connector Connects a serial device to the system. Back ID LED Lights when the system has been selected for identification. - Page 20 Table 1-3. NIC Speed Indicator Codes NIC Speed Indicator Condition Steady amber Link at 1 Gbps Blinks amber Identifying port with 1 Gbps connection Steady green Link at 100 Mbps Blinks green Identifying port with 10 Mbps or 100 Mbps connection Green off Link at 10 Mbps...
-
Page 21: Power And System Board Status Codes
Power and System Board Status Codes The LEDs on the system front and back panel display status codes during system startup. All systems share the same LEDs on the front and back panel. Table 1-6 lists the status associated with the codes. Table 1-6. -
Page 22: Collecting System Event Log For Investigation
Power Indicator Condition Yellow off Power supply is off or AC input voltage is out of normal operating range (90–264 VAC). Blinks green Standby power is on. Table 1-9. Fault Indicator Codes Fault Indicator Condition Blinks amber Host has critical or non-critical events detected by iBMC, please check iBMC SEL for details. - Page 23 Code Log in iBMC Error Message Corrective Action Remove AC power to the system for 0004 Yes CMOS Settings 10 seconds and restart the system. Wrong If the problem persists, see "Getting Help" on page 133. Remove AC power to the system for 0005 Yes CMOS Checksum 10 seconds and restart the system.
- Page 24 Code Log in iBMC Error Message Corrective Action See "Getting Help" on page 133. 0017 Yes WARN SETUP INVALID Error See "Getting Help" on page 133. 0018 Yes WARN DIMM COMPAT MINOR X16 C0MBO Error See "Getting Help" on page 133. 0019 Yes WARN DIMM COMPAT MINOR...
- Page 25 Code Log in iBMC Error Message Corrective Action See "Getting Help" on page 133. 0020 Yes WARN MEMTEST DIMM DISABLE Error See "Getting Help" on page 133. 0021 Yes WARN MIRROR DISABLE MINOR RAS DISABLED Error See "Getting Help" on page 133. 0022 Yes WARN MIRROR DISABLE MINOR...
- Page 26 Code Log in iBMC Error Message Corrective Action See "Getting Help" on page 133. 002B Yes WARN WR DQ DQS Error See "Getting Help" on page 133. 002C Yes WARN DIMM POP RUL MINOR OUT OF ORDER Error See "Getting Help" on page 133. 002D Yes WARN DIMM POP RUL MINOR...
- Page 27 Code Log in iBMC Error Message Corrective Action See "Getting Help" on page 133. 0035 Yes WARN DIMM VREF NOT PRESENT Error See "Getting Help" on page 133. 0036 Yes WARN DDR3L MIXED Error See "Getting Help" on page 133. 0037 Yes WARN DDR3L 3DPC Error...
- Page 28 Code Log in iBMC Error Message Corrective Action See "Troubleshooting System Memory" 0045 Yes DMA-1 Error on page 117. If the problem persists, see "Getting Help" on page 133. See "Troubleshooting System Memory" 0046 Yes DMA-2 Error on page 117. If the problem persists, see "Getting Help"...
- Page 29 Code Log in iBMC Error Message Corrective Action See "Getting Help" on page 133. 005D Yes S.M.A.R.T. Command Failed S.M.A.R.T. Status BAD, Backup and Replace See "Troubleshooting a Hard Drive" on 0060 Yes Primary page 119. Master Hard Disk Error See "Troubleshooting a Hard Drive"...
- Page 30 Code Log in iBMC Error Message Corrective Action See "Troubleshooting a Hard Drive" on 0083 Yes Secondary page 119. Slave Drive - ATAPI Incompatible Ensure that your processors match and 0101 Yes Warning! This conform to the type described in the system board processor technical specifications does not...
- Page 31 Code Log in iBMC Error Message Corrective Action Ensure that the processor heat sinks are 0121 Yes Thermal properly installed. Failure See "Troubleshooting Processors" on detected by page 122 and "Troubleshooting System PROCHOT# Cooling Problems" on page 116. Ensure that the processor heat sinks are 0122 Yes Thermal properly installed.
- Page 32 Code Log in iBMC Error Message Corrective Action Remove AC power to the system for 10 0150 Yes Processor seconds and restart the system. failed BIST If the problem persists, see "Getting Help" on page 133. Remove AC power to the system for 0151 Yes Processor 10 seconds and restart the system.
- Page 33 Code Log in iBMC Error Message Corrective Action A BIOS update is required. 0160 Yes Processor missing If the problem persists, see "Getting Help" on page 133. microcode A BIOS update is required. 0161 Yes Processor missing If the problem persists, see "Getting Help"...
- Page 34 Code Log in iBMC Error Message Corrective Action Ensure that your processors match 0181 Yes BIOS does not and conform to the type described in support the processor technical current specifications outlined in your stepping system’s Getting Started Guide. Ensure that your processors match 0182 Yes BIOS does not and conform to the type described in...
- Page 35 Code Log in iBMC Error Message Corrective Action Ensure that your processors match and 0194 Yes CPUID, conform to the type described in the Processor processor technical specifications family are outlined in your system’s Getting Started different Guide. Ensure that your processors match 0196 Yes CPUID, and conform to the type described in...
- Page 36 Code Log in iBMC Error Message Corrective Action See "Troubleshooting a Hard Drive" on 0403 Yes AHCI Port3 page 119. HDD Error See "Troubleshooting a Hard Drive" on 0404 Yes AHCI Port4 page 119. HDD Error See "Troubleshooting a Hard Drive" on 0405 Yes AHCI Port5 page 119.
- Page 37 Code Log in iBMC Error Message Corrective Action See "Troubleshooting a USB Device" on 8104 Yes Warning! Port page 110. 60h/64h If the problem persists, see "Getting emulation is Help" on page 133. not supported by this USB Host Controller!!! See "Troubleshooting a USB Device"...
- Page 38 Code Log in iBMC Error Message Corrective Action Remove AC power to the system for 8701 Yes Insufficient 10 seconds and restart the system. Runtime space If the problem persists, see "Getting for MPS data. Help" on page 133. System may operate in PCI or Non- MPS mode.
-
Page 39: Beep Codes
Beep Codes The following table describes the system pre post beep codes. Table 1-10. Pre Post Beep Codes Number of Beeps Description No media Boot-block BIOS file absent Insert next diskette in A: Flash program successful Read file error No flash present Floppy controller error Flash erase error Flash program error... -
Page 40: Other Information You May Need
Dell systems management application documentation provides information about installing and using the systems management software. This document is available online at support.dell.com/manuals. NOTE: Always check for updates on support.dell.com/manuals and read the updates first because they often supersede information in other documents. About Your System... -
Page 41: Using The System Setup Program
Using the System Setup Program Start Menu The system employs the latest AMI Core BIOS, which is stored in Flash memory. The Flash memory supports the Plug and Play specification, and contains a System Setup program, the Power-On Self-Test (POST) routine, and the PCI auto-configuration utility. -
Page 42: System Setup Options At Boot
System Setup Options at Boot You can initiate Setup by pressing <F2> during POST. Console Redirection The console redirection allows a remote user to diagnose and fix problems on a system, which has not successfully booted the operating system. The centerpiece of the console redirection is the BIOS Console. The BIOS Console is a Flash ROM-resident utility that redirects input and output over a serial or modem connection. -
Page 43: Main Menu
Main Menu The main menu displays information about your system board and BIOS. Main Screen Figure 2-1. System Setup Program Main Screen Use [ENTER],[TAB] or [SHIFT TAB] to select Use [+] or [-] to configure system time Select Screen Select Item Change Field Select Field General Help... -
Page 44: Amibios Settings
AMIBIOS Settings Option Description Version Displays the BIOS version. Check this version number when updating BIOS from the manufacturer. Build Date Displays the date the BIOS was created. Processor Settings Option Description Type Displays the type of processor installed on the system board. Speed Displays the maximum speed of the processor. -
Page 45: Processor Configuration
Processor Configuration Option Description Hardware Prefetcher Enable this option to control the Hardware Prefetcher (Enabled default) feature. Adjacent Cache Line Enable this option to control the Adjacent Cache Line Prefetch (Enabled Prefetch feature. default) Max CPUID Value Limit Enable this option to limit the maximum CPUID input (Disabled default) value to 03h when queried, even if the processor supports a higher CPUID input value. -
Page 46: Memory Configuration
Option Description When Enabled, executes software for NUMA aware OS. NUMA Support When Disabled, allows better memory access (Disabled default) performance for non-NUMA OS. Memory Configuration Option Description Current Memory Displays the current memory frequency. Frequency Memory Turbo Mode Enables/disables the memory turbo mode. (Disabled default) Memory Frequency Forces a DDR3 frequency slower than the common tck... -
Page 47: Super Io Configuration
Super IO Configuration Option Description Serial Port1 Address Assigns the I/O address and IRQ for the first onboard (3F8/IRQ4 default) serial port. Serial Port2 Address Assigns the I/O address and IRQ for the second onboard (3F8/IRQ4 default) serial port. USB Configuration Option Description USB Devices Enabled... - Page 48 Option Description PCI-E SLOT Option Enables or disables add-on card option ROM. Rom (Enabled default) PCI-E Connector Option Enables or disables board to board PCI-E connector Rom (Enabled default) option ROM. NIC1 Mac Address Displays the NIC1 MAC address. NIC2 Mac Address Displays the NIC2 MAC address.
-
Page 49: Boot Menu
Boot Menu Option Description Boot Settings Configures the settings during system boots. Configuration Boot Device Priority Specifies the boot device priority. Hard Disk Drives Specifies the boot device priority sequence from the available hard drives. CD/DVD Drives Specifies the boot device priority sequence from the available CD/DVD drives. - Page 50 Option Description Force PXE First Enables forced network boot (PXE). (Enabled default) Force PXE Boot Only Enable or disable PXE to be the only boot device. Force USB First Enable force USB to be the first boot device. Using the System Setup Program...
-
Page 51: Server Menu
Server Menu NOTE: Delay Time, Minimum time, and Maximum time are only shown in SETUP screen when AC Power Recovery Delay is set to User define. The selection of Restore on AC Power Loss setup to Power-on or Last State takes 60 seconds for running iBMC initialization after AC Power on. -
Page 52: Ibmc Lan Configuration
Option Description QPI Error Logging Enables or disables IOH QPI 0/1 error. (Enabled default) IOH Internal Error Enables or disables IOH Internal error logging. Logging (Enabled default) NMI on Error Enable to set the state of NMI on Error: (Fatal default) •... -
Page 53: Remote Access Configuration
Option Description IPv6 AutoConfig Enable or disable IPv6 auto config. IPv6 Prefix Length Enter the IPv6 prefix length in decimal in the form of xxx (xxx less than 128 and in decimal only). IPv6 IP Address Enter IPv6 address in string form. IPv6 Gateway Address Enter IPv6 Gateway address in string from. -
Page 54: Security Menu
Security Menu Option Description Supervisor Password Displays whether the supervisor password is installed or not. User Password Displays whether the user password is installed or not. Change Supervisor Use this option to install, change or clear the password. Password/ If you select these items and press Enter, a dialog box appears Change User and then you can enter a password. -
Page 55: Installing System Components
You should only perform troubleshooting and simple repairs as authorized in your product documentation, or as directed by the online or telephone service and support team. Damage due to servicing that is not authorized by Dell is not covered by your warranty. Read and follow the safety instructions that came with the product. -
Page 56: Inside The System
Damage due to servicing that is not authorized by Dell is not covered by your warranty. Read and follow the safety instructions that came with the product. -
Page 57: Hard Drives
Damage due to servicing that is not authorized by Dell is not covered by your warranty. Read and follow the safety instructions that came with the product. -
Page 58: Removing A Hard-Drive Blank
Removing a Hard-Drive Blank CAUTION: To maintain proper system cooling, all empty hard-drive bays must have drive blanks installed. Press the release button and slide the hard-drive blank out of the hard-drive bay. See Figure 3-2. Figure 3-2. Removing and Installing a Hard-Drive Blank release lever hard-drive blank Installing a Hard-Drive Blank... -
Page 59: Installing A Hard-Drive Carrier
2 Press the release button on the front of the hard-drive carrier to open the release lever. 3 Using the release lever, slide the hard-drive carrier out of the hard-drive bay. See Figure 3-3. 4 If you are not installing another hard-drive carrier, insert a hard-drive blank in the vacated drive bay. -
Page 60: Removing A Hard Drive From A Hard-Drive Carrier
Removing a Hard Drive From a Hard-Drive Carrier 1 Turn over the hard drive and remove the four screws on the hard-drive carrier. See Figure 3-4. 2 Lift the hard drive out of the hard-drive carrier. Figure 3-4. Removing and Installing a Hard Drive From a Hard-Drive Carrier hard drive hard-drive carrier screws (4) -
Page 61: Removing The Optional Internal Hard Drive
Removing the Optional Internal Hard Drive 1 Turn off the system, including any attached peripherals, and disconnect the system from its electrical outlet. 2 Open the system. See "Opening the System" on page 58. 3 Remove the cooling shroud. See "Removing the Cooling Shroud" on page 60. -
Page 62: Installing The Optional Internal Hard Drive
You should only perform troubleshooting and simple repairs as authorized in your product documentation, or as directed by the online or telephone service and support team. Damage due to servicing that is not authorized by Dell is not covered by your warranty. Read and follow the safety instructions that came with the product. -
Page 63: Closing The System
Figure 3-6. Opening and Closing the System locking button screw system cover traction pad Closing the System 1 Place the cover on the chassis and offset it slightly toward the back of the system, so that the hooks on the sides of the cover fit over the corresponding slots on the sides of the chassis. -
Page 64: Cooling Shroud
You should only perform troubleshooting and simple repairs as authorized in your product documentation, or as directed by the online or telephone service and support team. Damage due to servicing that is not authorized by Dell is not covered by your warranty. Read and follow the safety instructions that came with the product. -
Page 65: Installing The Cooling Shroud
Figure 3-7. Removing and Installing the Cooling Shroud screws (4) internal hard drives (2) cooling shroud Installing the Cooling Shroud 1 Align the cooling shroud around the sides of the heat sink and along the memory slots and lower it into the system. See Figure 3-7. 2 Secure the cooling shroud using the four screws. -
Page 66: Heat Sinks
You should only perform troubleshooting and simple repairs as authorized in your product documentation, or as directed by the online or telephone service and support team. Damage due to servicing that is not authorized by Dell is not covered by your warranty. Read and follow the safety instructions that came with the product. - Page 67 Figure 3-8. Removing and Installing the Heat Sink expansion-card riser assembly heat sinks (2) captive screws (4 each) Installing System Components...
-
Page 68: Installing The Heat Sink
You should only perform troubleshooting and simple repairs as authorized in your product documentation, or as directed by the online or telephone service and support team. Damage due to servicing that is not authorized by Dell is not covered by your warranty. Read and follow the safety instructions that came with the product. - Page 69 4 Remove the heat sink. See "Removing the Heat Sink" on page 62. CAUTION: The processor is held in its socket under strong pressure. Be aware that the release lever can spring up suddenly if not firmly grasped. 5 Position your thumb firmly over the processor socket-release lever and release the lever from the locked position.
-
Page 70: Installing The Processor
1 If you are upgrading your processors, prior to upgrading your system, download and install the latest system BIOS version from support.dell.com. Follow the instructions included in the file and download to install the update on your system. 2 Pull the locking lever of the processor socket out and up. -
Page 71: System Memory
7 Align the notches in the processor with the socket keys on the ZIF socket. See Figure 3-9. 8 With the release lever on the processor socket in the open position, align the processor with the socket keys and set the processor lightly in the socket. -
Page 72: General Memory Module Installation Guidelines
• Single-rank, and dual-rank RDIMMs of sizes 1 GB, 2 GB, 4 GB, 8 GB and 16 GB are supported for a total of up to 288 GB. • Quad-rank RDIMMs (two per channel) are supported for a total of up to 48 GB. -
Page 73: Mode-Specific Guidelines
• Two memory modules per channel are limited to 800 MHz, regardless of the memory module speed. • If quad-rank memory modules are mixed with single- or dual-rank modules, the quad-rank modules must be installed in the sockets with the white release levers. •... -
Page 74: Memory Socket Location On The System Board
Memory Socket Location on the System Board The system contains 18 memory sockets split into two sets of 9 sockets, one set per processor. Figure 3-10. Memory Socket Location on the System Board Installing System Components... -
Page 75: Supported Memory Configuration
Supported Memory Configuration There are eighteen DIMMs on each system board to support processor 0 and processor 1. The DIMM sequence of eighteen DIMM sockets is shown below. When you insert the DIMM(s), you have to always start with DIMM0_CHA. See the following for possible memory configurations. -
Page 76: Removing Memory Modules
You should only perform troubleshooting and simple repairs as authorized in your product documentation, or as directed by the online or telephone service and support team. Damage due to servicing that is not authorized by Dell is not covered by your warranty. Read and follow the safety instructions that came with the product. -
Page 77: Installing Memory Modules
You should only perform troubleshooting and simple repairs as authorized in your product documentation, or as directed by the online or telephone service and support team. Damage due to servicing that is not authorized by Dell is not covered by your warranty. Read and follow the safety instructions that came with the product. - Page 78 NOTE: The memory module socket has an alignment key that allows you to install the memory module in the socket in only one way. 4 Press down on the memory module with your thumbs until the ejectors lock into position. See Figure 3-11. When the memory module is properly seated in the socket, the ejectors on the memory module socket align with the ejectors on the other sockets that have memory modules installed.
-
Page 79: Expansion-Card Riser And Expansion Card
You should only perform troubleshooting and simple repairs as authorized in your product documentation, or as directed by the online or telephone service and support team. Damage due to servicing that is not authorized by Dell is not covered by your warranty. Read and follow the safety instructions that came with the product. - Page 80 Figure 3-12. Removing and Installing the Expansion-Card Riser Assembly expansion-card riser assembly expansion-card riser assembly connector Installing System Components...
-
Page 81: Installing The Expansion-Card Riser
You should only perform troubleshooting and simple repairs as authorized in your product documentation, or as directed by the online or telephone service and support team. Damage due to servicing that is not authorized by Dell is not covered by your warranty. Read and follow the safety instructions that came with the product. -
Page 82: Removing The Expansion Card
You should only perform troubleshooting and simple repairs as authorized in your product documentation, or as directed by the online or telephone service and support team. Damage due to servicing that is not authorized by Dell is not covered by your warranty. Read and follow the safety instructions that came with the product. - Page 83 NOTE: Keep this bracket in case you need to remove the expansion card. Filler brackets must be installed over empty expansion-card slots to maintain FCC certification of the system. The brackets also keep dust and dirt out of the system and aid in proper cooling and airflow inside the system. 9 Replace the cooling shroud.
-
Page 84: Installing The Expansion Card
You should only perform troubleshooting and simple repairs as authorized in your product documentation, or as directed by the online or telephone service and support team. Damage due to servicing that is not authorized by Dell is not covered by your warranty. Read and follow the safety instructions that came with the product. -
Page 85: Integrated Storage Controller Cards
You should only perform troubleshooting and simple repairs as authorized in your product documentation, or as directed by the online or telephone service and support team. Damage due to servicing that is not authorized by Dell is not covered by your warranty. Read and follow the safety instructions that came with the product. -
Page 86: Installing The Integrated Storage Controller Card
You should only perform troubleshooting and simple repairs as authorized in your product documentation, or as directed by the online or telephone service and support team. Damage due to servicing that is not authorized by Dell is not covered by your warranty. Read and follow the safety instructions that came with the product. -
Page 87: Raid Battery (Optional)
You should only perform troubleshooting and simple repairs as authorized in your product documentation, or as directed by the online or telephone service and support team. Damage due to servicing that is not authorized by Dell is not covered by your warranty. Read and follow the safety instructions that came with the product. -
Page 88: Installing A Raid Battery
You should only perform troubleshooting and simple repairs as authorized in your product documentation, or as directed by the online or telephone service and support team. Damage due to servicing that is not authorized by Dell is not covered by your warranty. Read and follow the safety instructions that came with the product. -
Page 89: Dual Raid Battery (Optional)
You should only perform troubleshooting and simple repairs as authorized in your product documentation, or as directed by the online or telephone service and support team. Damage due to servicing that is not authorized by Dell is not covered by your warranty. Read and follow the safety instructions that came with the product. - Page 90 Figure 3-17. Removing and Installing the Dual RAID Battery Cage RAID battery carrier screws (2) RAID batteries (2) Installing System Components...
-
Page 91: Installing A Raid Battery
You should only perform troubleshooting and simple repairs as authorized in your product documentation, or as directed by the online or telephone service and support team. Damage due to servicing that is not authorized by Dell is not covered by your warranty. Read and follow the safety instructions that came with the product. -
Page 92: Mezzanine Card (10 Gbe Lan)
You should only perform troubleshooting and simple repairs as authorized in your product documentation, or as directed by the online or telephone service and support team. Damage due to servicing that is not authorized by Dell is not covered by your warranty. Read and follow the safety instructions that came with the product. - Page 93 Figure 3-19. Removing and Installing the Mezzanine Card (10 GbE LAN) mezzanine card (10 GbE LAN) mezzanine-card cover screws (3) back panel spacer pins (3) Installing System Components...
-
Page 94: Installing The Mezzanine Card (10 Gbe Lan)
You should only perform troubleshooting and simple repairs as authorized in your product documentation, or as directed by the online or telephone service and support team. Damage due to servicing that is not authorized by Dell is not covered by your warranty. Read and follow the safety instructions that came with the product. -
Page 95: Power Supplies
You should only perform troubleshooting and simple repairs as authorized in your product documentation, or as directed by the online or telephone service and support team. Damage due to servicing that is not authorized by Dell is not covered by your warranty. Read and follow the safety instructions that came with the product. -
Page 96: Installing The Power Supply
Figure 3-20. Removing and Installing the Power Supply power supply release latch power supply handle Installing the Power Supply 1 Verify that both power supplies are of the same type and have the same maximum output power. 2 Slide the new power supply into the system until the power supply is fully seated and the release latch snaps into place. -
Page 97: Removing The Power Supply Blank
You should only perform troubleshooting and simple repairs as authorized in your product documentation, or as directed by the online or telephone service and support team. Damage due to servicing that is not authorized by Dell is not covered by your warranty. Read and follow the safety instructions that came with the product. -
Page 98: Installing The Power Distribution Board Assembly
You should only perform troubleshooting and simple repairs as authorized in your product documentation, or as directed by the online or telephone service and support team. Damage due to servicing that is not authorized by Dell is not covered by your warranty. Read and follow the safety instructions that came with the product. -
Page 99: Cooling Fans
You should only perform troubleshooting and simple repairs as authorized in your product documentation, or as directed by the online or telephone service and support team. Damage due to servicing that is not authorized by Dell is not covered by your warranty. Read and follow the safety instructions that came with the product. -
Page 100: Installing The Cooling Fan Assembly
Figure 3-22. Removing and Installing the Fan Assembly screw fan assembly cooling fans (3) Installing the Cooling Fan Assembly 1 Place the fan assembly into the system and slide the fan assembly slightly toward the back of the system. 2 Align the slot on the fan assembly with the slot on the chassis. 3 Replace the screw that secures the fan assembly to the chassis. -
Page 101: Removing The Fan Module
Removing the Fan Module Remove the four screws that secure the fan module to the fan assembly and separate the fan module from the fan assembly. See Figure 3-23. Figure 3-23. Removing and Installing the Fan Module cooling fans (3) fan assembly screws (4 each) air flow direction... -
Page 102: Installing The Fan Module
You should only perform troubleshooting and simple repairs as authorized in your product documentation, or as directed by the online or telephone service and support team. Damage due to servicing that is not authorized by Dell is not covered by your warranty. Read and follow the safety instructions that came with the product. - Page 103 Figure 3-24. Removing and Installing the Backplane backplane screws (3) Installing System Components...
-
Page 104: Installing The Backplane
You should only perform troubleshooting and simple repairs as authorized in your product documentation, or as directed by the online or telephone service and support team. Damage due to servicing that is not authorized by Dell is not covered by your warranty. Read and follow the safety instructions that came with the product. - Page 105 5 Disconnect the LED signal cable from the front panel connector on the system board. See Figure 5-3. 6 Remove the screw securing the LED panel cover to the chassis and slide the cover out. See Figure 3-25. 7 Remove the two screws securing the control panel assembly to the chassis. See Figure 3-25.
-
Page 106: Installing The Control Panel Assembly
You should only perform troubleshooting and simple repairs as authorized in your product documentation, or as directed by the online or telephone service and support team. Damage due to servicing that is not authorized by Dell is not covered by your warranty. Read and follow the safety instructions that came with the product. -
Page 107: Installing The System Battery
3 Remove the cooling shroud. See "Removing the Cooling Shroud" on page 60. 4 Locate the battery socket. See "System Board Connectors" on page 127. CAUTION: To avoid damage to the battery connector, you must firmly support the connector while installing or removing a battery. 5 Slide the battery toward the positive side of the connector and lift it out of the securing tabs at the negative side of the connector. -
Page 108: System Board
You should only perform troubleshooting and simple repairs as authorized in your product documentation, or as directed by the online or telephone service and support team. Damage due to servicing that is not authorized by Dell is not covered by your warranty. Read and follow the safety instructions that came with the product. -
Page 109: Installing The System Board
9 Loosen the ten screws securing the system board, and then slide the board toward the front, up and out of the system. See Figure 3-27. Figure 3-27. Removing and Installing the System Board screws (10) system board assembly Installing the System Board 1 Align the holes A and B on the system board to position the board correctly in the system. - Page 110 4 Replace the processors. See "Installing the Processor" on page 66. 5 Replace the heat sinks. See "Installing the Heat Sink" on page 64. 6 Replace the expansion-card riser assembly. See "Installing the Expansion- Card Riser" on page 77. 7 Replace the memory modules. See "Installing Memory Modules" on page 73.
- Page 111 Installing System Components...
- Page 112 Installing System Components...
-
Page 113: Troubleshooting Your System
You should only perform troubleshooting and simple repairs as authorized in your product documentation, or as directed by the online or telephone service and support team. Damage due to servicing that is not authorized by Dell is not covered by your warranty. Read and follow the safety instructions that came with the product. -
Page 114: Troubleshooting System Startup Failure
Troubleshooting System Startup Failure If your system halts during startup prior to video imaging, especially after installing an operating system or reconfiguring your system’s hardware, see "System Memory" on page 67. For all other startup issues, note the LED panel indicators and any system messages that appear on screen. -
Page 115: Troubleshooting A Serial I/O Device
5 Turn off all attached USB devices and disconnect them from the system. 6 Restart the system and, if your keyboard is functioning, enter the system setup program. Verify that all USB ports are enabled. See "USB Configuration" on page 43. If your keyboard is not functioning, you can also use remote access. -
Page 116: Troubleshooting A Nic
Troubleshooting a NIC 1 Restart the system and check for any system messages pertaining to the NIC controller. 2 Check the appropriate indicator on the NIC connector. See "NIC Indicator Codes" on page 15. • If the link indicator does not light, check all cable connections. •... -
Page 117: Troubleshooting A Wet System
You should only perform troubleshooting and simple repairs as authorized in your product documentation, or as directed by the online or telephone service and support team. Damage due to servicing that is not authorized by Dell is not covered by your warranty. Read and follow the safety instructions that came with the product. -
Page 118: Troubleshooting A Damaged System
You should only perform troubleshooting and simple repairs as authorized in your product documentation, or as directed by the online or telephone service and support team. Damage due to servicing that is not authorized by Dell is not covered by your warranty. Read and follow the safety instructions that came with the product. -
Page 119: Troubleshooting Power Supplies
You should only perform troubleshooting and simple repairs as authorized in your product documentation, or as directed by the online or telephone service and support team. Damage due to servicing that is not authorized by Dell is not covered by your warranty. Read and follow the safety instructions that came with the product. -
Page 120: Troubleshooting System Cooling Problems
You should only perform troubleshooting and simple repairs as authorized in your product documentation, or as directed by the online or telephone service and support team. Damage due to servicing that is not authorized by Dell is not covered by your warranty. Read and follow the safety instructions that came with the product. -
Page 121: Troubleshooting System Memory
You should only perform troubleshooting and simple repairs as authorized in your product documentation, or as directed by the online or telephone service and support team. Damage due to servicing that is not authorized by Dell is not covered by your warranty. Read and follow the safety instructions that came with the product. - Page 122 6 Remove the cooling shroud. See "Removing the Cooling Shroud" on page 60. 7 Check the memory channels and ensure that they are populated correctly. See "General Memory Module Installation Guidelines" on page 68. 8 Reseat the memory modules in their sockets. See "Installing Memory Modules"...
-
Page 123: Troubleshooting A Hard Drive
You should only perform troubleshooting and simple repairs as authorized in your product documentation, or as directed by the online or telephone service and support team. Damage due to servicing that is not authorized by Dell is not covered by your warranty. Read and follow the safety instructions that came with the product. -
Page 124: Troubleshooting A Storage Controller
You should only perform troubleshooting and simple repairs as authorized in your product documentation, or as directed by the online or telephone service and support team. Damage due to servicing that is not authorized by Dell is not covered by your warranty. Read and follow the safety instructions that came with the product. -
Page 125: Troubleshooting Expansion Cards
You should only perform troubleshooting and simple repairs as authorized in your product documentation, or as directed by the online or telephone service and support team. Damage due to servicing that is not authorized by Dell is not covered by your warranty. Read and follow the safety instructions that came with the product. -
Page 126: Troubleshooting Processors
You should only perform troubleshooting and simple repairs as authorized in your product documentation, or as directed by the online or telephone service and support team. Damage due to servicing that is not authorized by Dell is not covered by your warranty. Read and follow the safety instructions that came with the product. -
Page 127: Irq Assignment Conflicts
13 Replace processor 1 with processor 2. See "Installing the Processor" on page 66. 14 Repeat step 9 through step 11. If you have tested both the processors and the problem persists, the system board is faulty. See "Getting Help" on page 133. IRQ Assignment Conflicts Most PCI devices can share an IRQ with another device, but they cannot use an IRQ simultaneously. -
Page 128: Troubleshooting Changes In Bios Settings
Troubleshooting Changes in BIOS Settings Certain changes in BIOS settings (such as chipset timing or latency, memory timing or latency, processor clock frequency, etc.) can cause a system to stop booting. If you are able to enter the BIOS Setup by pressing F2, reset the BIOS to factory defaults by pressing F9. -
Page 129: Jumpers And Connectors
You should only perform troubleshooting and simple repairs as authorized in your product documentation, or as directed by the online or telephone service and support team. Damage due to servicing that is not authorized by Dell is not covered by your warranty. Read and follow the safety instructions that came with the product. -
Page 130: Backplane Jumper Settings
You should only perform troubleshooting and simple repairs as authorized in your product documentation, or as directed by the online or telephone service and support team. Damage due to servicing that is not authorized by Dell is not covered by your warranty. Read and follow the safety instructions that came with the product. -
Page 131: System Board Connectors
System Board Connectors Figure 5-3. System Board Connectors Jumpers and Connectors... - Page 132 PCI-E card assembly connector processor 0 Ethernet connector port KVM over IP Port back USB connectors video connector serial connector system identification button processor 0 power connector 1 DDR3 DIMM slots (for processor 0) (9) 11 processor 0 power connector 2 processor 1 13 main power connector processor 1 power connector...
-
Page 133: Backplane Connectors
Backplane Connectors Figure 5-4. Expander Backplane Connectors—Front View hard-drive 11 connector hard-drive 8 connector hard-drive 5 connector hard-drive 1 connector hard-drive 2 connector hard-drive 0 connector hard-drive 4 connector hard-drive 3 connector hard-drive 7 connector 10 hard-drive 6 connector hard-drive 10 connector 12 hard-drive 9 connector Figure 5-5. - Page 134 Figure 5-6. One-to-One Backplane Connectors 14-pin power connector system fan2 connector system fan 1 connector PCI e fan connector iBMC connector SAS A2 cable connector SAS B1 connector SAS A1 cable connector Jumpers and Connectors...
-
Page 135: Power Distribution Board Connectors
Power Distribution Board Connectors Figure 5-7. Power Distribution Board 1 Connectors 14-pin power connector 24-pin power connector 5-pin PMBus connector 14-pin power connector Jumpers and Connectors... - Page 136 Figure 5-8. Power Distribution Board 2 Connectors 4-pin power connector 4-pin power connector 14-pin power connector Jumpers and Connectors...
-
Page 137: Getting Help
Dell provides several online and telephone-based support and service options. If you do not have an active Internet connection, you can find contact information on your purchase invoice, packing slip, bill, or Dell product catalog. Availability varies by country and product, and some services may not be available in your area.To contact Dell for sales, technical support, or customer-service... - Page 138 Getting Help...
- Page 139 42 processor, 41 backplane remote access, 49 installing, 100 super IO, 43 removing, 98 USB, 43 batteries contacting Dell, 133 troubleshooting, 114 control panel assembly battery installing, 102 troubleshooting the RAID card removing, 100 battery, 120 cooling fan battery (system)
- Page 140 114 installing, 56 removing, 54 Dell troubleshooting, 119 contacting, 133 Hard Drives DIMMs installing, 53 See memory modules (DIMMs) hard drives installing, 53 heat sink installing, 64 exit menu, 50 removing, 62 expansion card troubleshooting, 121...
- Page 141 SAS controller, 82 optimizer memory mode, 69 system battery, 102 system board, 105 system cover, 59 configuring, 43 phone numbers, 133 keyboards POST troubleshooting, 110 accessing system features, 9 power supplies, 91 power supply installing, 92 memory configuration, 71 power supply blank, 93 configuring, 42 processor, 64 troubleshooting, 117...
- Page 142 9 hard drive, 119 super IO keyboard, 110 configuring, 43 memory, 117 NIC, 112 support processors, 122 contacting Dell, 133 SAS RAID controller daughter system card, 120 closing, 59 sequence, 109 opening, 58 system cooling, 116 system board, 104...
- Page 143 video, 110 wet system, 113 configuring, 43 video troubleshooting, 110 wet system troubleshooting, 113 Index...
- Page 144 Index...