Table of Contents
Advertisement
Quick Links
Download this manual
See also:
Use and Care Manual
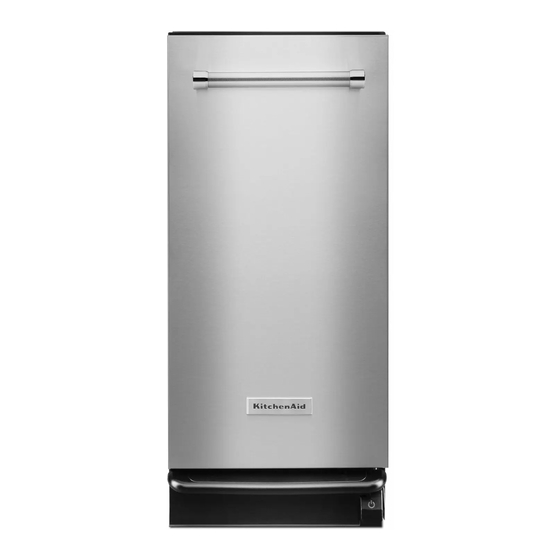
INTEGRATED COMPACTOR
Use & Care Guide
For questions about features, operation/performance, parts, accessories or service, call: 1-800-422-1230 or visit our website at
www.kitchenaid.com
In Canada, for assistance, installation or service, call: 1-800-807-6777 or visit our website at www.KitchenAid.ca
Table of Contents ............................................................................................................2
W10242569B
Advertisement
Table of Contents

Summary of Contents for KitchenAid INTEGRATED COMPACTOR
- Page 1 Use & Care Guide For questions about features, operation/performance, parts, accessories or service, call: 1-800-422-1230 or visit our website at www.kitchenaid.com In Canada, for assistance, installation or service, call: 1-800-807-6777 or visit our website at www.KitchenAid.ca Table of Contents ......................2 W10242569B...
-
Page 2: Table Of Contents
TABLE OF CONTENTS COMPACTOR SAFETY ..............2 Using the Air Filter or Freshener ..........8 Removing a Filled Bag ..............8 INSTALLATION INSTRUCTIONS ..........3 Installing a New Bag..............8 Unpacking ..................3 Location Requirements ..............4 COMPACTOR CARE ..............9 Electrical Requirements ...............4 Changing the Air Filter or Freshener ..........9 Undercounter Installation.............5 Cleaning..................9 COMPACTOR USE.................7... -
Page 3: Installation Instructions
IMPORTANT SAFETY INSTRUCTIONS WARNING: When using an electrical appliance, basic precautions should always be followed, including the following: Read all instructions before using the compactor. Do not compact toxic or volatile flammable material such as oily rags and insect sprays. Do not compact lighted Close supervision is necessary when used by or near cigarettes, cigars, or other hot or burning items. -
Page 4: Location Requirements
13. Remove the shipping base from the bottom of the compactor. Clearance Dimensions A. Leveling legs B. Shipping base Location Requirements Product Dimensions A. Leave 6" (15.2 cm) of clearance space to the right side of the compactor in order to remove the compactor bags. B. -
Page 5: Undercounter Installation
Undercounter Installation NOTE: Proper installation is your responsibility. Make sure you 2. Use pliers to lower the leveling legs away from the cabinet. have everything necessary for correct installation. It is the Adjust the legs so there will be a "... - Page 6 Cabinet-face Mounting Installation 1. Remove the 2 rubber bumpers from the lower corners of the inside drawer front. Set aside the bumpers and discard the screws. 2. Align the bottom of the custom panel with the bottom of the exterior drawer front and rest the panel on the rest tab. NOTE: The bottom of the custom panel should not extend below the bottom rest tab at the lower center of the exterior drawer front.
-
Page 7: Compactor Use
COMPACTOR USE 2. Place trash in compactor. How Your Compactor Works Wrap or cover wet or messy trash. The compacting ram is the part of the compactor which Do not compact items that may develop offensive odors such as raw meat, fish, grapefruit rinds, disposable compresses the trash. -
Page 8: Using The Air Filter Or Freshener
Using the Air Filter or Freshener Installing a New Bag 1. Set the Air Filter switch to ON. The fan creates air movement Do not use any kind of bag other than those designed especially in the compactor for odor removal. for use in your compactor. -
Page 9: Compactor Care
COMPACTOR CARE Your new compactor is designed to give you many years of Cleaning Inside the Drawer dependable service. However, there are a few things you are expected to do in order to properly maintain your compactor. This section will tell you how to clean and care for your NOTE: You may want to wear gloves since there may be bits of compactor. -
Page 10: Troubleshooting
3. Grasp the drawer on the sides and pull it out the rest of the Cleaning the Ram way. Set the drawer down gently. NOTE: You may want to wear gloves since there may be bits of glass on the ram cover. 1. -
Page 11: Assistance Or Service
Our Consultants Provide Assistance With: Features and specifications on our full line of appliances. For Further Assistance Installation information. If you need further assistance, you can write to KitchenAid with any questions or concerns at: Use and maintenance procedures. KitchenAid Brand Home Appliances Accessory and repair parts sales. -
Page 12: Warranty
For thirty days from the date of purchase, when the compactor is installed, operated and maintained according to instructions attached to or furnished with the product, KitchenAid will provide a replacement filter or air freshener if the original filter or air freshener fails due to defects in materials or workmanship.


