
Related Manuals for Toshiba SD-R5372V


Summary of Contents for Toshiba SD-R5372V
- Page 1 TOSHIBA AMERICA INFORMATION SYSTEMS STORAGE DEVICE DIVISION IRVINE, CALIFORNIA SD-R5372V DVD REWRITEABLE DRIVE USER MANUAL...
-
Page 2: Table Of Contents
CONTENTS Introduction................1 Setup ..................3 Using the DVD Rewriteable Drive ...........7 Troubleshooting..............10 Specifications ................ 11 Drive Connectors..............15... -
Page 3: Introduction
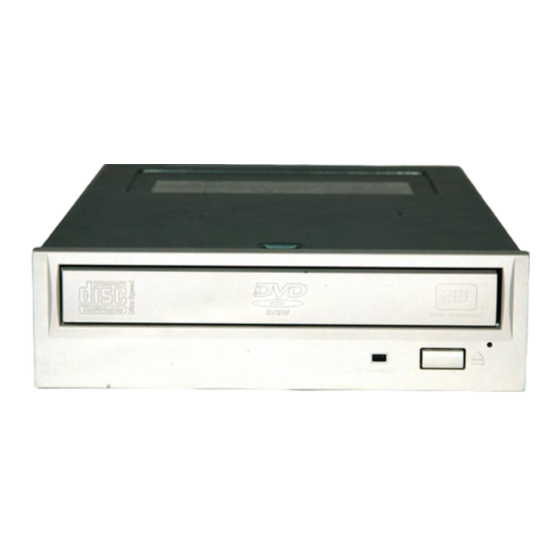
INTRODUCTION – SD-R5372V General Features Reads and records digital data on DVD-R/-RW, DVD+R/+RW, DVD±R DL, CD-R/-RW, HS CD-RW and US CD-RW discs. Read Write DVD-R DVD+R DVD-RW DVD+RW DVD±R DL DVD-ROM DVD-RAM CD-ROM CD-R CD-RW CD-DA HS CD-RW US CD-RW... - Page 4 DVD-ROM, DVD-R/RW, DVD+R, DVD±R DL, DVD+RW, DVD-RAM CD-DA, CD+G, CD-MIDI, CD-TEXT, CD-ROM, CD-ROM XA, MIXED MODE CD, CD-I, CD-I Bridge (Photo-CD, Video-CD), Multi-session (Photo-CD, CD-EXTRA, CD-R, CD-RW, Portfolio) Front Panel Figure 1.SD-R5372V DVD Writeable Drive Front Panel Loading Load disc using tray. Tray...
-
Page 5: Setup
SETUP – SD-R5372V The following steps must be performed to properly install your drive: • Set Drive Jumper Settings • Connect Audio Cable • Attach IDE BUS Cable • Attach Power Cable • Mount Drive Jumper Settings The mode select jumpers are 6 straight angle pins located on the rear of the DVD Rewriteable drive. - Page 6 If the DVD Rewriteable drive is replacing a CD-ROM or DVD-ROM, remove drive presently installed in your system. Your Toshiba DVD Rewriteable drive can be placed in any free half-height drive slot at the front of your computer. (It can be mounted horizontally or vertically.) Carefully start sliding the DVD Rewriteable drive into the opening with the disc tray facing the front of the computer.
- Page 7 CDs on your computer, you will need to install a CD/DVD audio cable. Toshiba's DVD Rewriteable drives use a standard 4-pin audio cable that can be purchased from most local computer suppliers. The sound cable connects to your...
- Page 8 NeroVision Express 2 - a software package that leads you comfortably through the whole process of making Video CDs, Super VideoCDs or high-value DVDs If you did not purchase the SD-R5372V as a kit, you will need to purchase third party software in order to view DVDs and create CD-R/-RW and DVD-R/-RW discs.
-
Page 9: Using The Dvd Rewriteable Drive
USING THE DVD REWRITEABLE DRIVE – SD-R5372V Drive Operation Inserting a Disc - Horizontally To insert a disc into a drive that is mounted horizontally, perform the following steps: Figure 1.Inserting Disc 1. Open the drive's Loading tray by pressing the Eject Button. - Page 10 3. Grasp disc by edges, and lift out of loading tray. 4. Press Eject Button again to close Loading Tray. Software When you purchase the SD-R5372V as a Kit, it will include Nero6 OEM Suite Software. Nero6 OEM Suite 3 disc contains the following software: Nero Burning Rom...
- Page 11 NOTE: High-speed drives spin the disc at a high rotational speed. If a disc has printing on only half of the disc, or if there is a slight imbalance in the disc, the imbalance is greatly magnified by the high speed, causing the drive to vibrate or produce a fan-like noise.
-
Page 12: Troubleshooting
TROUBLESHOOTING – SD-R5372V Problem Solution • Disc tray cannot be opened Check that there is power to drive. • Use Emergency Eject instructions to open tray. • Drive is not recognized by system Is the drive connected properly? Are all cables plugged in properly (e.g. -
Page 13: Specifications
SPECIFICATIONS –SD-R5372V General Interface: ATAPI Applicable Write Format CD-R/-RW Disc at once, Track at once, Session at once, Packet write DVD-R Disc at once, Incremental write DVD-RW Disc at once, Incremental write, Restricted overwrite DVD+R Sequential Write DVD+RW Sequential Write, Random Write Applicable Write disc DVD-R, DVD-RW, DVD+R, DVD±R DL, DVD+RW, CD-R, CD-RW, High Speed CD-RW,... - Page 14 Performance Rotational Speed DVD-ROM (single layer) 9,200rpm (6.6 - 16X CAV) DVD-ROM (dual layer) 7,580rpm (5 - 12X CAV) DVD-R, DVD+R (read) 6,900rpm (5 - 12X CAV) DVD-RW, DVD+RW (read) 5,300rpm (4 - 8X CAV) DVD-RAM (Ver 2.1) (read) 1,400 - 3,300rpm (2X ZCLV) DVD-R (Ver 2.0) (Write) 1,150 - 2,700rpm (2X CLV) 2,300 - 5,300rpm (4X CLV)
- Page 15 CD-ROM Max (Mode 2) Data Buffer Reliability MTBF 100,000 hours Power ON Hours 5,436 hours/year ON/OFF Cycles 313 cycles/year Number of Access 600,000 accesses/year Operating Duty Cycle 20% of Power ON time (Reading/Seeking) 2% of Power ON time (Writing/Seeking) MTTR 0.5 hours Environmental Ambient Temperature...
- Page 16 40 Pin I/F ATAPI Standard Audio Connectors 4-pin and 2-pin connector (use matching housing, Part No. 70066, made by Molex Corp, or equivalent) Regulatory The SD-R5372V DVD Writeable drive has been certified by the following regulatory agencies: • UL 1950 •...
-
Page 17: Drive Connectors
ON. Supplies Analog and Digital sound to your system Audio Connectors The SD-R5372V DVD drive is connected to your computer system through the ATAPI ATAPI connector Connector The mode select jumpers are 6 straight angle pins located on the rear of the DVD drive. - Page 18 Table 1.Interface Pin Assignments INTERFACE PIN ASSIGNMENT SIGNAL HOST SIGNAL NAME SIGNAL HOST SIGNAL NAME NAME NAME Reset Host Reset HDRQ DMA Request Host Data Bus BIT 7 HWR-,STOP Host I/O Write Host Data Bus BIT 8 Host Data Bus BIT 6 HRD-, Host I/O Read HDMARDY, -...