Table of Contents
Advertisement
Quick Links
Owners
Mc
32" CJass (
Thank you for purchasing this Hitachi product. Please read these instructions carefully.
For additional assistance please call 800.HITACHI
(800.448.2244)
or visit our website at www.hitachi.us/tv.
Keep this owners guide for future reference.
Record the model number and serial number of your LCD Television for future reference.
This information is located on the back of the television.
MODEL NUMBER
SERIAL NUMBER
TABLE
OF CONTENTS
IMPORTANT SAFETY INSTRUCTIONS .......................................................................
2-6
HOW TO ATTACH / REMOVE THE STAND .....................................................................
7
FIRST TIME USE .......................................................................................................
10-13
TV OPERATION ........................................................................................................
14-18
CONNECTIONS
TO OTHER EQUIPMENT ..............................................................
19-21
TROUBLESHOOTING
...................................................................................................
22
SPECIFICATIONS ..........................................................................................................
23
SERVICE INFORMATION ..............................................................................................
24
LIMITED WARRANTY ...............................................................................................
25-27
APPENDIXES .................................................................................................................
28
ES-J111201-A
HIGH
DEFINITION
MULTIMEDIA
INTERFACE
N_GH'D_FI
ITION
TELEVISION
[]:] DOLBY
DIGITAL ]
Advertisement
Table of Contents

Related Manuals for Hitachi LE32H405


Summary of Contents for Hitachi LE32H405
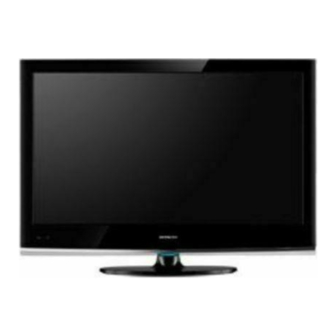
- Page 1 Owners 32" CJass ( Thank you for purchasing this Hitachi product. Please read these instructions carefully. For additional assistance please call 800.HITACHI Record the model number and serial number of your LCD Television for future reference. This information is located on the back of the television.
-
Page 2: Important Safety Instructions
CAUTION CAUTION :TO REDUCE THE RISK OF ELECTRIC SHOCK, DO NOT REMOVE COVER (OR BACK). NO USER-SERVICEABLE PARTS INSIDE. REFER SERVICING TO QUALIFIED SERVICE PERSONNEL. WARNING: TO PREVENT FIRE OR SHOCK HAZARD, DO NOT EXPOSE THIS APPLIANCE TO RAIN OR MOISTURE. TO PREVENT THE SPREAD OF FIRE, KEEP CANDLES OR OPEN FLAMES AWAY FROM THIS PRODUCTAT ALL TIMES. - Page 3 Read these instructions. Keep these instructions. Heed all warnings. Follow all instructions. Do not use this apparatus near water. Clean only with dry cloth. Do not block any ventilation openings. Install in accordance with the manufacturer's Do not install near any heat sources such as radiators, heat registers, stoves, or other apparatus (including amplifiers) that produce heat.
- Page 4 Adjust only those controls that are covered in the instructions, as improper changes or modifications not expressly approved by Hitachi could void the user's warranty. This Class B digital apparatus complies with Canadian ICES-003 as a Standard Television Receiving Apparatus, Canada BET-7/NTMR7.
-
Page 5: Child Safety Notice
• A minimum of two people are required for installation.Flat panel displays can be heavy. CHILD SAFETY NOTICE on your purchase! HITACHI CARES! • The consumer electronics industry is commited to making home entertainment enjoyable and safe. • Please note the American Academy of Pediatrics discourages television viewing for children younger than two years of age. -
Page 6: Safety Precautions
If the unit is to be mounted on a cabinet smaller than length of the unit, it could result in an unstable location and the unit may tumble over, making a risk of personal, possibly fatal injury. Also, this would damage the product seriously. Accordingly, responsibility or liability for any injuries or property damage resulting from the improper installation. 4 inches YES!! Hitachi accepts no... -
Page 7: How To Attach The Stand
• Unplug the AC cord from the AC INPUT terminal. • Before beginning this process, assure that TV is laid on a clean, safe, and cushioned space to avoid any damage to the unit. • Do not touch or press the LCD screen, the glass might break under pressure. Place the TV on its front onto a table. -
Page 8: Features
Features LCD color TV Unique space saving design combines a 32" class LCD color TV. • Integrated Digital Tuner - You can view digital broadcasts without using a Digital TV Set-Top Box. • Closed Caption Decoder With Full Text Mode - Displays text captions or full screen text on the screen for hearing impaired viewers. -
Page 9: Table Of Contents
I Before using your unit IMPORTANT SAFETY INSTRUCTIONS CHILD SAFETY NOTICE SAFETY PRECAUTIONS How to attach the stand How to remove the stand Features Power source Contents Location of controls Remote control ... Antenna connections Cable TV connections ITV operation Starting setup ... -
Page 10: Location Of Controls
CH AV POWER Rear Power input HITACHI Power Indicator Receives IR signals from the remote control. Do not put anything near the sensor, as its function may be affected. Illuminates blue when the TV is in standby mode and flashes for a few seconds when you turn on/off the TV. -
Page 11: Remote Control
@o%e- ©®® Q'O'@ r ... HITACHI 1. POWER Button - Press to turn the LCD TV's power on/off. 2. P.MODE- Picture mode selecting button. 3. ASPECT Button - Press to change the picture size. 4. C.C. Button - Used to turn on/off the Closed Captions. -
Page 12: Antenna Connections
Antenna connections If you are using an indoor or outdoor antenna, follow the instructions below that correspond to your antenna system. If you are using a Cable TV service, see Cable TV connections. Combination VHF/UHF Antenna Antenna Jack Coaxial 75 ohm Cable Cable TV connections This TV has an extended tuning range and can tune most cable channels without using a Cable TV Converter box. -
Page 13: Itv Operation
Starting setup The Setup Wizard appears the first time you turn on the TV. It will assist you to specify the Air/Cable setting and program your channels automatically. IMPORTANT: Make sure that the antenna or cable TV system connection is made. To turn on the TV, press POWER (POWER indicator on the front of the unit changes blue. -
Page 14: Using The Channels Menu
Using the Channels Press Menu button to display the main menu. Press .,_or v button to select Channels. Press i, or SELECT button to enter Channels menu. Press A or v button to select the option, press I, or SELECT button to enter or press Exit button to exit. -
Page 15: Using The Audio Menu
Using the Audio Menu Press Menu button to display the main menu. Press A or v button to select Audio. Press i, or SELECT button to enter Audio menu. Press A or .v button to select the option, press 1,or SELECT button to enter or press Exit button to exit. - Page 16 Using the Setup Menu _1 Cinema Stretches the 4:3 aspect ratio horizontally to fill the screen at 1.33:1.50 aspect ratio. O Dot to dot use the function to see the full image without when TV is in VGA source. PC Standby - This is a good function for a computer monitor. When PC Standby is on, the computer will control the screen on or off.
-
Page 17: Using The Parental Controls Menu
Using the Parental Controls Menu Press Menu button to display the main menu. Press A or v button to select Parental Controls. Press ), or SELECTbutton to enter Parental Controls menu. Press A or .v button to select the option, press l, or SELECT button to enter or press Exit button to exit. - Page 18 Using the Parental The following are descriptions TV Parental Guide Ratings Defined TV-Y All children TV-Y7 Directed to older children TV-G General audience TV-PG Parental Guidance TV-14 Parents Strongly TV-MA Mature Audience Motion Picture Ratings Rating Defined General audience Parental Guidance PG-13 Parents...
-
Page 19: Connections To Other Equipment
The exact arrangement you use to interconnect features of each component. Check the Owner's Manual provided with each component for the location of video and audio inputs and outputs. To connect the LCD TV to a VCR Back of the unit I ®... - Page 20 Connections to other equipment To connect a HDMI or a DVI device The HDMI/DVI input receives digital audio and uncompressed device. When you connect to a DVI device with a HDMI-to-DVI adapter cable, it transfers only video signal. Separate analog audio cables are required.
- Page 21 Connections to other equipment To connect the TV to a camcorder, To play back from a camcorder, connect the camcorder to the unit as shown. This unit can also be used as a display device for many video games. However, due to the wide variety of signals generated by these devices and subsequent hook-up variations required, they have not all been included in the suggested connection diagrams.
-
Page 22: Troubleshooting
TV is not shown in your language. contact 800.HITACHI. For your safety, never try to repair POSSIBLE SOLUTIONS • Check digital signal strength. • Check all Cable TV connections. • Set Air/Cable menu option to the Cable mode. -
Page 23: Specifications
32/44.1/48 kHz sampling frequency 16/20/24 bits per sample Mini-Dsub 15pin x 1 VHF/UHF In 75 ohms coaxial 0.7 V (p-p), 75 ohms terminated 2V RMS,10k ohms terminated (AAA) x 2/Stand/Stand Screw x 3/Owner's Guide/Easy please visit our website at www.hitachi.us Specifications... - Page 24 Service Information HITACHI AMERICA, LTD. HITACHI has made every effort to assure you hours of trouble free operation from your Hitachi product. Should you require service assistance with OPERATIONAL, SERVICE SUPPORT, please contact one of our knowledgeable (800.448.2244). Our Customer Service Representatives repair process with a local Authorized Service Facility in your area.
-
Page 25: Limited Warranty
Product's screen, cabinet or the appearance of bright or dark screen pixels. N. Any Product returned for service that is damaged due to improper packaging, mishandling or shipping. (IMPORTANT: When shipping any Product to a Hitachi Authorized Service Facility, Product owner must package it securely in the original shipping container or its equivalent to prevent damage. The Product must be returned with the shipping charges prepaid and proof of purchases included in the shipping container. - Page 26 "flash card" or other media to effect or facilitate an Upgrade, you understand to return such flash card or other media to HITACHI as HITACHI may require could result in HITACHI placing your name and your DTV's serial number on a "No Further Upgrades"...
- Page 27 SOFTWARE LICENSE This Hitachi TV incorporates open source software modules distributed under certain licenses, including the GNU General Public License Version 3 (as defined by the Free Software Foundation, Inc.). The open source software modules incorporated in this Hitachi TV are shown in the table below.
-
Page 28: Appendixes
Appendixes Appendix A: Picture Format for Each Input Source Aspect Specifications Aspect SD:OverScan(5%) Zoom Ratio HD:OverScan (3%) NTSC, 480i,480p Air / Cable 720p, 1080i Composite/S-video 480i, 480p Component 720p, 1080i,1080P VGA, SVGA, XGA, WXGA HDMI (DVI) 480i, 480p 720p, 1080i, 1080p Appendix B: RGB Format Resolution...