Table of Contents
Advertisement
Quick Links
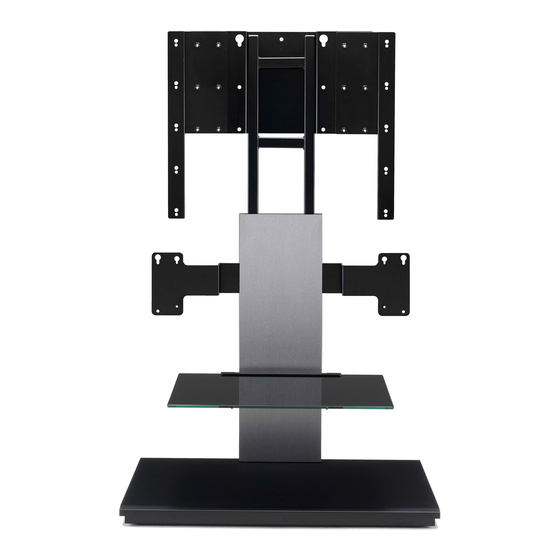
Integrated TV/Soundbar Floor Stand
Support au sol intégré pour téléviseur et projecteur de son
YTS-F500
1
The installation of this unit demands carefully performed work, so
take care in terms of safety during the installation. Read this install
manual carefully prior to starting the assembly and installation work.
Yamaha shall not bear any responsibility for any accidents or injury
that occur due to careless assembly, installation or use of this
product.
2
Install this unit on a flat and stable place that can support sufficient
weight. If you install this unit in an unstable place, such as on a
carpet or a straw mat, place a board under the unit. If installed in a
poor location, your TV/speaker may tip over or fall off the stand,
resulting in personal injury.
3
When you install this unit, take measures to prevent it from falling
over by attaching wire or the L bracket.
4
Do not install the unit against a sliding door, a partition or other place
that is not sturdy enough.
5
Be sure that the installation is performed by two or more people.
When moving the unit, lift it up from the base board and carry. If you
lift it up by other than the base board, it may damage this unit.
6
Be sure to use all of the screws and/or mounting hardware indicated
in the install manual. Tighten screws securely in every location as
directed.
7
Do not lean on or place objects on the corner of your TV/speaker.
8
Do not rattle or hit the unit.
9
Do not make any alterations to parts or use any broken parts.
10 Do not install in a humid or dusty place, or where your TV/speaker
would be subject to steam or oily smoke.
11 Install this unit in a well-ventilated, cool, dry and clean place. For
minimum clearances for proper ventilation, refer to the owner's
manual of your TV/speaker.
12 Mount your TV/speaker properly. If not, your TV/speaker may tip
over or fall off the stand, resulting in personal injury.
13 Do not use on a wet or waxed floor. If this product is used in such a
location, it may stick to the floor.
SAFETY PRECAUTION
14 Install in a place that does not get too hot. Installing it under direct
sunlight or close to a heater may result in bubbling, peeling or
discoloration of painted surfaces.
15 Do not apply cellophane tape or other adhesive materials to painted
surfaces, as the paint may peel.
16 Use a dry cloth to remove dust or dirt. If the unit is very dirty, wet the
cloth in a neutral detergent diluted with water and wring it out well
before wiping the unit. Note that if products like benzene, paint
thinner or household wax are used, they may cause the paint to fade
and/or damage the finish.
17 Do not drop a sharp object on this unit, as damage may result.
18 This install manual provides explanations of important precautions to
take to avoid any accidents, as well as how to assemble and install the
unit. During installation, also refer to the owner's manuals of your
TV and speaker, and attain a good understanding of them before
proceeding according to their directions.
19 After reading, keep this manual in a safe place for future reference.
20 Do not place equipment exceeding the maximum weight capacity
(8 kg) on the glass, as it may break.
21 Distribute weight across the table as evenly as possible.
22 Do not subject the glass to excessive impact or heat.
23 To avoid damaging the shatterproof film on the glass, do not scrub
hard, or use strong chemicals, etc., when cleaning.
24 The glass of the shelf is reinforced, and includes a shatterproof film
protector. Breakage, however, can occur if handled improperly, and
may result in personal injury. Observe the following precautions.
– Avoid impacting the glass excessively.
– Avoid placing sharp objects on the glass.
– If there is a crack in the glass, sudden breakage may occur. Change
the glass immediately should the glass become cracked.
Printed in Malaysia
Install Manual
Manuale d'installazione
Manuel d'installation
Manual de instalación
Installationsanleitung
Installatiehandleiding
Installationsanvisningar
Руководство по установке
WU23990-1
G
i
En
Advertisement
Table of Contents

Related Manuals for Yamaha YTS-F500


Summary of Contents for Yamaha YTS-F500
- Page 1 Yamaha shall not bear any responsibility for any accidents or injury 15 Do not apply cellophane tape or other adhesive materials to painted that occur due to careless assembly, installation or use of this surfaces, as the paint may peel.
-
Page 2: Supplied Parts
: Glass × 1 : Glass holder × 1 SUPPLIED PARTS Make sure you have all of the following items. : Floor stand × 1 : Base board × 1 : Front plate × 1 : Non-skid pads : Non-skid pads (small) ×... -
Page 3: Consignes De Sécurité
Lisez attentivement ce manuel d’installation avant de proximité d’une source de chaleur, les surfaces peintes risquent de se procéder aux travaux de montage et d’installation. Yamaha décline gondoler, de s’écailler ou de se décolorer. toute responsabilité en cas d’accident ou de blessure résultant d’un 15 N’appliquez pas de ruban adhésif sur les surfaces peintes, car vous... -
Page 4: Éléments Fournis
: Vitre × 1 : Porte-vitre × 1 ÉLÉMENTS FOURNIS Vérifiez que les éléments suivants sont fournis. : Pied de sol × 1 : Base × 1 : Plaque avant × 1 : Patins : Patins antidérapants (petits) antidérapants × 2 (grands) ×... -
Page 5: Before Assembling
ASSEMBLING/MONTAGE English Français Before Assembling Avant le montage • y indicates a tip for your operation. • Le symbole y appelle votre attention sur un conseil d’utilisation. • In the MEMO box, note down dimensions and the number (on the mounting •... -
Page 6: Installing The Tv
ASSEMBLING/MONTAGE Blanket, etc. Couverture, etc. TV stand Support TV English Français 2 Installing the TV 2 Installation du téléviseur Note Remarque Also refer to the owner’s manual of your TV. Consultez également le mode d’emploi du téléviseur. Remove the TV stand. Retirez le support TV. - Page 7 ASSEMBLING/MONTAGE When using Screws checked in 2-2-2 Lors de l’utilisation de Vis définies à l’étape 2-2-2 When using Lors de l’utilisation de English Français Attach Fixez The holes for vary depending on the screw Le nombre de trous que possèdent varie selon les vis checked in step 2-2-2.
- Page 8 ASSEMBLING/MONTAGE i.e. When using YSP-4100 Par ex., lors de l’utilisation de YSP-4100 English Français Check the location to attach and the TV. Vérifiez l’emplacement de montage de le téléviseur. 1 Place over mounting hole A on so that the hole on aligns with mounting hole A on , as 1 Placez...
- Page 9 ASSEMBLING/MONTAGE When the X checked in 2-2-1 is other than 60 cm Lorsque la distance X mesurée à l’étape 2-2-1 n’est pas de 60 cm Only when the X checked in 2-2-1 is 60 cm Uniquement lorsque la distance X mesurée à l’étape 2-2-1 est de 60 cm English Français...
- Page 10 ASSEMBLING/MONTAGE i.e. When X checked in 2-2-1 is 40 cm Par ex., lorsque la distance X mesurée à l’étape 2-2-1 est de 40 cm English Français Attach Fixez à 1 Hang on the screws you tightened temporarily in step 1 Accrochez aux vis que vous avez provisoirement serrées à...
-
Page 11: Installing The Speaker
ASSEMBLING/MONTAGE YSP-4000 YSP-4000 YSP-5100/4100 YSP-5100/4100 YAS-81/71 YAS-81/71 YHT-S1400/S400 YHT-S1400/S400 YHT-S1400/S400 YAS-81/71 English Français 3 Installing the speaker 3 Installation du haut-parleur Notes Remarques • Before mounting the speaker to the floor stand, complete the cable • Avant d’installer le haut-parleur sur le pied de sol, vous devez raccorder les câbles. -
Page 12: Installing The Glass
ASSEMBLING/MONTAGE Sticker Autocollant English Français 4 Installing the glass 4 Installation de la vitre Prepare for installing the glass. Préparez-vous à installer la vitre. 1 Stick as shown in the illustration above. 1 Assemblez comme indiqué dans l’illustration ci-dessus. 2 Tighten (2 screws) temporarily halfway into shown in the illustration above. - Page 13 ASSEMBLING/MONTAGE English Français 5 Bundling the cables and positioning the 5 Regroupement des câbles et floor stand positionnement du pied de sol Bundle the cables. Regroupez les câbles. 1 Insert into the holes of your choice on the right and left 1 Insérez dans les trous de votre choix situés de part et d’autre de...
-
Page 14: Specifications
COMPATIBLE TV TÉLÉVISEURS COMPATIBLES Compatible TV size: up to 60-inch, under 50 kg Formats compatibles : jusqu’à 60 pouces, moins de à 50 kg Compatible distance between mounting holes on the rear panel of the TV Distance compatible entre les trous de montage situés sur le panneau arrière (W ×...