Sony UVW-1800 Operating Instructions Manual
Videocassette recorder
Hide thumbs
Also See for UVW-1800:
- Operating instructions manual (60 pages) ,
- Operating instructions manual (49 pages)
Table of Contents
Advertisement
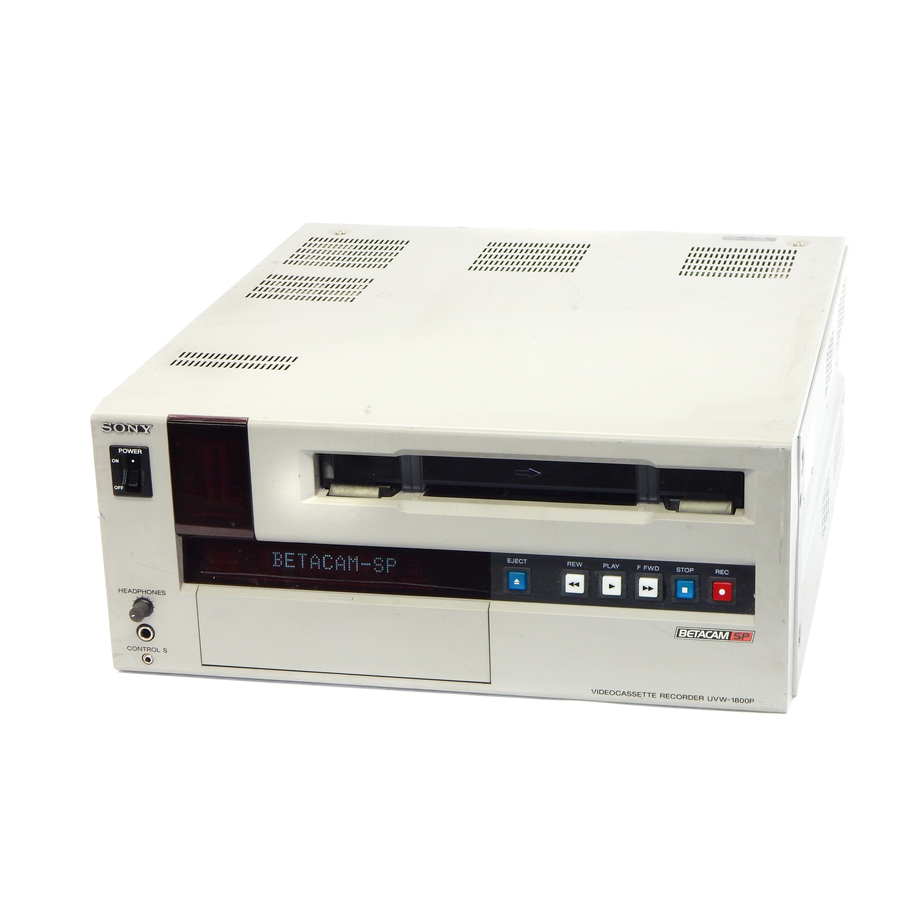
SONY
Videocassette Recorder
Model:
UVW-1800/1800P
Operating Instructions pagei(E)
Before operating the unit, please read this manual thoroughly
and retain it for future reference.
Mode d'emploi page-i(F)
Avant la mise en service de cet apparail, priere de lire
attentivement ce mode d'emloi que I'on conservera pour toute
reference ulterieure.
© 1993 by Sony Corporation
3-757-561-24(2)
Advertisement
Table of Contents

Related Manuals for Sony UVW-1800


Summary of Contents for Sony UVW-1800
- Page 1 Before operating the unit, please read this manual thoroughly and retain it for future reference. Mode d'emploi page-i(F) Avant la mise en service de cet apparail, priere de lire attentivement ce mode d'emloi que I'on conservera pour toute reference ulterieure. © 1993 by Sony Corporation...
- Page 2 Class A digital device, pursuant to Refer to these numbers whenever you call upon your Part 15 of the FCC Rules These limits are designed to Sony dealer regarding this product provide reasonable protection against harmful interference when the equipment is operated in a Model No.
-
Page 3: Table Of Contents
Precautions ..................3 (E) Features....................1-2 (E) Front Panel ..................2-2 (E) Rear Panel................... 2-5 (E) Before Use ................... 3-2 (E) Cassettes....................3-3 (E) Cassettes Which Can Be Used ............3-3 (E) Inserting and Ejecting a Cassette ..........3-3 (E) Record Inhibit Function ..............3-4 (E) Reference Video Signals ..............3-5 (E) Playback Operation ................ - Page 4 Menu Organization................7-2 (E) Hierarchical Structure ..............7-2 (E) Menu Screens................7-3 (E) Menu Operations................7-8 (E) Buttons Used to Change the Setting..........7-8 (E) Operation Sequence ..............7-9 (E) Self-Diagnosis Functions..............8-2 (E) Condensation ..................8-3 (E) Regular Checks and Maintenance............ 8-4 (E) Digital Hours Meter ..............8-4 (E) Head Cleaning................
-
Page 5: Precautions
To take best advantage of the many features of this unit, note the following important points. Usable cassette tapes (see page 3-3(E)) Use only metal cassette tapes with this unit. Do not use oxide tapes. Reference video input (see page 3-5(E)) When recording or playing back videotapes on this unit, always input a composite video signal synchronized with the video signal to be used to the REF. -
Page 6: Features
Chapter 1 Overview________ This chapter overviews the features of the UVW-1800/1800P. Features................. 1.2 (E) - Page 7 A metal tape cassette recorded on this unit can also be played back on other Betacam SP VTRs. Again, metal tape cassettes recorded on other Betacam SP VTRs can be played back on the UVW-1800/1800P. The cassette size is detected automatically.
-
Page 8: Other Features
Other features Compact, power-saving design The unit is light and simple, and very energy-efficient. Menu-based set-up system All the initial settings for system operation conditions and so forth are accessed through a simple menu system, from the subsidiary control panel. Remote control function The unit can be operated from a remote control unit through the RS-422A serial interface. -
Page 9: Front Panel
Chapter 2 Identification of Parts and Controls______ This chapter lists the names of all the controls and other components used in the operation of the unit Front Panel ..............2-2 (E) Rear Panel ...............2-5 (E) - Page 10 Tape transport section 2-2 (E) Chapter 2 Identification of Parts and Controls...
-
Page 11: Rear Panel
Rear Panel Video inputs Video inputs Chapter 2 Identification of Parts and Controls... - Page 12 Side control panel Side control pane Indicators Indicators...
- Page 13 Subsidiary control panel The subsidiary control panel is behind a flap on the front panel. Open the flap as shown in the figure. Accessing the subsidiary control panel Subsidiary control panel Chapter 2 Identification of Parts and Controls...
-
Page 14: Video Outputs
Video outputs Video outputs Audio inputs and outputs Audio inputs and outputs... - Page 15 Power, time code and control signals Always power off the UVW-1800/1800P before connecting a remote control unit to the TBC REMOTE connector (Load current: Max. 300mA) Power, time code and control signals Chapter 2 Identification of Parts and Controls...
- Page 16 Chapter 3 Preparations______ This chapter describes various preparatory aspects of operation of the UVW-1800/1800P. Before Use ................3-2 (E) Cassettes ................3-3 (E) Cassettes Which Can Be Used........3-3 (E) Inserting and Ejecting a Cassette........ 3-3 (E) Record Inhibit Function..........3-4 (E)
- Page 17 If there should be a strange sound or smell or smoke emanating from the unit, immediately power off the unit, and disconnect the power supply and all signal connections, then refer to your supplier or Sony service representative. Notes on operation Operation and storage locations Avoid operation or storage in any of the following places.
-
Page 18: Inserting A Cassette
This unit only accepts metal tapes. Use the following '/2-inch Betacam SP cassettes. Always check that the unit is powered on before attempting to insert or eject a cassette. Inserting a cassette Inserting a cassette 1 Turn the POWER switch on. 2 Check the following points, then insert the cassette. -
Page 19: Cassettes
Cassettes Removing slack in the tape Carefully retote one of the reels with your finger in the direction of the arrows until it stops. Removing slack in the tape No double insertion of cassettes When you insert a cassette, the orange lock-out plate appears in the cassette compartment to prevent double insertion. - Page 20 When this unit is being used, a composite video signal, synchronized to the signal being used must be input to the REF. VIDEO INPUT connector to enable the time base corrector (TBC) to operate correctly, and ensure stable operation. If no reference video signal is input, then during recording or editing, or in EE mode the monitor screen will tend to drift vertically, as shown in the figure below.
-
Page 21: Recording And Playback
Chapter 4 Recording and Playback This chapter describes the preparation necessary before using the unit for recording or playback, including connections and switch settings, and basic operating procedures. It also describes the text information which can be superimposed on the monitor screen. Playback Operation ............4-2 (E) Preparation for Playback..........4-2 (E) Playback Operation............. - Page 22 This section describes the connections, switch settings, and basic operating procedures for playback of both video and audio signals. Connect the unit to the monitor and make the switch settings as shown in the following figure. a) The VIDEO IN connectors of the PVM-1444Q are provided with automatic termination function. Connections and switch settings 4-2 (E) Chapter 4 Recording and Playback...
- Page 23 To stop playback Press the STOP button. This puts the UVW-1800/1800P into stop mode. This unit automatically enters standby-off mode if it is left in stop mode for eight minutes. You can change the time to switch to stand-by o f f mode in the TAPE PROTECTION menu.
- Page 24 Connect this unit as the recorder and a UVW-1600/1600P as the player as shown in the following figure. To check the video and audio signals being recorded, connect the UVW-1800/1800P to a monitor as described in the Section "Playback Operation" (page 4-2(E)).
- Page 25 3 Following the instructions in the appropriate operation manual, and prepare the player for playback. 4 Power on the UVW-1800/1800P. 5 Set the VIDEO IN selector switch to Y-RJB. 6 Set the time counter display selector switch according to the time data to be used.
-
Page 26: Recording Operation
Operation 1 Insert a cassette in the UVW-1800/1800P. Always be sure to use a metal tape. Before inserting the cassette, check that it is not record-inhibited. - Page 27 When the subsidiary control panel CHARACTER switch is in the ON position, the video signal output from the VIDEO 2 (SUPER) OUTPUT connector includes superimposed indications of time data and the operating state of this unit. Selecting the information displayed and the character type and position of the indications The information displayed and the character type and position of the indications can be selected by using the menu item "DISPLAY CONTROL."...
-
Page 28: Superimposed Text Information
Superimposed Text Information Drop-frame indication for time code reader (onUVW-1800only) " . " : A single dot indicates drop-frame mode. " : " : Two dots (i.e. a colon) indicate non-drop-frame mode. Drop-frame indication for time code generator (onUVW-1800only) " . " : A single dot indicates drop-frame mode. "... - Page 29 Chapter 5 Editing__________ By connecting two or more UVW-1800/1800P units or using UVW-1600/1600P units as players, and connecting an editing control unit such as a PVE-500 it is possible to assemble an editing system; the UVW-1800/1800P can be used as the recorder in such an editing system.
- Page 30 The figure below illustrates a system for cut editing using the UVW-1800/1800P withaUVW-1600/1600P. For details of editing operations, refer to the operation manual for the editor being used. For details of the connections and settings on each of the other pieces of equipment, refer to the respective operation manuals.
- Page 31 Monitoring the video signals To monitor the video signals, connect monitors as shown in the figure below. The connections are the same-for the recorder and player. To obtain superimposed information on the monitor screen, set the CHARACTER switch to the ON position. Connecting a video monitor Chapter 5 Editing 5-3 (E)
-
Page 32: Cut Editing
Cut Editing Reference video signal and editor connections Reference video signal and editor connection 5-4 (E) Chapter 5 Editing... - Page 33 Video and audio signal connections Using BNC cable and VDC-C5 dubbing cable Video and audio signal connection 1 Using BNC cables Video and audio signal connection 2 Chapter 5 Editing 5-5 (E)
- Page 34 The figure below illustrates a system for A/B roll editing using the UVW-1800/ 1800P with two UVW-1600/1600P units. Example configuration of system for A/B roll editing (component signals) Switch settings on the UVW-1800/1800P (recorder) and UVW-1600/1600P (player) 5-6 (E) Chapter 5 Editing...
- Page 35 Monitoring the audio and video signals To monitor the audio signals, connect speakers as shown in the figure below. For details of video monitor connections, see the section "Monitoring the video signals" under "Cut Editing" above (page 5-3(E)). Connecting speakers Chapter 5 Editing 5-7 (E)
-
Page 36: A/B Roll Editing
A/B Roll Editing Reference video signal connections Reference video signal connections 5-8 (E) Chapter 5 Editing... - Page 37 Control signal connections Control signal connections Chapter 5 Editing 5-9 (E)
- Page 38 A/B Roll Editing Video and audio signal connections Video and audio signal connections 5-10 (E) Chapter 5 Editing...
- Page 39 When using two or more players, as in an A/B roll editing system, phase synchronization of the signals (i.e. system sync) is necessary and for composite signals only, the subcarrier phase must also be in sync. If not, picture instabilities or color break-up may occur at edit points.
-
Page 40: Phase Adjustments
Phase Adjustments 4 Adjust the phase synchronization control on the Vectorscope so that the sync and subcarrier phases are close to the reference line. 5 Output the player 1 signal from the PVE-500. 6 Press the A channel button on the Vectorscope. This displays the sync phase and subcarrier phase (composite signals only) of the signal from player 1. -
Page 41: Displaying Time Data
Chapter 6 Time Data________ The time data used by the UVW-1800/1800P for both recording and display include CTL signal count values, longitudinal time codes (LTC), and user bit data. This chapter describes how to display time data, and how to set LTC and user bit values. - Page 42 During recording or playback, you can display the time data selected on this unit on the monitor and on the time counter display. During editing, the data displayed is selected by the editor. On the time counter display Use the time counter display selector switch to select the data to be displayed on the time counter display.
- Page 43 Using the internal time code generator it is possible to preset the longitudinal time code (LTC) value to be recorded on the tape to any desired initial value. This section describes how to preset the LTC value, and also how to preset the user bit data which is also written on the same track.
-
Page 44: Settings For Longitudinal Time Code And User Bits
Settings for Longitudinal Time Code and User Bits Setting procedure Setting the initial value for time code or user bits 1 Set the time counter display selector switch to LTC or U-BIT, to display the required time data on the monitor and time counter display. 2 Press the TC PRESET button. - Page 45 3 Use the buttons to select the digit in the value which is flashing. 4 Use the buttons to adjust the value of the flashing digit. Note that user bit data values are in hexadecimal (digits 0-9 and A-F). 5 Repeat steps 3 and 4 as required to set the required value. To set the value to 00:00:00:00, press the RESET (NO) button.
- Page 46 RUN MODE: Automatically set to "FREE RUN." DF MODE (for UVW-1800 only): Automatically set to either drop-frame mode or non-drop-frame mode according to the mode of the input time code. After setting the TC IN selector switch to EXT position, the internal time code generator begins to run in synchrony with the external time code generator.
- Page 47 Chapter 7 Menus__________ This chapter describes the organization of the principal set-up menus (selecting the superimposed information on the monitor screen, time code, run mode, etc.) and how to use them. Menu Organization............7-2 (E) Hierarchical Structure ..........7-2 (E) Menu Screens............... 7-3 (E) Menu Operations ............7-8 (E) Buttons Used to Change the Setting ......7-8 (E) Operation Sequence ...........7-9 (E)
- Page 48 The menu screens are arranged in a three-level tree structure, as shown in the figure below. The top-level selections (level 1) access the main divisions of the settings, and except for the MENU GRADE item, the settings themselves are made on levels 2 and 3.
- Page 49 The table below lists the.menu screens and explains the meaning of each setting. In the table the following conventions are used: • Factory default settings are preceded by an asterisk (*). • Each indication appears twice: the upper version is what appears on the monitor screen, and the lower version in parentheses appears on the time counter display.
-
Page 50: Menu Organization
Menu Organization Menu selections (continued) 7-4 (E) Chapter 7 Menus... - Page 51 Menu selections (continued) (Continued) Chapter 7 Menus 7-5 (E)
- Page 52 Menu Organization Menu selections (continued) 7-6 (E) Chapter 7 Menus...
- Page 53 Menu selections (continued) Chapter 7 Menus 7-7 (E)
- Page 54 Although the menu screens are divided into basic and extended categories, the method of operation is the same. This section describes as an example the procedure required to change the setting for the tape protection mode used when the deck is stopped. Check the location of this setting in the menu tree, by referring to the previous section;...
- Page 55 Displaying the extended menus Displaying the extended menus 1 Press the MENU button. The level 1 menu appears on the monitor screen. The factory default setting is basic menu screens only. The reverse video cursor shows the current selection; in the figure below, this is "OPERATIONAL FUNCTION."...
-
Page 56: Menu Operations
Menu Operations 2 Press the button to select "MENU GRADE :BASIC". Selecting MENU GRADE :BASIC 3 Press the button. This displays all of the settings, and the current selection appears on the monitor screen in reverse video. The <— mark indicates the "BASIC" has an assoicated menu at the next higher level. - Page 57 5 Press the SET (YES) button. The messages shown below appear in the monitor screen and the ti display, and the new setting is saved in memory. Messages when saving settings Once the saving operation is completed, both the monitor screen and time counter display return to the normal state.
- Page 58 Menu Operations Changing the "NEXT MODE" setting Changing the NEXT MODE setting I Press the MENU button. The level 1 extended menu appears on the monitor screen. The reverse video cursor shows the current selection, "MENU GRADE • ENHAN", made in the previous section. When the currently selected setting is not the factory default setting, the "•"...
- Page 59 1 Press the button. The level 2 menu screen appears. When this menu appears for the first time, "FROM STOP" is selected. Level 2 menu screen (TAPE PROTECTION) 4 Press the LG button to select "FROM STILL". Selecting FROM STILL 5 Press the button.
- Page 60 Menu Operations 6 Press the button to select "NEXT MODE". Selecting NEXT MODE 7 Press the button. The settings for "NEXT MODE" appear. When this menu screen appears for the first time, "STEP FWD" is selected. Setting screen display 8 Press the button to select "TENSION RELEASE".
- Page 61 9 Press the SET (YES) button. The "Saving" message appears on the monitor (as shown below), and the new setting is saved in memory. Messages when saving settings Once the saving operation is completed, both the monitor screen and time counter display return to the normal state.
- Page 62 Menu Operations Returning menu settings to the factory default Returning a specific menu setting to its factory default In the screen for making the setting, press the RESET (NO) button. In the example above of the "NEXT MODE" setting, press the RESET (NO) button in step 8 to return to the factory default of "STANDBY OFF".
-
Page 63: Self-Diagnosis Functions
Maintenance______ This chapter describes the self-diagnosis functions with which the UVW-1800/1800P is provided, the action to be taken in the event of condensation on the head drum, the digital hours meter, and the head-cleaning process needed to ensure high video and audio reproduction quality. - Page 64 The UVW-1800/1800P is provided with self-diagnosis functions which detect internal faults. If a fault is detected, the UVW-1800/1800P displays an error code in the time counter display and an error message on the monitor screen. To display error messages on the monitor screen, the monitor must be connected to the VIDEO 2 (SUPER) OUTPUT connector, and the CHARACTER switch on the subsidiary control panel must be in the ON position.
- Page 65 If the unit is suddenly moved from a cold to a warm location, or used in a very humid place, moisture from the air can condense on the head-drum. If the tape is run in this state, the tape may stick to the drum, in which case it is highly likely to be damaged.
-
Page 66: Digital Hours Meter
These counts can be displayed on the monitor and time counter display; use them as guidelines for scheduling maintenance. Consult your Sony service representative about necessary periodic maintenance checks. Digital hours meter indications The digital hours meter provides the following four display items. - Page 67 Ending the digital hours meter display Press the HOURS METER button. Resetting the trip values Consult your Sony service representative. Clean both the video and audio heads using the special BCT-5CLN cleaning cassette. Follow the instructions for the cleaning cassette carefully, as improper use can damage the heads.
- Page 68 Chapter 9 Operational Problems If an alarm message appears on the screen, or the unit appears to be malfunctioning, check this chapter before consulting your Sony service representative. Alarm Messages ............9-2 (E) Trouble-Shooting Chart..........9-4 (E)
- Page 69 There are a number of messages which may appear on the monitor screen during operation. (A message also appears in the time counter display.) Alarm messages These alarm messages indicate misoperations or problems with the unit such as condensation on the drum. To display these messages on the monitor screen, the monitor must be connected to the VIDEO 2 (SUPER) OUTPUT connector, and the CHARACTER switch on the subsidiary control panel must be in the ON position.
-
Page 70: Alarm Messages
The alarm messages indications are listed below. Alarm messages ABNORMAL SETTINGS SET ITEMS IN THE SETUP Irr. SETUP ! SELECTED IN SETUP MENU TO THE MENU. APPROPRIATE VALUES. CONTACT YOUR DEALER IF THIS ALARM APPEARS AGAIN DESPITE THE ABOVE PROCEDURE. MOISTURE HAS BEEN KEEP THE POWER ON AND HUMID! - Page 71 Recording is not possible. The record-inhibit plug on the cassette Pull out the plug, or use a different is pressed in tape. The tape transport controls The REMOTE/LOCAL switch is in the Set the REMOTE/LOCAL switch to (PLAY, F FWD, REW buttons REMOTE position, and the LOCAL LOCAL, or change the menu setting to etc.) do not operate.
- Page 72 A "V" appears on the screen. The TBC DELAY menu item is Set TBC DELAY to "SYNC DELAY". (The UVW- set to "VIDEO DELAY". series has a built-in time base corrector. Therefore, in editing mode or video EE mode, the output video signal is delayed exactly 8 lines behind the reference signal.
-
Page 73: Trouble-Shooting Chart
Trouble-Shooting Chart It is not possible to disable — On this unit, it is not possible to disable the Dolby the Dolby noise reduction. noise reduction. 9-6 (E) Chapter 9 Operational Problems... - Page 74 Appendixes Specification ............... A-2(E) Glossary............... A-6 (E)
- Page 75 Tape transport system Tape speed UVW-1800: 118.6 mm/s UVW-1800P: 101.5 mm/s Maximum recording/playback time UVW-1800: 90 minutes or longer (for BCT-90MLA) UVW-1800P: 100 minutes or longer (for BCT-90MLA) Fast forward/rewind time 180 s or less (for BCT-90MLA) Recommended cassettes Betacam SP...
-
Page 76: Processor Adjustment Range
Video input REF. VIDEO BNC x 2 (loop-through connection) Black burst or 1.0 Vp-p ±0.3 V, 75 ft, sync negative (286 mV for UVW-1800, 300 mV for UVW-1800P) VIDEO BNC x 2 (loop-through connection) Composite video, 1.0 Vp-p, 75 Q, sync negative... -
Page 77: Specification
VIDEO 1/2 (SUPER) BNC X 2 Composite video, 1.0 Vp-p, 75 , sync negative (286 mV for UVW-1800, 300 mV for UVW-1800P) Switch selection on the subsidiary control panel controls whether time codes and other superimposed information are output from VIDEO 2 (SUPER) OUTPUT. - Page 78 HEADPHONES Standard stereo jack Maximum -14 dBu, 8 (0 dBu = 0.775 Vnns) Remote connectors TBC REMOTE: 15-pin multi x 1 REMOTE: 9-pin multi x 1 CONTROL S: stereo minijack x 1 Supplied accessories Power cord x 1 9-pin remote control cable x 1 Operating Instructions x 1 Optional accessories RMM-130...
- Page 79 A/B roll edit Abbreviation of control signal. A pulse signal An edit in which two or more players are used to recorded on a longitudinal track of the tape in units of create special effects such as dissolve and wipe, and fields.
- Page 80 Luminance signal Servo lock The signal that determines the brightness of the Synchronizing the drum rotation phase and tape transport phase with a reference signal during picture. Also called Y signal. One of the component signals. .playback and recording so that the video heads scan the tape in the same pattern during playback Metal tape and recording.
-
Page 81: Glossary
Glossary V-blanking The portion of the video signal that occurs between Abbreviation of Video, Burst and Sync. A the end of one field and the beginning of the next. composite signal consisting of video signal, burst During this time, the electron beams in the cameras signal and sync signal. - Page 82 AC IN connector 2-7(E) Digital hours meter 1-3(E), 8-4(E), 8-5(E) Alarm 1-3(E), 9-2(E), 9-3(E) Dolby noise reduction 1-2(E), 9-6(E) ALARM (menu) 7-4(E) REF. ALARM (menu) 7-4(E) Arrow direction buttons 2-4(E), 7-8(E) to7-16(E) EDIT MODE indicator 2-3(E) Audio signals 1-2(E) Editing adjusting input level 4-5(E) A/B roll 5-6(E) adjusting playback volume 4-2(E)
-
Page 83: Index
Index Menu S-VIDEO INPUT connector 2-5(E) hierarchical structure 7-2(E) S-VIDEO OUTPUT connector 2-6(E) menu selections SC adjuster 2-4(E), 5-12(E) about indications on the monitor and unit Self-diagnosis functions 1-3(E), 8-2(E) 7-4(E), 7-5(E) SET (YES) button 2-4(E) about menu screen selection 7-7(E) LTC and user bits settings 6-5(E) about operation 7-3(E), 7-4(E) menu operations...