Table of Contents
Advertisement
Quick Links
Download this manual
See also:
User Manual
≥ This manual describes for the Panasonic KX-P7500/KX-P7510 with Network Card KX-PNB2 Laser Printer.
≥ Please carefully read the Operating Instructions and the KX-PNB2 User's Guide before operating.
Keep this CD-ROM in the protective case.
Do not expose the CD-ROM to direct sunlight or extreme heat and do not scratch or smudge the surface
of the CD-ROM.
Operating Instructions
Laser Printer
KX-P7510
KX-P7500
Model No.
Advertisement
Table of Contents

Related Manuals for Panasonic KX-P7500


Summary of Contents for Panasonic KX-P7500
-
Page 1: Laser Printer
KX-P7510 KX-P7500 Model No. ≥ This manual describes for the Panasonic KX-P7500/KX-P7510 with Network Card KX-PNB2 Laser Printer. ≥ Please carefully read the Operating Instructions and the KX-PNB2 User’s Guide before operating. Keep this CD-ROM in the protective case. Do not expose the CD-ROM to direct sunlight or extreme heat and do not scratch or smudge the surface... - Page 2 Thank you for purchasing the Panasonic Laser Printer. • KX-P7500 The KX-P7500 comes standard with 20 MB RAM and one 500-sheet cassette. • KX-P7510 The KX-P7510 comes standard with network card (KX-PNB2). Install the network utilities (Network Setup Tool) for network printing.
- Page 3 To order consumables CALL 1-800-833-9626 To order operating instructions/CD’s CALL 1-800-833-9626 To locate your nearest authorized service center CALL 1-800-726-2797 For technical support CALL 1-800-PANASYS Automated 24-hour support via Fax back CALL 1-800-PANASYS World Wide Web Technical & Driver Support http://www.panasonic.com/ office/printer...
-
Page 4: End-User License Agreement
CONDITIONS. If you do not agree to these terms and conditions, return the unopened packet and the other components of the Panasonic product to the place of purchase and your money will be refunded. No refunds will be given for the products that have an opened packet or missing components. - Page 5 4. LIMITED WARRANTY: Within ninety (90) days of your receipt of the SOFTWARE, Panasonic warrants that the storage media on which the SOFTWARE are furnished is free from defect in materials and workmanship under normal use, and that it will repair or at its option replace any defective media at no charge to you, provided that such defective media is returned to Panasonic within such ninety (90) days period.
-
Page 6: Table Of Contents
Start Features of the KX-P7500 Series ..... . . Model description .......... - Page 7 Displaying the KX-P7500 Series properties windows ....Using the KX-P7500 Series printer driver ......
- Page 8 Contents Manual Feed printing from MP tray ..... Chapter 4 Both side (Duplex) printing ......Using the Menu setting procedure.
- Page 9 Contents Printing a document using PS Option in Macintosh ..171 Chapter 7 Removing the printer cover ......172 Installing a PostScript SIMM .
-
Page 10: For Your Safety
For your safety General Warning • To prevent fire or shock hazard, do not expose this product to rain or any type of moisture. Caution • Do not open covers and do not attempt to repair the unit yourself. Refer servicing to qualified personnel. -
Page 11: Ozone Release
Ozone release Warning • Make sure that the printer is installed in a well ventilated room so as not to increase density of ozone in the air. Since ozone is heavier than air, it is recommended that air at floor level be ventilated. - Page 12 CAUTION : HOT SURFACE ATTENTION : TEMPERATURE ELEVEE VORSICHT : HEISS PRECACION/ATTENZIONE : ALTA TEMPERATURA...
- Page 13 If you lose the fuse cover the plug must not be used until a replacement cover is obtained. A replacement fuse cover can be purchased from your local Panasonic Dealer. IF THE FITTED MOULDED PLUG IS UNSUITABLE FOR THE SOCKET OUTLET IN YOUR HOME THEN THE FUSE SHOULD BE REMOVED AND THE PLUG CUT OFF AND DISPOSED OF SAFELY.
- Page 14 Chapter 1 Before You Start Before you set up your new printer, please read the following information. • “Cautions” l page • “Features of the KX-P7500 Series” l page • “System requirements” l page • “Minimum space requirements” l page •...
-
Page 15: Cautions
Too much media/document Top/Rear covers opened Any toner other than genuine which exceeds the limit mark while the printer is operating; Panasonic toner. It may on the guide of the tray. it may cause a media jam. damage the printer. -
Page 16: Cd-Rom
The interface connectors—parallel, network, RS-232C, LocalTalk, and IrDA • Electrical components, connectors inside the printer, any components on the optional board (network card* , LocalTalk/RS-232C interface card, IrDA/RS-232C interface card or SIMMs) • The connector pins on the 2nd feeder for the printer Option for KX-P7500. -
Page 17: Interface Cable
Waste material may be dumped or incinerated under conditions which meet national and local environmental regulations. Features of the KX-P7500 Series The KX-P7500 Series provides fast, high-quality monochrome printing on plain paper, plus the ease of operation and high performance you expect from a laser printer, including the following. Model description •... -
Page 18: Networking Capability (For Kx-P7510)
Before You Start Networking capability (for KX-P7510) • Supports 100 Base-TX and 10 Base-T • Supports the following operating systems — Windows /Windows /Windows NT 4.0* ® ® ® — Netware 3.X/Netware 4.X/Netware 5.0 — Macintosh — UNIX • Supports the following Print Protocols —... -
Page 19: System Requirements
Network Card for Ethernet (Page 177) or LocalTalk/RS-232C Interface Card (Page 180) • Upgrade SIMM (PostScript SIMM) (Page 175) You can connect KX-P7510 to Macintosh computer directly, though KX-P7500 needs either of the optional cards, Ethernet network card or LocalTalk/RS-232C Interface Card. -
Page 20: Minimum Space Requirements
Before You Start Minimum space requirements 12" (300 mm) 12" (300 mm) enough space to allow enough space to allow opening of the rear cover opening of the top cover and replacement of the toner cartridge 8" (200 mm) 4" (100 mm) enough space 24"... -
Page 21: Unpacking
1. Printer 2. Toner cartridge 3. KX-P7500 Series CD-ROM (includes Printer & Network card Software, Operating Manual and Acrobat Reader) 4. Power cord 5. Setup Guide 6. -
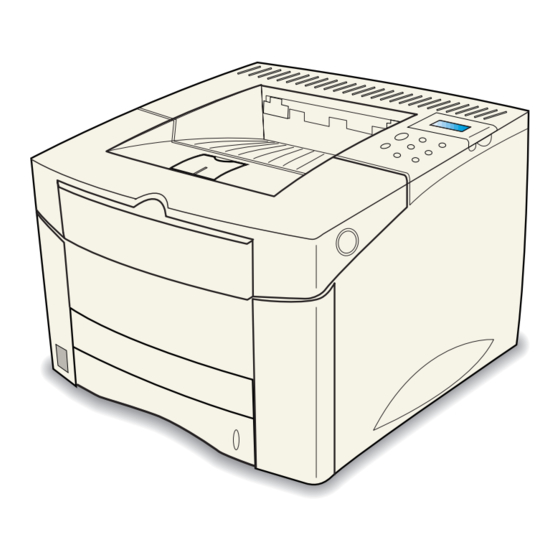
Page 22: Front Side View
Before You Start Front side view The following illustration shows the front view of your printer and indicates the various main elements. Output tray (see page 130) Print prevention sensor (It prevents the printer Top cover from printing when 250 (see page sheets of paper are piled... -
Page 23: Overview Of The Operator Panel
Before You Start Overview of the operator panel The operator panel, on the front right side of your printer, has a 2-line LCD (Liquid Crystal Display) and eight buttons. Operator panel display ON LINE/ CONTINUE MENU Operator panel buttons ITEM ENTER/ CANCEL •... -
Page 24: Operator Panel Buttons
Before You Start Operator panel buttons Use the eight operator panel buttons to open a menu, scroll through a list of values, change printer settings, and respond to printer messages. The following table describes the functions of each button. Button Function •... -
Page 25: Setting Up The Printer
Chapter 2 Setting up the Printer This chapter describes setting up the KX-P7500 Series, connecting it to a PC compatible computer, and powering on the printer. It also includes instructions on loading paper, guidelines for using the MP (Multi-Purpose) tray and printing the test page. - Page 26 Setting up the Printer Preparing the printer During the storage and transport of your printer, adhesive tape is used to block some of the elements that may move or open unexpectedly and consequently be damaged. Before connecting up your printer and starting to use it, you must therefore remove all the adhesive tapes.
- Page 27 Setting up the Printer a) Press down on the metal plate until it locks, locking it in place. b) Remove the packaging material from the cassette carefully to prevent any damage to the tab. Metal plate Slide the cassette completely into the printer.
- Page 28 Setting up the Printer Installing the toner cartridge Remove the toner cartridge from its packaging. AUTION • To prevent the toner cartridge from damages: —Do not remove the toner cartridge from its packaging until you are ready to use it. —Do not expose the toner cartridge to light for more than 3 minutes, it could damage the cartridge.
- Page 29 Setting up the Printer Rotate the toner cartridge and gently shake it from side to side about 10 times in the directions of the arrows to distribute the toner evenly inside the cartridge. a) Position the toner cartridge as shown with the arrow on the toner cartridge pointing to the back of the printer.
-
Page 30: Loading Media
Setting up the Printer Loading media Your printer has the 1st cassette that can hold up to 500 sheets of paper and the MP (Multi- Purpose) tray that can hold up to 100 sheets of paper, 30 transparencies or 10 envelopes. For detailed information about media, see page 199. - Page 31 Setting up the Printer Loading paper in the 1st cassette • The directions for loading paper in the OPT cassette of 2nd feeder differ from these directions (see page 161). Pull the cassette completely out of the printer. To load the paper of the Legal or Folio (24 lbs., 90 g/m ) size into the cassette, push down the green lever on the left side of the cassette to lock it into the small hole under the slot.
- Page 32 Setting up the Printer Squeeze the back of the length guide and slide it to the desired paper size until it clicks into place. The paper sizes are indicated on the bottom of the cassette. Length guide Lift the rear right guide and slide it to match the width of the paper. Rear right guide Squeeze the width guide and slide it to the far right side of the cassette.
- Page 33 Setting up the Printer Press down on the metal plate until it clicks, locking it in place. Fan the paper, and then tap it on a level surface to avoid paper jams or skewed printing. • Reusing media that has been fed through the printer once (for example, after jams) can reduce the life of the consumables and paper path components.
- Page 34 Setting up the Printer Place the paper against the rear side of the cassette and against the left side of the cassette carefully to prevent any damage to the corner of the paper by the tab. Limit mark line Printing side (down) OTES •...
- Page 35 Setting up the Printer Make sure the paper is set below the tab on the cassette. Gently slide the cassette back into the printer. The printer automatically senses the size of paper loaded if the cassette is adjusted correctly. AUTION •...
-
Page 36: Loading Paper In The Mp (Multi-Purpose) Tray
Setting up the Printer Loading paper in the MP (Multi-Purpose) tray MP tray provides a convenient way to print envelopes, transparencies, or other type of media without having to unload the other tray. For detailed information on media, see “Media” on page 199. - Page 37 Setting up the Printer Place the paper against the side of the MP tray with the recommended print side face up and the top edge going in first toward the printer as shown. Limit mark line Printing side (up) • Do not exceed the limit mark line on the paper guide.
-
Page 38: Loading Transparencies In The Mp Tray
Setting up the Printer Loading transparencies in the MP tray Transparencies automatically feed from the MP tray. Some brand of transparencies may require manual feeding. The MP tray is a tray that holds the transparencies of A4 or Letter, including up to 30 sheets. -
Page 39: Loading Envelopes In The Mp Tray
Setting up the Printer Loading envelopes in the MP tray Many types of envelopes can be printed from the MP tray or the OPT cassette. The types of envelopes are COM-10, MONARCH, DL, C5 and C6 (60 to 90 g/m [16 to 24 lbs.]). - Page 40 Setting up the Printer Load up to 10 envelopes in the left side of MP tray with the side-to-be printed facing up, and the postage-end toward the printer. Printing side (up) Adjust the guide to touch the envelope stack without bending the envelopes.
-
Page 41: Loading Labels In The Mp Tray
Setting up the Printer Set the source item in the properties window to “Manual Feed” or “MP Tray” (see page 98). — To print continuously from the MP tray, set the source item to MP Tray. — To print a sheet of paper from the MP tray, set the source item to Manual Feed. Select “Thick”... -
Page 42: Connecting The Printer
Setting up the Printer For the MP tray, load the labels with the side-to-be-printed facing up, and the short edge toward the printer. Print a stack of 25 labels from the MP tray. Printing side (up) Connecting the printer Using a parallel interface cable To print directly from an IBM compatible computer, you need to connect your printer to the computer with a parallel interface cable. - Page 43 Setting up the Printer Connect the appropriate end of the parallel interface cable into the parallel interface connector on the rear of the printer. Push the clip at each end of the connector down into the notches on the plug as shown.
-
Page 44: Using A Network Cable
The actual connector on the computer may differ depending on the manufacturer of the computer. Using a network cable If you use KX-P7510 or KX-P7500 with the installed optional network card KX-PNB2, you can connect your printer to an Ethernet 10/100 Base-T network. -
Page 45: Connecting The Power Cord And Power On
Setting up the Printer To setup the printer for the network, see the KX-PNB2 Network Card for Ethernet Quick Installation Guide. Connecting the power cord and power on Connect the appropriate end of the power cord supplied to the AC inlet on the rear of the printer. -
Page 46: Printing The Test Page From The Operator Panel
Setting up the Printer Printing the test page from the operator panel Print a menu map page to make sure the printer is operating correctly. For instructions of buttons on the operator panel, see page Make sure “READY” appears on the display. READY Press ON LINE/CONTINUE button. - Page 47 Setting up the Printer The test page is printed as shown below. Laser Printer KX-P7500 Series Menu Map PRINTING MENU CONFIG MENU JOB MENU PAPER = LETTER EMUL = AUTO ORT MODE = ENHANCE MP SIZE = A4 LOCKTRAY = NONE...
-
Page 48: Installing Software For Windows
Utilities, refer to Network Card KX-PNB2 Quick Installation Guide. For successful printing using the PostScript Printer Driver, you need to install the optional PS SIMM. The general steps for installing the KX-P7500 Series software from the CD-ROM are: • “Installing the printer driver” (PCL Printer Driver) l page 49 •... -
Page 49: Windows Nt 4.0
Installing the printer driver for Windows 95/Windows 98/Windows NT 4.0 If autorun is enabled on your computer, when the KX-P7500 Series CD-ROM is inserted in the CD- ROM drive the installer runs automatically, allowing you to specify which files to install on your computer. - Page 50 Installing Software for Windows In the Panasonic KX-P7500 Series window, select a language and click the PCL Printer Driver from the installation options. Click [NextÃ].
- Page 51 When the “READY” is displayed on the operator panel, turn on the computer and start Windows 95. The Update Device Driver Wizard window is displayed. Insert the KX-P7500 Series CD-ROM in your CD-ROM drive. Click [NextÃ]. Click [Finish]. The Insert Disk window is displayed.
- Page 52 When the “READY” is displayed on the operator panel, turn on the computer and start Windows 98. The Add New Hardware Wizard window is displayed. Insert the KX-P7500 Series CD-ROM in your CD-ROM drive. Click [NextÃ]. Click on ( ) the CD-ROM driver check box, and click off the other item’s check box.
- Page 53 Click [Browse...] and select your CD-ROM drive from the [Drives:] box. Select setup16.exe, and click [OK]. Click [OK]. The installer starts. The Panasonic KX-P7500 Series window is displayed. Follow Step 2 through 4 on page 50 to complete the installation.
- Page 54 • If autorun is not enabled, you can run the installer by double-clicking the CD-ROM drive icon in My Computer, or by double-clicking the Setup.exe file in the KX-P7500 Series CD-ROM. To run the Status Display: The Status Display is a program which shows the current printer status.
-
Page 55: Installing The Postscript Driver For Windows 95/Windows 98
To install the PostScript Printer Driver for Windows 95/Windows 98: Insert the KX-P7500 Series CD-ROM in your CD-ROM drive. The installer is launched automatically. In the Panasonic KX-P7500 Series window, select a language and click the PostScript Printer Driver from the installation options. - Page 56 Installing Software for Windows Click [NextÃ]. Click [NextÃ]. • If you are printing to the parallel interface, select “Local printer”. • If you are printing on the network, select “Local printer” and finish installing the printer driver, then refer to Network Card KX-PNB2 Quick Installation Guide for network configuration.
- Page 57 Installing Software for Windows Click [Have\Disk...], and click on the Browse “X* :\English* \Ps\Win95_98” and [OK], and then [OK]. CD-ROM drive name differs depending on your computer. Select a language from English, Deutsch, Francais, Espanol or Italiano. The printer name is displayed. Click [NextÃ].
- Page 58 Installing Software for Windows Select whether the KX-P7500 Series is default printer or not, and click [NextÃ]. Click [Finish]. • If you do not want to print a test page, click “No”. • If you want to print a test page, click “Yes [recommended]”.
- Page 59 Installing Software for Windows Click [OK]. Insert the original CD for Windows. Select the CD-ROM drive, then select Win95 (or Win 98) folder. Click [OK]. When you insert Windows 95 Disk XX in STEP 11, select disk drive and click [OK]. •...
- Page 60 The Printers window is displayed. Select Panasonic KX-P7500 Series PS icon. Select Properties from the File menu. The Panasonic KX-P7500 Series PS Properties window is displayed, with the General tab displayed. Each of the major program features can be viewed by clicking the tab.
-
Page 61: Installing The Postscript Driver For Windows Nt 4.0
To install the PostScript Printer Driver for Windows NT 4.0: Insert the KX-P7500 Series CD-ROM in your CD-ROM drive. The installer is launched automatically. In the Panasonic KX-P7500 Series window, select the language and click the PostScript Printer Driver from the installation options. - Page 62 Installing Software for Windows Click [NextÃ]. Click [NextÃ]. • If the printer is managed and configured on this computer or used for Network Peer-to- Peer Printing, click “My Computer”.
- Page 63 Installing Software for Windows Click the check box next to the port(s) you want to use, and click [NextÃ]. Click [Have\Disk...].
- Page 64 Installing Software for Windows In the text field, type the name of the CD-ROM drive (for example, X:\), and click [Browse...]. * CD-ROM drive name differs depending on your computer. Browse to “X:\English*\PS\Winnt\7500PS”. * Select a language from English, Deutsch, Francais, Espanol or Italiano. Click [Open], and click [OK].
- Page 65 Installing Software for Windows Click [NextÃ]. Select whether the KX-P7500 Series is default printer or not, and click [NextÃ].
- Page 66 Installing Software for Windows Click [NextÃ]. • Click “Shared”, and enter a share name in the Share Name box, if you want to share the printer with network users. Select the operating system or systems used by clients from the Alternate Drivers box, if you want to install a printer driver that those clients can automatically download when they connect.
- Page 67 Installing Software for Windows Click [Finish]. • If you do not want to print a test page, click “No”. • If you want to print a test page, click “Yes [recommended]”. A test print is performed and follow the instructions that appear on the screen. Click [OK].
- Page 68 Select Panasonic KX-P7500 Series PS icon. Select Document Defaults... from the File menu. The Panasonic KX-P7500 Series PS Default Document Properties window is displayed, with the Page Setup tab displayed. Each of the major program features can be viewed by clicking the tab.
-
Page 69: Removing The Kx-P7500 Series Software
Installing Software for Windows Removing the KX-P7500 Series software If you need to remove the KX-P7500 Series software, perform the following steps. For Windows 95/Windows 98 users To remove the PCL Printer Driver: Click [Start], select Programs, Panasonic, and click Panasonic KX-P7500 Series. - Page 70 Installing Software for Windows For Windows NT 4.0 users To remove the PCL Printer Driver: Click [Start], select Programs, Panasonic, and click Panasonic KX-P7500 Series. Click uninstall PCL Driver. Follow the instructions that appear on the screen. To remove the PostScript Printer Driver: Click [Start], select Settings, and click Printers.
-
Page 71: Using The Printer
Using the Printer Chapter 4 Using the Printer This chapter describes changing printer settings from operator panel, setting print options in the printer driver, and special printing. It also includes detail information about menus and functions of the operator panel. This chapter is divided into the following categories: •... -
Page 72: Changing Printer Settings
Using the Printer Using the operator panel Operator panel menus A number of menus are available on the printer to make it easy for you to change printer settings. Some menus are displayed only if a specific option is installed in the printer. When you select a new setting from the operator panel, the asterisk (¢) moves next to the selected setting to identify it as the current user default setting. - Page 73 Using the Printer Overview of the printer menus PRINTING CONFIG Menus JOB MENU TEST MENU PCL MENU MENU MENU PAPER EMUL ORT MODE SELFTEST FONTLIST MP SIZE SWITCH TIMEOUT DEMOPAGE TYPEFACE COPIES LOCKTRAY DENSITY SYMBOL ORIENT PWR SAVE PAP.TYPE LINES TRAY AUTOCONT MENU CLR...
- Page 74 Using the Printer Some menus are displayed only if a required option is installed. They are as follows: PS II MENU I/O MENU NETWORK MENU If the PostScript If the LocalTalk/ Menus If the Network card (KX-PNB2) is installed in your SIMM is RS-232C card is printer...
-
Page 75: Printing Menu
Using the Printer PRINTING MENU Use the PRINTING MENU to define all settings relating to printer input and output, as well as the specific print materials you are using with your printer. PRINTING MENU Items Menu Item Values and Functions PRINTING PAPER* If the TRAY menu is AUTO, MP, MANUAL... - Page 76 Using the Printer Menu Item Value and Functions PRINTING COPIES 1 to 999 (1; Factory Default) MENU The COPIES setting determines the number of copies printed for each page. The printer does not automatically collate the copies. For example, if you send three pages to print and set COPIES to 2, the printer prints page 1, page 1, page 2, page 2, page 3, page 3.
- Page 77 Using the Printer Menu Item Value and Functions PRINTING TRAY AUTO (Factory Default) MENU OPT (If the 2nd feeder is installed) MANUAL The TRAY setting identifies the default paper tray. “AUTO” means that the printer feeds print material from the other tray when one tray is empty.
- Page 78 Using the Printer Menu Item Value and Functions PRINTING DUPLEX OFF (Factory Default) MENU LONG SHORT In printing both sides of paper, select either LONG or SHORT which is the binding edge. When you set margins, see page The printer can automatically print on both sides of paper. Use the OFF selection when printing only one side of a sheet of paper.
-
Page 79: Config Menu
Using the Printer CONFIG MENU Use the CONFIG MENU to configure a variety of printer features. CONFIG MENU Items Menu Item Values and Functions CONFIG EMUL AUTO (Factory Default) MENU PS II (If the PostScript SIMM is installed) HEXDUMP You can select the emulation for printing a document. PWR SAVE 15 (Factory Default) The PWR SAVE (POWER SAVE) menu item lets you reduce power... - Page 80 Using the Printer Menu Item Values and Functions CONFIG TON.SAVE OFF (Factory Default) MENU The TON.SAVE (TONER SAVE) setting helps conserve the toner cartridge by controlling how much toner the printer uses for print job. Select OFF if toner conservation is not a concern. But this setting may affect the print quality of your job.
-
Page 81: Job Menu
Using the Printer JOB MENU Use the JOB MENU to define all settings relating to print quality, as well as Menu clear. JOB MENU Items Menu Item Values and Functions JOB MENU ORT MODE ENHANCE (Factory Default) NORMAL GRAY Use the printer’s ORT (Optimum Resolution Technology) setting to produce print with smooth angles, curves, and edges. - Page 82 Using the Printer Menu Item Values and Functions JOB MENU PAP.TYPE NORMAL (Factory Default) THICK THIN TRANSP. The PAP.TYPE (PAPER TYPE) setting lets you specify the type of print material installed in each tray. Select NORMAL if the printer material is plain paper (16 to 28 lbs.). Select THICK if the printer material is thick paper (over 28 lbs.), high cotton paper, envelopes or labels.
-
Page 83: Test Menu
Using the Printer Menu Item Values and Functions JOB MENU L-BIND 0 (Factory Default) 0 to 22 mm (In increments of 1) This item lets you select the left margin for the binding when long edge duplexing (see page 78). FUSER If there happens random dirty spots on the back side of paper, CLEAN... -
Page 84: I/O Menu
Using the Printer I/O MENU This menu is only available if the optional LocalTalk/RS-232C Interface Card or optional IrDA/RS- 232C Interface kit is installed in your printer. I/O MENU Items Menu Item Values and Functions I/O MENU BAUDRATE This setting lets you select the rate at which data is being sent to or from your computer. - Page 85 Using the Printer Menu Item Values and Functions PCL MENU SYMBOL ROMAN 8 to PCCYRILLIC PC 8 (Factory Default) List of symbol set name A SYMBOL set is a set of alphabetic and numeric characters, punctuation, and specific symbols used when printing with a selected font.
- Page 86 Using the Printer PS II MENU Menu Item Values and Functions PS ll FONTLIST You can print a font sample list showing all the fonts available for PostScript 2 emulation.
-
Page 87: Using The Printer Driver (Pcl Printer Driver)
The Printers window is displayed. Select Panasonic KX-P7500 Series PCL6 icon. Select Properties from the File menu. The Panasonic KX-P7500 Series PCL6 Properties window is displayed, with the General tab displayed. Click the appropriate tab. Each of the major program features can be viewed by clicking the tab. - Page 88 The Printers window is displayed. Select Panasonic KX-P7500 Series PCL6 icon. Select Document Defaults... from the File menu. The Panasonic KX-P7500 Series PCL6 Default window is displayed, with the Paper tab displayed. Click the appropriate tab. Each of the major program features can be viewed by clicking the tab.
- Page 89 Double click the Printers icon in the Control Panel window. The Printers window is displayed. Select the Panasonic KX-P7500 Series PCL6 , then click [Setup...] . The Panasonic KX-P7500 Series PCL6 window is displayed. Print options are specified from tabs in this window. Click the appropriate tab.
-
Page 90: Using The Kx-P7500 Series Printer Driver
The feature of the printer driver are arranged on nine tabs: To access one of the tab dialog boxes, click the tab at the top of the properties windows. Each tab of Panasonic KX-P7500 Series PCL6 is described as an example in this section. Paper tab... - Page 91 Using the Printer OTES • If you want to know more about each menu, click the Help button. The help screen gives detailed information about each menu. • When printing edge to edge there may be some loss of data at the edge due to mechanical and physical restraints Graphics Graphics Mode...
- Page 92 Using the Printer OTES • Not all graphic images can print using the Vector setting. If you are using the Vector setting, and your graphic images do not print as they appear on your computer screen select the Raster setting and reprint your graphic. •...
- Page 93 Using the Printer Printer Page Protection This setting allows the printer to reserve memory and is especially useful when printing complex documents containing text and graphics. This will help prevent print overrun errors. Memory Select the value of the printer memory installed in the printer.
- Page 94 Using the Printer Overlays You can superimpose an existing file across your final output. Typical example of Overlays are the your company’s trademark in the header and its address in the footer. Overlays To select a file to be used as an overlay, enter the path to locate the bitmap file. Load Overlay You can use an externally source file as an overlay.
-
Page 95: Overlay Printing
Using an application such as Paint, create and save the file that you want to overlay on a document. Click Print from File menu and click Properties to display the Panasonic KX-P7500 Series PCL6 Properties window. Click [Create\Overlay...] in the Overlays tab. - Page 96 If the overlay file is not displayed in the list box, click [Load\Overlay], browse the directory in which you saved your graphic file (OVP file) and select the overlay file. Click [OK]. Click [OK] to print the document to the KX-P7500 printer. The document is printed on the overlay file. •...
- Page 97 Using the Printer Watermarks You can superimpose a line of text diagonally across your final output. Typical example of Watermarks are the words “Draft” or “Secret”. Watermark To print a watermark, you must first select it from the list. Preview window The text for the Text: watermark is...
- Page 98 Using the Printer Manual Feed printing from MP tray The Manual Feed feature allows you to print on special paper from MP tray such as envelopes or letterhead. If the Tray menu item is set to Manual, the printer will print only from MP tray. Manual Feed is selected through the software or printer driver too.
-
Page 99: Using The
Using the Printer Both side (Duplex) printing The printer can automatically print on both sides of paper by setting the Printing Menu or Finishing tab of KX-P7500 Series PCL6 Driver. OTES • Do not print on both sides of labels, transparencies, envelopes, or paper heavier than 90 g/m (24 lbs.). -
Page 100: Paper Orientation For Printing Both Sides Of Paper
Using the Printer Paper orientation for printing both sides of paper The printer prints the second sides of paper first, so paper such as letterhead and preprinted paper needs to be oriented as illustrated in the figure below. For the MP tray, load the first side facing down and the top toward you. •... -
Page 101: Printing
Using the Printer Printing Open the document to be printed in appropriate application. Click Print from File menu. Click Properties. The PCL printer driver is displayed with the General tab selected. Click the Finishing tab. The paper tab is displayed. Set the Duplex item to Short Edge or Long Edge, and select the source item. -
Page 102: Care And Maintenance
Care and Maintenance Chapter 5 Care and Maintenance This chapter describes maintaining your printer and solving problems that you may frequently encounter in using the printer. This chapter is divided into the following categories: • “Maintaining the toner cartridge” l page 103 •... -
Page 103: Distributing The Toner
Care and Maintenance Maintaining the toner cartridge The toner cartridge is a user replaceable component. When the operator panel indicates “TONERLOW”*, make sure that you have the replacement toner cartridge on hand. The printer may continue to print until the toner cartridge is completely used up. AUTION •... - Page 104 Care and Maintenance Remove the toner cartridge from the printer. Rotate the toner cartridge and gently shake it from side to side about 10 times in the directions of the arrows to distribute the toner.
- Page 105 Care and Maintenance a) Position the toner cartridge as shown with the arrow on the toner cartridge pointing to the back of the printer. Slide the toner cartridge into the printer as far as it will go. b) Push the toner cartridge to set it properly as shown below. Arrow Push here Close the top cover.
-
Page 106: Cleaning The Main Unit
Care and Maintenance AUTION • Never use alcohol or solvent based cleaning agents to clean the printer as they may damage the printer casing and components. • Never use a hard-bristled brush or abrasive pad. • Do not expose the toner cartridge to light for more than 3 minutes to avoid damage. •... - Page 107 Care and Maintenance a) Open the top cover and remove the toner cartridge. b) Clean the bottom face of the toner cartridge with a soft cloth. Toner cartridge Bottom face • Do not open the shutter or touch the green drum surface inside the cartridge. Clean the inside of the printer with a soft cloth.
- Page 108 Care and Maintenance If the outer casing or the MP tray are dirty, clean them with a soft, clean cloth, slightly dampened with any mild commercial cleaner. AUTION • Do not use benzine, thinner, aerosol cleaners, or any abrasive powder. •...
-
Page 109: Clearing Paper Jams
Care and Maintenance Slide the LSU cleaner horizontally across a track on the top of the LSU. Label LSU cleaner Replace the toner cartridge, close the top cover, and turn the printer on. • For illustrated instruction on using method, see attached label on the inside of the top cover. Clearing paper jams If the printer’s operator panel displays a paper jam message*, look for paper in the locations indicated in the figure on the next page, then perform the procedure for clearing the paper jam. - Page 110 Care and Maintenance • Be very careful not to tear the paper when clearing paper jams. If a small piece of paper is left in the printer, it could cause additional jams. PAPER JAM 2 PAPER JAM 1 DUPLEX JAM 1 DUPLEX JAM 2 PAPER JAM 0 1st CASSETTE...
- Page 111 Care and Maintenance “PAPER JAM 0” Slide the cassette out of the printer, and remove any damaged paper from the tray. AUTION • The cassette weighs approximately 4.7 kg {10.3 lbs.} when it is fully loaded. Hold it carefully with both hands as shown below.
- Page 112 Care and Maintenance If the edge of jammed paper is visible in the feed area, grasp both sides of the jammed paper and slowly pull the paper down and out of the printer. Make sure the paper is below the tab on the guide. Replace the cassette.
- Page 113 Care and Maintenance “PAPER JAM 0” with 2nd feeder Slide the cassette out of the printer, and remove any damaged paper from the tray. AUTION • The cassette weighs approximately 4.7 kg {10.3 lbs.} when it is fully loaded. Hold it carefully with both hands as shown below.
- Page 114 Care and Maintenance If the edge of jammed paper is visible in the feed area, grasp both sides of the jammed paper and slowly pull the paper down (or up) and out of the printer. (Pull up) (Pull down) Make sure the paper is below the tab on the guide of the 1st cassette. 1st cassette Replace the cassettes.
- Page 115 Care and Maintenance “PAPER JAM 0” with multi-purpose tray Grasp both sides of the jammed paper and slowly pull the paper out of the printer. Top cover Multi-purpose tray Open and close the top cover to clear the paper jam message. “PAPER JAM 1”...
- Page 116 Care and Maintenance Open the top cover and remove the toner cartridge. Top cover AUTION • Do not expose the toner cartridge to light for more than 3 minutes to avoid damage. • Do not expose the toner cartridge to direct sunlight to avoid damage. •...
- Page 117 Care and Maintenance a) Position the toner cartridge as shown with the arrow on the toner cartridge pointing to the back of the printer. Slide the toner cartridge into the printer as far as it will go. b) Push the toner cartridge to set it properly as shown below. Arrow Push here Close the top cover.
- Page 118 Care and Maintenance Open the rear cover. Fuser cover [Fuser is behind the fuser cover.] AUTION • The fuser cover and fuser are hot. — Take care when clearing the jammed paper. — If you need to open the fuser cover, turn off the printer and wait 10 minutes (after opening the rear cover) for the fuser to cool before opening the fuser cover.
- Page 119 Care and Maintenance Grasp both sides of the paper, and slowly pull the paper out of the printer. Rear cover If the fuser cover is opened, lift it up (a) and close it (b). AUTION Do not hook the sensor lever when closing the Fuser cover, or it may cause a damage.
- Page 120 Care and Maintenance Open the rear cover. Fuser cover [Fuser is behind the fuser cover.] AUTION • The fuser cover and fuser are hot. — Take care when clearing the jammed paper. — If you need to open the fuser cover, turn off the printer and wait 10 minutes (after opening the rear cover) for the fuser to cool before opening the fuser cover.
- Page 121 Care and Maintenance “DUPLEX JAM 2” Open and close the top cover. The paper comes out of the printer and the paper jam message is cleared. If the paper jam message is not cleared, follow the next steps. Pull the cassette completely out of the printer. AUTION •...
- Page 122 Care and Maintenance a) Pull down the metal plate holding the green tab on the right inside of the printer. b) Slowly pull the paper out of the printer. Green tab Metal plate Replace the cassette. Open and close the top cover to clear the paper jam message.
-
Page 123: Troubleshooting
Care and Maintenance Troubleshooting General printing problems Problem Solution • The power does not turn on. Check the power cord connections. • Check that the power supplied to the printer is steady and meets printer specifications. • The printer does not operate by pressing Turn the printer off, and then turn the printer on. - Page 124 Care and Maintenance Problem Solution • The printed page appears dirty. Clean the bottom face of the toner cartridge. Do not open the shutter or touch the green drum surface inside the cartridge. • Clean the internal black ribs of the printer. (See page 106)
-
Page 125: Macintosh Problems
Care and Maintenance Macintosh problems Problem Solution • The printer driver icon does not appear in LaserWriter 8.x driver should be installed in Mac the Chooser dialog box. OS. Check that it is in the Extensions folder under the System folder. If not, install LaserWriter 8.x driver. -
Page 126: Operator Panel Messages
Care and Maintenance Operator panel messages The following table explains messages that might be displayed on the operator panel. Status messages Massage The printer is ... Ready for operation READY Receiving the data or printing PR I NT I NG In Power Save mode (see page 79.) -
Page 127: Error Messages
• Reinstall the toner cartridge correctly. The wrong toner cartridge has been installed in the printer. I NVAL • Replace with a Panasonic KX-P7500 Series toner cartridge. CAR T R I DG The printer is running out of toner. READY •... - Page 128 Care and Maintenance Message Meaning and Required Action The printer detects a paper jam while printing both sides of paper. DUPLEX • Open the cover and remove the jammed paper (see pages 119–121). JAM1 • Load the paper to clear the message. EMP T Y1 s t Paper Op t...
- Page 129 Care and Maintenance Message Meaning and Required Action An internal error has occurred. • Turn the printer off, and then turn the printer on. I NT ERNAL • Contact an authorized service representative. ERROR Data which was too complex was sent to the printer. •...
-
Page 130: Repacking
OTES • Should you need to send your KX-P7500 Series for service, consult your reseller first or Panasonic. • Please use the original carton and all of the original packaging materials. - Page 131 Care and Maintenance To prepare the printer for repacking: Turn off the printer; remove the power cord and all interface cables. Slide the cassette out of the printer and remove the paper. Insert the packaging material into the cassette. Insert the cassette into the printer.
- Page 132 Care and Maintenance To pack the toner cartridge: Open the top cover of the printer by pressing the button on right side of the printer. Remove the toner cartridge from the printer. Insert toner cartridge into a bag and seal the end of the bag tightly. Close the top cover.
- Page 133 Care and Maintenance To finish repacking the printer: Wipe off any loose toner in and around the printer. • If a toner vacuum is available, it is the best tool for cleaning spilled toner. Do not use a standard office vacuum; the toner will not be retained by typical vacuum dust collectors. Secure the printer’s MP tray, the cassette and the rear cover to the printer with adhesive tape.
- Page 134 Care and Maintenance Repack the printer in the original shipping box. Front...
-
Page 135: Upgrade Options
Options Chapter 6 Options Upgrade options The following upgrade options are available for the KX-P7500 Series Printer from your local Panasonic reseller: • 32 MB or 64 MB DRAM SIMM l page 143 Two SIMM slots for additional memory are available on the printer controller board. (One is occupied by 16 MB SIMM.) Each slot can support a 16 MB, 32 MB or 64 MB SIMM. -
Page 136: Chapter 6 Removing And Replacing The Printer Cover
Options You must remove the printer cover from the right of the KX-P7500 Series in order to install following options. • DRAM SIMM • PS SIMM • Network Card for Ethernet* • IrDA/RS-232C Interface Card *Network Card for Ethernet has been installed in the KX-P7510 printer. - Page 137 Options Unplug the power cord and disconnect any cables connected to the connectors on the back of the printer. Power cord a) Open the rear cover. b) Remove the two screws from the back of the printer. Rear cover Screw...
- Page 138 Options a) Pull the tab to release the printer cover. b) Slide printer cover towards back of the printer. c) Rotate the printer cover away from the printer and lift the printer cover away. Printer cover Remove the five screws from the metal plate covering the control board, then remove the plate.
- Page 139 Options ∫ ∫ ∫ ∫ Understanding the printer control board If the printer cover is opened, you can see the printer control board as below. PostScript SIMM Network Card Connector Connector DRAM SIMM Connector IrDA/RS-232C Connector For instructions on installing printer options see: •...
- Page 140 Options To close the printer cover: a) Replace the top screw loosely and hang the plate on it. b) Tighten the other four screws. c) Tighten the top screw. Top screw Screw Ensure that metal plate tabs fit properly in. Stand the clips on the connector to avoid hiding them behind the printer cover.
- Page 141 Options a) Set the bottom of the printer cover onto the printer. Make sure the bottom tabs on the printer cover fit into the corresponding slots in the printer. b) Rotate the cover up towards the printer. Slot Slide the cover toward the front of the printer until it clicks into place. If the tab does not fit properly, push the rear side toward the arrow A.
- Page 142 Options a) Gently tighten all the screws. b) Close the rear cover. Screw Replace the 1st cassette, then reconnect any interface cables and power cord.
-
Page 143: Installing Additional Printer Memory
Options Installing additional printer memory The following section explains how to install a 32 or 64 MB DRAM SIMM on the KX-P7500 Series. To install the SIMM you will need to do the following: • Remove the printer cover from the right of the printer. See page 136. - Page 144 Options Installing DRAM SIMM The printer controller board ships with the following memory configuration: • The SIMM connectors numbered CN9 and CN10 are reserved for the printer’s system software ROM SIMM. • The SIMM connectors numbered CN7 and CN8 are reserved for the printer’s memory SIMM. •...
- Page 145 Options To install a DRAMM SIMM: Unpack the DRAM SIMM(s). Do not touch the connector edge on the SIMM. Notch Connector edge Hold the SIMM with the connector edge pointing toward the connector and position the notch as shown. Insert the SIMM all the way into the connector at a 30o angle, and rotate it left until it snaps into place.
- Page 146 Options Make sure both metal clips on the connector are fastened, and the two pins on each of the connector are pushed through the holes on the SIMM. Metal clip Continue with “To close the printer cover:” on page 140. Set the printer memory item on the printer tab of the properties window to the value of the added printer memory.
- Page 147 Options To remove the DRAM SIMM: Complete the following steps if you need to replace the installed SIMM by one with larger memory. Push the metal clips at each end of the connector away from SIMM. Metal clip Rotate the SIMM right to a 30o angle and gently pull it out of the connector as shown.
-
Page 148: Kit Contents
Options Installing a PostScript SIMM The following section explains how to install a PS SIMM (KX-PPSU4) on the KX-P7500 Series. To install the PS SIMM, you will need to do the following: • Remove the printer cover from the right of the printer. See page 136. -
Page 149: Installing A Ps Simm
Options Installing a PS SIMM The printer controller board ships with the following memory configuration: • The DRAM SIMM connectors numbered CN7 and CN8 are reserved for the printer’s memory. • The remaining two connectors CN9 and CN10 are empty and reserved for the PS SIMM. PS SIMM Connector CN 9... - Page 150 Options Hold the PS SIMM with the connector edge pointing toward the connector (CN9 or CN10) and position the notch as shown. Insert the PS SIMM all the way into the connector at a 30o angle, and rotate it to the left until it snaps into place. Notch Make sure both metal clips on the connector are fastened, and the two pins on each of the connector are pushed through the holes on the PS SIMM.
-
Page 151: Installing A Network Card For Ethernet
Options Installing a Network Card for Ethernet The following section explains how to install a Network Card for Ethernet (KX-PNB2) on the KX- P7500. Network Card for Ethernet To install the network card you will need to perform the following: •... - Page 152 Options Before you begin this procedure, remove the printer cover from the printer. For instructions, see “Removing and replacing the printer cover” on page 136. To install a network card: Remove the two screws from the metal plate covering the opening for cable connector.
- Page 153 Options Insert the connector on the network card into the network card connector on the printer control board until it is completely in place. The two connectors should fit snugly together. Network card connector on the printer Connector on the network card Gently tighten the screws to secure the card to the printer control board.
-
Page 154: Installing An Irda/Rs-232C Interface Kit
Options Turn ON the printer. See Network card’s Setup Guide for installation instructions and network menu displayed on the operator panel display. OTES • The top green LED comes on when the cable is connected to the port on the Network Card for Ethernet. -
Page 155: Kit Contents
Options Kit contents • IrDA adaptor • IrDA/RS-232C interface card Before you begin this procedure, remove the printer cover from the printer. For instructions, see “Removing and replacing the printer cover” on page 136 To install an IrDA/RS-232C interface kit: Remove the single screw that fastens the metal plate covering the cable connector opening. - Page 156 Options Insert the IrDA/RS-232C interface card into the card slot. Insert the connector on the card into the IrDA/RS-232C connector on the printer control board until it is completely in place. The two connectors should fit snugly together. IrDA/RS-232C Connector...
- Page 157 Options Gently tighten the screw to secure the card. Continue with “step1-4” on “To close the printer cover:” on page 140. Plug the IrDA adaptor cable into the infrared port. Infrared port Replace the 1st cassette, then reconnect any interface cables and power cord.
- Page 158 You can download the infrared driver for Windows 95 from the internet at no charge (http://www.microsoft.com). Open the KX-P7500 Series PCL or PS printer properties in Printers folder. Click Details tab and select Infrared Printing Port. Aim the infrared port on your computer within 15 degrees of either side of the line as shown.
-
Page 159: Installing The 2Nd Feeder (500 Pages)
Options Send the print job from the computer. • If printing spped is too slow, please perform the following procedures. 1)Perform step 7 and 8 above to display the Infrared Monitor window. 2)Click Options tab and check “Limit connection speed to:” to ON, and change the baud rate to a faster rate. -
Page 160: Kit Contents
Options Kit contents • 2nd feeder To install a 2nd feeder: Turn off the printer, then remove the power cord and cables. Place the 2nd feeder on a solid table or cart. Carefully place the printer on top of the 2nd feeder. Make sure the connector is properly inserted. - Page 161 Options To load the paper into the OPT cassette: Your printer has an OPT cassette that can hold up to 500 sheets of paper or 40 envelopes. To load paper in the OPT cassette, proceed as follows. Pull the cassette completely out of the printer. AUTION •...
- Page 162 Options Make sure the green lever on the left side of the cassette is set as shown below. (See the label which shows a lever direction attached on the cassette.) Cassette Green lever • To set the green lever, push down the green lever to lock it into the small hole under the slot.
- Page 163 Options Perform the following steps before you start loading paper; a) Press down on the metal plate to lock it into position. b) Lift the length guide lever and slide the length guide to the “LTR” size indicated on the bottom of the cassette. The guide will lock into place. c) Squeeze the width guide and slide it to the far right side of the cassette.
- Page 164 Options Lift the length guide lever and slide the length guide to the desired paper size until it clicks into place. The paper size is indicated on the bottom of the cassette. Length guide Load the paper by placing the paper against the left rear corner of the cassette.
- Page 165 Options Squeeze the width guide, and slide it to the left until it lightly rests against the edge of the paper. Width guide Slide the cassette completely into the printer. • The printer may pull paper from 1st cassette first. To change this, see “To select Paper Source in PCL properties window:”...
- Page 166 Options AUTION • The cassette weighs approximately 4.7 kg {10.3 lbs.} when it is fully loaded. Hold it carefully with both hands as shown below. Make sure the green lever on the left side of the cassette is set as shown below.
- Page 167 Options Perform the following steps before you start loading envelopes; a) Press down on the metal plate to lock it into position. b) Lift the length guide lever and slide the length guide to the “LTR” size indicated on the bottom of the cassette. The guide will lock into place. c) Squeeze the width guide and slide it to the far right side of the cassette.
- Page 168 Options AUTION • To prevent any damage to the rear right guide, pull the tab of the rear right guide completely before slide it. Lift the length guide lever and slide the length guide to the desired envelope size until it clicks into place. The envelope size is indicated on the bottom of the cassette.
- Page 169 Options If necessary squeeze the envelope guide lever and slide it until it touches the edge of the envelopes. Lever Envelope guide Squeeze the width guide, and slide it to the left until it lightly rests against the edge of the envelopes. Width guide Slide the cassette completely into the printer.
- Page 170 Options To select Paper Source in PCL properties window: Click [Start], select Settings, then click Printers. Click on the Panasonic 7500 Series PCL6 icon. Click the File menu, then click Properties. Click the Paper tab. Set the Source item to Auto Select or Option cassette.
-
Page 171: Printing A Document Using Ps Option In Macintosh
For Macintosh User’s Guide Chapter 7 For Macintosh User’s Guide Printing a document using PS Option in Macintosh To print, complete the following six sections in order: • Removing the printer cover l page 172 • Installing PS SIMM l page 175 •... -
Page 172: Chapter 7 Removing The Printer Cover
For Macintosh User’s Guide Removing the printer cover AUTION • Do not remove the components which are not indicated. To remove the printer cover: Turn the printer OFF, pull out the 1st cassette. 1st cassette Unplug the power cord and disconnect any cables connected to the connectors on the back of the printer. - Page 173 For Macintosh User’s Guide a) Open the rear cover. b) Remove the two screws from the back of the printer. Rear cover Screw a) Pull the tab to release the printer cover. b) Slide printer cover towards back of the printer. c) Rotate the printer cover away from the printer and lift the printer cover away.
- Page 174 For Macintosh User’s Guide Remove the five screws from the metal plate covering the control board, then remove the plate. Screw Plate AUTION • Do not remove the components which are not indicated. ∫ ∫ ∫ ∫ Understanding the printer control board If the printer cover is opened, you can see the printer control board as below.
-
Page 175: Installing A Postscript Simm
For Macintosh User’s Guide Installing a PostScript SIMM The following section explains how to install a PS SIMM (KX-PPSU4) on the KX-P7500 Series. MPORTANT • To prevent static electricity damage to certain components (see page 171), touch a grounded metal surface, such as the printer’s bare metal frame prior to touching the component. - Page 176 For Macintosh User’s Guide To install a PS SIMM, you will need to remove and replace the printer cover. For instructions, see “Removing the printer cover” on page 172. To install a PS SIMM: Unpack the PS SIMM. Do not touch the connector edge on the PS SIMM. Notch Connector edge...
- Page 177 For Macintosh User’s Guide Make sure both metal clips on the connector are fastened, and the two pins on each of the connector are pushed through the holes on the PS SIMM. Metal clip Continue with “Installing a Network Card for Ethernet” on page 177 “Installing a LocalTalk/RS-232C Interface Card”...
- Page 178 For Macintosh User’s Guide Kit contents • Network Card for Ethernet (KX-PNB2) AUTION • Do not drop or bend the network card. • Do not touch the connector of the network card. • Protect the network card from static electricity by keeping it in its anti-static package until you are ready to install it.
- Page 179 For Macintosh User’s Guide Remove the plate. Plate Insert the connector on the network card into the network card connector on the printer control board until it is completely in place. The two connectors should fit snugly together. Network card connector on the printer Connector on the...
-
Page 180: Kit Contents
For Macintosh User’s Guide Installing a LocalTalk/RS-232C Interface Card The following section explains how to install a LocalTalk/RS-232C Interface Card (KX-PNB4) on the KX-P7500 Series. LocalTalk/RS-232C Interface Card MPORTANT • To prevent static electricity damage to certain components (see page 171), touch a grounded metal surface, such as the printer’s bare metal frame prior to touching the component. - Page 181 For Macintosh User’s Guide To install a LocalTalk/RS-232C Interface Card: Remove the single screw that fastens the metal plate covering the cable connector opening. Screw Remove the plate. Insert the LocalTalk/RS-232C Interface Card into the card slot.
- Page 182 For Macintosh User’s Guide Insert the connector on the card into the LocalTalk/RS-232C Connector on the printer control board until it is completely in place. The two connectors should fit snugly together. LocalTalk/RS-232C Connector Gently tighten the screw to secure the card to the printer control board. Screw Continue with “Replacing the printer cover”...
-
Page 183: Replacing The Printer Cover
For Macintosh User’s Guide Replacing the printer cover To close the printer cover: a) Replace the top screw loosely and hang the plate on it. b) Tighten the other four screws. c) Tighten the top screw. Top screw Screw Ensure that metal plate tabs fit properly in. Stand the clips on the connector to avoid hiding them behind the printer cover. - Page 184 For Macintosh User’s Guide a) Set the bottom of the printer cover onto the printer. Make sure the bottom tabs on the printer cover fit into the corresponding slots in the printer. b) Rotate the cover up towards the printer. Slot Slide the cover toward the front of the printer until it clicks into place.
- Page 185 For Macintosh User’s Guide a) Gently tighten all the screws. b) Close the rear cover. Screw Replace the 1st cassette, then reconnect any interface cables and power cord.
-
Page 186: Connecting Network Cables (For Network Printing)
For Macintosh User’s Guide Connecting network cables (For Network Printing) Connect to network using standard cabling that you use for other network components. Make sure the printer is turned off before connecting to the port. • There are no special cabling requirements. Connect a twisted-pair network cable (not supplied) to the RJ-45 port. -
Page 187: Connecting The Localtalk Cable
For Macintosh User’s Guide Connecting the LocalTalk cable Connect to a LocalTalk port using a LocalTalk cable. Make sure the printer is turned off before connecting to the port. Connect the printer to your Macintosh using a LocalTalk cable. Continue with “Installing software”... -
Page 188: Installing Software
If you have installed optional PS SIMM in your printer, install the PostScript Printer Driver. Make sure the “READY” message appears on the operator panel display. If necessary, press the power switch on the Macintosh computer. Insert the KX-P7500 Series CD-ROM in your CD-ROM drive. - Page 189 For Macintosh User’s Guide Double-click KXP7500 icon, ENGLISH folder and make a copy of the P7500.PPD file to Printer Descriptions folder in the Extensions folder. From the Apple menu, choose Control Panel, then click AppleTalk. The AppleTalk window appears. From the Connect via drop-down list, select Printer Port if connecting with a LocalTalk cable, or select Ethernet if using a network connection.
- Page 190 The name by default will be “KXP0000f0a0XXXX” (KXP followed by a MAC address in Hexadecimal) if you selected Ethernet in step 5 or “Panasonic KX-P7500” if you selected Printer Port in step 5.
-
Page 191: Printing From Macintosh
Start the necessary application and open the document you want to print. Select Chooser from the Apple menu. Ensure AppleTalk is active. Click LaserWriter 8 icon, then select the name of your KX-P7500 Series. From your application’s File menu, select Page Setup. The Page Setup dialog box is displayed. -
Page 192: The Page Setup Dialog Box
For Macintosh User’s Guide The Page Setup dialog box When you select Page Setup on the File menu of your application, a dialog box is displayed. • The Page Setup dialog box may differ depending on the application and LaserWriter version you are using. -
Page 193: Postscript Options
For Macintosh User’s Guide PostScript Options To display additional LaserWriter settings, select PostScript Options from the pop-up menu. The window as shown below is displayed. Visual Effects Flip Horizontal: To print a mirror image of the document, click this check box. Flip Vertical: To print the document upside down, click this check box. -
Page 194: The Print Dialog Box
For Macintosh User’s Guide The Print dialog box When you select Print... on the File menu of your application, you will see the dialog box as shown below. • The Page Setup dialog box may differ depending on the application and LaserWriter version you are using. - Page 195 For Macintosh User’s Guide Printer Specific Options features To display additional printer settings, select Printer Specific Options from the pop-up menu directly below the printer name. The window as shown below is displayed. Choose Resolution: Selects print resolution. ORT Mode: Sets the ORT (Optimum Resolution Technology) setting to produce print with smooth angles, curves, and edges.
- Page 196 For Macintosh User’s Guide Layout To display additional printer settings, select Layout from the pop-up menu directly below the printer name. The window as shown below is displayed. Print on Both Sides: Sets binding direction for duplex printing, or turns off duplex printing.
- Page 197 Appendix Appendix This appendix contains specifications for the following: • “Printer” l page 198 • “Media” l page 199 • “Cable” l page 208 • “Bi-directional parallel interface” l page 209 • “Controller” l page 210...
-
Page 198: Specifications
0°C to 35°C (32°F to 95°F) Power consumption Humidity Printing Avg: 340 W Operating: 20% to 80% RH Power save mode: 20 W (KX-P7500) Storage: 10% to 90% RH 25 W (KX-P7510) Resolution Noise level 600 x 600 dpi Printing: 50 dB (A) -
Page 199: Paper Handling
Appendix Media Paper handling Input capacity MP tray: • Paper, Transparency, Label 1st cassette: 500 sheets at 75 g/m (20 lbs.) 60 g/m to 161 g/m (16 to 43 lbs.) MP tray: 100 sheets at 75 g/m (20 lbs.) • Card stock Up to 161 g/m (10 envelopes) •... - Page 200 Appendix Media Paper size 1st Cassette OPT Cassette MP tray ENVELOPE — COM-10 105 x 241 mm (4.12" x 9.5") — ¥ ¥ — MONARCH 98 x 191 mm (3.87" x 7.5") — ¥ ¥ — DL 110 x 220 mm (4.33" x 8.66") —...
- Page 201 Appendix To load the Legal or Folio (24lbs., 90g/m ) into the 1st cassette: Set the green lever according to the media type. About detailed descriptions on how to set the green lever, see page Media 1st cassette — paper FOLIO —...
-
Page 202: Margins And Print Area
Appendix Paper weight The printer is designed to work well with most types of paper. However, differences in paper may have significant effects on the quality of the print or the reliability of paper handling. It is strongly recommended that you always test paper before purchasing it to make sure it provides desirable performance. -
Page 203: Transparencies And Labels
When single-sided printing, it’s recommended to avoid printing in fill color in this area. Transparencies and labels You may also print on transparencies and labels that are made for the printer. Panasonic has tested and found that the following work satisfactorily:... - Page 204 Appendix • To avoid damaging the printer, use only transparencies and labels recommended for use in laser printers. • To avoid damaging the printer, do not use ink jet transparency. • Transparencies and adhesive material of labels should be stable at 205°C (400°F), the printer’s maximum temperature.
- Page 205 Appendix Envelopes It is recommended that you print and purchase high quality envelopes with diagonal seams, as shown in the diagram below: High quality envelopes have the following characteristics: • A thin, sharply creased leading edge • Paper weight of 75 g/m (20 lbs.) •...
- Page 206 Appendix It is not recommended that you use envelopes with any of the following characteristics (using these may result in paper jams): • Irregularly shaped envelopes • Envelopes with curls, wrinkles, nicks, twists, dog-ears or other damage • Envelopes with side seam construction •...
- Page 207 Appendix • Self-adhesive envelopes • Envelopes that are baggy or not sharply creased • Embossed envelopes • Envelopes that have previously been printed on Do not attempt to print on any of the following types of envelopes. These may cause damage to your printer.
-
Page 208: Cable
Appendix For best printing results • Avoid printing in high humidity i.e., above 70% RH. High humidity may cause the envelope to curl and pick up excess toner. High humidity may also cause the envelope to seal. • Avoid printing below 10°C (50°F) with less than 30% RH. Low temperature with low humidity may cause light printing. -
Page 209: Bi-Directional Parallel Interface
Appendix Bi-directional parallel interface The bi-directional parallel interface is based on the IEEE P1284-B standard. If your computer has a bi-directional parallel port, the printer driver and printer can take advantage of the fastest possible data transfer. Specifications: Connector type 57-30360 (AMPHENOL) or equivalent cable use a shielded cable 2 meters (6.6 feet) or less in length... -
Page 210: Controller
Appendix OTES • “Return” denotes the return side wire of a twisted pair cable and is connected to signal ground. • Be sure to use only a shielded cable. The printer will not operate properly if any of the pins are not connected. -
Page 211: Font Name Corresponding Table
If you select true type font in table, the printer prints using not the true type font but the resident font. Font Names in Windows Applications Font Names in KX-P7500 PCL Font list FontType Courier Courier Lt SWC Courier Lt SWC Bold... - Page 212 Appendix Font Names in Windows Applications Font Names in KX-P7500 PCL Font list FontType Univers Swiss742 SWC Swiss742 SWC Bold Swiss742 SWC Italic Swiss742 SWC Italic Bold Univers Cd Swiss742 Cn SWC Condensed Swiss742 Cn SWC Condensed Bold Swiss742 Cn SWC Condensed Italic...
-
Page 213: Index
Index Numerics 10 envelopes ......EMPTY MANUAL ..... . 10/100 Base-T. - Page 214 Index KX-P7500 ......Network Card for Ethernet ... 151, KX-P7510 .
- Page 215 Index Plug and Play ......Poor print quality ..... . . SELFTEST .
- Page 216 Index Watermarks tab ......Width guide ......Windows 3.1 installing the printer driver .