Table of Contents
Advertisement
Before connecting, operating or adjusting this product, please read
the instructions completely.
Please keep this manual for future reference.
Antes de conectar, operar o ajustar este producto, sírvase leer
estas instrucciones completamente.
Guarde este manual para su consulta en el futuro.
Przed pod∏àczeniem, obs∏ugà lub regulacjà sprz´tu prosimy o
dok∏adne zapoznanie si´ z treÊcià niniejszej instrukcji.
Prosimy o zachowanie niniejszej instrukcji obs∏ugi.
Niniejsza instrukcja zosta∏a opracowana na podstawie
oryginalnej publikacji f irmy MATSUSHITA ELECTRIC
INDUSTRIAL CO., LTD.
Dfiíve neÏ zaãnete jakékoli zapojování, provoz nebo nastavování
tohoto v˘robku, prostudujte si prosím cel˘ tento návod.
Uschovejte si prosím tento návod k obsluze.
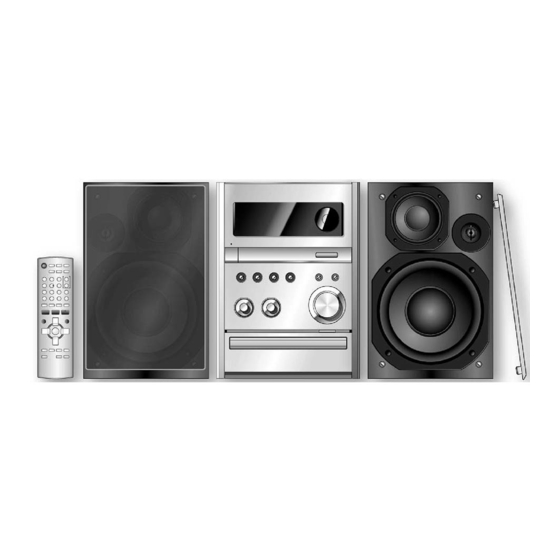
SUPPLIED ACCESSORIES
SUPPLIED ACCESSORIES
ACCESORIOS SUMINISTRADOS
DOSTARCZONE WYPOSA˚ENIE
VANÉ É P P¤ ¤ Í Í SLU
DOD
DODÁ Á VAN
Please check and identify the supplied accessories.
Por favor, verifi que e identifi que los accesorios suministrados.
Zidentyfi kuj poszczególne jego elementy wyposazenia
standard-owego.
Zkontrolujte si prosím a identifi kujte dodávané pfiislušenství.
1 x Remote control
1 x Mando a distancia
1 x Pilot zdalnego sterowania
1 x Dálkové ovládání
(N2QAYB000257)
1 x AC mains lead
1 x Cable de alimentación
de CA
1 x Przewód sieciowy
1 x Kabel pfiívodu
stfiídavého proudu
1 x FM indoor antenna
1 x Antena interior de FM
1 x Antena wewn´trzna FM
1 x FM pokojová anténa
E
PMX3_E_EN.indd 1
PMX3_E_EN.indd 1
SLUŠ Š ENSTV
ENSTVÍ Í
2 x Remote control batteries
2 x Pilas del mando a
distancia
2 x Baterie do pilota
zdalnego sterowania
2 x Baterie dálkového
ovládání
1 x AM loop antenna
1 x Antena de cuadro de AM
1 x Antena p´tlowa AM
1 x AM rámová anténa
2 x Speaker cables
2 x Cables de altavoz
2 x Kable głoÊnikowe
2 x Reproduktorové kabely
Operating Instructions
Instrucciones de funcionamiento
Instrukcja obs∏ugi
Návod k obsluze
CD Stereo System
Sistema estéreo
con reproductor de
discos compactos
Zestaw stereo z CD
Stereosystém s CD
Model No.
Operations in these instructions are described using
remote control, but you can do the operations with the
main unit if the controls are the same.
Your unit may not look exactly as illustrated.
Las operaciones de estas instrucciones se describen
principalmente usando el mando a distancia, pero
puede realizar las mismas operaciones en el aparato
principal.
Es posible que su unidad no se parezca exactamente a
la que se muestra.
W niniejszej instrukcji opisano przede wszystkim
sposoby wykonywania operacji przy u˝yciu pilota,
mo˝na je jednak wykonywaç tak˝e na urzàdzeniu
g∏ównym, jeÊli sà na nim dost´pne identyczne elementy
sterujàce.
Urzàdzenie mo˝e si´ nieznacznie ró˝niç od
przedstawionego na ilustracji.
Operace v tûchto instrukcích jsou popsány vût‰inou pro
pouÏití dálkového ovládání, ale mÛÏete je vykonat i na
hlavní jednotce, pokud jsou ovládací prvky totoÏné.
Vzhled v˘robku nemusí pfiesnû odpovídat uveden˘m
obrázkÛm.
SC-PMX3
RQTV0271-4E
6/17/08 10:14:33 AM
6/17/08 10:14:33 AM
Advertisement
Table of Contents

Related Manuals for Panasonic SC-PMX3


Summary of Contents for Panasonic SC-PMX3
-
Page 1: Operating Instructions
Prosimy o zachowanie niniejszej instrukcji obs∏ugi. Niniejsza instrukcja zosta∏a opracowana na podstawie oryginalnej publikacji f irmy MATSUSHITA ELECTRIC INDUSTRIAL CO., LTD. SC-PMX3 Dfiíve neÏ zaãnete jakékoli zapojování, provoz nebo nastavování Model No. tohoto v˘robku, prostudujte si prosím cel˘ tento návod. - Page 2 Dear customer Thank you for purchasing this product. For optimum performance and safety, please read these instructions carefully. These operating instructions are applicable to the following system. System SC-PMX3 Inside of product Main unit SA-PMX3 Tuotteen sisällä Speakers SB-PMX3 Produktets innside THIS UNIT IS INTENDED FOR USE IN MODERATE CLIMATES.
-
Page 3: Table Of Contents
Safety precautions Table of contents Placement Safety precautions ........3 Set the unit up on an even surface away from direct sunlight, high temperatures, high humidity, and excessive vibration. These Placement of speakers ........ 3 conditions can damage the cabinet and other components, thereby shortening the unit’s service life. -
Page 4: Simple Setup
Simple setup Making the connections Making the connections Connect the AC mains lead only after all the other connections have been made. Conserving power The main unit consumes a small amount of power, even when it is in standby mode (approx. 0.7 W). To save power when the unit is not to be used for a long time, unplug it from the household mains socket. -
Page 5: Preparing The Remote Control
Optional antenna connections FM outdoor antenna AM outdoor antenna FM outdoor antenna AM loop antenna (not included) (included) Rear panel of this main unit Rear panel of this main unit AM outdoor antenna (not included) Ω coaxial cable (not included) •... -
Page 6: Overview Of Controls
Overview of controls Main unit Main unit Refer to the numbers in parentheses for page reference. Display panel Remote control sensor AC supply indicator (AC IN) This indicator lights when the unit is connected to the AC Track skip/search, album mains supply. -
Page 7: Discs
Discs Display function Basic play Basic play This function allows you to display the information of the current track. Press [DISPLAY] repeatedly during play or pause mode. Press [y/l] to turn the unit on. Press [0] to open the disc tray and then load the disc. Elapsed play time Remaining play time Press [0] again to close the tray. -
Page 8: Using The Fm/Am Radio
Discs (continued) Using the FM/AM radio Action Manual tun Manual tuning Cancel program Press [PROGRAM] in the stop mode. mode Replay the program Press [PROGRAM] then [6, CD]. Press [MUSIC P., FM/AM] repeatedly to select “FM” or “AM”. Check program Press [4/ ] or [¢/ ] when “PGM”... -
Page 9: Using The Timers
Using the timers Memory preset Memory preset Setting the clock Setting the clock Up to 30 stations can be set in the FM band and 15 stations in the This is a 24-hour clock. AM band. Press [CLOCK/TIMER] to select “CLOCK”. Preparation Each time you press the button: Press [MUSIC P., FM/AM] repeatedly to select “FM”... -
Page 10: Using Sound Effects
Using the timer (continued) Using sound effects Press [CLOCK/TIMER] repeatedly to select your desired Selecting sound effects Selecting sound effects timer. ˚ PLAY ˚ REC CLOCK You can change the sound effect by selecting Preset EQ or adjusting the bass or treble effect. Original display Within 10 seconds, press [4/ ] or [¢/ ] to set the Preset EQ... -
Page 11: Usb
Devices which are defi ned as USB mass storage class: Note • USB devices that support bulk only transfer. • Only one memory card will be selected when connecting a • USB devices that support USB 2.0 full speed. multiport USB card reader. Typically the fi rst memory card inserted. - Page 12 USB (continued) High-speed recording Recording from other sources Recording from other sources Connect the USB device. By main unit only Recording speed: Select the source to be recorded. CD to USB device : Four times (4x) the normal speed. Radio recording: CD-RW to USB device: Two times (2x) the normal speed.
- Page 13 Display function (FM radio mode) Erasing the recorded tracks You can display the information of the FM RDS radio broadcast that This function allows you to erase unwanted tracks quickly and easily. you are currently recording. Press [3¥8, USB] and then [7]. Press [DISPLAY] during USB recording while listening to FM RDS radio broadcast.
-
Page 14: Using Other Equipment
Using other equipment Connecting and playing a B Connecting and playing a Bluetooth luetooth Connecting the Universal Dock for iPod Connecting the Universal Dock for iPod device You can charge and play your iPod by connecting a Universal Dock By connecting a Bluetooth Receiver (e.g SH-FX570R, sold for iPod (SH-PD10, sold separately) to this unit. - Page 15 Connecting and playing a portable Connecting and playing a portable Changing the remote control code Changing the remote control code audio equipment audio equipment This feature enables you to enjoy music from portable audio Change the code if you fi nd the remote control unintentionally also equipment.
-
Page 16: Troubleshooting Guide
Troubleshooting guide Before requesting service, make the below checks. If you can’t fi x the system as described below, or if something not listed here occurs, refer to the enclosed directory to locate an Authorized Service Center convenient to you or contact your dealer. Playing back No sound. -
Page 17: Specifi Cations
Specifi cations AMPLIFIER SECTION SPEAKER SECTION RMS Output Power Stereo Mode Type 3 way, 3 speaker system (Bass refl ex) Front Ch (both ch driven) Speaker unit(s) Impedance 3 Ω 80 W per channel (3 Ω), 1 kHz, 10% THD 1. - Page 18 DETTE APPARATET ER BEREGNET TIL BRUK UNDER MODERATE KLIMAFORHOLD. Matsushita Electric Industrial Co., Ltd. Web Site: http://panasonic.net Pursuant to at the directive 2004/108/EC, article 9(2) Panasonic Testing Centre Panasonic Marketing Europe GmbH Winsbergring 15, 22525 Hamburg, Germany RQTV0271-4E L0108SN4068 PMX3_E_EN.indd 18 PMX3_E_EN.indd 18...