Table of Contents
Advertisement
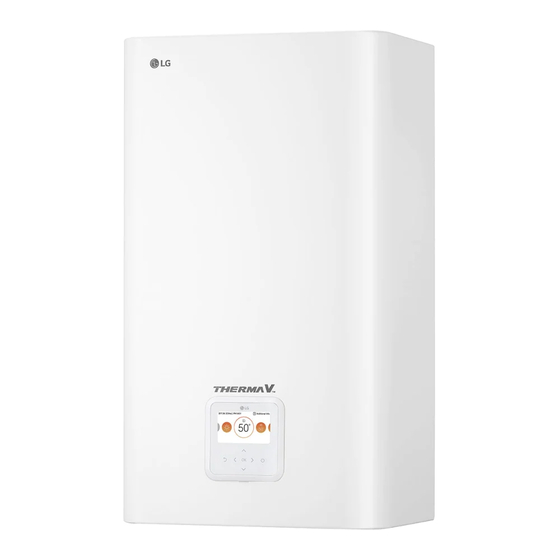
LG
Air-to-Water Heat Pump
Owner's Manual
Models : AH Series
Dear Owner
Thank you for installing LG Air-to-Water Heat Pump.
Your best choice guarantees you a great
performance and service to make your life
comfortable & pleasant.
IMPORTANT
• Please read this owner's manual carefully and
thoroughly before installing and operating your
Air-to-Water Heat Pump.
• Please retain this owner's manual for future
reference after reading it thoroughly.
LG
Advertisement
Table of Contents

Related Manuals for LG AH Series THERMA V


Summary of Contents for LG AH Series THERMA V
- Page 1 Air-to-Water Heat Pump Owner's Manual Models : AH Series Dear Owner Thank you for installing LG Air-to-Water Heat Pump. Your best choice guarantees you a great performance and service to make your life comfortable & pleasant. IMPORTANT • Please read this owner's manual carefully and thoroughly before installing and operating your Air-to-Water Heat Pump.
-
Page 2: Table Of Contents
Air-to-Water Heat Pump Owner’s Manual TABLE OF CONTENTS FOR YOUR RECORDS Safety Precautions ......3 Write the model and serial numbers here: Product Introduction ......6 Model # Owner's Instruction ......8 Serial # You can find them on a label on the side of each Using Thermostat ......24 unit. -
Page 3: Safety Precautions
Safety Precaution Safety Precautions To prevent injury to the user or other people and property damage, the following instructions must be followed. Incorrect operation due to ignoring instruction will cause harm or damage. The seriousness is classified by the following indications. WARNING This symbol indicates the possibility of death or serious injury. - Page 4 Safety Precaution Indoor/outdoor wiring connections must Safely dispose off the packing materials. Make sure to check that the power be secured tightly and the cable should Like screws, nails, batteries, broken device is not dirty, loose or broken and be routed properly so that there is no things etc after installation or service then Turn on the power.
- Page 5 Safety Precaution CAUTION Two or more people must lift and Do not install the product where it will be Keep level even when installing the transport the product. exposed to sea wind (salt spray) directly. product. • Avoid personal injury. •...
-
Page 6: Product Introduction
Product Introduction Product Introduction Typical Installation Scene Water Water Inlet Outlet 1. Indoor unit 2. Outdoor unit 3. Refrigerant pipe and connecting cable 4. Water pipe 5. Ground wire to ground outdoor unit to prevent electrical shocks. *The shape of products can be chaged according to the model capacity and type. 6 Air-to-Water Heat Pump... -
Page 7: Control Panel
Product Introduction Control Panel 1. Display panel 9. Function setting button 2. Change temperature button 10. Temperature setting mode button 3. Silent mode On/Off button 11. Temperature view mode button 4. Operation mode selection button 12. Programming button 5. Water heating Enable/Disable button 13. -
Page 8: Owner's Instruction
Owner's instruction Owner's Instruction Monitoring Information Electric Heater STEP ONE Electric Heater STEP TWO These icons indicate that the backup electric heater which is located inside the indoor unit is operating. Sanitary Water Tank heater This icon indicates that sanitary water tank electric heater which is located inside sanitary water tank is active. - Page 9 Owner's instruction Central Controller This icon indicates that the product is controlled by the central controller. Thermostat This icon indicates connection with thermostat. Slight trouble This icon indicates that slight trouble is occurred. Heavy trouble This icon indicates that heavy trouble is occurred. Owner’s Manual 9...
-
Page 10: Operation Mode
Owner's instruction Mode Change Turn on the product and select operation mode. Press Power Button to turn on the product. Press OPER MODE Button to select each operation mode. Cooling operation Heating operation Weather dependent operation Operation Mode • Cooling Operation - The product yields cool water to use in under floor cooling or FCU cooling. •... -
Page 11: View Temperature
Owner's instruction Weather-dependent Operation This mode is only applied to heating. In order to save energy and to give highest comfort, setting temperature will follow outside temperature. If outdoor temperature decreases, heating capacity for the house will increase automatically in order to keep same room temperature. All parameters will be set by installer during start-up procedure and will be adapted to the site characteristic. -
Page 12: Silent Mode Operation
Owner's instruction Sanitary Water Heating Operation Press repeatedly View Button to enable sanitary tank heating. <Sanitary Water Heating Disable> <Sanitary Water Heating enable> Sanitary water heating operation is operating only on enable condition. During operation, segment will be on. <Sanitary Water Heating ON> <Note>... -
Page 13: Child Lock
Owner's instruction Child Lock This function is to prevent children or other people from using controller. Press Function Setting Button to enter user setting mode. (The segment will be flashed) Press set/clear button to finish the selection. The segment will be disappear. During Child Lock, icon and 'CL' will be displayed during 3 seconds whenever entering... - Page 14 Owner's instruction Quick Sanitary Tank Heating If there is urgent sanitary heating demand, Quick Sanitary Tank Heating mode can be used to reduce the time to reach target sanitary tank temperature by forcibly turning on sanitary tank heater. After reaching target sanitary tank temperature or by user’s input to stop, Quick Sanitary Tank Heating mode will be finished.
-
Page 15: Error Code Display
Owner's instruction Error code display When the error is occurred on indoor unit, the error code will be displayed on control panel. Slight trouble A problem is found inside the indoor unit. In most case, this trouble is concerned with sensor problems. -
Page 16: Setting Current Time
Owner's instruction Setting Current Time You can set current time. Keep pressing programming button for 3 seconds to enter Setting current time mode. Press left, right button to adjust the current day. Press down button to move to AM/PM part and adjust it. (The AM/PM segment will be flashed) Press right button to move to "Hour"... - Page 17 Owner's instruction Programming : Setting Simple Reservation You can easily turn-on reservation.(ONLY enable when unit is stand-by.) Press programming button to enter the Programming mode. (the segment flashing) Press up, down button to adjust the reservation time. If you finish the setting, press setting/cancel button to complete programming Press exit button to exit or system will automatically release without any input after 25 seconds.
- Page 18 Owner's instruction Programming : Setting ON Reservation This function is able to turn-on after a setting time. Press programming button to enter the Programming mode. Repeat pressing button to select [on reservation]. (the segment flashing) Press up, down button to adjust AM/PM. Press right button to move to "Hour"...
- Page 19 Owner's instruction Programming : Setting OFF Reservation This function is able to turn-off after a setting time. Press programming button to enter the Programming mode. Repeat pressing button to select [off reservation]. (the segment flashing) Press up, down button to adjust AM/PM. Press right button to move to "Hour"...
- Page 20 Owner's instruction Programming : Weekly Reservation The weekly reservation is active after setting current time. Press programming button to enter the Programming mode. Repeat pressing button to select [Weekly reservation]. (the segment flashing) Press left, right button to adjust the current day.
- Page 21 Owner's instruction Please refer the process from No.5 to No.7 for setting OFF Time. It is same method. If you finish the setting, press setting/cancel button to complete programming. The under bar segment will be created, when it finished. Please refer the process from No.2 to No.10 for setting other day weekly program.
- Page 22 Owner's instruction Programming : Holiday Reservation This function is to automatically stop the machine working on some days. Press programming button to enter the Programming mode. Repeat pressing button to select [Holiday reservation]. (the segment flashing) Press left, right button to adjust the holiday.
- Page 23 Owner's instruction Programming : Sanitary tank heating & Sanitary tank heater operation This function is schedule programming about sanitary tank heating and sanitary tank heater operation. Two schedule programming for sanitary tank heating and another Two schedule programming for sanitary tank heater operation are possible. Pre-assigned program numbers for sanitary tank heating programming are ‘1’...
-
Page 24: Using Thermostat
The term "thermostat", which is widely used in this chapter, is a kind of 3rd party accessory. LG Electronics does not supply thermostat and it should be supplied 3rd party manufacturers. Room thermostat can be used for easy and convenience control. To utilize thermostat more efficiently and correctly, this chapter presents information about using thermostat. - Page 25 Using Thermostat Emergency Operation • Definition of terms - Trouble : a problem which can stop system operation, and can be resumed temporally under limited operation without certificated professional's assist. - Error : problem which can stop system operation, and can be resumed ONLY after certificated professional's check.
- Page 26 Using Thermostat • Following features are permitted in emergency operation : Operation On/Off VIEW TEMP button(*) Temperature adjust button (*) Sanitary water heating Enable / Disable (*) : Temperature measured by failed sensor is displayed as ‘- -’. (*) : Adjusted temperature is only used to control electric heater on / off condition. The product does not turn on / off according to the setting temperature at the control panel.
-
Page 27: Maintenance And Service
Maintenance and Service Maintenance and Service Maintenance activities In order to ensure optimal availability of the unit, a number of checks and inspections on the unit and the field wiring have to be carried out at regular intervals, preferably yearly. This maintenance should be carried out by your local agreed technician. - Page 28 Maintenance and Service Troubleshooting Tips! Save time and money! Check the following points before requesting repairs or service..If the malfunction persist, please contact your dealer. Case Explanation • Have you made a mistake in timer operation? AWHP does not operate. •...
- Page 29 P/No.: MFL57490703 Printed in Korea After reading this manual, keep it in a place easily accessible to the user for future reference.