Table of Contents
Advertisement
Quick Links
Advertisement
Table of Contents

Related Manuals for Bosch HSG223055Z


Summary of Contents for Bosch HSG223055Z
- Page 1 Instruction manual HSG223055Z...
-
Page 3: Instruction Manual
Making cooking as much fun as eating Please read this instruction manual. This will ensure that you make use of all the technical benefits the cooker has to offer. It will provide you with important safety information. You will then be familiarised with the individual components of your new cooker. -
Page 4: Table Of Contents
Table of contents Important information ......Your new oven ........Before you use the appliance for the first time . - Page 5 Table of contents After sales service ....... . Tables and tips .
-
Page 6: Important Information
Important information Transport damage Environmentally friendly disposal ó Electricity and gas connection... -
Page 7: Safety Precautions
Safety precautions This appliance has been designed for domestic use only. Use the appliance for cooking only. CAUTION: Accessible parts and the grill may be Hot surfaces hot when in use. Keep children away. Never touch the hob surface, the inside of the oven, the inside of the lower drawer and the heating elements. - Page 8 Insufficent ventilation The use of a gas cooking appliance will generate heat in gas hobs during and humidity in its operating environment. Make sure cooking you ventilate the kitchen adequately. Do not block the natural ventilation channels or install a mechanical ventilation device (an extractor hood).
-
Page 9: Causes Of Damage
Glass cover Caution: the glass cover may crack when heated. Turn off all the burners before closing the glass cover. Before you close the glass cover wait until the hob surface cools down. Causes of damage Damage in the cooking Always use the burners by placing a saucepan on area (hob) them. -
Page 10: Gas Connection
Damage to the lower Do not place hot items in the lower drawer. The lower drawer drawer may be damaged. Damage to the surrounding Only leave the oven to cool down when it is switched furniture surfaces off. Even if you leave the oven door open a little, the edges of the surrounding furniture may be damaged over time. -
Page 11: Electrical Connection
If an approved safety hose is used then care must be taken to ensure that it is not squashed or crushed in any way. The hose must not come into contact with hot surfaces. The gas may be connected (gas pipe or safety gas hose) to the left or the right side of the appliance. -
Page 12: Levelling The Cooker
The use of extension cables and multi socket adapters is forbidden. This appliance must be operated with an earthed connection to provide adequate electrical safety. If the appliance is not earthed in accordance with regulations, then protection against hazards in the electrical system cannot be guaranteed. - Page 13 Positioning the appliance The product must be installed in accordance with the dimensions provided and it must be placed directly on the kitchen floor. It should not be placed over another object. The distance between the top of the cooker and the lower part of the hood should be adjusted according to the guidelines provided by the hood manufacturers.
-
Page 14: Your New Oven
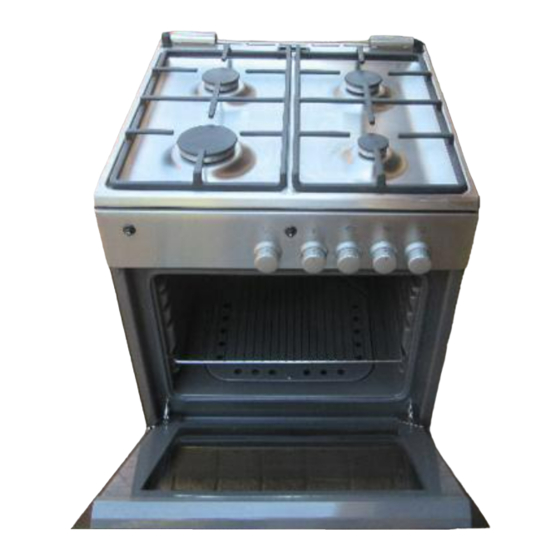
Your new oven This section will familiarise you with your new appliance. With the help of your user guide, you will learn about the hob, the oven and the accessories. Upper lid Steam outlet The upper lid must be open when the Important: when the oven appliance is in operation. - Page 15 Steam outlet Caution: Hot air is released from here. Normal burner Normal burner Power burner Economy burner Heating efficiency Diameters of pots and pans of the burners suitable for the burners Economy burner 1 kW 12 18 cm Normal burner 1.75 kW 18 24 cm Power burner 3 kW...
- Page 16 Hotplate controls You can use the four hotplate controls to control the level of heating provided by the hotplates. The symbol above the hotplate controls indicate which hotplate the switch controls. For the gas hotplates Settings Large flame, highest power Economy flame, lowest power There is a stop at the end of the range.
- Page 17 Oven Heating efficiency of the burners Lower gas burner in oven 3 kW Gas grill in oven 2.1 kW Function selector switch Turn the function selector switch to the left to heat the oven or turn it to the right to select the grill function. Settings 170 270 The temperature range that is used for...
- Page 18 Oven The shelf can be inserted at 5 different heights in the oven. You can remove the shelf two thirds of the way without it tipping. This makes it easier to take food out of the oven. Accessories Accessories may be purchased at a later date from the after sales service or from specialist shops.
- Page 19 Optional accessories*...
- Page 20 Optional accessories* Protective grid The protective grid is fixed to the oven door. This prevents small children from touching the hot oven door. The protective grid can be ordered from the factory after sales service with number 361 480. You will find a comprehensive range of products for your cooker in our brochures and on the Internet.
-
Page 21: Before You Use The Appliance For The First Time
Before you use the appliance for the first time In this section you will find out what you have to do before you start using the appliance for the first time. Read the safety warnings in the "Important information" section. Clean the oven accessories. Pre cleaning the burner body and Clean the burner covers (1) and bodies (2) with water... -
Page 22: Heating Up The Oven
Heating up the oven Open the upper lid. The upper lid must be kept open as you bake. Turn on the main gas switch of the appliance. Connect the appliance to the mains. Open the oven lid. To clear the odour caused by first use, heat up the Things that must be done for the lower gas burner oven with the lid closed. - Page 23 Things that must be done Heat up the grill in order to clear the odour caused by for the gas grill first use. 1. Attach the protective sheet under the control panel. Place the sheet with its longest end facing the front and the curve in the tip looking down.
-
Page 24: Setting Up The Hob
Setting up the hob There are 4 gas burners on the hob. This section explains how to use the gas burners. Activating the burners Please make sure that the burner covers are firmly in place on top of the burner assemblies. The burner channels should not be filled. - Page 25 5. Adjust the flame as you wish. Between the closed and , positions, the flame size is not fixed. You should therefore always choose between the bigger flame , and the smaller flame ; . The ignition mechanism should not be used for more than 15 seconds.
- Page 26 Hotplate settings table The base diameter of the saucepan or frying pan that you will place for cooking on the hotplate must not be smaller than the recommended value. Cooking times vary according to the type of meal, the type of ingredients used and the weight. You can determine the most appropriate cooking time using your observations.
- Page 27 Setting up the oven Tables and tips You can find the appropriate standards for many different foods here. The lower gas burner can be Igniting the lower gas burner, you can bake on a single tray, keeping the oven lid closed. adjusted as follows Example: Baking at: 170 ºC 1.
- Page 28 Safety system If the gas coming out of the oven burner is turned off for some reason, the safety system will be activated and the gas flow cut. Do not use the ignition system for more than 15 seconds. If the burner does not ignite within 15 seconds, stop using the mechanism and wait for at least 1 minute before you attempt to ignite the burner once again.
- Page 29 The oven grill is adjusted as follows 1. Open the upper lid. The upper lid must be kept open as you bake. 2. Turn on the main gas switch of the appliance. Connect the appliance to the mains. Open the oven lid.
- Page 30 8. Check whether the gas is ignited or not. If there are no flames, repeat the above steps starting with step 5. When the food is cooked Turn the function selector switch off. Setting procedure for the rotating 1. Open the upper lid. The upper lid must be kept skewer open as you bake.
- Page 31 Do not use the ignition system for more than 15 seconds. If the burner does not ignite within 15 seconds, stop using the mechanism and wait for at least 1 minute before you attempt to ignite the burner once again. 8.
- Page 32 Inserting the rotary spit 1. Place the frame for the rotary spit in the enamel baking tray. 2. Place the rotary spit on the frame. 3. Insert the enamel baking tray at level 1 as far as it will go. There is an opening in the rear wall of the oven.
-
Page 33: Care And Cleaning
Care and cleaning Do not use high pressure cleaning equipment or a steam jet. Definitely do not use corrosive cleaning materials, sharp objects, a hard sponge or a corrosive cleaning cloth when cleaning. Otherwise, the surfaces of the appliance may become scratched and lose their shine. - Page 34 Cleaning equipment Exterior of the appliance Wipe the external surfaces of the appliance with a cloth that has been dampened with hot water and washing up liquid. Dry with a soft cloth. Stainless steel surfaces Wipe with a cloth that has been dampened with water and washing up liquid.
- Page 35 Knobs Do not remove the knobs for cleaning. Simply pull the knobs out a little and clean away the food remains that have accumulated underneath with a cloth that has been dampened with hot water and washing up liquid. The upper surfaces of the knobs must be cleaned using a cloth that has been dampened with hot water and washing up liquid.
-
Page 36: Removing The Door
3. Half close the oven door. With both hands, grip the bottom of the door on the left and right hand sides. Close the door a little more and pull it out. After cleaning, re install the oven door, following the instructions in reverse order. -
Page 37: Procedure To Be Applied In The Event Of A Fault
Procedure to be applied in the event of a fault Faults generally occur for simple reasons. Please note the following fault warnings before contacting the after sales service: Fault Possible reason Information/correcting Appliance is not operating. Plug is not connected to Connect the plug to the power socket. - Page 38 Fault Possible reason Information/correcting The door seal has come out Check the position and fitting of the or is not correctly door seals, correct as required. assembled. The door seal is down. Replace the door gasket. Oven is not heating. Plug is not connected to Connect the plug to the power socket.
- Page 39 Replacing the oven light on the ceiling If the oven light fails, it must be replaced. 25 watt heat resistant replacement bulbs can be obtained of the oven from the after sales service or specialist shops. Please specify the E number and FD number of your appliance.
-
Page 40: After Sales Service
After sales service Our after sales service is there for you if your oven needs repairing.You will find the address and telephone number of your nearest after sales service centre in the phone book. The after sales service centres listed will also be happy to advise you of a service point in your local area. -
Page 41: Tables And Tips
Tables and tips This table contains a selection of dishes and the optimum settings at which to cook them. You can find out which type of heating and temperature is best for your dish, which accessories to use, and at which oven level the dish should be inserted. - Page 42 Flans and flaky Tin above grill Height Tempera Cooking time, pastries* ture ºC minutes Yufka*** flan Baking tin Flaky pastry with yeast Baking tin Choux pastry Baking tin Pastry with sesame Baking tin Pizza Baking tin Do not pour water directly onto the hot oven. Gratin and casseroles Tin above grill Height...
-
Page 43: Gas Operated Grill Pan
Gas operated grill Table of guidelines for placing cold food in the oven. Meats should be turned over once three quarters of the grilling time has elapsed. Always place the food that you will cook in the centre of the grill. Food Plates and Level... -
Page 44: Grilling With The Rotary Spit
Grilling with the rotary spit You can use the rotary spit to cook particularly large roasts, such as rolled up joints or poultry. The meat becomes crispy and brown. Preparing roasts To ensure that the roast is well browned and cooked evenly, observe the following points: Skewering and securing Position the roast as close as possible to the centre of... - Page 45 Notes...
- Page 46 Notes...
- Page 48 Carl Wery Straße 34 81739 München 9000204277 DEUTSCHLAND BO S en S 220886...