Table of Contents
Advertisement
Quick Links
Advertisement
Table of Contents
Troubleshooting

Related Manuals for Yamaha DT125R


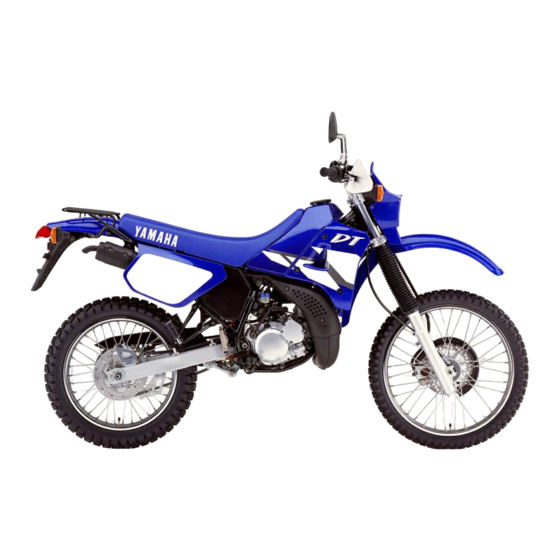
Summary of Contents for Yamaha DT125R
- Page 1 OWNER’S MANUAL DT125R DT125X 1D0-F8199-E2...
- Page 3 Yamaha a reputation for dependability. Please take the time to read this manual thoroughly, so as to enjoy all advantages of your DT125R/X. The owner’s manual does not only instruct you in how to operate, inspect and maintain your motorcycle, but also in how to safe- guard yourself and others from trouble and injury.
-
Page 4: Important Manual Information
Yamaha continually seeks advancements in product design and quality. Therefore, while this manual contains the most current product information available at the time of printing, there may be minor discrepancies between your motorcycle and this manual. If you have any questions concerning this manual, please consult your Yamaha dea- ler. - Page 5 IMPORTANT MANUAL INFORMATION EAUS1171 DT125R/X OWNER’S MANUAL ©2004 by YAMAHA MOTOR SPAIN S.A. 1st edition, July 2004 All rights reserved Any reprinting or unauthorized use without the written permission of YAMAHA MOTOR SPAIN S.A. is expressly prohibited. Printed in Spain.
-
Page 6: Table Of Contents
TABLE OF CONTENTS SAFETY INFORMATION .....1-1 OPERATION AND IMPORTANT RIDING Adjusting the brake pedal position POINTS ..........5-1 and free play........6-17 DESCRIPTION........2-1 Starting a cold engine ......5-1 Adjusting the rear brake light Left view ...........2-1 Starting a warm engine ....5-2 switch ..........6-17 Right view .........2-2 Shifting..........5-2 Checking the front and rear... - Page 7 TABLE OF CONTENTS Front wheel ........6-26 Rear wheel ........6-28 Troubleshooting ......6-29 MOTORCYCLE CARE AND STORAGE ........7-1 Care ..........7-1 Storage ..........7-3 SPECIFICATIONS .......8-1 Specifications ........8-1 CONSUMER INFORMATION .....9-1 Identification numbers ......9-1...
-
Page 8: Safety Information
SAFETY INFORMATION EAU10310 Safe riding Many accidents involve inexpe- MOTORCYCLES SINGLE Always make pre-operation rienced operators. In fact, many TRACK VEHICLES. THEIR SAFE USE checks. Careful checks may help operators who have been invol- AND OPERATION ARE DEPENDENT prevent an accident. ved in accidents do not even UPON THE USE OF PROPER RIDING This motorcycle is designed to... - Page 9 Modifications made to this motorcy- both feet on the operator foo- ment of vision that could delay cle not approved by Yamaha, or the trests during operation to seeing a hazard. removal of original equipment, may...
- Page 10 Since Yamaha can- handlebar or front fork area, 178 kg (392 lb) DT125R, 180 kg (396 not test all other accessories that may they must be as lightweight as lb) DT125X. When loading within this...
- Page 11 SAFETY INFORMATION • Bulky or large accessories may Gasoline and exhaust gas • Do not park the motorcycle on seriously affect the stability of GASOLINE IS HIGHLY FLAMMA- a slope or soft ground, other- the motorcycle due to aerody- BLE: wise it may fall over.
-
Page 12: Description
DESCRIPTION EAU10410 Left view 8 5 6 3 1. Headlight (page 6-24) 2. Radiator cover (page 6-5) 3. Fuel cock (page 3-7) 4. Air filter (page 6-10) 5. Choke lever (page 3-8) 6. Shift pedal (page 3-4) 7. Y.E.I.S (page 3-9) 8. -
Page 13: Right View
DESCRIPTION EAU10420 Right view 12 14 11. Tool kit (page 6-1) 12. Fuse (page 6-24) 13. Coolant tank (page 6-8) 14. Rear brake pedal (page 3-5) -
Page 14: Controls And Instruments
DESCRIPCION EAU10430 Controls and instruments 18 19 1 0 0 1 2 0 1 3 0 16. Clutch lever (page 3-4) 17. Left handlevar swicht (page 3-3) 18. Speedometer (Page 3-3) 19. Coolant temperature warning lamp (page 3-3) 20. Indicators (page 3-2) 21. -
Page 15: Instruments And Control Functions
INSTRUMENT AND CONTROL FUNCTIONS EAU10460 NOTE: EWA10060 s WARNING Main switch/steering lock The headlights come on automatically Never turn the key to “OFF” or when the engine is started and stay “LOCK” while vehicle on until the key is turned to “OFF”, moving, otherwise the electrical even if the engine stalls. -
Page 16: Indicator And Warning Lights
Neutral indicator light “N” or does not go off after the 2-stroke This indicator light comes on when engine oil tank has been refilled, have the transmission is in the neutral posi- a Yamaha dealer check the electrical tion. circuit. -
Page 17: Speedometer Unit
INSTRUMENT AND CONTROL FUNCTIONS EAU11640 NOTE: EAU12460 Turn signal switch “c/d” Speedometer unit Only for the German model equipped To signal a right-hand turn, push this with a speed limiter: switch to “d”. To signal a left-hand The speed limiter prevents the vehicle turn, push this switch to “c”. -
Page 18: Clutch Lever
INSTRUMENT AND CONTROL FUNCTIONS stop the engine in case of an emer- EAU12820 EAU12880 Clutch lever Shift pedal gency, such as when the motorcycle overturns or when the throttle cable is stuck. EAU12710 Start switch “g” Push this switch to crank the engine with the starter. -
Page 19: Brake Lever
INSTRUMENT AND CONTROL FUNCTIONS EAU12890 EAU12941 EAU13150 Brake lever Brake pedal Fuel tank cap To remove the fuel tank cap 1. Insert the key into the lock and turn it 1/4 turn counterclockwise. 2. Turn the fuel tank cap 1/3 turn counterclockwise and pull it off. -
Page 20: Catalytic Converter
EWA10120 engine. tem. s WARNING Make sure that the fuel tank cap is ECA10070 Your Yamaha engine has been desig- CAUTION properly closed and locked before ned to use regular unleaded gasoline Immediately wipe off spilled fuel riding. with a research octane number of 91 with a clean, dry, soft cloth, since or higher. -
Page 21: 2-Stroke Engine Oil
INSTRUMENT AND CONTROL FUNCTIONS ECA10700 Make sure that there is sufficient oil in CAUTION the 2-stroke engine oil tank. Add the The following precautions must be recommended 2-stroke engine oil if observed to prevent a fire hazard or necessary. other damages. NOTE: Use only unleaded gasoline. -
Page 22: Starter (Choke) Lever
INSTRUMENT AND CONTROL FUNCTIONS Starting a cold engine requires a To install the seat richer air-fuel mixture, which is sup- 1. Insert the projections on the front plied by the starter (choke). of the seat into the seat holders Move the lever in direction (a) to turn as shown. -
Page 23: Shock Absorber
Improper installation of or damage to This model is equipped with the YPVS to open the gas cylinder. any part of the YEIS (Yamaha Energy (Yamaha Power Valve System). This Do not subject the shock Induction System) will result in poor... -
Page 24: Sidestand
The built-in sidestand switch is part of The YPVS has been set and exten- system the ignition circuit cut-off system, sively tested at the Yamaha factory. which cuts the ignition in certain The ignition circuit cut-off system Changing these settings without situations. -
Page 25: Instrument And Control Functions
5. Push the start switch. Does the engine start? The neutral switch may be defective. The motorcycle should not be ridden until checked by a Yamaha dealer. With the engine still running: 6. Move the sidestand up. 7. Keep the clutch lever pulled. -
Page 26: Pre-Operation Checks
PRE-OPERATION CHECKS EAU15591 The condition of a vehicle is the owner’s responsibility. Vital compo- nents can start to deteriorate quickly and unexpectedly, even if the vehicle remains unused (for example, as a result of exposure to the elements). Any damage, fluid leakage or loss of tire air pressure could have serious consequences. -
Page 27: Pre-Operation Check List
6-15 • Check lever free play. • Adjust if necessary. • Make sure that operation is smooth. • Check cable free play. Throttle grip 6-12/6-21 • If necessary, have Yamaha dealer adjust cable free play and lubricate cable andgrip housing. - Page 28 Instruments, lights, • Check operation. – signals and switches • Correct if necessary. Engine stop switch • Check operation. • Check operation of ignition circuit cut-off system. Sidestand switch 3-11 • If system is defective, have Yamaha dealer check vehicle.
-
Page 29: Operation And Important Riding Points
Yamaha dealer check the electrical their functions before riding. The transmission is in the neutral circuit. Consult... -
Page 30: Starting A Warm Engine
OPERATION AND IMPORTANT RIDING POINTS 7. When the engine is warm, turn Always use the clutch while the starter (choke) off. changing gears to avoid dama- ging the engine, transmission, NOTE: and drive train, which are not The engine is warm when it responds designed to withstand the normally to the throttle with the starter shock of forced shifting. -
Page 31: Parking
If any engine trouble should occur ten minutes. during the engine break-in period, Vary the engine speed from time to immediately have a Yamaha dealer time. Do not operate the engine at check the vehicle. one set throttle position. 150–500 km (90–300 mi) -
Page 32: Periodic Maintenance And Minor Repair
If you are not familiar with mainte- nance work correctly. nance work, have a Yamaha dealer do it for you. NOTE: If you do not have the tools or expe- rience required for a particular job, have a Yamaha dealer perform it for you. -
Page 33: Periodic Maintenance And Lubrication Chart
The annual checks must be performed every year, except if a kilometer-based maintenance is performed instead. From 30000 km, repeat the maintenance intervals starting from 6000 km. Items marked with an asterisk should be performed by a Yamaha dealer as they require special tools, data and technical skills. ODOMETER READING (x 1000 Km) - Page 34 PERIODIC MAINTENANCE AND MINOR REPAIR ODOMETER READING (x 1000 Km) ANNUAL CHECK ITEM CHECK OR MAINTENANCE JOB • Check tread depth and for damage. • Replace if necessary. 9 * Tires • Check air pressure. • Correct if necessary. 10 * Wheel bearings •...
- Page 35 PERIODIC MAINTENANCE AND MINOR REPAIR ODOMETER READING (x 1000 Km) ANNUAL CHECK ITEM CHECK OR MAINTENANCE JOB • Check oil level. Transmission oil • Change. • Check coolant level and vehicle for coolant leakage. 23 * Cooling system • Change. Every 3 years Front and rear 24 *...
-
Page 36: Removing And Installing Cowlings And Panels
PERIODIC MAINTENANCE AND MINOR REPAIR EAU18711 The cowlings and panels shown need EAU18980 Cowlings B and C Removing and installing to be removed to perform some of the To remove one of the cowlings cowlings and panels maintenance jobs described in this Remove the cowling screws, and then chapter. -
Page 37: Checking The Spark Plug
If the spark plug shows a distinctly different color, the engine could be defective. Do not attempt to diagnose such problems yourself. Instead, have a Yamaha dealer check the vehicle. 1. Spark plug inspection If the spark plug shows signs of elec- 1. -
Page 38: Transmission Oil
PERIODIC MAINTENANCE AND MINOR REPAIR The transmission oil level should be 2. Start the engine, warm it up for Tightening torque: checked before each ride. In addition, several minutes, and then turn it Spark plug: the transmission oil must be changed off. -
Page 39: Coolant
PERIODIC MAINTENANCE AND MINOR REPAIR 1. Start the engine, warm it up for ECA10450 EAU20170 CAUTION To check the coolant level several minutes, and then turn it In order to prevent clutch slip- off. page (since the transmission 2. Place an oil pan under the trans- oil also lubricates the clutch), mission to collect the used oil. - Page 40 If water has been added to the 1. Put the vehicle on a level place. The coolant should be between the coolant, have a Yamaha dealer 2. Remove cowling C and panel D. minimum and maximum level marks. check the antifreeze content of (See page 6-5 ~ 6-6.)
-
Page 41: Cleaning The Air Filter Element And Check Hose
If water has been used instead NOTE: Tightening torque: of coolant, replace it with coo- If any leakage is found, ask a Yamaha Coolant drain bolt: lant as soon as possible, other- dealer to inspect the cooling system. 10 Nm (1,0 m•kgf) wise the engine may not be 15. -
Page 42: Ajusting The Carburetor
3. Pull the air filter element out. 7. Insert the element into the air fil- to a Yamaha dealer, who has the ter case. necessary professional knowledge ECA10480 and experience. The adjustment des-... -
Page 43: Adjusting The Engine Idling Speed
If the specified idling speed cannot be checked and, if necessary, adjusted obtained as described above, have a as follows at the intervals specified in Yamaha dealer make the adjustment. the periodic maintenance and lubrica- tion chart. EAU21370 The engine should be warm before Adjusting the throttle cable making this adjustment. -
Page 44: Tires
Tire air pressure (measured on cold tires): To maximize the performance, durabi- Because loading has an enormous DT125R lity, and safe operation of your impact on the handling, braking, Up to 90 kg (198 lb): motorcycle, note the following points... - Page 45 2. Side wall Front tire: approved for this model by The tires must be checked before Size: Yamaha Motor España, S.A. 120/70-17 58H each ride. If the center tread depth Manufacturer/model: reaches the specified limit, if the tire Pirelli/Sport Demon...
-
Page 46: Spoke Wheels
The wheel should be balanced ding the tires, should be left to whenever either the tire or wheel 1. Lock nut a Yamaha dealer, who has the has been changed or replaced. 2. Adjusting bolt 3. Free play necessary professional know- An unbalanced wheel can result ledge and experience. -
Page 47: Adjusting The Brake Lever Free Play
If there is air in the 2. Adjusting bolt 3. Free play hydraulic system, have Yamaha dealer bleed the sys- The brake lever free play should mea- before operating 1. Lock nut sure 2-5 mm (0,07 ~ 0,19 in) as 2. -
Page 48: Adjusting The Brake Pedal Position And Free Play
EWA10670 shown. Periodically check the brake s WARNING pedal free play and, if necessary, It is advisable to have a Yamaha adjust it as follows. dealer make these adjustments. To increase the brake pedal free play, turn the adjusting nut at the brake rod Brake pedal position in direction (a). -
Page 49: Checking The Front And Rear Brake Pads
If a malfunction is noted, have a turn the adjusting nut in direction (a). ke fluid level may indicate worn brake Yamaha dealer check the system To make the brake light come on later, pads and/or brake system leakage. If before riding. -
Page 50: Changing The Brake Fluid
1. Place the motorcycle on a level Changing the brake fluid Recommended brake fluid: surface and hold it in an upright DOT 4 Have a Yamaha dealer change the position. brake fluid at the intervals specified in Refill with the same type of brake NOTE: the NOTE after the periodic mainte- fluid. -
Page 51: Lubricating The Drive Chain
PERIODIC MAINTENANCE AND MINOR REPAIR EAU22960 ECA10570 ECA10581 To adjust the drive chain slack CAUTION CAUTION Improper drive chain slack will The drive chain must be lubricated overload the engine as well as after washing the motorcycle and other vital parts of the motorcycle riding in the rain. -
Page 52: Checking And Lubricating The Cables
Recommended lubricant: damaged or does not move smoothly, chart. Lithium-soap-based grease (all-pur- have a Yamaha dealer check or repla- pose grease) EAU23120 ce it. Adjusting the Autolube pump The Autolube pump is a vital and sop-... -
Page 53: Checking The Front Fork
EWA10750 If any damage is found or the front s WARNING fork does not operate smoothly, Securely support the motorcycle so have a Yamaha dealer check or that there is no danger of it falling repair it. over. 6-22... -
Page 54: Checking The Wheel Bearings
If any free This model is equipped with a sealed- medical attention. play can be felt, have a Yamaha type (MF) battery, which does not • Batteries produce explosive dealer check or repair the stee- require any maintenance. -
Page 55: Replacing The Fuse
ECA10630 4. If the fuse immediately blows CAUTION 1. Fuse again, have a Yamaha dealer Always keep the battery char- 2. Reserve fuse check the electrical system. ged. Storing a discharged bat- The fuse holder is located beside the... -
Page 56: Replacing The Tail/Brake Light Bulb
NOTE: 4. Install the lens by installing the 6. Install the cowling. The removal procedure depends on screws. 7. Have a Yamaha dealer adjust the the type of bulb holder installed on headlight beam if necessary. your vehicle. 6-25... -
Page 57: Replacing The Turn Signal Light
PERIODIC MAINTENANCE AND MINOR REPAIR ECA10680 4. Install the lens by installing the 2. Raise the front wheel off the CAUTION screw. ground by using a motorcycle ECA11190 Do not overtighten the screws, stand. CAUTION otherwise the lens may break. To service the rear wheel Do not overtighten the screw, Raise the rear wheel off the ground by... - Page 58 PERIODIC MAINTENANCE AND MINOR REPAIR EWA10820 EAU24950 s WARNING To install the front wheel It is advisable to have a Yama- ha dealer service the wheel. Securely support the motorcy- cle so that there is no danger of it falling over. 1.
-
Page 59: Rear Wheel
PERIODIC MAINTENANCE AND MINOR REPAIR EAU25080 Rear wheel EAU25230 To remove the rear wheel 1. Gap 1. Axle nut 2. Chain tensioner 7. After tightening the axle holder 3. Remove the swingarm end bolts. nuts, push down hard on the 4. -
Page 60: Troubleshooting
Imitation parts may look wheel axle from the left-hand Tightening torque: like Yamaha parts, but they are often Axle nut: side. inferior, have a shorter service life and 90 Nm (9,0 m•kgf) can lead to expensive repair bills. -
Page 61: Troubleshooting Charts
Remove the spark plug and check the electrodes. The engine does not start. Have a Yamaha dealer check the vehicle. Check the battery. 4. Battery The engine turns over The battery is good. - Page 62 Start the engine. If the engine overheats again, have a The coolant level Yamaha dealer check and repair the cooling system. is OK. NOTE: If coolant is not available, tap water can be temporarily used instead, provided that it is changed to the recommended coolant as soon as possible.
-
Page 63: Motorcycle Care And Storage
MOTORCYCLE CARE AND STORAGE EAU26000 3. Remove extremely stubborn dirt, Do not use any harsh chemical Care like oil burnt onto the crankcase, products on plastic parts. Be While the open design of a motorcy- with a degreasing agent and a sure to avoid using cloths or cle reveals the attractiveness of the brush, but never apply such pro-... - Page 64 MOTORCYCLE CARE AND STORAGE ve any marks. If the windshield 1. Clean the motorcycle with cold 4. To prevent corrosion, it is recom- is scratched, use a quality water and a mild detergent, after mended to apply a corrosion pro- plastic polishing compound the engine has cooled down.
-
Page 65: Storage
NOTE: Before storing your motorcycle for head so that the electrodes are Consult a Yamaha dealer for advice several months: grounded. (This will limit sparking on what products to use. 1. Follow all the instructions in the during the next step.) - Page 66 MOTORCYCLE CARE AND STORAGE EWA10950 9. Remove the battery and fully s WARNING charge it. Store it in a cool, dry To prevent damage or injury from place and charge it once a sparking, make sure to ground the month. Do not store the battery in spark plug electrodes while turning an excessively cold or warm pla- the engine over.
-
Page 67: Specifications
DT125RE 2210 mm MIKUNI Electric starter DT125X 2139 mm Type x quantity Lubrication system Overall width TM28-92 x1 Separate lubrication (Yamaha autolube) 795 mm Spark plug(s) Type Overall height Manufacturer/model YAMALUBE 2-cycle oil or 2-stroke engine DT125RE 1200 mm NGK/BR8ES... - Page 68 SPECIFICATIONS Tire air pressure (measured on cold Front brake 22/23 (0.957) tires) Type Single disc brake Loading condition 18/22 (0.818) Operation 0-90 kg Chassis Right hand operation Front Frame type Recommended fluid DT125RE 150 kPa Semi double cradle DOT 4 DT125X 180 kPa Caster angle Rear brake...
- Page 69 SPECIFICATIONS Charging system AC magneto Battery Model GT6B-3 Voltage, capacity 12 V, 6.0 Ah Headlight Bulb type Halogen bulb Bulb voltage, wattage x quantity Headlight 12 V, 600 W/55.0 W x 1 Tail/brake light 12 V, 21.0 W/5.0 W x 1 Front turn signal light 12 V, 10.0 W x 2 Rear turn signal light...
-
Page 70: Consumer Information
Record the key identification number, vehicle identification number and model label information in the spaces provided below for assistance when ordering spare parts from a Yamaha dealer or for reference in case the vehicle is stolen. KEY IDENTIFICATION NUMBER: 1. Key identification number 1. - Page 71 The model label is affixed to the frame into the crankcase. under the seat. (See page 3-8.) Record the information on this label in the space provided. This information will be needed when ordering spare parts from a Yamaha dealer.
- Page 72 INDEX Cleaning the air filter element and check Removing and installing cowlings and hose ............6-10 panels ............6-5 Adjusting the autolube pump ....6-21 Clutch lever ..........3-4 Replacing the fuse ........6-24 Adjusting the brake lever free play ..6-16 Controls and instruments ......2-3 Replacing the headlight bulb ....6-24 Adjusting the brake pedal position and Coolant............6-8...
- Page 74 YAMAHA MOTOR ESPAÑA, S.A. PRINTED IN SPAIN 2004-07-Bengar Gràfiques, S.L.