Panasonic Workio DP-C305 Scan/Email Manual
Digital colour imaging systems
Hide thumbs
Also See for Workio DP-C305:
- Service manual (921 pages) ,
- Operating instructions manual (112 pages) ,
- Service handbook (808 pages)
Table of Contents
Advertisement
Quick Links
Operating Instructions
(For Scanner and Email)
Digital Colour Imaging Systems
DP-C405 / C305 / C265
Model No.
Before operating this machine, please carefully read this manual
and keep this documentation in a safe place for future reference.
English
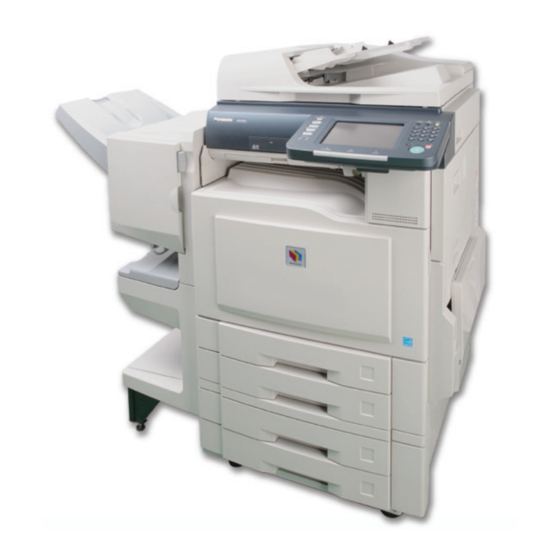
(Illustration shows optional accessories that may not be installed on your machine.)
Advertisement
Table of Contents

Related Manuals for Panasonic Workio DP-C305


Summary of Contents for Panasonic Workio DP-C305
-
Page 1: Operating Instructions
Operating Instructions (For Scanner and Email) Digital Colour Imaging Systems DP-C405 / C305 / C265 Model No. Before operating this machine, please carefully read this manual and keep this documentation in a safe place for future reference. English (Illustration shows optional accessories that may not be installed on your machine.) - Page 2 The following Operating Instruction manuals are included with this machine. Please refer to the appropriate manual and keep all manuals in a safe place for future reference. If you lose the manual, contact the authorized Panasonic dealer. Operating Instructions (For Setting Up) This manual contains essential information for setting up the machine.
- Page 3 Conventions Icons The following icons are used in this manual. Icon Description Indicates important information that must be read in detail. Indicates reference information. Notation The following notation is used in this manual. Notation Description For Keys and Buttons Hard buttons on the Control Panel are depicted as **** key, and soft buttons on the Touch Panel Display are depicted as “xxx”.
-
Page 4: Table Of Contents
Table of Contents Chapter 1 Getting To Know Your Machine Basic Operation Procedure ....................Sending an Email ........................ Chapter 2 Scan/Email Operations Scan to the SD Memory Card................“SD Card” 10 Scan to the PCMCIA/PC Card................“PC Card” 12 Scan to the Internal Hard Disk Drive ................... 14 Retrieving Scanned Image from Hard Disk Drive ............ - Page 5 Scanning Special Originals....................50 Scanning 2-Sided Originals ............. “2-Sided Originals” 50 Scanning Special Originals (Thin Paper, etc.) from ADF ... “Job Build and SADF” 52 Chapter 4 Adding to the Address Book Editing the Address Book ....................54 Editing an Email Address ....................54 Deleting an Email Address ....................
-
Page 6: Chapter 1 Getting To Know Your Machine
Chapter 1 Basic Operation Procedure Getting To Know Your Machine This section describes the workflow of Scan/Email operations. For the detailed description of each setup item involved, refer to the relevant suggested section. Place original(s). Press the Scan/Email key. Face up. Up to 100 sheets (80 g/m / A4) Select “Basic Menu”, and then set the... - Page 7 Select the location or destination. Press the Start key. When scanning from the Platen Glass, place the next original, and then follow the Scan to SD Card/PCMCIA (PC) Card/ instructions described on the Touch Panel Internal Hard Disk Drive Display. SD Memory Select “SD Card / Hard The scanned image(s) is transferred to the SD...
-
Page 8: Sending An Email
Sending an Email There are two ways for sending the scanned data via Email. • Sending an Email using the Scan/Email function • Sending an Email using the Internet Fax function Scan/Email Function Colour Original Sending an Email using the Scan/Email function Monochrome Original Set the file type to attach. - Page 9 Internet Fax Function Monochrome Original Sending an Email using the Internet Fax function Select “Email”. Internet Fax Device Set the file type to attach. Press the Fax key. (Refer to Setting a File Type and a File Name in the Operating Instructions (For Facsimile and Internet Fax) of provided CD-ROM.) Monochrome...
-
Page 10: Chapter 2 Scan/Email Operations
Chapter 2 Scan to the SD Memory Card Scan/Email Operations The scanned image will be directly transferred to the SD Memory Card. Be sure to use only a genuine SD Memory Card*. (Any commercial grade genuine SD / SDHC Memory Card can be used.) The scanned image(s) cannot be saved to the SD Memory Card if the setting of Function Parameter “84 SD/PC Card Function”... - Page 11 C322*, DP-C262*, DP-C354*, DP-C264*, Insert the SD Memory Card as illustrated. DP-C323*, DP-C263*, DP-C213*, DP-C405, (Label side up) DP-C305, and DP-C265. For more details, refer to Printing from SD Memory Card/PC in the Operating Instructions (For Basic Operations) of provided booklet. When...
-
Page 12: Scan To The Pcmcia/Pc Card
Scan to the PCMCIA/PC Card The scanned image will be directly transferred to the PCMCIA/PC Card. Be sure to use only PCMCIA/PC Card Adapter (Type II, 3.3 V Operating Voltage Only) for memory card. For types of memory cards that can be used with the PCMCIA/PC Card Adapter, refer to the document that came with the PCMCIA/PC Card Adapter. - Page 13 PCMCIA/PC Card Adapter can be printed by this machine or another DP-C322*, DP-C262*, DP-C354*, DP-C264*, DP-C323*, DP-C263*, Insert a PCMCIA/PC Card Adapter as DP-C213*, DP-C405, DP-C305, and DP-C265. illustrated. (Label side up) For more details, refer to Printing from SD Memory Card/PC in the Operating Instructions (For Basic Operations) of provided booklet.
-
Page 14: Scan To The Internal Hard Disk Drive
Scan to the Internal Hard Disk Drive The scanned image can be saved to the internal Hard Disk Drive, and the saved data can be retrieved using a computer via a network. Hard Disk Drive The Hard Disk Drive is enabled with 12 image boxes. For instructions on how to change the image box name, refer to Editing Image Box Name (see page 58). - Page 15 Select an Image Box in the Hard Disk Drive. Only one Image Box can be selected at a time. When the Hard Disk Drive is selected as the storage destination, the scanned image cannot be saved to the SD Memory Card and PCMCIA/PC Card at the same time.
-
Page 16: Retrieving Scanned Image From Hard Disk Drive
Retrieving Scanned Image from Hard Disk Drive Select an Image Box where image data is Start a Web browser, such as Internet saved. ® Explorer , on your computer. Enter the IP Address that has been set on this machine. Ex: http://10.74.232.130 The machine status will be displayed on the Web browser. - Page 17 Memo...
-
Page 18: Scan To A Computer
The scanned image will be transferred to the desired computer. Before transferring the scanned image to your computer, it is necessary first to install the Panasonic Document Management System software, and then set up the scanner configuration on your computer. - Page 19 Select “Address Book”. Press the Start key. When the scanned image is transferred to the computer, the Scanner reception notice appears on the destination computer’s display. When scanning from the Platen Glass, place the next original, and then follow the instructions described on the Touch Panel Display.
-
Page 20: Scan To Email
Scan to Email The scanned image can be emailed to network connected computers. JPEG (jpg) file is not available for multiple pages. JPEG (jpg) file is only available in the Colour/Grey Scale mode. TIFF file is only available in the Monochrome mode. When sending a multi-page colour document: <To a Single Address>... - Page 21 Select an alphabet tab. If the Function Parameter “145 Sender Selection” (Fax/Email Settings > Fax Parameters) is set to “Valid”, you can preset up to 25 sender names. You can select from the sender list when sending an Email. However, if you select “From” on the Email screen, the sender list will not be displayed.
- Page 22 Select “Close”. Press the Start key. The scanned image(s) is transferred as Email. When scanned image transfer fails, a transfer error message is printed out. Confirm the selected or inputted Email address. Select “Addresses:###”. (###: Number of selected Email addresses) Select “OK”.
-
Page 23: Searching Ldap Server For Email Address
Searching LDAP Server for Email Address You can search the LDAP server for Email addresses by computer names beginning with the specified character. This function is available where the LDAP server is configured. For the setting of LDAP server, refer to Operating Instructions (For Function Parameters) of provided CD-ROM. Place original(s). - Page 24 Select a computer, and then select Enter the subject if necessary. “OK”. If the Function Parameter “21 Default Subject” (Fax/Email Settings > User Parameters) has been set, the information is added to the subject line for all outgoing Emails without having to input it manually. For programming instructions, refer to Fax/ Email Settings in the Operating Instructions (For Function Parameters) of provided...
-
Page 25: Adding An Email Address To The Address Book
Select “Edit”. Select “Keyboard”. Enter the Station Name, and then select “OK”. Enter an Email address. Ex: pcc@panasonic.com Up to 15 characters. For instructions on how to enter characters, refer to Using the Keyboard in the Up to 60 characters. - Page 26 Enter the Key Name, and then select “OK”. Select “OK” to register the Email address as a station. Select “OK”. For the following steps, refer to steps 6 to 11 in Scan to Email (see pages 21 to 22).
- Page 27 Memo...
-
Page 28: Sending An Email With Image File Attachment
Sending an Email with Image File Attachment The image data saved on the SD Memory Card, the PCMCIA/PC Card, or the internal Hard Disk Drive can be emailed to network connected computers. Original cannot be scanned in this operation. The image data that has already been saved on the storage device can be attached. - Page 29 Insert the SD Memory Card as illustrated. If the setting of Function Parameter “84 SD/ (Label side up) PC Card Function” (General Settings > Key Operator Mode) is set to “No”, the Confirmation screen displays the “Function not available” error message and beeps. Select “Attachment”.
- Page 30 Select an alphabet tab. Enter the subject if necessary. If the Function Parameter “21 Default Subject” (Fax/Email Settings > User Parameters) has been set, the information is added to the subject line for all outgoing Emails without having to input it manually. For programming instructions, refer to Fax/ Email Settings in the Operating Instructions (For Function Parameters) of provided...
- Page 31 Press the Start key. The Email with image file(s) attached is sent. Push the SD Memory Card, and then remove it. Do not remove the SD Memory Card while the Access Indicator is flashing. Close the Slot Cover.
-
Page 32: Attaching An Image File From The Pcmcia/Pc Card
Attaching an Image File from the PCMCIA/PC Card The image data saved on the PCMCIA/PC Card can be emailed to network connected computers. Be sure to use only PCMCIA/PC Card Adapter (Type II, 3.3 V Operating Voltage Only) for memory card. For types of memory cards that can be used with the PCMCIA/PC Card Adapter, refer to the document that came with the PCMCIA/PC Card Adapter. - Page 33 If you do not touch any key for 3 seconds, or Select “PC Card”. select “Close” on the Touch Panel Display, the machine will display the previous screen. For more details, refer to General Settings in the Operating Instructions (For Function Parameters) of provided CD-ROM.
- Page 34 When searching for address(es) via LDAP Enter a subject, and then select “OK”. server, refer to Searching LDAP Server for Email Address (see page 23). Select an Email address. Up to 40 characters. For instructions on how to enter characters, refer to Using the Keyboard in the Operating Instructions (For Function Select “Cc”, “Bcc”, or “From”, and...
- Page 35 Do not remove the PCMPIA/PC Card Adapter while the Access Indicator is flashing. Close the Slot Cover.
-
Page 36: Attaching An Image File From The Internal Hard Disk Drive
Attaching an Image File from the Internal Hard Disk Drive The image data saved on the internal Hard Disk Drive can be emailed to network connected computers. Confirm that nothing is inserted in the Card Slot. If the SD Memory Card or PCMCIA/PC Card is inserted, the Hard Disk Drive cannot be selected. - Page 37 Only JPEG files are displayed as Thumbnails. Some For programming instructions, refer to Fax/ JPEG file(s) may not be displayed as Thumbnails. Email Settings in the Operating Instructions (For Function Parameters) of provided CD-ROM. Up to 80 image files in a folder can be selected at a time.
-
Page 38: Receiving An Email
Receiving an Email If the machine connects to a network as a POP client, it can receive an Email and print the attached file either automatically or manually. The Email reception method from a POP server varies depending on the POP settings programmed in Function Parameters. Configuring to Receive Email Program the following parameters in Function Parameters (Fax/Email Settings >... -
Page 39: Receiving Email Manually
Receiving Email Manually With “147 Auto POP Receive” set to “Invalid” in Function Parameters (Fax/Email Settings > Fax Parameters), Email is received manually. With POP acquisition interval set between 1 and 60 minutes, queries are transmitted to the POP server periodically to check for new Emails, and the number of the incoming Email messages on the server appears on the display. -
Page 40: Chapter 3 Scanner Settings
Chapter 3 Setting the Scanning Quality Scanner Settings Documents, whether in full colour or monochrome, are scanned in three-colours. The Colour mode settings are reset to their factory defaults when: - The Reset key is pressed. - The Auto Reset Time interval has lapsed (default = 1 min). - The power is turned OFF. -
Page 41: Setting Original Type And Scanning Density
Setting Original Type and Scanning Density Selecting Original Type Text Text/Photo Photo Adjusting Scanning Density Darker Lighter The standard setting of “Original Type” and “Density” can be changed. Refer to Scanner Settings in the Operating Instructions (For Function Parameters) of provided CD-ROM. Selecting Original Type Adjusting Scanning Density Select the Original Type, and then... -
Page 42: Scanning Resolution
Scanning Resolution You can set the appropriate resolution according to your originals. The standard setting of “Resolution” can be changed. Refer to Scanner Settings in the Operating Instructions (For Function Parameters) of provided CD-ROM. Resolution settings are reset to their factory defaults when: - The Reset key is pressed. - Page 43 Memo...
-
Page 44: Advanced Colour Quality Settings
Advanced Colour Quality Settings The following picture qualities can be adjusted: • Compression (Full Colour) • Compression (Grey Scale) • Compression (Black) • Background Removal • Contrast The standard setting of “Compression (Full Colour)”, “Compression (Grey Scale)”, “Compression (Black)”, “Background Removal”, and “Contrast” can be changed. Refer to Scanner Settings in the Operating Instructions (For Function Parameters) of provided CD-ROM. - Page 45 Select “OK”.
-
Page 46: Compression (Grey Scale)
Compression (Grey Scale) Compression (Black) Select picture quality in the Grey Scale mode. Select the compression method in the Black mode. Select “Adjustment”. (See page 44) Select “Adjustment”. (See page 44) Select “Compression (Grey Scale)”. Select “Compression (Black)”. Select a picture quality, and then select Select a compression method, and “OK”. -
Page 47: Background Removal
Background Removal Contrast Colour documents can be scanned in monochrome The scanning contrast can be adjusted to match with their background colour removed. This feature the original. is convenient for scanning newspapers, background-coloured documents or the like. Higher Lower When the Photo original is selected in the Original Type (see page 41), the setting of Background Select “Adjustment”. -
Page 48: Setting The File Type And/Or File Name
Setting the File Type and/or File Name Documents can be scanned with a file type specified. While files are named after the date by default, documents may also be scanned with a file name specified. The standard setting of “File Type and Name” can be changed. Refer to Scanner Settings in the Operating Instructions (For Function Parameters) of provided CD-ROM. - Page 49 Select a File Name type. Select “Custom”. When “Date / Time” is selected for the File Name, the file name will automatically default to the date/time format. Enter a file name by using the on-screen Keyboard, and then select “OK”. Up to 20 characters.
-
Page 50: Scanning Special Originals
Scanning Special Originals Scanning 2-Sided Originals 2-sided originals can be scanned, and the binding position can be selected. The standard setting of “2-Sided Original” can be changed. Refer to Scanner Settings in the Operating Instructions (For Function Parameters) of provided CD-ROM. Place original(s) on the ADF. - Page 51 Press the Start key. When cancelling the operation, press the Stop key on the Control Panel, and then select “Yes” on the Touch Panel Display.
-
Page 52: Scanning Special Originals (Thin Paper, Etc.) From Adf
Scanning Special Originals (Thin Paper, etc.) from ADF SADF Special originals (thin paper, etc.) can be fed from the ADF, and scanned continuously using the Job Build and SADF mode. Place one original. Select “Address Book”, and then (Minimum 50 g/m select a destination. -
Page 53: Job Build
Job Build This is useful for scanning multiple sets of originals that exceed the maximum capacity of the ADF of 100 sheets (80 g/m / A4). (See the example below.) Ex: To make quality adjusted scanning of 115-sheet of originals. (a) Place the first 100 sheets of originals on the ADF. -
Page 54: Chapter 4 Adding To The Address Book
Chapter 4 Editing the Address Book Adding to the Address Book The Email addresses in the Address Book can be edited or deleted. For instructions on how to edit or delete IP Addresses in the Address Book, refer to Network Configuration in the Operating Instructions (For Setting Up) of provided booklet. - Page 55 Edit the Email address, and then Select “Close”. select “OK”. Press the Reset key. Enter an Email address (up to 60 characters). For instructions on how to enter characters, refer to Using the Keyboard in the Operating Instructions (For Function Parameters) of provided CD-ROM.
-
Page 56: Deleting An Email Address
Deleting an Email Address The Email addresses in the Address Book can be deleted. On the Scanner Settings screen (see Select “Yes”. page 54), select “26 Delete Address : Email”. For instructions on how to display the The Email address is deleted. Scanner Settings screen, refer to steps 1 to 3 in the Editing an Email Address (see Select “Cancel”. - Page 57 Memo...
-
Page 58: Editing Image Box Name
Editing Image Box Name The image box name can be changed. For instructions on how to save scanned image to an image box, refer to Scan to the Internal Hard Disk Drive (see page 14). When there is data stored in the image box, the image box name cannot be changed. Press the Function key. - Page 59 Enter a key name, and then select “OK”. Up to 12 characters. Select “OK” or “Cancel”. Select “Close”. Press the Reset key. To reset the name to the default setting, refer to Scanner Settings in the Operating Instructions (For Function Parameters) of provided CD-ROM.
-
Page 60: Index
Display ................19 Multi-page Colour Document ..........20 Multiple Addresses ............20 Multi-Size Feed ..............40 Edit ................. 25 Email ................7 Email Address ..............54 Original Size ..............40 Original Type ..............41 Favourites ..............18 Fax key ................39 Panasonic Communication Utility ........18... - Page 61 Panasonic Document Management System ....18 PC Card ..............13, 33 PCMCIA/PC Card .............12, 32 PCMCIA/PC Card Adapter ........12, 32 PCMCIA/PC Card Adapter (Type II) ......12, 32 PCMCIA/PC Card Slot ..........13, 34 PDF ................48 Photo ................41 POP server ..............38 Quality Adj..............40 Resolution ..............42...
- Page 62 For Customer Support: Panasonic Communications Co., Ltd. Fukuoka, Japan http://panasonic.net © 2007 Panasonic Communications Co., Ltd. All Rights Reserved. Tr1207-1018 (01) Unauthorized copying and distribution is a violation of law. PJQMC1091ZB The contents of these Operating Instructions are subject to change without notice.