Yamaha BD-S667 Owner's Manual
Blu-ray disc player
Hide thumbs
Also See for BD-S667:
- Owner's manual (124 pages) ,
- Owner's manual (278 pages) ,
- Owner's manual (48 pages)
Table of Contents
Advertisement
Available languages
Available languages
Quick Links
Download this manual
See also:
Owner's Manual
Advertisement
Table of Contents

Related Manuals for Yamaha BD-S667


Summary of Contents for Yamaha BD-S667
- Page 1 BLU-RAY DISC PLAYER BD-S667 ИНСТРУКЦИЯ ПО ЭКСПЛУАТАЦИИ OWNER’S MANUAL...
- Page 3 About fonts...............i ■ MUSIC VIDEO PHOTO...
- Page 4 ВВЕДЕНИЕ × TRANSMIT MARKER SETUP CLEAR SEARCH PROGRAM DIGEST REPEAT HOME AUDIO POP-UP MENU MENU ENTER RETURN SCREEN SUBTITLE ANGLE ZOOM AUDIO STATUS...
- Page 5 ■ Примечания...
- Page 6 О ДИСКАХ И ФАЙЛАХ × ■ ■ Примечания...
- Page 7 ■ Примечания 30˚ 30˚ TRANSMIT MARKER SETUP CLEAR SEARCH PROGRAM DIGEST REPEAT HOME AUDIO POP-UP MENU MENU ENTER RETURN SCREEN SUBTITLE ANGLE ZOOM AUDIO STATUS...
- Page 8 ОРГАНЫ УПРАВЛЕНИЯ И ФУНКЦИИ ■ TRANSMIT MARKER SETUP CLEAR SEARCH PROGRAM DIGEST REPEAT Примечание HOME AUDIO POP-UP MENU MENU ENTER RETURN SCREEN SUBTITLE ANGLE ZOOM AUDIO Примечание STATUS 5 a 2 3 ENTER. Примечание Примечание 5 a 2 3 à. VIDEO...
- Page 9 ОРГАНЫ УПРАВЛЕНИЯ И ФУНКЦИИ Примечание VIDEO VIDEO MUSIC VIDEO MUSIC PHOTO Примечание VIDEO MUSIC Примечания PHOTO VIDEO MUSIC VIDEO PHOTO...
- Page 10 ПОДКЛЮЧЕНИЕ ■ DIGITAL OUT AUDIO OUT VIDEO OUT COAXIAL COMPONENT HDMI NETWORK REMOTE CONTROL OPTICAL VIDEO USB BD STORAGE...
- Page 11 Подключение видео и аудио к аудио/видео ресиверу HDMI (стр. 10) Подключение аудио к аудио/ Подключение видео видео ресиверу к телевизору Подключите аудио к A’ HDMI (стр. 10) аудио/видео ресиверу. COAXIAL (стр. 12) или к аудио/видео ресиверу OPTICAL (стр. 12) COMPONENT (стр. 11) или...
- Page 12 ■ DIGITAL OUT AUDIO OUT VIDEO OUT COAXIAL COMPONENT HDMI NETWORK OPTICAL VIDEO USB BD STORAGE Указания HDMI IN...
- Page 13 ■ DIGITAL OUT AUDIO OUT VIDEO OUT DIGITAL OUT AUDIO OUT VIDEO OUT COMPONENT COMPONENT COAXIAL COAXIAL HDMI NETWORK HDMI NETWORK OPTICAL VIDEO OPTICAL VIDEO USB BD STORAGE USB BD STORAGE (Желтый) COMPONENT IN (Красный) (Желтый) (Синий) (Зеленый) VIDEO AV INPUT Примечание...
- Page 14 ■ DIGITAL OUT AUDIO OUT VIDEO OUT DIGITAL OUT AUDIO OUT VIDEO OUT COAXIAL COMPONENT COAXIAL COMPONENT HDMI NETWORK HDMI NETWORK OPTICAL VIDEO OPTICAL VIDEO USB BD STORAGE USB BD STORAGE COAXIAL OPTICAL AV INPUT DIGITAL AUDIO IN Указание...
- Page 15 ПОДКЛЮЧЕНИЕ АУДИО ■ DIGITAL OUT AUDIO OUT VIDEO OUT COAXIAL COMPONENT HDMI NETWORK OPTICAL VIDEO USB BD STORAGE (Белый) (Красный) AUDIO AUDIO IN...
- Page 16 ■ DIGITAL OUT AUDIO OUT VIDEO OUT COAXIAL COMPONENT HDMI NETWORK OPTICAL VIDEO USB BD STORAGE Примечание Примечания...
- Page 17 ■ Указания ■ NETWORK REMOTE CONTROL USB BD STORAGE Примечание REMOTE CONTROL IN REMOTE CONTROL OUT...
- Page 18 ВОСПРОИЗВЕДЕНИЕ ■ Примечание...
- Page 19 Примечание Примечание ■ CLEAR SEARCH PROGRAM DIGEST REPEAT HOME AUDIO POP-UP MENU MENU ENTER RETURN SCREEN SUBTITLE ANGLE ZOOM AUDIO...
- Page 20 МЕНЮ HOME Примечание 5 a 2 3 Указание Указание Примечание...
- Page 21 МЕНЮ HOME Примечание Примечание Примечания ■ Примечания...
- Page 22 Указание Примечание ■ VIDEO 5 a 2 3 VIDEO VIDEO MUSIC VIDEO VIDEO VIDEO MUSIC PHOTO VIDEO MUSIC VIDEO MUSIC VIDEO MUSIC PHOTO VIDEO MUSIC PHOTO PHOTO VIDEO...
- Page 23 РАСШИРЕННЫЕ ОПЕРАЦИИ ВОСПРОИЗВЕДЕНИЯ ■ MUSIC MUSIC MUSIC...
- Page 24 РАСШИРЕННЫЕ ОПЕРАЦИИ ВОСПРОИЗВЕДЕНИЯ ■ VIDEO RETURN Примечание ■ ■ VIDEO MUSIC 5 a 2 3 VIDEO MUSIC...
- Page 25 РАСШИРЕННЫЕ ОПЕРАЦИИ ВОСПРОИЗВЕДЕНИЯ ■ Примечание ■ Примечания Примечания Примечания ■...
- Page 26 УСТАНОВКИ...
- Page 27 МЕНЮ УСТАНОВКИ ■ Примечание TRANSMIT MARKER SETUP CLEAR SEARCH PROGRAM DIGEST REPEAT HOME AUDIO POP-UP MENU MENU ENTER RETURN SCREEN SUBTITLE ANGLE ZOOM AUDIO...
- Page 28 МЕНЮ УСТАНОВКИ ■ Примечания...
- Page 29 МЕНЮ УСТАНОВКИ Примечание Français Deutsch Español Italiano Nederlandse Svenska Français Español Deutsch Italiano Nederlandse Svenska Français Español Deutsch Italiano Nederlandse Svenska...
- Page 30 МЕНЮ УСТАНОВКИ ■ Примечание Примечание...
- Page 31 МЕНЮ УСТАНОВКИ Примечание ■ ■...
- Page 32 МЕНЮ УСТАНОВКИ ■ Примечание ■...
- Page 33 МЕНЮ УСТАНОВКИ Примечания...
- Page 34 Указание Примечания ■...
- Page 35 ДОПОЛНИТЕЛЬНАЯ ИНФОРМАЦИЯ ■ ■ ■ ■...
- Page 36 УСТРАНЕНИЕ НЕИСПРАВНОСТЕЙ ■ ■...
- Page 37 ■ AVCHD BONUSVIEW BD-Live BUDA (Область связывания данных устройства) Закрытый заголовок BDMV...
- Page 38 ГЛОССАРИЙ Цветовое пространство DTS-HD Master Audio | Essential HDMI Deep Color Letterbox (LB 4:3) Звук Linear PCM Dolby Digital Dolby Digital Plus Mac-адрес Dolby TrueHD Pan Scan (PS 4:3) Субтитры DRC (контроль динамического диапазона) Главное меню диска x.v.Color DTS-HD High Resolution Audio DTS-HD Master Audio...
- Page 39 ■ × × × × ■ ■ × × × × × × × ■...
- Page 40 Yamaha will not be held responsible for any damage resulting from use of this unit with a voltage other than specified.
-
Page 41: Table Of Contents
CONTENTS 1. INTRODUCTION 5. ADDITIONAL INFORMATION WHAT YOU CAN DO WITH THIS PLAYER..2 TROUBLESHOOTING ........33 SUPPLIED PARTS ..........2 Power ................33 Basic operation.............. 33 ABOUT DISCS AND FILES......... 3 Disc playback..............33 Types of discs/files that can be used with this player..3 Picture ................ -
Page 42: Introduction
INTRODUCTION WHAT YOU CAN DO WITH THIS PLAYER Easy setting for language, resolution, screen aspect ratio p. 16 You can perform language and TV settings. p. 20 Play back commercially-released BD/DVD/CD discs In addition to BD discs, this Player also supports playback of a variety of other discs. p. -
Page 43: About Discs And Files
ABOUT DISCS AND FILES ■ Types of discs/files that can be Region management information used with this player Destination BD-Video DVD-Video Australia Region code “B” or Region number “4” – 12 cm (5”) and 8 cm (3”) discs can be played back in “ALL”... -
Page 44: Disc Precautions
Wipe any dirt off the playing surface with a soft cloth. Cleaning the pick up lens – Never use commercially available cleaning discs. The use of these discs can damage the lens. – Request the nearest service center approved by Yamaha to clean the lens. -
Page 45: Controls And Functions
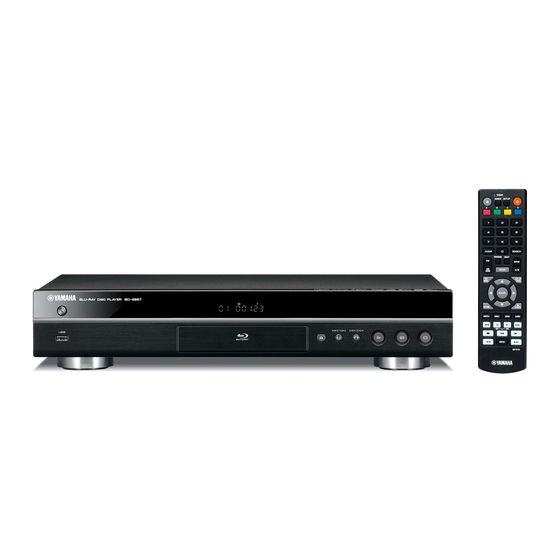
CONTROLS AND FUNCTIONS ■ Front panel 1 p (On/Standby) (Search backward/Skip backward): Press to skip backward, and press and hold to search 2 USB port (p. 14) backward. 3 Indicator: Lights up while this Player is starting up. (Search forward/Skip forward): 4 Front panel display Press to skip forward, and press and hold to search 5 Disc tray (p. -
Page 46: Remote Control
CONTROLS AND FUNCTIONS ■ Remote control 6 Number buttons: Enters numbers, or during playback, jumps to the track/chapter corresponding to the number you input. 7 CLEAR: Clears entered number/set item. TRANSMIT MARKER SETUP 8 PROGRAM : Sets the order of playback (p. - Page 47 CONTROLS AND FUNCTIONS G Control buttons N REPEAT VIDEO MUSIC VIDEO MUSIC PHOTO Changes repeat mode. Repeat mode shown below will change each time you press the button. : Searches backward/forward. The search speed will change each time you press the button : Repeats the title being played back.
-
Page 48: Connection
CONNECTION INTRODUCTION TO CONNECTIONS Find the corresponding connection method on your video/audio equipment. We recommend that you use the HDMI terminal which provides high quality digital audio and video on a single connection. If you use the other terminals/jacks, connect the video first. Then connect the audio. Connect video and audio to AV receiver with HDMI cable. - Page 49 Video and audio connection to AV receiver HDMI (p. 10) Video connection Audio connection to AV receiver to TV Connect audio to AV A’ HDMI (p. 10) COAXIAL (p. 12) receiver. to AV receiver OPTICAL (p. 12) COMPONENT (p. 11) L/R (p.
-
Page 50: Hdmi Connection
HDMI CONNECTION ■ Connecting to the HDMI terminal – You can enjoy high quality digital picture and sound through the HDMI terminal. – Firmly connect an HDMI cable (commercially available) to the HDMI terminals. – See page 30 for information on the audio/video output formats. –... -
Page 51: Video Connections
VIDEO CONNECTIONS ■ Connecting to the component/video jack – You can enjoy accurate color reproduction and high quality images through the component jacks. – Firmly connect a component video cable (commercially available) or an Audio/Video cable to the COMPONENT jacks/VIDEO jack. –... -
Page 52: Audio Connections
AUDIO CONNECTIONS ■ Connecting to the digital audio jack/terminal – You can connect audio equipment or the TV to the COAXIAL jack/OPTICAL terminal. – Firmly connect a Coaxial digital audio cable (commercially available) or optical cable (commercially available) to the coaxial digital audio jack or optical digital audio terminal. –... -
Page 53: Connecting To The Audio Jacks
AUDIO CONNECTIONS ■ Connecting to the audio jacks – You can connect audio equipment or the TV to the AUDIO OUT L/R jacks. – Firmly connect an Audio/Video cable (supplied) to the AUDIO OUT L/R jack. – See page 30 for information on the audio output formats. Caution! Do not connect the power cable of this Player until all connections are completed. -
Page 54: Network And Usb Connection
Player from performing correctly. To USB/BD To NETWORK Note STORAGE terminal Terminal – Yamaha cannot guarantee that all brands’ USB memory devices will operate with USB memory device this Player. (commercially available) Network cable (commercially available) Notes –... -
Page 55: Other Connections
(commercially available) to the REMOTE the Player. Then plug into AC outlet. CONTROL (OUT/IN) jacks. – If your AV receiver is a Yamaha product and has the capability to transmit SCENE control signals, you can use the SCENE function. Caution! Do not connect the power cable of this Player until all connections are completed. -
Page 56: Playback
PLAYBACK INITIAL WIZARD/EASY SETUP ■ Setting with the Initial Wizard/ 4 Press 5/a to select the screen aspect ratio, then press ENTER. For details on setting items, see “TV Screen” Easy Setup (p. 28). Initial Wizard/Easy Setup allows you to set language, Easy Setup is completed. -
Page 57: Home Menu
HOME MENU HOME menu allows you to browse and play multi-media files on data discs, USB memory devices and your Common operations for playing back network. files in a selected folder Example: Selecting a movie file on a USB memory Note device –... - Page 58 HOME MENU 3 Select the Photo, Music, Video or AVCHD folder you Hint want to play back, then press ENTER. To return to the parent folder, press 2 or select – To enjoy slide show with music, press HOME to return to the HOME menu screen while music is played back, and select photo file.
-
Page 59: Using Network Content
HOME MENU 3 To play back a file in playlist, select the file you want – The file requirements may not always be compatible. There may be some restrictions depending on file to play back under the playlist folder on HOME menu features and DLNA sever capability. -
Page 60: Advanced Playback Operation
ADVANCED PLAYBACK OPERATION This chapter explains playback of commercially available Hint BD and DVD discs (like movies), CDs, and recorded DVD-RW/R discs. – When a DVD is played back, you can select Random All, Random TT (title), Random CH (chapter), Note Shuffle All, Shuffle TT (title) and Shuffle CH –... -
Page 61: Status Menu
ADVANCED PLAYBACK OPERATION ■ Status menu When playing Audio CD or music file This allows you to adjust various settings, such as Example: Icons when playing music file subtitles, angle settings and the title selection for direct playback. To display status menu, press STATUS. Status menu contains following menus. -
Page 62: Using Bookmark
ADVANCED PLAYBACK OPERATION ■ Using Bookmark 2 Press ENTER to program playback order. VIDEO For CD, press 5/a to select a desired track then press This allows you to set Bookmark at the specified point of ENTER. the video. After Bookmark is set, you can move to the For DVD disc, select a desired title (shown as TT) and point you set using this function. -
Page 63: Enjoying Bonusview And Bd-Live
– Some time may be required for the data to load (read/write). Notes – Yamaha cannot guarantee that all brands’ USB memory devices will operate with this Player. – Do not use a USB extension cable when connecting a USB memory device to the USB/BD STORAGE terminal of the player. -
Page 64: Settings
SETTINGS SETUP MENU The SETUP menu enables various audio/visual settings and adjustments for functions using the remote control unit. Menu/Submenu Item Function Page System Screen Saver Sets screen saver on/off. Disc Auto Playback Sets this Player to start disc playback automatically. HDMI Control Sets this Player to receive control signal from the remote control of your TV/AV receiver. -
Page 65: Example Of Setup Menu Operation
SETUP MENU Menu/Submenu Item Function Page Audio Output COAXIAL/ Selects the output mode of COAXIAL jack/OPTICAL OPTICAL terminal from Bitstream/PCM/Reencode/Off. HDMI Selects the output mode of HDMI terminal from Bitstream/ PCM/Reencode/Off. Audio Setting Downsampling Selects the digital audio signal down sampling frequency from 48k/96k/192k. -
Page 66: General Setting
SETUP MENU ■ General Setting 3. Select a menu item. The default settings are marked with “ ”. Press 5/a to select Parental Control, then press System ENTER or 3. Screen Saver You can set the screen saver to on/off. When set to on, this Player will switch to screen saver mode if there is no operation for 3 minutes. - Page 67 SETUP MENU Disc Auto Upgrade Angle Mark You can set Disc Auto Upgrade to on/off. When set to on, this You can set to display the Angle Mark ( ) when BD/ Player will upgrade the software after loading the disc which DVD with multiple angles is played back.
-
Page 68: Display Setting
SETUP MENU IP Setting On 4:3 TV Original You can set IP Setting to Auto/Manual. When set to Auto, image size 4:3 Pan Scan 4:3 Letterbox IP address is allocated automatically by system. When set to Manual, IP Address, Subnet Mask, Default Gateway and DNS should be set manually. -
Page 69: Video Process
SETUP MENU Downsampling Video Process You can select digital audio signal down-sample frequency. This function is effective for the audio signal Video Adjust output from the COAXIAL jack/OPTICAL terminal. You can adjust the visual image. Press 5/a to select the The highest sampling rate of digital PCM output is parameter, then press 2/3 to adjust the figure. -
Page 70: About The Audio Output Formats
SETUP MENU ■ About the audio output formats HDMI COAXIAL/OPTICAL Source format Bitstream Reencode Bitstream Reencode PCM 2ch PCM 2ch PCM 2ch PCM 5.1ch PCM 5.1ch PCM 2ch PCM 7.1ch PCM 7.1ch PCM 2ch Dolby Digital Dolby Digital Dolby Digital Dolby Digital PCM 5.1ch Dolby Digital... - Page 71 SETUP MENU When TV System is set to PAL Resolution Auto 480i/576i 480p/576p 720p 1080i 1080p HDMI – – – – – 1080p 24Hz Playback BD 1080p 24 Hz HDMI 576i 576p 720p 50 Hz 1080i 50 Hz 1080p 50 Hz others 1080p 50 Hz Playback...
-
Page 72: Software Upgrade
We recommend upgrading the software of this Player with software upgrade so that this Player is operated based on the latest software. To check for the availability of a software upgrade, visit http://download.yamaha.com/downloads/service/top/ ?site=europe.yamaha.com&language=en Hint – When Disc Auto Upgrade (p. 27) is set to on,... -
Page 73: Additional Information
Refer to the table below when this Player does not function properly. If the problem you are experiencing is not listed below or if the instruction below does not help, turn off this Player, disconnect the power cable, and contact the nearest authorized Yamaha dealer or service center. ■ Power... -
Page 74: Sound
TROUBLESHOOTING The playback screen will be disturbed if – This Player complies with analog copy protection. Some discs contain a copy DVD video is recorded to a VCR, or prohibiting signal. If you try to play back such discs through a VCR, or record to a VCR played back through a VCR. -
Page 75: Glossary
Error message Possible causes and solutions The Setting is prohibited, – BD-Live connection is prohibited. See “BD-Live Connection” (p. 28). please setup again. No valid upgrade file is – Check if the upgrade file is in the appropriate folder. found! Upgrade has failed for some –... -
Page 76: Specifications
SPECIFICATIONS Linear PCM Sound Subtitles Linear PCM is a signal recording format used for Audio These are the lines of text appearing at the bottom of the CDs and on some DVD and Blu-ray discs. The sound on screen which translate or transcribe the dialog. They are Audio CDs is recorded at 44.1 kHz with 16 bits. -
Page 77: Copyright
SPECIFICATIONS ■ Copyright – Audio-visual material may consist of copyrighted works which must not be recorded without the authority of the owner of the copyright. Refer to relevant laws in your country. – This product incorporates copyright protection technology that is protected by U.S. patents and other intellectual property rights. -
Page 78: (At The End Of This Manual) About Fonts
■ About fonts Fonts are (c) Bitstream (see below). DejaVu changes are in public domain. Glyphs imported from Arev fonts are (c) Tavmjong Bah (see below) Bitstream Vera Fonts Copyright ------------------------------ Copyright (c) 2003 by Bitstream, Inc. All Rights Reserved. Bitstream Vera is a trademark of Bitstream, Inc. - Page 79 ПРЕДОСТЕРЕЖЕНИЕ Использование органов управления или LASER RADIATION WHEN OPEN. CAUTION: произведение настроек или выполнение DO NOT STARE INTO BEAM. процедур, не указанных в данной инструкции, может отразиться на выделении опасной LASER RADIATION WHEN OPEN. DANGER: AVOID DIRECT EXPOSURE TO THE BEAM. радиации.
- Page 80 Printed in China BD-S667_F © 2010 Yamaha Corporation...