Table of Contents
Advertisement
Available languages
Available languages
Quick Links
Advertisement
Chapters
Table of Contents

Related Manuals for Kenmore Kenmore 580.72187


Summary of Contents for Kenmore Kenmore 580.72187
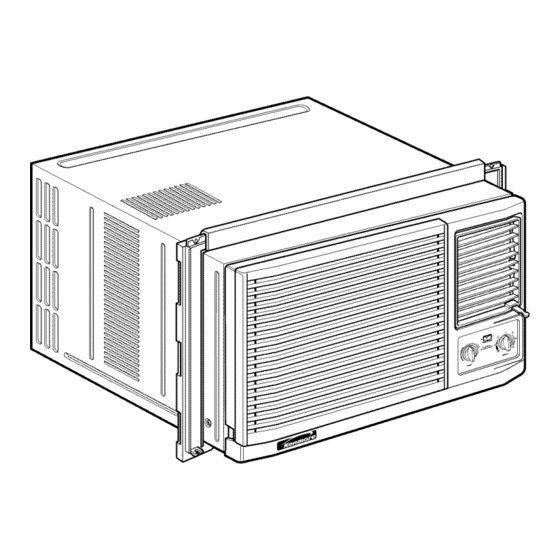
- Page 1 Owner's Manual Manual del Propietario ® HEAT / COOL AIR CONDITIONER EICALOR / REFRESCA ACONDICIONADOR DE AIRE DE VENTANA Model, Modelo 580.72187 Sears, Roebuck and Co., Hoffman Estates, IL 60179 U.S.A. www.sears.com...
-
Page 2: Table Of Contents
Sears will repair this air conditioner, free of charge, if defective in material This warranty applies only while this product is in use in the United States. -
Page 3: Safety
IMPORTANT SAFETY INSTRUCTIONS The safety instructions below will tell you how to use your room air conditioner to avoid harm to yourself damage to your ROOM AIR CONDITIONER. YOUR SAFETY Do not store or use gasoline or other flammable _void fire hazard or electric shock. - Page 4 OBSERVE ALL LOCALCODES AND ORDINANCES. DONOT,UNDER ANYCIRCUMSTANCES, REMOVE THEPOWER SUPPLY CORD GROUND PRONG. ELECTRICAL GROUND IS REQUIRED O N THISAPPLIANCE. A 250-volt 60 Hz,AConly,20Afusedand Electrical Shock Hazard properly g rounded electrical supply is required. Plug into a grounded 3 prong outlet. A time delay fuse or time delay circuit breaker Do not remove ground prong.
-
Page 5: Installation
INSTALLATION HARDWARE INSTALLATION REQUIREMENTS Your air conditioner will install into standard double hung windows with actual clear opening widths 29 to 41 inches (737mm to 1041mm) (FIG. Lower sash must open sufficiently to allow a clear vertical opening of 18 inches (457mm). -
Page 6: How To Install
INSTALLATION Insert the side curtain (ITEM A) into the upper guide and lower guide of the air conditioner. Fasten the curtains to the unit with screws (ITEM E). Pick a location which will allow you to blow the cold air into the area you want. - Page 7 Pull the bottom window sash down behind • Connect a drain elbow of 9/16" inside diameter upper guide until they meet. the drain pipe. • Connect a drain hose of 9/16" inside diameter to the NOTE: drain elbow. (Drain hose is not supplied.) •...
-
Page 8: Removal From Window
FRONT INSTALLATION Top of wood strip should be approximately 3/4" higher than the storm window frame to help install the front grille (packed separately) onto the condensation to drain properly to the outside. cabinet as follows: • Install a second wood strip (approximately 6"... -
Page 9: Operation
HOW AND WHY Your room air conditioner provides the following You may hear air functions to make hot weather living more movement from the comfortable: fan. • Cools and circulates room air. Unit Vibration Compressor • Lowers humidity by removing excess moisture. -
Page 10: Features
FEATURES USING THE AIR CONDITIONER reduce the risk of fire, electric shock, or injury to persons, read the important SAFETY instructions section before operating this appliance To begin operating the air conditioner after installation, follow these steps: 1. Plug in the air conditioner. (To prevent electrical hazards,... -
Page 11: Display
AIR CONDITIONER FEATURES The controls featured in this manual are representative of the many models available. Your model may look slightly different. Auto Swing Turn off Auto Swing COOL When 0perafi0rl Switch is off T%ONL ONLY HIGH HEAT COOL TEMP MODE TEMP Auto Swing... -
Page 12: Air Filter Cleaning
AIR FILTER CLEANING HOW TO REMOVE THE FRONT GRILLE The Air Filter will become dirty as it removes dust from the inside air. It should be washed at least • Open the inlet grille downward. every 2 weeks. If the Air Filter remains full of dust, the air flow will decrease and the cooling... -
Page 13: Maintenance
BEFORE CALLING FOR SERVICE Check the following list to be sure a service call is really necessary. A quick reference to this manual help you avoid an unneeded service call. THE AIR CONDITIONER WILL NOT OPERATE Check if... Then... Wal! plug disconnected. Push plug firmly into wall outlet. -
Page 14: Indice De Materias
EL SERVIClO DE GARANTiA ESTA A SU GARANTIA DE UN ANO POR EL DISPOSICION CON SOLO PONERSE EN EQUlPO DE A!RE ACONDIClONADO CONTACTO EL CENTRO DE SEARS AL DE HABITAClON 1-800-4-MY-HOME _ Durante un aSo completo a partir de la fecha de... -
Page 15: Importantes Instrucciones De Seguridad
IMPORTANTES INSTRUCCIONES DE SEGURIDAD Las siguientes instrucciones de seguridad le indicaran como usar su equipo de aire acondicionado habitacion para evitar daSos para usted mismo y para su EQUIPO DE AIRE ACONDICIONADO. ['Y.'_J_vt_;ll_[_[il POR SU SEGURIDAD No almacene ni use gasolina u otros vapores liquidos inflamables... - Page 16 RESPETE TODOS LOS CODIGOS Y REGLAMENTOS. BAJO NINGUNA CIRCUNSTANCIA CORTE, QUITE O EVITE EL USO DE LA CONEXION A TIERRA DE ESTA CLAVIJA. ESTE APARATO NECESITA SER CONECTADO A TIERRA. Se requiere una alimentacion electrica CA, adecuadamente conectada a tierra con un Peligro de choque electrico fusible de 20 A, de 60 Hz y de 250 V.
-
Page 17: Requerimientos Para Instalaci6N
INSTALACION PIEZAS DE MONTAJE REQUERIMIENTOS PARA INSTALAClON Su equipo de aire acondicionado se instalar& ventanas est&ndar de doble panel con anchos abertura libre de 737 mm a 1041 mm (29 a 41 pulgadas). (Figura El marco inferior debe abrirse Io suficiente para permitir una abertura... -
Page 18: Instalacion
INSTALACION Inserte los panetes de guia (iTEM A) en Ia guia superior y las guias de marco det equipo de aire acondicionado. Escoja un lugar que le permJta Ilevar el aire frio al area que Sujete las cortinas en la unidad con los tomillos (iTEM E) desea. - Page 19 _Tire del marco inferior de la ventana hacia abajo • Conecte un codo de tubo de 9/16" de pulgada de diametro detras de la guia superior hasta que se encuentre ia guia interno al tubo de drenaje, conecte seguidamente con el marco. manguera de drenaje de 9/16"...
-
Page 20: La Eliminaci6N De La Ventana
INSTALACION FRONTAL La parte superior del liston de madera debe ser aproximadamente 3/4" mas alto que el marco de la Instale la rejilla frontal con el gabinete de la contraventana o el list6n de madera (fuera de la casa) siguiente manera: para que el vapor emanado de Ia unidad pueda drenar •... -
Page 21: Sonidos Normales
COMO Y POR QUI En ocasiones, el uso de HIGH FAN para hacer circular el aire por la habitacion hace que el ambiente sea m&s Su equipo de aire acondicionado de habitacion confortable aun cuando el equipo no este enfriando brinda las siguientes funciones... -
Page 22: Uso Del Equipo De Aire Acondicionado--22
CARACTERiSTICAS USO DEL EQUIPO DE AIRE ACONDICIONADO _Para reducir el riesgo de incendio, descargas electrica o lesiones personales, lea las IMPORTANTES INSTRUCCIONES SEGURIDAD antes de operar este aparato. Para comenzar a utilizar el equipo de aire acondicionado, siga estos pasos: 1. -
Page 23: Despliegue
CARACTERiSTICAS DEL EQUIPO DE AIRE ACONDICIONADO Los controles que se explican en este manual son representativos de muchos modelos disponibles a la venta en el mercado. Su modelo puede tener un aspecto ligeramente diferente. ONLY ONLY Auto Swing T[_rn o ffAutoSwing COOL WhenOperation S witchis off HIGH... -
Page 24: Limpieza Del Filtro Del Aire
LIMPIEZA DEL FILTRO DEL AIRE COMO A REEMPLAZA GRILLE ANTERIOR El filtro del aire se ira ensuciando a medida que va atrapando el polvo proveniente del aire interior. Es • Saque el tomillo que mantiene la rejilla frontal en preciso lavar el filtro deI aire al menos cada dos posicion. -
Page 25: De Fallas
ANTES DE LLAMAR PARA SERVICIO Cheque la siguiente lista para asegurarse si en realidad es necesario Ilamar para servicio. Una referencia rapida a este manual puede evitar una Ilamada para servicio innecesaria. EL EQUIPO DE AIRE ACONDICIONADO NO FUNCIONA. El enchufeno estaconectadoen latomadecorrientede pared. Conecte elenchufe flrmemente enlatomade comente depared El fusibleesta quemadoo el interruptor d ecircuitoseha disparado. - Page 26 1 26 1...
-
Page 27: Master Protection Agreements
Sears has over 12,000 professional repair Sears cuenta con mas de 12.000 tecnicos profesionales specialists, who have access to over 4.5 million especialistas en reparaciones,... -
Page 28: Para Pedir Servlclo
® Registered Trademark / Trademark / Service Mark of Sears, Roebuck and Co ® Marca Registrada / Marca de Fabdca / ') Marca de Servicio de Sears, Roebuck and Co. ® Sears, Roebuckand Co. Marque de commerce Marque deposee...