Table of Contents
Advertisement
Quick Links
Advertisement
Table of Contents

Related Manuals for Sanyo SCP-6600


Summary of Contents for Sanyo SCP-6600
-
Page 1: User Guide
User Guide SCP-6600... -
Page 3: Table Of Contents
Table of Contents 1. The Basics ........2 Front View of Your Phone . - Page 4 Making a Call From Call History ......54 Saving a Phone Number From Call History ..... .54 Prepending a Phone Number From Call History .
- Page 5 12. Bluetooth ....... . .101 Using Bluetooth .........101 Turning Bluetooth On and Off .
- Page 7 SCP-6600 User Guide Note: Due to possible updates with the phone software, this printed guide may not include the most current instructions for your phone. For further information on Telecom Mobile services, please visit www.telecom.co.nz/mobile or call *123.
-
Page 8: The Basics
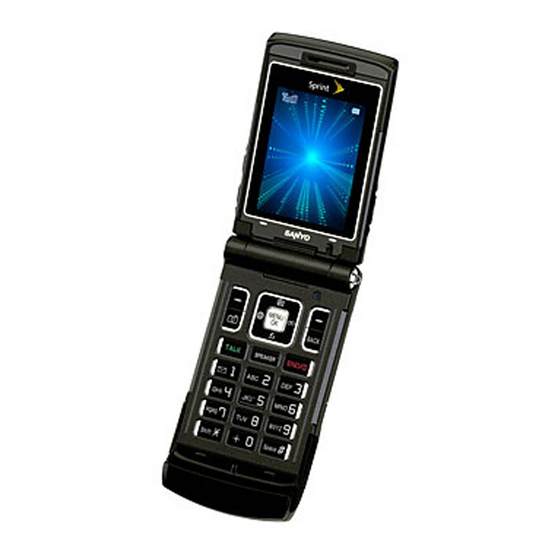
1. The Basics Front View of Your Phone 1. Earpiece 20. Battery Strength 2. Signal Strength Indicator Indicator 3. Main LCD (display) 4. Side Volume 19. Side Camera Key 5. Navigation Key 6. Softkey (left) 7. Camera Key 18. Softkey (right) 17. -
Page 9: Key Features
Key Features Earpiece lets you hear the caller and automated prompts. Signal Strength Indicator represents the signal strength by displaying bars. The more bars displayed, the better the signal strength. Main LCD (display) displays all the information needed to operate your phone, such as the call status, the Contacts list, the date and time, and the signal and battery strength, etc. - Page 10 with your phone. CAUTION! Inserting an incorrect accessory into the headset jack may damage the phone. Keypad lets you enter numbers, letters, and characters, and navigate within menus. Press and hold keys 2–9 for speed dialing. END/POWER Key lets you turn the phone on or off, end a call, or return to standby mode.
-
Page 11: Viewing The Display Screen
Viewing the Display Screen This list identifies the symbols you’ll see on your phone’s display screen: shows your current signal strength. The more lines you have, the stronger your signal. means your phone cannot find a signal. indicates the call is on hold. tells you a call is in progress. - Page 12 indicates the vibrate feature is set. indicates volume level 8 or 1 and vibrate feature are set. indicates 1-beep feature is set. indicates the voice call ringer setting is off. indicates all the sound settings are off. indicates the Location Service of your phone is enabled. indicates the Location Service of your phone is disabled.
-
Page 13: Turning Your Phone On And Off
Turning Your Phone On and Off Turning Your Phone On To turn your phone on: Press Once your phone is on, it displays “Looking for service...” which indicates that your phone is searching for a signal. When your phone finds a signal, it automatically enters standby mode – the phone’s idle state. -
Page 14: Using The Battery
Using the Battery Installing the Battery To install the LiIon battery: Insert the battery into the opening on the back of the phone at a 45-degree angle, making sure to line up the gold contacts. Gently press down until the battery snaps into place. Install the protective cover by lining up the tabs at a 45-degree angle, and gently press down until the cover snaps into place. - Page 15 Charging the Battery Your phone’s LiIon battery is rechargeable and should be charged as soon as possible so you can begin using your phone. Keeping track of your battery’s charge is important. If your battery level becomes too low, your phone automatically turns off and you will lose all the information you were just working on.
-
Page 16: Navigating Through Phone Menus
Navigating Through Phone Menus The navigation key on your phone allows you to scroll through menus quickly and easily. To navigate through a menu, simply press the navigation key up or down. You can change your phone’s main menu style (see “Changing the Phone’s Menu Style”... -
Page 17: Making And Answering Calls
Making and Answering Calls Holding Your Phone To maximise performance, do not obstruct the bottom portion of your phone where the internal antenna is located while using the phone. Correct Incorrect Internal Antenna Making Calls To place a call using your keypad: Make sure your phone is on. -
Page 18: Dialing Options
Dialing Options Dialing options are displayed when you press Options (right softkey) after entering numbers in the phone’s standby mode. Abbrev. Dial to use Ph.Book Match or Prepend feature. (See “Using Abbreviated Dialing” on page 21 and “Setting Abbreviated Dialing” on page 41.) Call to dial the phone number. - Page 19 be answered in speakerphone mode.) – or – Open the phone to use the earpiece. Note: If the setting for Open Flip is set to , opening the phone will not No Action answer the call. (See “Setting the Open/Close Flip Option” on page 39.) Your phone notifies you of incoming calls in the following ways: The phone rings and/or vibrates.
-
Page 20: Ending A Call
To resume the call: Press Answer (left softkey) or – or – Press Options (right softkey) > Answer or Answer:Speaker. (The options will appear as Answer or Select Audio when connected to an optional hands-free device.) Ending a Call To disconnect a call when you are finished: Close the phone or press Note: If the setting for Close Flip is not set to... -
Page 21: Changing The Ringer Volume
Changing the Ringer Volume To change the ringer volume, press the Side Volume key when the phone is open and in standby mode. Note: To change the ringer volume from the main menu, see “Adjusting the Phone’s Volume Settings” on page 28. Adjusting Volume During a Conversation When you need to adjust the receiver volume during a conversation, use the Side Volume key, or press the navigation key up or down... -
Page 22: Calling Emergency Numbers
Calling Emergency Numbers You can place calls to 111 (dial and press even if your phone is locked or your account is restricted. Once you dial the numbers, your phone will enter Emergency mode. Press Options (right softkey) to display the options. Speaker On to activate speakerphone mode. -
Page 23: Transfer Audio
In-Call Options During a call, your phone displays menu options when you press Options (right softkey). Flash or Flash: Speaker to answer an incoming Call Waiting call. Mute or Unmute to mute or reactivate your phone’s microphone. Transfer Audio to switch the call to your desired device (if applicable). -
Page 24: Saving A Phone Number
End-of-Call Options To display the following options, press Options (right softkey) within 10 seconds after disconnecting a call. Call Again to dial the phone number. Call:Speaker On to dial the phone number in speakerphone mode. Save Phone# to save the phone number in your Contacts list. (See “Saving a Phone Number”... -
Page 25: Finding A Phone Number
Finding a Phone Number You can search Contacts list entries for phone numbers that contain a specific string of numbers. To find a phone number: Enter the last four or more digits of the number and press Options (right softkey). (The more numbers you enter, the more specific the search becomes.) Select Find. -
Page 26: Making International Calls With Plus Code Dialing
Making International Calls With Plus Code Dialing Your phone’s Plus Code Dialing feature can automatically dial the international access code when you are traveling outside of New Zealand. (Not available in some areas.) To make a call using Plus Code Dialing: From standby mode, press and hold until a “+”... -
Page 27: Using Speed Dialing
Using Speed Dialing With this feature, you can dial your favourite entries using one key press for locations 2-9. (See “Assigning Speed Dial Numbers” on page 60.) To use speed dial for voice calls: From standby mode, press and hold the appropriate key for approximately two seconds. - Page 28 To place a call using Prepend Abbreviated Dialing: Enter the last three to ten digits of your desired number. Press Note: When Prepend is set to Enable and Ph.Book Match is set to Disable, you can dial the 9-to-15-digit number (including the predefined prepend number) by entering the last three to ten digits of the number.
-
Page 29: Entering Text
Entering Text Selecting a Character Input Mode Your phone provides convenient ways to enter words, letters, punctuation, and numbers whenever you are prompted to enter text (for example, when adding a Contacts entry or when sending email messages). To change the character input mode: When you display a screen where you can enter text, press Mode (right softkey). -
Page 30: Entering Characters Using T9 Text Input
Entering Characters Using T9 Text Input T9 Text Input lets you enter text in your phone by pressing keys just once per letter. (To select the T9 Word mode when entering text, see “Selecting a Character Input Mode” on page 23.) T9 Text Input analyses the letters you enter using an intuitive word database and creates a suitable word. -
Page 31: Setting The Default Input Mode
Customising the T9 Settings To customise the T9 Settings: > Settings > Others > Text Entry > T9 Settings. Select Select your desired option and press Predict. Text Mode to allow T9 text input to recognise words you have added to the T9 database. Word Choice List to display the word choice list. -
Page 32: Entering Characters Using Alphabet Mode
Entering Characters Using Alphabet Mode To enter characters using alphabet mode, select the Alphabet mode (see “Selecting a Character Input Mode” on page 23). Press the corresponding key repeatedly until the desired character appears. By default, the first letter of an entry is capitalised and the following letters are lowercased. -
Page 33: Your Phone's Settings
2. Your Phone’s Settings Sound Settings Ringer Types Selecting Ringer Types for Voice Calls To select a ringer type for voice calls: > Settings > Sounds > Ringer Type > Voice Calls. Select Select With Caller ID or No Caller ID. Scroll to your desired ringer type. -
Page 34: Using Voice Prompt
Setting a Start-up/Power-off Tone To set a Start-up/Power-off tone: > Settings > Sounds > Others. Select Select Start-up Tone or Power-off Tone. Scroll to your desired tone and press Using Voice Prompt This feature allows you to hear voice prompts when using Voice Memo, etc. -
Page 35: Alert Notification
Tip: You can adjust the ringer volume in standby mode (or the earpiece volume during a call) by using the Side Volume key. To adjust the application volume: This setting is available to adjust the volume for downloaded data and the browser. -
Page 36: Display Settings
Silence All To activate Silence All: With the flip open, press the Side Volume key down repeatedly in standby mode. (The screen will display “Silence All”.) Note: You can also activate Silence All using the main menu: 1. Select > >... -
Page 37: Changing The Display Screen Animation
Changing the Display Screen Animation To change the animation display: > Settings > Display > Animation. Select Select Standby, Outgoing Calls, or Service Search. (Select Set if you have selected Standby.) Select your desired option (Preset, My Content, Get New, or Off) and press For standby, you can select Time to set the animation starting time. -
Page 38: Changing The Screen Saver
Changing the Screen Saver To change the screen saver: > Settings > Display > Screen Saver. Select Select Main LCD or Sub LCD. Select your desired option (Preset, My Content, Get New, In Camera, Saved to Phone, or Off) and press Select your desired screen saver and press OK (left softkey). -
Page 39: Location Settings
Sleep Mode This feature helps conserve your battery power by disabling the display after a specified amount of time. To set sleep mode: > Settings > Display > Others > Sleep Mode. Select Select Main LCD or Sub LCD. Select your desired option. (Select Off to deactivate this feature.) Power Save Mode This feature helps conserve your battery power by setting the Main LCD, Sub LCD, and key pad backlights to “Always Off,”... -
Page 40: Messaging Settings
Messaging Settings Your phone’s messaging settings allow you to create and edit preset messages, signatures, notifications, and so on, making messaging faster and easier than ever to use. Setting the Message Notification Display When you receive a text message, your phone notifies you by displaying an icon on your display screen. -
Page 41: Setting A Callback Number
Setting a Callback Number With this feature, you can notify your recipients of your callback number using a text message. To set the callback number: > Settings > Messaging > Send Callback#. Select Press , and then select an option from the following and press None to send no callback number. -
Page 42: Setting Drafts Alert
Setting Drafts Alert Drafts Alert gives you a reminder when you have unsent messages waiting in the drafts folder. To set Drafts Alert: > Settings > Messaging > Drafts Alert. Select Select On. 2. Your Phone’s Settings... -
Page 43: Airplane Mode
Airplane Mode Airplane Mode allows you to use many of your phone’s features, such as Games and Voice Memos, when you are in an airplane or in any other area where making or receiving calls or data is prohibited. When your phone is in Airplane Mode, it cannot send or receive any calls or access online information. -
Page 44: Phone Setup Options
Phone Setup Options My Favourites Your phone offers you the option of assigning a shortcut key to a favourite or often-used function. To assign your shortcut key: Press Favourites (left softkey) to display the My Favourites list. Highlight <AddFavourite> and press Select one of the following options. -
Page 45: Auto Answer Mode
Auto Answer Mode To set Auto Answer mode: > Settings > Others > Auto Answer. Select Select Hands-free or Speakerphone. Select either 5 Seconds, 15 Seconds, or Off. Setting the Current Time To set the current time when you are in an area with no digital network: >... -
Page 46: Setting Any Key Answer
Setting Any Key Answer This feature allows you to answer incoming calls by pressing any key (except , softkeys and side keys). To turn Any Key Answer on or off: > Settings > Others > Any Key Answer. Select Select On or Off. Changing the Phone’s Menu Style Your phone allows you to choose how the main menu appears on your display screen. -
Page 47: Setting Text Entry Options
Setting Text Entry Options To set your text entry options: > Settings > Others > Text Entry. Select Select your desired option and press Auto-Capital to turn auto-capitalisation on or off. My Words to set your original words (see page 24). Default Input to set the input mode menu items from T9 Word, Alphabet or Retain Mode (see page 25). -
Page 48: Headset Mode
Headset Mode This feature allows you hands-free phone use. Press the Turbo Button (the operation button) on the headset to activate useful functions. To connect the headset: Simply plug the headset into your phone’s headset jack. To set headset mode: >... -
Page 49: Security
3. Security Accessing the Security Menu All of your phone’s security settings are available through the Security menu. You must enter your lock code to view the Security menu. To access the Security menu: > Settings > Security. Select Enter your lock code. (The Security menu is displayed.) Tip: If you can’t recall your lock code, try using either the last four digits of your phone number or 0000. -
Page 50: Lock Services
Lock Services With this feature, you can choose to restrict access to Internet services, and incoming and outgoing voice calls. To activate lock services: From the Security menu, select Others > Lock Services. Select Voice Calls or Internet. Select Locked. (Select Unlocked to deactivate this feature.) Changing the Lock Code To change your lock code: From the Security menu, select Others >... -
Page 51: Restricting Calls
Restricting Calls To restrict calls: From the Security menu, select Others > Limit Use. Select Outgoing Calls or Incoming Calls. Select your desired option and press Allow All lets you make or receive all calls. Phone Book Only lets you make or receive calls to or from Contacts entries, voicemail, or special numbers only. -
Page 52: Erasing The Phone Content
Erasing the Phone Content You can quickly and easily erase all the content that you have created. To erase phone content: From the Security menu, select Erase/Reset, select the item from the following, and press Erase Ph. Book to erase all of your Contacts entries. Erase My Content to erase all items you have downloaded to your phone. -
Page 53: Resetting Your Picture Message Account
Resetting Your Picture Message Account This option resets your authentication ID for your Picture Message account. To reset your Picture Message account: From the Security menu, select Picture Msg > Reset Picture Msg. (A warning appears.) Press OK (left softkey) to continue. If you are certain you would like to reset your Picture Message account, select Yes. -
Page 54: Lost Or Stolen Phones
Lost or Stolen Phones To report your phone missing, call Telecom Customer Services on 0800 651 000. They will be able to put a bar on your phone to disable it from being used. You will be asked to load a password that will need to be repeated if you find or recover your phone. -
Page 55: Roaming
4. Roaming Understanding Roaming Recognising the Roaming Icon on the Display Screen Your phone’s display screen always lets you know when you’re off the home network. The following chart indicates what you’ll see depending on where you’re using your phone. Indicator Home Digital Roaming... -
Page 56: Menu Navigation
5. Menu Navigation Viewing the Menus Menu Diagram The following list outlines your phone’s menu structure. 1. Missed Alerts 2. Call History 1. Outgoing 2. Incoming 3. Missed 4. Recent Calls 5. Erase History 3. Contacts 1. Find/Add Entry 2. Group 3. - Page 57 8. Tools 1. Voice Services 1. Voice Memo 2. Screen Call 2. Bluetooth 3. Calendar 4. Alarm Clock 5. Countdown 6. Stop Watch 7. World Clock 8. Calculator 9. Settings 1. Sounds 1. Ringer/Key Vol. 2. Ringer Type 3. Vibrate Pattern 4.
- Page 58 4. Signature 5. Drafts Alert 7. Security 1. Lock Phone 2. Picture Msg 3. Erase/Reset 4. Others 8. Others 1. Airplane Mode 2. Text Entry 3. Any Key Answer 4. Auto Answer 5. Open/Close Flip 6. Abbrev. Dial 7. Headset Mode 8.
-
Page 59: Managing Call History
6. Managing Call History Viewing History You’ll find the Call History feature very helpful. They are lists of the last 20 voice calls that you placed, accepted, or missed. Call History makes redialing a number fast and easy. It is continually updated as new numbers are added to the beginning of the list and the oldest entries are removed from the bottom of the list. -
Page 60: Making A Call From Call History
Making a Call From Call History To place a call from Call History: > Call History, and then select Outgoing, Incoming, Select Missed, or Recent Calls. Use your navigation key to select a Call History entry and press - or - Press Options (right softkey) >... -
Page 61: Prepending A Phone Number From Call History
Prepending a Phone Number From Call History If you need to place a call from Call History and you happen to be outside your local area code, you can add the appropriate prefix by prepending the number. To prepend a phone number from Call History: Scroll to a call history entry and press Options (right softkey). -
Page 62: Contacts Directory
7. Contacts Directory Adding a New Contacts Entry To add a new entry: > Contacts > Find/Add Entry > <Add Contact>. Select - or - From standby mode, press Contacts (right softkey) and press Enter a name for the entry and press the navigation key down. Enter the phone number and press Select a label for the entry and press Press Save (left softkey). -
Page 63: Finding Contacts Entries
Finding Contacts Entries Finding Names To find Contacts entries by name: > Contacts > Find/Add Entry. Select – or – From standby mode, press Contacts (right softkey). Scroll to the desired entry using your navigation key. – or – Enter the first letter of the name. (The display shows the entries beginning with the letter entered.) To display the entry’s details, select your desired entry and press... -
Page 64: Contacts List Options
Contacts List Options To access Contacts list options, display the list, highlight an entry, and press Options (right softkey). Options available may include: Select Group to choose a group entry. Set Secret to make an entry secret. Erase Contact to erase a contact. Add Contact to add a new contact. -
Page 65: Adding A Phone Number To A Contacts Entry
Adding a Phone Number to a Contacts Entry To add a phone number to an entry: From standby mode, press Contacts (right softkey). Scroll to the entry you wish to add and press Select a phone number and press Options (right softkey) > Edit. Select the box next to the icon and press Enter the number and press... -
Page 66: Assigning Speed Dial Numbers
Assigning Speed Dial Numbers To assign Speed Dial: > Contacts > Speed Dial #s. Select Select an available speed dial field from the list and press Select an entry from the list and press Select the phone number you want to set as a speed dial number and press to save the setting. -
Page 67: Selecting A Ringer Type For An Entry
Selecting a Ringer Type for an Entry You can assign a ringer type to a Contacts entry so you can identify the caller by the ringer type. (See “Ringer Types”on page 27.) To select a ringer type for an entry: From standby mode, press Contacts (right softkey). -
Page 68: Dialing Services
Dialing Services Your Contacts list is preprogrammed with contact numbers for various dialing services. To dial a service: > Contacts > Services. Select Select Customer Service, Dir Assistance, or Account Info. Press – or – Press Options (right softkey) > Call or Call:Speaker On. 7. -
Page 69: Personal Organiser
8. Personal Organiser Using Your Phone’s Calendar Displaying Your Calendar To display your calendar: > Tools > Calendar. Select Tip: The current day is framed by a rectangle. Note: In a no-service area, it’s necessary to set the actual time and date to use the Calendar function. -
Page 70: Event Alerts
Press Save (left softkey) to schedule the event. Tip: The date you have scheduled events for is indicated with a triangle. Tip: Press the navigation key up or down to scroll by week through the Calendar and the Side Volume key to scroll by month. Event Alerts There are several ways your phone alerts you of scheduled events: By playing the alert tone (depending on the ringer type and ringer... -
Page 71: Editing An Event
Editing an Event To edit an event or call alarm: > Tools > Calendar and select the date for which you Select set events and press Select one of the events and press . (The event details appear.) Select the information you want to edit and press Enter or select a new setting and press Press Save (left softkey). -
Page 72: Using The Call Alarm Feature
Using the Call Alarm Feature Adding a Call Alarm to the Calendar You can set call alarms to notify you when you need to place a call. The call alarm will let you know when and to whom to place a scheduled call. -
Page 73: Using The To Do List
Using the To Do List Adding To Do List Items Your phone can store and manage up to 20 To Do List items. To add an item to your To Do List: > Tools > Calendar > Options (right softkey). Select Select To Do List >... -
Page 74: Adding A To Do List Item To The Calendar
Adding a To Do List Item to the Calendar To add your To Do List item to the Calendar: From the To Do List display (see page 67), select the item you want to add to the schedule and press Options (right softkey). Select Add To Schedule. -
Page 75: Using Your Phone's Alarm Clock
Using Your Phone’s Alarm Clock To use the alarm clock: > Tools > Alarm Clock. Select Note: A caution notification may appear. If you don’t want this caution to be displayed ever again, press before pressing (left softkey). Continue Select a number, press , and then enter the following items. -
Page 76: Using Your Phone's Tools
Using Your Phone’s Tools Using the Countdown Timer To use the countdown timer: > Tools > Countdown. Select Select a number and the following items. Description to enter a description of the countdown (up to 14 characters). Time to enter the countdown time. Alarm to set the countdown alarm on or off. -
Page 77: Using The World Clock
To display the stop watch options: During stop watch operation, press Options (right softkey). Go to Lap List to display a saved Lap List. Press Detail (left softkey) to display the lap list detail or press Options (right softkey) for further options. Edit Title to edit the current Lap List’s title. -
Page 78: Personal Information Management
Personal Information Management Viewing Memory in Your Calendar To view available memory space and options: > Tools > Calendar > Options (right softkey). Select Select View Memory > Schedule, Call Alarm, or To Do List. (The available memory space and further options are displayed.) Displaying Your Phone’s Information To display your phone’s information: >... -
Page 79: Downloading Through The Web Wirelessly
Downloading Through the Web Wirelessly Your phone allows you to download images (screen savers), ringers, games, etc., from a Web site. To download a file from the My Content menu: > My Content > Options (right softkey). Select Select Get New. (The browser will launch and display the Downloads main screen.) Select your desired file and follow the system prompts. -
Page 80: Downloaded Data Options
Downloaded Data Options Selecting Download Settings This feature is available when you select a Java application. To select the settings for the downloaded data: > My Content. Select Select Games or Applications. Select the data for which you want to select settings and press Options (right softkey). -
Page 81: Erasing The Downloaded Data
Assigning the Downloaded Data To assign the downloaded data: > My Content. Select Select Ringers or Screen Savers. Select the data you want to assign and press Options (right softkey). Select Set as. Select the menu you want to assign and press Erasing the Downloaded Data To erase the downloaded data: >... -
Page 82: Voice Services
9. Voice Services Using Voice-Activated Dialing With a voice tag that you record, your phone will automatically dial a phone number. Your phone can store up to 30 voice tags. (To create a voice tag, see “Programming Voice Tags” below.) Programming Voice Tags To program a voice tag: From standby mode, press Contacts (right softkey). -
Page 83: Voice Tag Options
Voice Tag Options To display voice tag options: From standby mode, press Contacts (right softkey). Select a contact and press Press Options (right softkey) > Set Voice Tag. Select an option from the following. Play to play the recorded voice tag. Play:Speaker to play the recorded voice tag in speakerphone mode. -
Page 84: Using The Voice Memos
Using the Voice Memos You can use your phone’s Voice Services to record brief memos to remind you of important events, phone numbers, or grocery list items. Displaying the Voice Memo Menu To display the voice memo menu: > Tools > Voice Services > Voice Memo. Select Recording Voice Memos To record a voice memo:... -
Page 85: Reviewing Voice Memos
Reviewing Voice Memos To play the voice memos: > Tools > Voice Services > Voice Memo > Play or Select Play:Speaker. Select a memo from the list and press – or – Select All to play all memos continuously. Press to stop playing. -
Page 86: Setting Up Screen Call
Setting Up Screen Call This feature enables you to screen incoming calls by using a recorded announcement, either one that is pre-recorded or one that you record. You can also record the caller’s message into the Voice Memo list. Activating Screen Call To start Screen Call when you have incoming calls: When the phone rings or vibrates, press Options (right softkey) >... - Page 87 RecordingYour Name for a Pre-Recorded Announcement You can use a pre-recorded announcement with or without your name. If you record your name, your phone uses your name to announce that you are not available to answer the call. To record your name: >...
-
Page 88: Reviewing An Announcement
Reviewing an Announcement To review an announcement: > Tools > Voice Services > Screen Call > Announcement. Select Select Pre-Recorded or Custom and press Edit (right softkey). Select Play or Play:Speaker. Erasing an Announcement To erase an announcement: > Tools > Voice Services > Screen Call > Announcement. Select Select Pre-Recorded or Custom and press Edit (right softkey). -
Page 89: Messaging
10. Messaging Understanding Messaging Message Storage Your phone can store up to 200 received and 180 sent messages. When the message memory is full, the oldest unlocked message will be deleted automatically. Displaying Messages To view a new message: When you receive a text/picture message, it will automatically appear on your phone’s main display screen. -
Page 90: Composing And Sending A Text Message
To display a text message from the main menu: > Messaging. Select Select Text > Inbox, Sent Mail, Pending, Drafts, or your defined folder. Select the message you want to see and press . (To display the message options, press Options [right softkey].) Tip: Press the navigation key right to read the next message from the message detail display;... -
Page 91: Editing Preset Messages
Compose a message or use the preset messages or smileys (icons) and press when you are finished. To type a message, use your keypad. Press Mode (right softkey) to select a character input mode. (See “Entering Text” on page 23.) Scroll down to select the message priority (Ordinary or Urgent), set the callback number, and/or set the signature. -
Page 92: Message Folders
Message Folders Incoming text messages are stored in folders in your phone’s Messaging menu. You may add up to 10 folders or use the phone’s default folder. To add a new folder: > Messaging > Text > Options (right softkey) > Select Create Folder. -
Page 93: Erasing Messages
Erasing Messages To erase an individual message: From the folder list display, select Inbox, Sent Mail, Pending, Drafts, or your defined folder and press Select the message you want to erase and press Options (right softkey) > Erase > This Message. Tip: To erase all messages in the specified folder, select after... -
Page 94: Built-In Camera
11. Built-in Camera Taking Pictures Taking pictures with your phone’s built-in camera is as simple as choosing a subject, pointing the lens, and pressing a button. You can activate camera mode and take pictures whether the phone is open or closed. To take a picture with the flip open: >... -
Page 95: Camera Mode Options
To take a picture with the phone closed: Press and hold the side camera key to activate camera mode. Point the camera lens at your subject. (You can check the picture framing through the external display screen.) Note: When taking a picture with the phone closed, the subject image appears in reverse on the external display. -
Page 96: Setting The Self-Timer
Setting the Self-Timer To activate the Self-Timer: From camera mode, select Options (right softkey) > Self-Timer. Select the length of delay you want the timer to use (10 Seconds or 5 Seconds) and press To deactivate the self-timer, select Off. Press Start (left softkey) when you are ready to start the timer. -
Page 97: Selecting Camera Settings
Using the Zoom This feature allows you to zoom in on an object when you take a picture. Depending on your resolution settings, you can adjust the zoom from 1x to 8x for medium resolution, and 1x to 20x for low resolution (not available for high resolution). -
Page 98: Using The Settings & Info Menu
Viewing Pictures Using Slideshow To view pictures using slideshow: > Pictures > My Pictures > In Camera. Select Select Options (right softkey) > Slideshow. Using the Settings & Info Menu The “Settings & Info” menu allows you to set Auto Delete or to view your account information. - Page 99 Camera Icon Indication Function Icons Details Beach/Snow Use this setting in bright light. Scenery Use this setting for scenery from a distance. Picture Mode Night/Dark Use this setting in low light. Soft Focus Use this setting to “soften” the picture. Sunny Use this setting for sunny weather.
-
Page 100: Storing Pictures
Storing Pictures Your phone’s picture storage area is called My Pictures. There are two types of folders in My Pictures that can be used separately according to your needs: In Camera (see below) Saved to Phone (see page 95) In Camera Folder Once a picture is taken, it is automatically saved to the In Camera folder. -
Page 101: Saved To Phone Folder
Details/Edit to display the following options: Special Effects to apply special effects on your pictures. You can select from Color Tone, Fun Stamps, or Rotate. Text Caption to edit the selected picture’s caption. Picture Info to display information such as the picture’s caption, time/date, and size. -
Page 102: Sending A Picture Message
Sending a Picture Message Once you’ve taken a picture, you can use the messaging capabilities of your phone to instantly send it to family and friends. You can send pictures to up to 16 people at a time using their email addresses or their phone numbers. - Page 103 Sending a Picture Message from Messaging You can also send your pictures from your phone’s Messaging menu. To send a Picture Message from the Messaging menu: > Messaging > Send Message > Picture > Select From My Pictures or Online Albums. Use the navigation key to select the picture you wish to send and press .
-
Page 104: Managing Photos
Managing Photos Each time you send photos from your phone, copies are automatically uploaded into your Online Gallery if you have signed up for Photo Messaging service. You can manage the photos saved in your Online Gallery. You can also manage your photos from your phone. -
Page 105: Downloading Your Online Pictures
Downloading Your Online Pictures From the Xtra Online Gallery you can download the selected picture(s) to your phone. To download pictures: From the online pictures display, select the picture(s) you wish to download and press Options (right softkey). (See “Managing Your Photos From Your Phone”... - Page 106 Create Album to create a new album (from Uploads folder only). Online Albums to switch the display to the online album list. Note: The online picture options may vary depending on the item you select. To access your Online Albums options from your phone: Display the album list in the Online Albums menu.
-
Page 107: Bluetooth
12. Bluetooth Using Bluetooth Bluetooth is a short-range communications technology that allows you to connect wirelessly to a number of Bluetooth devices, such as headsets, hands-free car kits, and Bluetooth enabled handhelds, PCs, and wireless phones. The Bluetooth communication range is usually up to approximately 10 meters (30 feet). -
Page 108: Using The Bluetooth Settings Menu
Using the Bluetooth Settings Menu The Bluetooth Settings menu allows you to set up many of the characteristics of your phone’s Bluetooth service, including: Entering or changing the name your phone uses for Bluetooth communication Setting your phone’s visibility (or “discoverability”) for other Bluetooth devices Displaying your phone’s Bluetooth device address To access the Bluetooth Settings menu:... -
Page 109: Bluetooth Settings: Visibility
Bluetooth Settings: My Bluetooth Information To display your phone’s Bluetooth Information: > Settings > Bluetooth > My Device Info. Press Bluetooth Settings: Visibility The Visibility section of the Bluetooth Settings menu allows you to manage your phone’s availability to other Bluetooth devices. To configure your phone’s visibility (discoverability) to other Bluetooth devices: >... - Page 110 Bluetooth Settings: Voice Priority The Voice Priority section of the Bluetooth Settings menu allows you to choose the default device you want to use for incoming and outgoing calls. To set the voice priority: > Settings > Bluetooth > Voice Priority. Press Select Phone or Hands-free.
-
Page 111: Bluetooth Profiles
Bluetooth Profiles All the Bluetooth settings you configure are stored in your phone’s Bluetooth user profile. Different profiles can be used for specific Bluetooth functions. Headset Profile – This profile functions as a wireless ear jack. When an incoming call is received, the ringer can be heard through the headset. -
Page 112: Pairing Bluetooth Devices
Pairing Bluetooth Devices Paired Devices The Bluetooth pairing process allows you to establish trusted connections between your phone and another Bluetooth device. When devices are paired, a passcode (PIN Code) is shared between devices, allowing for fast, secure connections while bypassing the discovery and authentication process. -
Page 113: Using The Trusted Devices Options
Using the Trusted Devices Options Once you have created paired devices, several options are available from the trusted devices list. To use the trusted devices options: From the trusted devices list, select a device. Press Options (right softkey) to display the following options: Connect or Disconnect to connect to or disconnect from the Bluetooth device. -
Page 114: Sending Data Via Bluetooth
Sending Data via Bluetooth You can send Business Card or Contacts data saved on your phone using Bluetooth technology. Sending an Item To send an item: > Tools > Bluetooth. Select Select the device from the trusted devices list > Options (right softkey) >... -
Page 115: Service Features
13. Service Features Using Voicemail Setting Up Your Voicemail All unanswered calls to your phone are automatically transferred to your voicemail, even if your phone is in use or turned off. Voicemail Notification There are several ways your phone alerts you to a new message: By displaying a message on the screen. -
Page 116: Clearing The Voicemail Message Icon
Clearing the Voicemail Message Icon Your phone may temporarily continue to display the message icon after you have checked your voice messages. To clear the icon from the display screen: > Messaging > Voicemail > Clear Count. Select Select Yes. Note: icon will appear when a new voicemail is received even after you have performed the procedures above. -
Page 117: Responding To Call Waiting
Responding to Call Waiting When you’re on a call, Call Waiting alerts you of incoming calls by sounding beeps. Your phone’s screen informs you that another call is coming in and displays the caller’s phone number. (if available) To respond to an incoming call while you’re on a call: (or select Options >... -
Page 118: Making A Three-Way Call
Making a Three-Way Call With Three-Way Calling, you can talk to two people at the same time. When using this feature, the normal airtime rates will be charged for each of the two calls. To make a Three-Way Call: Enter a number you wish to call and press Once you have established the connection, press (or press Options [right softkey] >... -
Page 119: Web
Launching the Web To launch a Web connection: Press to access the main menu. Select Web and press . (Your Web connection will launch and a Web page will display.) Net Guard When the Net Guard is enabled, a message will appear to confirm that you want to connect to the Web. - Page 120 Accessing a Bookmark To access a bookmark: Launch the Web and press (right softkey) to access the browser menu. Select View Bookmarks and press OK (left softkey). Select the bookmark you’d like to access and press OK (left softkey) to go to the Website. Editing a Bookmark To edit a bookmark: Connect to the Web and press...
- Page 121 Going to a Specific Website To go to a particular Website by entering a URL (Website address): Launch the Web and press (right softkey) to display the browser menu. Select Go to URL... and press OK (left softkey). Select Address and press OK (left softkey). Use your keypad to enter the URL of the Website you wish to go to and press OK (left softkey).
-
Page 122: Email
Sending a Web Page This feature allows you to send a URL (Web site address) you’re viewing through text messaging. To send a Web page: From an active Web connection, press (right softkey) to display the browser menu. Select Send Page > OK (left softkey). To complete and send a Web page, follow steps in “Composing and Sending a Text Message”on page 84. -
Page 123: Safety Guidelines And Warranty Information
14. Safety Guidelines and Warranty Information Safety Maintaining Your Phone’s Peak Performance Avoid exposing your phone and accessories to rain or liquid spills. If your phone does get wet, immediately turn the power off and remove the battery. To maximise performance, do not touch the bottom portion of your phone where the internal antenna is located while using the phone. -
Page 124: Using Your Phone Near Other Electronic Devices
Using Your Phone Near Other Electronic Devices Most modern electronic equipment is shielded from radiofrequency (RF) signals. However, RF signals from wireless phones may affect inadequately shielded electronic equipment. RF signals may affect improperly installed or inadequately shielded electronic operating systems and/or entertainment systems in motor vehicles. -
Page 125: Turning Off Your Phone In Dangerous Areas
Turning Off Your Phone in Dangerous Areas To avoid interfering with blasting operations, turn your phone off when in a blasting area or in other areas with signs indicating two- way radios should be turned off. Construction crews often use remote-control RF devices to set off explosives. -
Page 126: Protecting Your Battery
Protecting Your Battery The guidelines listed below help you get the most out of your battery’s performance. Use only approved batteries, AC adapters, and chargers. These chargers are designed to maximise battery life. Using other batteries or chargers voids your warranty and may cause damage. - Page 127 Cautions Any changes or modifications to your phone not expressly approved in this document could void your warranty for this equipment and void your authority to operate this equipment. Only use approved batteries, antennas and chargers. The use of any unauthorised accessories may be dangerous and void the phone warranty if the said accessories cause damage or a defect to the phone.
-
Page 128: Warranty
Product from the dealer. 2. If SANYO repairs or replaces the Product, the repaired or replaced Product shall be warranted for the remaining time of the original warranty period or for ninety (90) days from the date of repair, whichever is longer. - Page 129 THE IMPLIED WARRANTIES OF MERCHANTABILITY OR FITNESS FOR A PARTICULAR PURPOSE, ARE LIMITED TO THE DURATION OF THIS LIMITED WARRANTY. IN NO EVENT SHALL SANYO OR ITS LICENSORS BE LIABLE FOR INCIDENTAL OR CONSEQUENTIAL DAMAGES OF ANY NATURE WHATSOEVER, INCLUDING BUT NOT LIMITED TO LOST PROFITS OR COMMERCIAL LOSS, TO THE FULL EXTENT THOSE DAMAGES CAN BE DISCLAIMED BY LAW.
- Page 130 Copyright(c) 2006 ACCESS Systems America Inc. ACCESS, NetFront are registered trademarks or trademarks owned by ACCESS Co., Ltd. in Japan and selected countries worldwide. NetFront is a registered trademark of NetFront Communications, Inc.in the United States and is used under a license. Portions of this software are based in part on the work of the Independent JPEG Group.
-
Page 131: Index
Index Dialing 20 Editing 59 Erasing 59 Finding 57 Abbreviated Dialing 21, 41 Secret 61 Advanced Information 72 Airplane Mode 37 Alarm Clock 69 Dialing Options 12 Alert Notification 29 Display Settings 30 Answering Calls 12 Downloading 73, 99 Any Key Answer 40 Auto Answer Mode 39 Email 116 Emergency Calling 16... - Page 132 Muting 15 Voice Memo 78 Voicemail Clearing Message Icon 110 Net Guard 113 Details 110 Message Alerts 109 Notification 109 Open/Close Flip Option 39 Retrieving 109 Setting Up 109 Plus Code Dialing 20 Volume Settings 28 Power-off Tone 28 Prepending a Phone Number 55 Warranty 122 Preset Messages 34, 85 Launching 113...
- Page 133 Notes...