
Related Manuals for Sony SLV-751HF


Summary of Contents for Sony SLV-751HF
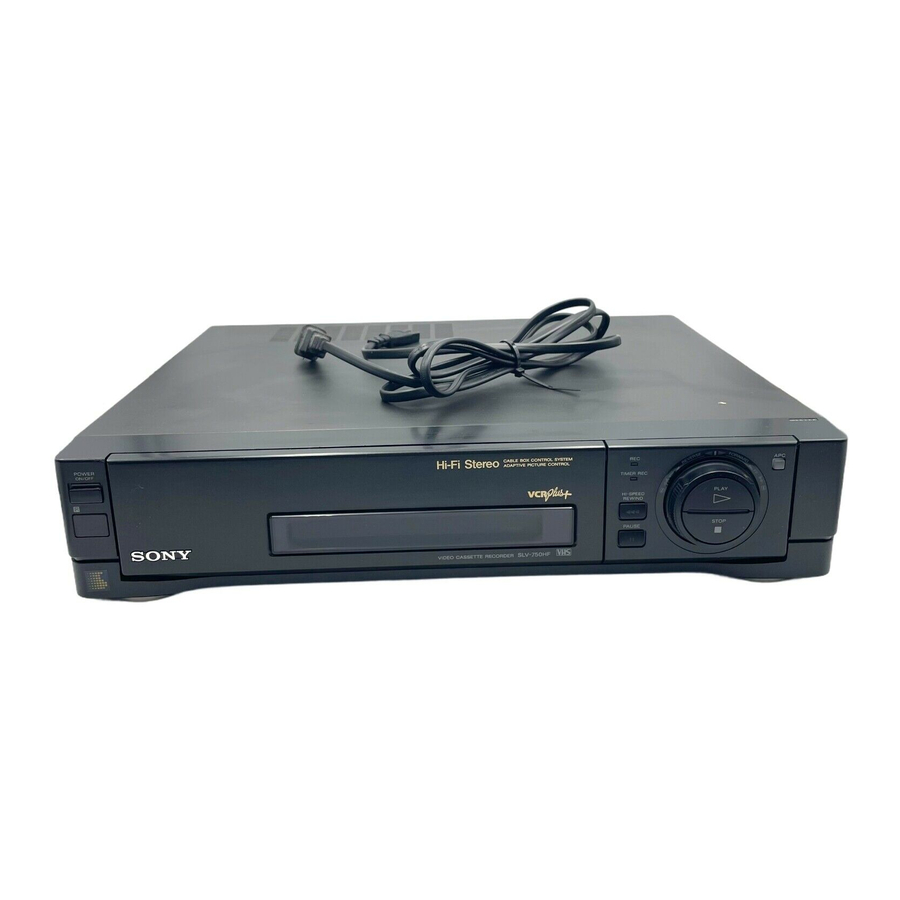
- Page 1 SONY® 3-756-090-21 /;') _ :,:.,.> I_ _ g -_ .sC_, VideoCassetteRecorder Operating Instructions SLV-750HF/751 HF £i-11i © 1992 by Sony Corporation...
-
Page 2: Warning
Record the serial number expose the unit to rain or moisture. in the space provided below. Refer to these numbers whenever you call upon your Sony service dealer regarding this product. Model No. SLV-750HF Serial No. -
Page 3: Table Of Contents
TableofContents TableofContents The Display ..............Indexing Tape Contents ..........Playing Back Externally-Recorded Tapes ...... 30 Selecting the Monitor Sound .......... -..Listening to Mixed Hi-Fi and Normal Track Sound ..31 WARNING ................. Recording 13/Programs ..........€ID Owner's Record ............... Recording TV Programs .......... -
Page 4: Precautions
Precautions • Operate the unit only on 120 V AC, 60 Hz. • When the unit is not in use, turn the power off to conserve energy and to extend its life. • If anything falls into the cabinet, unplug the unit and have it checked by qualified personnel before operating it any •... - Page 5 • High-quality picture • 75-ohm coaxial cable with F-type connectors (1) Your Sony VCR provides sharp, finely detailed pictures • AC powercord through High Quality (HQ) picture technology. Your VCR • Audio/video connecting cable (3 phono to 3 phono) (1) incorporates VHS high-quality picture technology and is •...
- Page 6 • Do not connect the AC power cords until all of the connections are completed. Rear panel • Make connections firmly. Loose connections may cause picture distortion. • If your TV doesn't match any of the examples provided, consult your nearest Sony dealer or qualified technician. Preparation...
-
Page 7: Operation
Hookup I If your TV has audio/video (A/V) input jacks, you will get If you intend to use the VCR for playback only, you're better picture and sound if you hook up your VCR using finished after you've made these connections. If you want to these connections. -
Page 8: Hookup
Hookups and GettingStarted Hookup2 - UsingVCRCableBoxControl A list of compatible cable boxes is on page 24. If, after checking Recommended Use: your setup, you are sure that the VCR will not control your cable This hookup is recommended for most cable systems. It box, contact your cable company. - Page 9 k_tl;1;JIft'JLe[dlTt11111_Jlk PC" Find the VCR Plus+ Channel Listing In your Set the RF UNIT on the VCR's rear panel to CH 3 or program guide. For details, see page 42. CH 4. If you made AN connections, skip this step. If the channels in the program guide are different from the channels that you actually use on your TV, set the channels that are different as follows:...
-
Page 10: Hookup
Hookupsand GettingStarted Hookup 3 - NoCableBoxorIncompatible C ableBox,Few"Scrambled" Channels Background Recommended Use: This VCR can record most unscrambled cable channels. Use this hookup if you do not have a cable box. Some cable systems "scramble" specific channels, usually premium or pay-per-view channels. You will not be able to Also use this hookup if your cable company cannot supply a cable box that is compatible with the VCR's cable box record "scrambled"... - Page 11 Find the VCR Plus+ Channel Listing in your program Set the RF UNIT on the VCR's rear panel to CH 3 or CH 4. guide. For details,see page 42. If you made AN connections, skip this step. If the channels in the program guide are different from the channels that you actually use on your TV, set the channels that are different as follows: Select SET VCR Plus+...
- Page 12 HookupsandGettingStarted Hookup 4 - IncompatibleCableBox,Many "Scrambled" Channels Background ecommended Use: This VCR can recold most unscrambled cable channels. se this hookup if your cable company cannot supply a Some cable systems "scramble" specific channels, usually able box that is compatible with the VCR's cable box premium, or pay-per-view channels.
- Page 13 € Find the VCR Plus+ Channel Listing in your program Set the RF UNIT on the VCR's rear panel to CH 3 or CH 4. guide. For details, see page 42. If you made AN connections, skip this step. For all channels that you want to record, set each channel to the channel that your cable box uses for Its output (usually 2, 3, or 4), as follows: SelectSETVCRPlus+...
- Page 14 Hookups a ndGetting Started Hookup 5 Make the following connections if you're using an antenna (nui cable I V). VHF/UHF Use hookup 5B for VHF only (you get Ch 2-13 only). VHF/LJHF ................-_'..,., MATCH THE CONNECTION ON YOUR "IV. "l _.__ OR ..
- Page 15 _o_'tktS']!'l 9 € Set the RF UNIT on the VCR's rear panel to Find the VCR Plus+ Channel Listing in your program OH 3 or OH 4. guide. For details, see page 42. If you made A/V connections, skip this step. If the channels In the program guide are different from the channels that you actually use on your TV, set the channels that are different as follows:...
-
Page 16: Preparing Theremote Commander
Set the _/V_RJ remote control selector at the top of the Remote Commander to "VTR." If you are using a Sony "IV You can use the Remote Commander of this VCR to operate the TV. When doing this, slide the _]/[_ remote control selector to 'q-V."... -
Page 17: Setting Thetimeanddate
Setting theTimeandDate You can set the VCR time and date on the TV screen using the Remote Commander. Press EXECUTE. CLOCK "1/1 1993 FRI 12:00 AM" is FRI 12:00 Use • and w to move the cursor, displayed. The leftmost 1, in Use 4 and •... - Page 18 Setting the TimeandDate Press I_ to make the "year" Press • to make the CLOCK CLOCK position flash and press a "minutes" position IIIII/ 7/4_J:993,;..SUN 12:00 7/4/1993 SUN _?,_w 3_IIII flash. to change the year. Press ,= or w until "32" CLOCK CLOCK SET Press _ to make the "time"...
-
Page 19: Presettingtheactive Channels
PresettingtheActive Channels This VCR is capable of receiving VHF channels 2 to 13, UHF Before presetting channels, check the following points: channels 14 to 69 and CATV channels 1 to 125. These • Turn on the VCR and the TV. channels can be preset using the Remote Commander and •... - Page 20 PresettingtheActive Channels Press EXECUTE Press • or • to select TUNER PRESET Receivable channels are preset in numerical NORM or CATV. ,NORMAL/CATVONORM CATV AUTO PRESET sequence.When no more channelscan be found, the NORM presets the VHF and MANUAL SET OADD ERASE presettingstopsand the pictureof the lowest UHF channels;...
-
Page 21: Fine-Tuning
"{3 €1} Cable TV systems use letters or numerals to designate the Normally, the Auto Fine Tuning (AFT) setting on the menu is channels. To tune-in a CATV channel, refer to the chart set to "ON," and the AFT function fine-tunes the picture. If below which shows the CATV channel, numbers on this VCR the picture of a channel is not acceptable, fine-tune it and the corresponding CATV channel. -
Page 22: Activating T Hecableboxcontrol Function
Activating t heCableBoxControl Function Your VCR includes a Cable Box Control feature which allows Note on setting the cable box and Cable Mouse the VCR to control channel selection on most cable boxes. Make sure that the Cable Mouse is positioned near to and above the sensor on the cable box so that the signal from The use of compatible cable box brand is shown on the the Cable Mouse is received correctly. - Page 23 __I_ _ _:_[_I[_'_';_ I To use the cable box control function, enter the cable box code numbe_ and select the cable box output channel as explained below. Press _ or • to move the MENU TIMER SET/CHECK cursor (_) to CABLE BOX UP MENU CONTROL, then press TUNER...
- Page 24 ActivatingtheCable BoxControlFunction Cable box code number chart In step 4 on page 23, enter the code number of your cable box as listed in the chart below. Using the information provided below, check to make sure that you have made the correct Cable Box Control setting. Note Make sure to do the following when using a cable box.
-
Page 25: Using Thesetupmenu
Using theSETUPMENU Before using your VCR, make your preferred audio and video display choices from the SET UP MENU. Press EXECUTE. SET UP MENU The SET UP MENU LANGUAGE eEN61_i s_H 'FRENCH appears. ,AUTO ANT SEL AUTO STEREO "o DIMMER OOFF AUDIO OOFF... - Page 26 Usingthe SETUP MENU LANGUAGE (Canadian versions only) AUTO STEREO You can preset your VCR to display screen information in If a stereo program's reception is poor, set to "OFF." The either English or French. program is recorded in monaural but sound quality may improve.
-
Page 27: Playback
Playback This section shows you how to play back a video cassette. Protecting your cassette against accidental erasure €/} Cassettes have a safety tab to protect against accidental ._" recording. Break off the safety tab with a screwdriver or other "... -
Page 28: Playback
Playback Insert a cassette. Turn on the TV. If your TV is connected to both VHF/UHF OUT and LINE OUT on the VCR, select the input for the VCR. If your TV is connected only to the VHF/UHF OUT on the VCR, select the channel for the VCR )°o... - Page 29 "D Before recording or playback, press COUNTER HESET on To delete or call up the Display on the TV screen, press the Remote Commander to reset the counter to zero. By DISPLAY on the Remote Commander. noting the setting, you can find that point later by referring to the counter.
- Page 30 Playback Automatic tracking adjustment lillillli_ I:_'I1.'tI__Jll_ / i_,,I¢_ The tracking condition is automatically adjusted on this VCR. The AUTO TRACKING indicator flashes while the VCR is When playing back a cassette recorded on another VCI4, the searching for the optimal tracking condition and lights when tracking condition is automatically adjusted.
- Page 31 "lo You can hear sound recorded on the hi-fi video track and the normal audio track simultal_euusly. 1 his allows you to listen to an €"a audio-inserted cassette. Press EXECUTE. SET UP MENU The SET UP MENU mAUTO ANT SEL appears.
-
Page 32: Recording 13/Programs
Recording W Programs Before you begin, check the following points: CAUTION: • Make sure that the connections have been made correctly Television programs, films, video cassettes and other (see pages 6 to 15). materials may be copyrighted. Unauthorized recording • Check the input mode indicator in the display window of of such material may be contrary to the provisions of the the VCR. - Page 33 Technique 1 You can stop recording an UllW_llted scene and resume recording smoothly. "10 Press II PAUSE when an unwanted scene appears. Recording will stop and the VCR enters the recording pause mode. Press II PAUSE at the desired point to release the pause mode.
-
Page 34: Recording Tv Programs
Recording T VPrograms Turn off the power of the TV or color monitor. There will be no interference with the recording. Press TV/VTR so that the VTR indicator light goes off. When using a cable box, make sure to leave the power for it Select the channel you want to watch on the TV. -
Page 35: Timerrecording
TimerRecording The timer recording function lets you preset your VCR to As a First Step record up to eight programs within a one-month period. Before setting the timer, make sure that: You'll do this procedure from the TIMER SET/CHECK • The time and date clock is set correctly. display on your TV. - Page 36 Timer Recording Press • to flash the Press •. T]MER SET/CHECK 7/ 4SUN TIMER SET/CHECK 7/ 4SUN DATE START STOP recording speed position, START STOP Make sure that today's date is 7/IOSAT 9:00PM I0:55PM 26-_ _7/ 4S]:_I-:-- -: ..then • or • or TAPE !}_U"...
-
Page 37: Checking The Timer Settings
The Timer Recording Standby Mode Daily/Weekly Recording ---I When you return the VCR to the timer recording standby --_' You can preset your VCR for daily or weekly recording. Daily mode, you can record any previously preset programs. The ", recording records the same program every day of the week, VCR turns on automatically to record the first preset while weekly recording records the same program on the... - Page 38 Timer Recording Case 1 If you preset two programs to record at the same time... The program listed first on the TIMER SET/CHECK display has priority over the other programs. The timer settings for lower priority programs will be deleted from the TIMER SET/ CHECK display when recording begins for the first program.
- Page 39 "-I Here's h ow to display youJ tin_u_ settings to confirm the programs you wish to record. Press MENU. MENU bTIMER SETICHECK The main MENU appears. SET UP MENU TUNER PRESET SET VCR Plus+ CHANNELS CABLE BOX CONTROL CLOCK Press • or w to move the MENU bTIMER SET/CHECK...
- Page 40 Timer Recording Here's how to cha_,gu oJ cancel ally timer settings lrom the I IMI-R SE I/CHECK display: Display the TIMER SET/ TIMER SET/CHECK 4114 WED DATE START STOP CHECK menu on the TV _,4124SAT 7:OOkM 8:00PN screen by following the 5/13THU IO:30PM ¿]:15PM 50EP MON - SAT 1:00 kM 3:00 AM LillE2...
- Page 41 §. If you want to use your VCR while it's in the timer recording standby mode, you must first turn off the TIMER REC (recording) indicator on the VCR. Here's how: Press TIMER REC (ON/OFF). The TIMER REC (recording) indicator on the VCR turns off and the VCR leaves the timer recording standby mode.
-
Page 42: Introducing Vcrplus
Introducing VCRPlus+ VCR Plus+ is a feature used in Sony VCRs that simplifies Then, just enter the number of the program you want--using the Remote Commander--and the VCR is automatically the task of programming your VCR to make unattended programmed to record that show. It's that simple. With VCR recordings. - Page 43 Example: For each channel your VCR receives, use the Channel Line- Up Chart to check that the channel numbers match. For example, if HBO is listed in the Channel Line-Up Chart on Guide Channel TV Channel channel 33, and your VCR receives HBO on channel 15, you (from "Channel Line-Up Chart"...
-
Page 44: Setting The Cable Box Control
Introducing VCRPlus+ To use VCR Plus+ to record programs, all you need is the NOTE: program's PlusCode, which you'll find in the program listings • You can set the program without opening the VCR in your local newspaper, cable TV guide, or TV Guide Plus+ menu. - Page 45 NOTES: You can't set the timer using PlusCodes in the following cases: • When the VCR is turned off • While the VCR is in the timer-recording or quick-timer recording mode • When the VCR is in the timer-recording standby mode The timerwill not acceptsettingsin the foltowing cases: •...
-
Page 46: Variable Speed Playback
Variable Speed Playback The following section explains the advanced playback [,."_111 Idl"6"t!1_ functions you can do with your VCR. When playing back a cassette, press II PAUSE to hold the picture in one place. To resume normal playback, press either I_ PLAY or II PAUSE. If you leave your VCR in the Using the DUAL MODE SHU1 1LE ring uJ_yuul V(JH ol pause mode, normal playback resumes after approximately Remote Commander, you can play cassettes at a variety of... - Page 47 This feature lets you lock In and view a high-speed picture while playing or pausing a cassette. In the play or If a picture played in slow motion displays streaks or has pause mode, press _ SEARCH (reverse) or poor sound quality, adjust the picture with the TRACKING ,_ SEARCH (forward) on the Remote Commander.
-
Page 48: Indexfunction
IndexFunction You can find specific locations on a cassette using your VCR's index function. The VCR automatically inserts index signals each time you use the recording, timer recording or quick-timer recording functions (index mark). When an index mark is made, INDEX MARK appears on the TV screen. - Page 49 "I"1 Here's how to find and play a plogram you've marked with an index signal: Turn the DUAL MODE SHUTTLE ring clock- wise to find the previous program, or counter clockwise to find the next program. The index scan locates the next marked index signal and plays about 10 seconds of tape prior to the signal.
- Page 50 IndexFunction Locate an index by indicating how many index signals ahead or behind that program is from the cassette's curlent position. Here's how: Turn the' DUAL MODE SHUI-I'LE ring clockwise to locate an upcoming Index signal or counterclockwise for a prior index signal. The cassette rewinds or advances to the next index.
-
Page 51: Apc(Adaptive Picture Control)
APC(Adaptive Picture Control) This function automatically improves recording and playback quality by adjusting the VCR for the condition of the video heads and video tape. To maintain better picture quality, we "f'l recommend that you leave the function on. (The APC button/ indicator remains lit.) "O ¢-j... -
Page 52: Quick-Timer Recording
Quick-Timer Recording This function allows you to preset your VCR to record for a NOTE: specified amount of time from now, without having to set the • Before you begin, make sure the clock has been set, recording start time. then ensure that the timer recording function is turned off by checking the TIMER REC (recording) indicator. -
Page 53: Editing
Editing Using an additional VCR, you can record programs from one VCR to the other. Here's how: Before you start: Here's how to edit from another VCR (such as an 8mm video • Select LINE 1 or LINE 2 with INPUT SELECT, whichever camera recorder for playback) when using this VCR for the playback VCR is connected to. - Page 54 Editing Here's how to use this VCR as the playback VCR and Before you start: another VCR as the recording VCR. • Select the EDIT position on the PICTURE switch. If your recording VCR has an editing function, it should also be selected to improve reception.
- Page 55 General S etupInformation Why this setting Is necessary: -... You must set the RF UNIT selector at the rear of the VCR properly so that your TV can receive the coFrect signal from the VCR. Set the selector to CH 3 (channel 3) or CH 4 (channel 4), whichever is not active in your area.
-
Page 56: General Setup Information
General S etupInformation VHF/UHF IN ]1IL--- 300-ohm,w,n w' " Loosen the screws on the U/V band separator/mixer. Loosen the screws on the antenna connector. Fit the 300-ohm twin lead cable on the UHF antenna Fit the 300-ohm twin lead cable on the UHF antenna under the screws. - Page 57 Identifying t hePartsandControls Refer to the pages indicated for details. ¢D ....POWER ON/OFF switch and indicator (See page 55.) II PAUSE button (See pages 28 & 32 & 46.) &__ EJECT button (See page 27.) CHANNEL-I+ buttons (See page 32.) •...
-
Page 58: Identifyingthe Partsand Controls
Identifyingthe Partsand Controls Refer to the pages indicated for details. i--q_ra 0000000001100000 AC IN socket (See page 6.) RF UNIT selector (See page 55.) LINE IN 1 AUDIO and VIDEO Jacks(phono type) VHF/UHF IN/OUT connectors (F-type) (See pages 12 to 15.) LINE OUT AUDIO and VIDEO jacks (phono type) CABLE BOX CONTROL jack (See page 8.) (See page 7.) - Page 59 Refer to the pages indicated for details. _=_. I I-I I-I I-I I-I • I-I I-I LI I_I H I_1 I_1 M" LI LI s Line and channel Indicator VTR indicator (See page 32.) AUTO TRACKING indicator (See page 30.) Linear time counter and clock (See page 29.) AM/PM indicator Cassette Indicator (appears when a cassette is loaded)
- Page 60 Identifyingthe Partsand Controls TL!_/VLVT_ r emote control selector (See page 16.) 1L!J Refer to the pages indicated for details. Menu operations buttons (See pages 17 and 18.) MENU button Cursor buttons (_ / • / 4 / ,) EXECUTE button INDEX button (See page 48.) Channel number buttons and ENTER button (See page 24.)
-
Page 61: Troubleshooting
If you have a problem with your VCR, first check the power cord connection, then go through the following list. Should the difficulty persist, unplug the unit, and contact your Sony dealer or local authorized Sony Service Center facility. L"D _=_. - Page 62 Troubleshooting Possible causes and remedies Symptom • Adjustthe verticalholdcontrolon the TV or colormonitor. Recording and The picture moves vertically Playback during picture search mode. The sound drops out. • The cassette is defective. Use a new video cassette. Stereo recording cannot be made. •...
-
Page 63: Specifications
Specifications System I Timer Section Format VHS NTSC standard Clock Quartz locked Time Indication =1" Video Recording System 12-hour cycle _0-. Timer Setting Rotary two-head helical Only for recording scanning FM system 8 program in one month at max. Video Signal NTSC color, EIA standards Power back-up Built-in self-charging capacitor... -
Page 64: Index
Index TV/VTR button 16, 37, 52, 55, 57 VCR Plus+ button 44, 60 Editing 55 Accessories supplied 63 VOL +/- button 60 Active channels 19 Editing from another VCR 53 WEEKLY button 37, 44, 60 EDIT picture 53 Adjusting Editing onto another VCR 54 FINE TUNING (See "Fine Tuning.") Ejecting a cassette (See "Cassette.") picture 21... -
Page 65: Rear Panel
Timer, setting TUNER PRESET 19 Rear panel 58 Recording Tracking adjustment 30 Automatic (timer) 35 Troubleshooting 61 TV/VTR remote control selector 16, 60 Daily programs 37 Quick-timer 52 REC (Recording) indicator 57 Using the VCR before timer recording Recording SAP (Second Audio starts 41 Program) Broadcasts 34 Recording TV programs 32... - Page 68 SLV-750HF/751 II you have any questions about this product, you may call: Sony Customer Information Center 1-800-222-SONY (7669) or write to: Sony Customer Information Center Sony Drive, Mail Drop # T1-11, Park Ridge, NJ 07656 Sony Corporation Printed in Singapore...