Dell EQUALLOGIC PS6500 Hardware Manual
Storage arrays
Hide thumbs
Also See for EQUALLOGIC PS6500:
- Overview (7 pages) ,
- Quick reference manual (2 pages) ,
- Installation and setup manual (62 pages)
Table of Contents
Advertisement
Advertisement
Table of Contents

Related Manuals for Dell EQUALLOGIC PS6500


Summary of Contents for Dell EQUALLOGIC PS6500
- Page 1 PS6500 Storage Arrays Hardware Maintenance 110-0118-EN-R2...
- Page 2 All trademarks and registered trademarks mentioned herein are the property of their respective owners. Information in this document is subject to change without notice. Reproduction in any manner whatsoever without the written permission of Dell is strictly forbidden. August 2010...
-
Page 3: Table Of Contents
Table of Contents Preface ..............................iii Audience ................................... iii Organization ................................iii Overview of Dell EqualLogic Products ........................iii Related Documentation ..............................v Technical Support and Customer Service ........................v Warranty Information ..............................vi 1 Basic Array Information ........................... 1-1 Field Replaceable Components..........................1-1 Array Bezel and Front Panel ........................... - Page 4 PS6500 Hardware Maintenance 4 Maintaining Power Supply and Cooling Modules ..................4-1 Power Supply and Cooling Module LEDs......................4-1 Power Supply and Cooling Module Status ......................4-2 Array Behavior When a Power Supply Fails ......................4-2 Power Requirements and Recommendations......................4-3 Removing a Power Supply and Cooling Module....................
-
Page 5: Preface
Appendix A, Array Technical Specifications, lists the environmental and physical specifications for the array. Overview of Dell EqualLogic Products Thank you for your interest in Dell EqualLogic™ PS Series storage products. We hope you will find them intuitive and simple to configure and manage. - Page 6 PS6500 Hardware Maintenance Preface PS Series arrays optimize resources by automating performance and network load balancing. Additionally, PS Series arrays offer all-inclusive array management software, host software, and free firmware updates. The features and products described next are available at no additional cost.
-
Page 7: Related Documentation
Technical Support and Customer Service Dell's support service is available to answer your questions about PS Series arrays. If you have an Express Service Code, have it ready when you call. The code helps Dell's automated-support telephone system direct your call more efficiently. -
Page 8: Online Services
2. Select your locale. Use the locale menu or click on the link that specifies your country or region. 3. Select the required service. Click the "Contact Us" link, or select the Dell support service from the list of services provided. -
Page 9: Basic Array Information
Channel cards. A PS6500 array includes two channel cards. Disk drives. A PS6500 array includes 48 disk drives. Drives are protected with spare disks and RAID. You access disk drives, channel cards, and the EIP card from the front of the array. You must remove the bezel and open the chassis cover to access these components. -
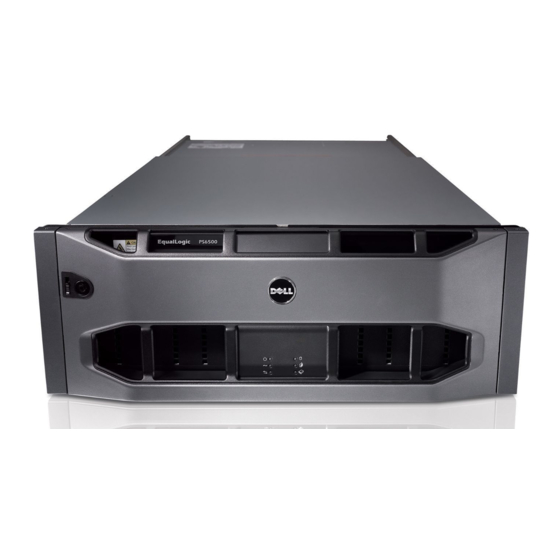
Page 10: Array Bezel And Front Panel
EIP card, minimize the time that the cover is open. Array Bezel and Front Panel Figure 1-2 shows the bezel of a PS6500 array. The bezel conceals the array front panel and the power switch, deterring a user from inadvertently turning off power to the array. -
Page 11: Hardware Status Leds
Chassis handles. The handles are used to pull out the chassis, opening the cover and exposing the disk drives, channel cards, and EIP card. Hardware Status LEDs Figure 1-4 shows a detail view of the hardware status LEDs. Figure 1-4: PS6500 Hardware Status LEDs Figure 1-4 Description Indicator Status... -
Page 12: Lcd Panel Display
PS6500 Hardware Maintenance Basic Array Information Figure 1-4 Description (Continued) Indicator Status Description EIP card Normal operation. Flashing yellow EIP card removed. Yellow EIP card failure. LCD Panel Display The LCD panel, located on the array front panel behind the bezel, provides information about array hardware status. - Page 13 ( Drive Fault n Approximate location of failed disk drive. A PS6500 chassis has 12 columns of four disk drives. From left to right and from the front of the array to the rear, the first column includes disk drives 0 to 3, the next column includes disk drives 4 to 7, and so on.
-
Page 14: Enclosure Switch Settings
A switch is on when it is in the position closest to the rear of the chassis. A switch is off when it is in the position closest to the front of the chassis. Array Back Panel Figure 1-9 shows the back panel of a PS6500 array. Figure 1-9: PS6500 Back Panel Figure 1-9 Description Power supply and cooling modules. -
Page 15: Protecting Hardware From Electrostatic Discharge
PS6500 Hardware Maintenance Basic Array Information Figure 1-10: Serial Number Label The serial number is also displayed in the Group Manager GUI. See the Group Administration manual for more information. Protecting Hardware from Electrostatic Discharge When handling the array chassis, disk drives, channel cards, EIP card, or control modules, you must use an electrostatic protection device to prevent electrostatic discharge. -
Page 16: Removing And Installing The Bezel
PS6500 Hardware Maintenance Basic Array Information Removing and Installing the Bezel You must remove the bezel to access the array front panel, which shows the LCD panel and disk activity LEDs and provides access to the power button. Also, you must remove the bezel to access the cam screws that lock the chassis cover. -
Page 17: Opening And Closing The Chassis Cover
PS6500 Hardware Maintenance Basic Array Information Figure 1-14: Detaching the Bezel from the Chassis To install and lock the bezel: 1. Facing the front of the rack, fit the right side of the bezel into the right side of the chassis. -
Page 18: Using The Cable Management System
PS6500 Hardware Maintenance Basic Array Information Figure 1-15: Opening the Chassis 2. Hold the chassis handles on the right side and the left side of the front panel and pull the chassis toward you, exposing the disk drives. To close and lock the chassis cover: 1. - Page 19 The cable management system attaches to the rear of the array chassis and to the rack rails. See Figure 1-17. Figure 1-17: Cable Management System – Installed See the PS6500 Rack Mount Instructions for information about installing the cable management system. To use the cable management system: 1.
- Page 20 PS6500 Hardware Maintenance Basic Array Information Figure 1-18: Routing Path on the Cable Management System Connect all three fasteners on the arm and place the cables below the arms. See Figure 1-19. Figure 1-19: Attaching the Hook-and-Loop Fasteners 2. Route the cables along the middle arm of the three-arm assembly, going from 3 to 4 in Figure 1-18.
-
Page 21: Turning On Power To An Array
PS6500 Hardware Maintenance Basic Array Information Turning on Power to an Array There are two power modes for a PS6500 array: • Standby mode. An array enters standby mode if you turn off power, but two or more functioning power supply and cooling modules are connected to a source of power. -
Page 22: Returning Hardware
PS6500 Hardware Maintenance Basic Array Information The serial connection must have the following characteristics: – 9600 baud – One STOP bit – No parity – 8 data bits – No flow control 2. When prompted, log in to a group administration account with read-write access, such as the grpadmin account. -
Page 23: Maintaining Disk Drives
Each array includes 48 hot-swappable disk drives. See the PS Series Release Notes for the latest PS6500 information about disk drive support. You access disk drives from the front of the array after removing the bezel and opening the chassis cover. See Removing and Installing the Bezel on page 1-8 and Opening and Closing the Chassis Cover on page 1-9. -
Page 24: Disk Drive Status
PS6500 Hardware Maintenance Maintaining Disk Drives Figure 2-3: Disk LED Table 2-1 explains how to interpret the LEDs that indicate disk status. Table 2-1: PS6500 Disk Drive Status LED Descriptions LED Location Color Description Disks LED on array front panel. -
Page 25: Disk Drive Numbering
3 comprise the first column of disk drives, disk drives 4 to 7 comprise the second column of disk drives, and so on. See Figure 2-4. Figure 2-4: PS6500 Disk Drive Numbering Array Behavior When a Disk Drive Fails How an array handles a disk drive failure depends on whether a spare disk drive is available and whether the failed drive was in a degraded RAID set. -
Page 26: Disk Drive Requirements
PS6500 Hardware Maintenance Maintaining Disk Drives Disk Drive Requirements Follow these disk drive handling requirements: • Protect disk drives from electrostatic discharge. When handling a disk drive, always wear an electrostatic wrist strap or a similar protective device. See Protecting Hardware from Electrostatic Discharge on page 1-7. - Page 27 PS6500 Hardware Maintenance Maintaining Disk Drives Figure 2-5: Identifying and Removing the Correct Drive 6. Open the disk drive release lever by sliding the latch toward the front of the array and pulling up the latch arm. This will disengage the disk drive from the slot.
- Page 28 PS6500 Hardware Maintenance Maintaining Disk Drives 8. Holding the sides of the disk drive, pull up and remove the drive from the slot. Caution: Do not pull the drive up by the lever. See Figure 2-6. Figure 2-6: Wrong Way to Hold a Disk Drive...
-
Page 29: Installing Disk Drives
PS6500 Hardware Maintenance Maintaining Disk Drives Return the failed drive in the packaging in which the replacement drive was shipped. Contact your PS Series support provider for information about returning hardware. Installing Disk Drives To install a disk drive in an array: 1. - Page 30 PS6500 Hardware Maintenance Maintaining Disk Drives c. Slide the replacement disk drive gently into the slot until you feel resistance (2). d. Push the disk drive the rest of the way into place. The lever should still be open. Do not force the lever closed (3).
- Page 31 PS6500 Hardware Maintenance Maintaining Disk Drives Holding the latch open, lower the lever until the drive is fully seated and flush with the other drives (5). Keep holding the latch open. g. Push the latch forward (6). h. Make sure it engages with the slot in the drive carrier (7).
- Page 32 PS6500 Hardware Maintenance Maintaining Disk Drives If you install a disk drive in an array that is an active group member, the drive will be automatically configured into a RAID set when you close the chassis. If you install a disk drive during RAID reconstruction or verification, the drive will not be configured until the operation completes.
-
Page 33: Maintaining Control Modules
3 Maintaining Control Modules A PS6500 array includes two hot-swappable control modules. One functioning control module is required for array operation. You access control modules from the rear of the array. Each control module includes: • Four Ethernet ports, one of which can be used as a dedicated management port if you configure a management network •... - Page 34 PS6500 Hardware Maintenance Maintaining Control Modules • Each Ethernet port has two LEDs that show the network interface status. See Figure 3-1 and Table 3-2. Table 3-1: Control Module LED Descriptions LED Location Color Description No power, secondary control module is not synchronized with active control module, or error condition.
-
Page 35: Identifying Control Module Failures
Replace a failed control module as soon as possible. Contact your PS Series support provider for a replacement. Maintaining Control Module Firmware A PS6500 array includes two control modules, each with a microSD card running the array firmware. You should run the latest firmware version to take advantage of new product features and enhancements. -
Page 36: Control Module Handling Requirements
PS6500 Hardware Maintenance Maintaining Control Modules To display the firmware version running on an array, examine the GUI Member Controllers window or use the CLI command. member select show controllers Control Module Handling Requirements Follow these control module handling guidelines: •... - Page 37 PS6500 Hardware Maintenance Maintaining Control Modules To remove a control module: 1. Open the control module latches by squeezing together the release mechanism for each latch and then rotating each latch outwards.This will disengage the control module from the array. See Figure 3-3.
-
Page 38: Installing A Control Module
PS6500 Hardware Maintenance Maintaining Control Modules 4. If you are replacing a failed control module, remove the micro SD card from the failed control module as described in Replacing the MicroSD Card on page 3-7 and install it in the replacement control module. This will make sure that the new control module is running the correct firmware. -
Page 39: Replacing The Microsd Card
PS6500 Hardware Maintenance Maintaining Control Modules Figure 3-6: Installing a Control Module 4. Rotate each latch toward the array until the latches are closed and the control module is completely seated in the slot. 5. Connect the network cables to the control module. See Network Requirements and Recommendations on page 3-10 for examples of network configurations. -
Page 40: Removing The Microsd Card
PS6500 Hardware Maintenance Maintaining Control Modules You can partially or completely remove a control module without shutting down the array if the remaining control module has at least one connected and functioning network interface. If you remove the active control module (the LED labeled ACT will be green), there will be a short interruption as failover to the secondary control module occurs. -
Page 41: Inserting The Microsd Card
PS6500 Hardware Maintenance Maintaining Control Modules Inserting the MicroSD Card 1. Align the replacement microSD card so the arrow on the card points towards the housing (Figure 3-8). 2. Firmly press the card into the housing until it clicks into place. Make sure you cannot pull it out. -
Page 42: Network Requirements And Recommendations
Dell recommends that you follow the guidelines in Table 3-4. In addition, all the usual rules for proper network configuration apply to group members. General network configuration is beyond the scope of this manual. -
Page 43: Connecting Network Cables
Maintaining Control Modules Connecting Network Cables A PS6500 must have at least one and can have up to four active network connections at one time. Multiple network connections are recommended for performance and availability. In addition, network cables must be routed though the cable management system. See the... - Page 44 PS6500 Hardware Maintenance Maintaining Control Modules Figure 3-10: Recommended PS6500 Network Configuration 3-12...
-
Page 45: Maintaining Power Supply And Cooling Modules
4 Maintaining Power Supply and Cooling Modules A PS6500 array includes three hot-swappable, redundant power supply and cooling modules. All three power supply and cooling modules must remain installed. Two functioning power supply and cooling modules connected to a source of power are required for array operation. -
Page 46: Power Supply And Cooling Module Status
PS6500 Hardware Maintenance Maintaining Power Supply and Cooling Modules Table 4-1: Power Supply and Cooling Module LED Descriptions Power Supply and Cooling Module Color Description Power/fan LED on array front panel. Normal operation. Flashing Module removed. orange Orange Power supply failure, fan failure, or upper or lower temperature limit exceeded. -
Page 47: Power Requirements And Recommendations
At a minimum, two functioning power supply and cooling modules, connected to one or more power sources, are required for proper operation. Also, you cannot turn on full power to an array unless three modules are installed. For a highly-available power configuration, Dell recommends that you: •... -
Page 48: Installing A Power Supply And Cooling Module
PS6500 Hardware Maintenance Maintaining Power Supply and Cooling Modules Note: You can detach one side of the cable management system from the rear chassis flange and carefully pull it away from the rear of the array to provide access to the power supply and cooling modules. - Page 49 PS6500 Hardware Maintenance Maintaining Power Supply and Cooling Modules 2. Carefully slide the module partially into the slot. 3. Squeeze together the module latches to release the handle and then rotate the handle downwards. See Figure 4- 4. Push the module completely into the slot, simultaneously rotating the handle upwards to close the handle and seat the module.
- Page 50 PS6500 Hardware Maintenance Maintaining Power Supply and Cooling Modules In addition, use the cable management system to organize your power cables. See Using the Cable Management System on page 1-10 for more information. Note: If you detached one side of the cable management system from the rear chassis flange for better access, re- attach it.
-
Page 51: Maintaining Channel Cards
5 Maintaining Channel Cards A PS6500 array includes two hot-swappable, redundant channel cards. Channel cards distribute connections from the control modules to the disk drives. Each channel card has redundant paths to all the disk drives for high availability. One functioning channel card is required for array operation. -
Page 52: Channel Card Status
PS6500 Hardware Maintenance Maintaining Channel Cards Channel card LEDs are described in Table 5-1. The LCD panel on the front panel (located behind the bezel) shows additional information about channel card failures. Table 5-1: Channel Card LED Descriptions LED Location... -
Page 53: Channel Card Handling Requirements
PS6500 Hardware Maintenance Maintaining Channel Cards Channel Card Handling Requirements Follow these channel card handling requirements: • Protect channel cards from electrostatic discharge. When handling a channel card, always wear an electrostatic wrist strap or a similar protective device. See Protecting Hardware from Electrostatic Discharge on page 1-7. -
Page 54: Inserting A Channel Card
PS6500 Hardware Maintenance Maintaining Channel Cards Figure 5-3: Opening the Channel Card Latches 5. Hold the channel card by the plastic handle and carefully pull up, sliding the channel card from the slot. See Figure 5-4. Make sure you place the channel card where it is protected from electrostatic discharge. - Page 55 PS6500 Hardware Maintenance Maintaining Channel Cards 2. Carefully slide the channel card partially into the slot, using the metal groove at the rear of the slot as a guide. Do not force the card into the slot. 3. Open the two channel card latches and slide the channel card completely into the slot, simultaneously rotating the latches downwards to close the latches and secure the card in the slot.
-
Page 57: Maintaining The Eip Card
6 Maintaining the EIP Card A PS6500 array includes one hot-swappable Enclosure Interface Processor (EIP) card. The EIP card monitors devices on the backplane and the control modules and displays data on the LCD panel. An array will continue to operate with a failed EIP card. - Page 58 PS6500 Hardware Maintenance Maintaining the EIP Card Figure 6-2: EIP Card and LEDs Figure 6-2 Description Mounting bracket. The bracket provides a way to hold an EIP card while protecting it from electrostatic discharge or other damage. LEDs. The LEDs show the EIP card status.
-
Page 59: Eip Card Status
PS6500 Hardware Maintenance Maintaining the EIP Card EIP Card Status You can identify an EIP card failure by: • LEDs. The EIP card hardware status LED is yellow, and the Fault LED on the EIP card is yellow. See EIP Card LEDs on page 6-1. - Page 60 PS6500 Hardware Maintenance Maintaining the EIP Card Figure 6-3: Removing the EIP Card Thumbscrew 5. Hold the EIP card mounting bracket and carefully pull up and slide the card from the chassis. See Figure 6-4. Figure 6-4: Removing the EIP Card...
- Page 61 PS6500 Hardware Maintenance Maintaining the EIP Card To install a new EIP card: 1. Hold the replacement EIP card by the mounting bracket and orient the card in the direction shown in Figure 6- 3, with the thumbscrew toward the front of the array.
-
Page 63: A Array Technical Specifications
A Array Technical Specifications Table A-2 describes the environmental, power, and physical specifications for a PS6500 array. Table A-2: PS6500 Technical Specifications Component Requirement Weight without disk drives 35 kg (77 lb) Weight with disk drives 80 kg (177 lb) Operating temperature 5 to 35 ºC (41 to 95 ºF) -
Page 65: Index
Index bezel installing accessing field replaceable modules locking array removing back panel unlocking batteries bezel 1-10 description 1-2 cable management system, using cable strain relief, using installing 1-8 cables, network removing 1-8 3-11 connecting 1-10 cable management system 3-11 supported channel cards cables, power control module restriction... - Page 66 PS6500 Hardware Maintenance Index locating modules maintaining removing module removing module requirements verifying operational status verifying operational status field replaceable modules cover (chassis), opening and closing how to access firmware identifying disk drives requirements accessing 3-10 Flow Control recommendation correct handling...
- Page 67 PS6500 Hardware Maintenance Index 3-11 minimum configuration LCD panel indication 3-10 3-11 recommendations LED indication 3-11 1-13 recommended configuration standby mode, defined 3-10 3-11 requirements status 3-11 network cables channel card 3-11 connecting control modules network interfaces cooling 3-10 configuring...