Epson LQ 670 Product Information Manual
Epson printer product information guide
Hide thumbs
Also See for LQ 670:
- User manual (196 pages) ,
- Service manual (135 pages) ,
- Technical brief (7 pages)
Table of Contents
Advertisement
Quick Links
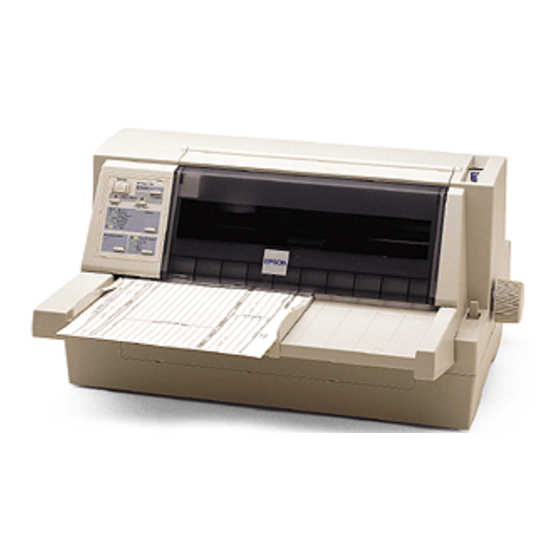
printer cover
ribbon
cartridge
control panel
left edge guide
paper guide
right edge guide
sprocket units
Printer Specifications
Printing
Printing method:
24-pin impact dot matrix
Printing speed:
Characters per inch
Quality
10 cpi
High speed draft
10 cpi
Normal draft
10 cpi
Letter quality
12 cpi
Draft
12 cpi
Letter quality
* The paper thickness lever position or an overheated print head
may affect the printing speed.
Printing direction:
Bidirectional logic seeking for text and graphics printing.
Unidirectional text or graphics printing can be selected using
software commands.
paper
thickness
lever
print
head
knob
paper release lever
paper support
parallel interface
Characters/second/line
300
250
83
300
100
Line spacing:
1/6-inch or programmable in 1/360-inch increments
Paper feed speed:
Normal Mode
Continuous
5 inches/second
Intermittent
60 ms/line at 1/6-inch line spacing
Copy Mode
Continuous
3.6 inches/second
Intermittent
70 ms/line at 1/6-inch line spacing
Printable columns:
Characters per inch
10 cpi
12 cpi
15 cpi
17 cpi
20 cpi
Buffer:
64KB or 0KB (selectable in the default-setting mode or the
EPSON Remote! utility)
Bitmap fonts:
Font
EPSON Draft
EPSON Roman
EPSON Sans Serif
EPSON Courier
EPSON Prestige
EPSON Script
EPSON Script C
EPSON Orator
EPSON Orator S
EPSON OCR-B
Scalable fonts:
Font
EPSON Roman
EPSON Sans Serif
EPSON Roman T
ESPON Sans Serif H
Barcode fonts:
EAN-13, EAN-8, Interleaved 2 of 5, UPC-A, UPC-E, Code
39, Code 128, POSTNET
Character tables:
One italic and 10 graphics character tables.
3/97
EPSON LQ-670
Maximum printed characters per column
106
127
159
181
212
Characters per inch available
10, 12, 15
10, 12, 15, proportional
10, 12, 15, proportional
10, 12, 15
10, 12
10
proportional
10
10
10
Available sizes
10.5, 8 to 32 points, in 2-point increments
10.5, 8 to 32 points, in 2-point increments
10.5, 8 to 32 points, in 2-point increments
10.5, 8 to 32 points, in 2-point increments
EPSON LQ-0670 - 1
Advertisement
Table of Contents

Related Manuals for Epson LQ 670


Summary of Contents for Epson LQ 670
-
Page 1: Printer Specifications
10, 12 proportional Available sizes 10.5, 8 to 32 points, in 2-point increments 10.5, 8 to 32 points, in 2-point increments 10.5, 8 to 32 points, in 2-point increments 10.5, 8 to 32 points, in 2-point increments EPSON LQ-0670 - 1... - Page 2 1 original plus 4 copies Total thickness 0.0025 to 0.015 inches (0.065 to 0.39 mm) Weight Ordinary paper 14 to 22 lb (52 to 82 g/m 2 - EPSON LQ-670 Part of multi- part form Quality Labels: Note: Use only labels mounted on continuous backing sheets.
- Page 3 B The minimum left and right margins are 0.12 inches (3.0 mm). Roll paper A The minimum top and bottom margins are 0 inches (0 mm). B The minimum left and right margins are 0.12 inches (3.0 mm). 3/97 EPSON LQ-670 Printable area Printable area EPSON LQ-0670 - 3...
-
Page 4: Parallel Interface Specifications
59° to 77°F (15° to 25°C) for multi-part forms, envelopes, postcards, and labels Storage: -22° to 140°F (-30° to 60°C) 4 - EPSON LQ-670 Humidity (without condensation): Operation: 10% to 80% RH 30% to 60% RH (for envelopes and labels) -
Page 5: Optional Cut-Sheet Feeder Specifications
) paper This section explains how you can use the control panel to ) paper control the basic operation of the printer and to perform more ) paper advanced operations, such as making changes to default settings or activating the printer’s quiet mode. - Page 6 * This light pattern means that a font other than those indicated on the control panel has been selected using the default-setting mode or the EPSON Remote! utility. (The fonts available in the default-setting mode or EPSON Remote! are: OCR-B, Orator, Orator-S, Script C, Roman T, or Sans Serif H.)
-
Page 7: Advanced Control Panel Functions
To use the functions below (in italics), turn on the printer while pressing the corresponding control panel button(s). Letter-quality self test = Load/Eject Performs a letter-quality self test, which helps you determine the source of some printing problems. -
Page 8: Changing The Default Settings
Otherwise, you cannot proceed to the next step. 1. Make sure paper is loaded, then turn off the printer. While holding down the Font button, press the Operate button to turn on the printer. The printer enters the default-setting mode and prints the language selection sheet. -
Page 9: Printer Driver Settings
Choose the EPSON LQ-670 printer at the appropriate step in the procedure. If the list in your application does not include the LQ-670 printer, choose the first available printer from this... -
Page 10: Paper Handling
Using the EPSON Remote! printer utility The EPSON Remote! utility is included with the printer. This utility allows you to change the printer’s default settings from your computer. Installing the printer utility Follow the steps below to install the EPSON Remote! utility. -
Page 11: Adjusting The Paper Thickness Lever
11.7 inches (92 to 297 mm) wide. You can load one sheet of paper at a time into the paper guide at the front of the printer, or you can load a stack of paper in the optional cut-sheet feeder. -
Page 12: Using Continuous Paper
EPSON LQ-670 Follow these steps to load single sheets: 1. Make sure that the printer is off and the paper guide is attached. Then close the sprocket covers and push down the sprocket lock levers to lock the sprocket units in place. - Page 13 Loading continuous paper with the tractor 1. Make sure the printer is turned off. Set the paper release lever to the tractor position, as shown below. Also make sure the paper thickness lever is set to “0” if you are using ordinary continuous paper.
- Page 14 Caution: Use the knob on the right side of the printer only to clear paper jams when the printer is off. Otherwise, you may damage the printer or cause it to lose the top- of-form position.
- Page 15 You can use the tear-off function in two ways: by pressing the Tear Off/Bin button on the control panel, or by using the control panel’s default-setting mode or the EPSON Remote! utility to select auto tear-off. If the perforation between pages is not aligned with the tear- off edge, you can adjust the tear-off position using the micro- adjust feature as described later.
-
Page 16: Using Multi-Part Forms
You can turn on the auto tear-off function by using the printer's default- setting mode or the EPSON Remote! utility. 2. Tear off the printed pages. 3. Press the Load/Eject button to feed the continuous paper backward out of the printer and into the standby position. -
Page 17: Using Postcards
1. When you have finished printing on continuous paper, press the Tear Off/Bin button to advance the paper to the tear-off position. (If you selected auto tear-off in the printer’s default-setting mode or the EPSON Remote! utility, the printer advances the paper perforation to the tear-off position automatically.) 2. -
Page 18: Using Micro Adjust
Your printing position setting is in effect only until the next time you load paper or turn off the printer. 1. Make sure that the printer is not printing. If it is, press the Pause button to stop printing. 2. Hold down the Pause button for about three seconds. The Pause light begins flashing and the printer enters the micro- adjust mode. -
Page 19: Replacing The Ribbon Cartridge
EPSON recommends the use of the EPSON Ribbon Cartridge (S015016) for best results. Genuine EPSON ribbon cartridges are designed for your EPSON printer; their high quality ensures the proper operation and long life of the print head and other printer parts. Other products not manufactured by EPSON may cause damage to your printer not covered by EPSON’s warranties. - Page 20 EPSON LQ-670 To replace the ribbon cartridge, follow these steps: 1. Press the Operate button to turn off the printer and then open the printer cover. Warning: If the printer has been used recently, the print head may be hot. Let it cool before attempting to replace the ribbon cartridge.
-
Page 21: Transporting The Printer
Do not use a hard or abrasive brush. Do not spray the inside of the printer with lubricants; unsuitable oils can damage the printer mechanism. Contact your EPSON dealer if you think lubrication is needed. Transporting the Printer If you need to transport your printer some distance, carefully repack it as described below, using the original box and packing materials. - Page 22 EPSON LQ-670 3/97 22 - EPSON LQ-670...