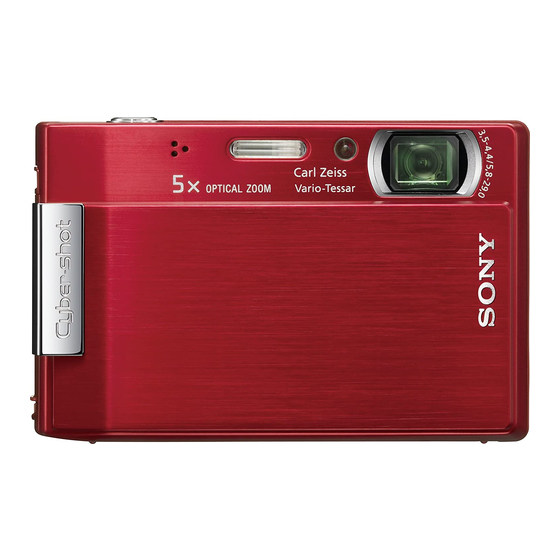
Sony Cyber-shot DSC-T100 Instruction Manual
Digital still camera
Hide thumbs
Also See for Cyber-shot DSC-T100:
- Handbook (119 pages) ,
- Service manual (47 pages) ,
- Instruction manual (32 pages)
Table of Contents
Advertisement
Quick Links
SON3t:
Cuber-shot
Digital
Still Camera
Instruction
Manual
DSC-TIO0
0
UTHlUMION
MeMoRY 5 TI[K _
For details on the advanced operations, please access
"Cyber-shot
Handbook"and
"Cyber-shot
Step-
up Guide"contained
on the supplied CD-ROM via a
computer.
Operating Instructions
Before
operating
the unit, please
read
this manual
thoroughly,
and retain
it for future
reference.
© 2007 Sony Corporation
2-319-290-12(1 )
Advertisement
Table of Contents

Related Manuals for Sony Cyber-shot DSC-T100


Summary of Contents for Sony Cyber-shot DSC-T100
- Page 1 For details on the advanced operations, please access "Cyber-shot Handbook"and "Cyber-shot Step- up Guide"contained on the supplied CD-ROM via a computer. Operating Instructions Before operating the unit, please read this manual thoroughly, and retain it for future reference. © 2007 Sony Corporation 2-319-290-12(1 )
-
Page 2: Important Safeguards
Record tile serial ntunber the space provided below. ReFer to these numbers whenever you call upon your Sony dealer regarding this product. For your protection, please read these safety Model No. DSC-T instructions completely belk_re operating Serial the appliance, attd keep this manual for future reference. - Page 3 long periods of time. unplug it from tile wall Cleaning oullel and disconnect file antenna or cable sysleln. Unplug tile set IYom tile wall outlet betknv This will prevent damage to tile sel due to clemling or polishing it. Do not use liquid clemlers fighming and power-line surges.
-
Page 4: Read This First
Read this first Regulatory Information Declaration of Conformity Replace the baltery with tile specified type Trade Name: SONY only. Otherwise, fire or injury may resttlt. Model No.: DSC-Tlt)0 Responsible Party: Sony Electronics hlc, Address: 16530 Via Esprillo. San Diego, CA 92127 U.S,A,... - Page 5 If tile plug supplied with this equipment has a detachable fll_ cover, be sure to attach the luse cover al_er you change the fuse. Nevcr use tile plug without the lhse cover. If you should lose the lhse cover, plea_ conlact your nearesl Sony service stalioll.
-
Page 6: Notes On Using Your Camera
Notes on using yourcamera Notes on the LCD screen Internal memory and "Memory Stick Duo" back up • Tile LCD screen is manulacmred using extremely lligll-precision teclmology so over triM file calncra or renlove file batt_ly 99.99% of tile pixels are operational lin+ pack or 'MelnoJy Stick Duo"... -
Page 7: Table Of Contents
Table of contents IMPORTANT SAFEGUARDS ..............Read this first .................... Notes on using your camera ..............Getting started ................. Checking the accessories supplied ............1 Preparing the battery pack ..............2 Inserting the battery pack/a "Memory Stick Duo" (not supplied) .. -
Page 8: Getting Started
Getting started Checkingthe accessoriessupplied • Battely charger BC-CSG/BC-CSGB/BC- • USB, A/V cable for multi-use terminal ( 1) CSGC (1) • Wrist strap ( 1) • Power cord (mains lead) (1) (nol supplied in the USA and Canada) • CD-ROM (Cyber-shot applicaion soflwarc/ 'Cyber-shot... -
Page 9: Preparing The Battery Pack
(wall sockel), • When charging is finished, disconnect lhe power cord (mains lead/li-om the wall outlet (wall socket), and remove the ballery pack flom the batte W charger. • Designed lot u_ wilh compalible Sony balteries. -
Page 10: Inserting The Battery Pack/A "Memory Stick Duo" (Not Supplied)
2 Inserting the battery pack/a "Memory Stick Duo" (not supplied) _) Open the battery/"Memory Stick Duo" cover. Olnsert the "Memory Stick Duo" (not supplied) all the way in until it clicks. Insert the battery pack. Close the battery/"Memory Stick Duo" cover. _When there is no "Memory Stick Duo"... - Page 11 To check remaining battery time Press POWER button to turn on and check tile remaining battery on tile LCD screen. Battery ,, t / remaining "_" indicator i-/_\ Battery Sufficient Battery Battery half Change the battery Battery lo'_,'_ remaining power ahnost fiflly full recording/...
-
Page 12: 3 Turningthe Camera On/Setting The Clock
3 Turningthe camera on/setting the clock Press the POWER button or slide the lens cover downward. 0 Set the clock with the control button. 1 Select the date display lormat with A/V. then press O. 2 Select each item with 4/_ and set the numeric value with A/V, then press 0. -
Page 13: Shootingimageseasily(Autoadjustmentmode)
Shootingimageseasily(Autoadjustmentmode) The following procedure is for shooting a still image. Slide the lens cover downward. OHold the camera steady, keeping your arm at your side. Position the subject in the center of the focus frame. Shoot with the shutter button. Still image: 1 Press and hold tile shutter button halfway down to focus. -
Page 14: Zoom/Flash/Macro/Seif-Tiraer/Dispiay
Z00m/Flash/Macr0/Self-timer/Display Using the zoom DISP Changing the screen display Press _ to zoom, press (_ to undo zoom. Press • (DISP) on tile control button. _ Flash (Selecting a flash mode Each time you press • (DISP) button, tile for still images) display changes as lk_llows. -
Page 15: Viewing/Deletingimages
Viewing/deletingimages Press [] (Playback). If you press when tile camera is powered off, the c_tmera is turned on mltomatically _md set to playback mode. To switch to the shooting mode, press ag_dn. I_ Select an image with 4111),, on the control button. Movie: back a movie. - Page 16 _Viewing an index screen Press _ to display tile index screen wbile a still image is displayed. Then. select an image with •/V/4IP". To return to the single image screen, press 0. • You can also access tile indexscreen by selecting [_m.Index Display] on tile HOME screen. •...
-
Page 17: Learningthe Variousfunctions- Home/Menu
Learningthe variousfunctions- HOME/Menu Using the HOME screen The HOME screen is the gateway screen lor all the functions of your camera. You can select the shooting mode or playback mode, or change the settings from the HOME screen. Press HOME to display the HOME screen. Select a category with 41•. -
Page 18: Homescreen Items
For detailson the operation _ page 17 HOMEscreen items The following categories and items are displayed when you press the HOME button. A description of tile selected category or item is displayed on tile screen by tile guide. Shooting AutoAqiusmlem Scene Selection Program Auto... -
Page 19: Using Menu Items
Using menu items _]_ Press MENU to display the menu. -- Function Guide • The menu can be displayed only when tile calnela is in shooting mode or playback mode, • DiffErent items are available, depending on the selected mode, Select the desired item... -
Page 20: Menu Items
For detailson the operation _ page lg Menu items The available menu items vary depending oil tile camera mode. The shooting menu is axailable only in the shooting mode. and the viewing menu is available only in the playback mode. Also. -
Page 21: Enjoyingyour Computer
Enjoyingyour computer You can display images shot wilh the camera on Ilae computer. Also, you can use still images and movies from the camera tnore than ever by, taking advantage of the £oldware. For details. refer to "Cyber-shot Handbook." SupportedOperating Systemsfor USBconnectionand application software (supplied) For Windows users For Macintosh users... -
Page 22: Viewing "Cyber-Shot Handbook" Or "Cyber-Shot Step-Up Guide
or "Cyber-shot Step-upGuide" Viewing "Cyber-shot Handbook" For Windows users For Macintosh users Turn on your computer and insert the CD- and insert the CD- Turn on your computer, ROM (supplied) into the CD-ROM drive. ROM (supplied) into the CD-ROM drive. Follow the instructions below. -
Page 23: Indicators On The Screen
Indicators on the screen Each time you press • (DISP) bullon, Ihe display changes (page 14). Battery remaining _When shooting still images Low battery warning Image size Shooting mode (Scene Selection) Shooting mode (Program) White balance • IS0400 125 F3.5 +2.0EV _ When shooting movies Recording mode ±0,3... - Page 24 <_ Red-eye reduction 1.0m Focus preset distance Metering mode AE/AF lock Flash mode ,_ ,_Sk ISO400 ISO number Flash charging NR slow shutter ";_{_" I1_ White balance Shutter speed F3.5 Aperture value C:32:00 Self-diagnosis display +2.0EV Exposure Value IS0400 ISO number AE range finder flame indicator +2.0EV...
-
Page 25: Battery Life And Memory Capacity
Battery life and memory capacity Battery life and number of images that can be rec0rded/viewed • Tile measuremenl metbod is based on tile CIPA The tables show tile approximate number slandard. images that can be recorded/viewed attd the (CIPA: Camera & hnaging Producls battery life when you shoot images Associalion) -
Page 26: Number Of Still Images And Recordingtime Of Movies
2 GB. • This canlma does nol support HD ivcordings or playbacks li_wmovies. • When images recorded using earlier Sony models are played back on this camera, lhe display may dillcr flom lhe actual image size. -
Page 27: Troubleshooting
If ;i code such as "C/E:r-IN:r-IN" appears on the screen, refer to "Cyber-shot Handbook". Removethe batterypack,andinsertthe battery pack again afteraboutone minute,andturnonthe power. Initializethe settings (page18). Censnlt your Sony dealer local authorized Sony service facility. Please understand thai you give your consent... -
Page 28: Shooting Still Images/Movies
The battery remaining indicator is incorrect. • This phenomenon occurs _hcn you use the camera in an extremely hot or cold location. • The displayed battery remaining differs from the current one. Fully discharge and then charge fl_e battery pack to correct the displa3_ •... -
Page 29: Precautions
Precautions On operating temperatures Do not use/store the camera following places Your camera is designed _>r u_ under tile tenlperatures between 0°C and 40°C (32°F and • In ml extremely hot, cold or hulnid plao: 104°F). Shooting ill extrenlely cold or hot places In ph,ces such as in a car pm'ked in tile sun, tile that exceed this range is not reconln/ended. -
Page 30: Specifications
11.8to 2.9 m (2 lcet 7 I/2 inches to 9 1Pet 6 1/4 inches) (T) [InputandOutputconnectors] Mufti connector: Trademarks Vkleo output • CybEp-sh_l: is _L tradem_u'k o1 Sony Audio output (mono) USB communication Corl_oralion. USB communication: • 'Memory Stick", _._, "Memol T Stick PRO",...