Table of Contents
Advertisement
Quick Links
Advertisement
Table of Contents

Related Manuals for Epson Y16499100301


Summary of Contents for Epson Y16499100301
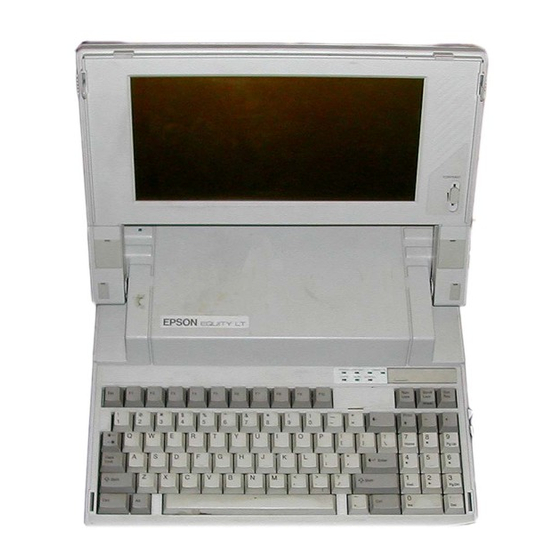
- Page 1 E Q U l T Y ™ L T User’s Guide Y16499100301...
-
Page 2: Important Safety Instructions
IMPORTANT SAFETY INSTRUCTIONS 1. Read all of these instructions and save them for later reference. 2. Follow all warnings and instructions marked on the product. 3. Unplug this product from the wall outlet before cleaning. Do not use liquid cleaners or aerosol cleaners. Use a damp cloth for cleaning. - Page 3 10. If an extension cord is used with this product, make sure that the total of the ampere ratings on the products plugged into the extension cord do not exceed the extension cord ampere rating. Also, make sure that the total of all products plugged into the wall outlet does not exceed 15 amperes.
- Page 4 ® EPSON Equity™ LT User’s Guide...
- Page 5 IMPORTANT NOTICE DISCLAIMER OF WARRANTY Seiko Epson Corporation makes no representations or warranties, either express or implied, by or with respect to anything in this manual, and shall not be liable for any implied warranties of merchantability and fitness for a particular purpose or for any indirect, special, or consequential damages.
-
Page 6: Fcc Compliance Statement
If the interference stops, it is caused by either the peripheral device or its I/O cable. These devices usually require shielded I/O cables. For Epson peripheral devices, you can obtain the proper shielded cable from your dealer. For non-Epson peripheral devices contact the manufacturer or dealer for assistance. - Page 7 User’s Guide...
-
Page 8: Table Of Contents
Introduction......How to Use This Manual ....Setting Up Your System . - Page 9 Using the Equity LT ......Using the AC Adapter ......Using the Battery .
- Page 10 Creating and Using Subdirectories ....Creating subdirectories ..... . . Changing directories .
- Page 11 Performing System Diagnostics ....Starting System Diagnostics ..... . Selecting a Test.
- Page 12 Equity LT Specifications ..... CPU and Memory ......Controllers .
-
Page 13: Introduction
The Equity LT includes 640KB (kilobytes) of internal memory and comes with built-in serial and parallel interfaces. These interfaces let you connect an Epson printer or almost any other peripheral device you choose. If you have a color monitor, you can connect it to the Equity LT to take advantage of the color and the larger display. -
Page 14: How To Use This Manual
Equity LT. The main commands are explained in this manual and full information, including descriptions of the special utility programs added by Epson, is in your MS-DOS manual. You can use almost all application programs designed for the IBM PC, PC XT and PC AT on your Equity LT. - Page 15 Appendix C provides information on the power-on diagnostics in case your computer has trouble powering up. Appendix D outlines the system diagnostic checks you can perform on your computer. If you are having trouble with any part of the hardware, you may want to run some or all of these diagnostic checks.
-
Page 16: Setting Up Your System
Chapter 1 Setting Up Your System Setting up your Epson Equity LT portable computer is easy. Just follow the steps in this chapter. They describe how to set up your computer, copy the system diskettes that come with your Equity LT, and run the initial Setup program on your reference diskette. -
Page 17: Connecting The Screen
You’ll find a registration card with the computer. Fill this card out now and mail it to Epson. With your registration card on file, Epson can send you update information. - Page 18 Use a flat blade screwdriver to lift off the plastic cover the front of each arm, as shown below. Set the covers aside. There is a plastic insert cap inside each of the arms; lift it out as shown below. You may want to keep these caps in case you need to store or ship your computer later.
- Page 19 Pick up the screen with both hands and insert it into the arms of the computer. When the screen is securely seated in both arms, replace the plastic covers on the front of the arms by snapping them back into place. These secure the screen to the computer.
-
Page 20: Connecting The Ac Adapter
Connecting the AC Adapter Follow these steps to connect the AC adapter: Insert the round end of the adapter cable into the jack marked AC ADAPTER Connect one end of the power cord to the adapter’s input socket. Setting Up Your System on the back panel of the computer. -
Page 21: Charging The Battery
The Equity LT has both parallel and serial interfaces. You can easily connect a printer or plotter that has either type of interface-just follow the instructions below. Of course, Epson offers a full range of printer products; consult your dealer for more information. Setting Up Your System... -
Page 22: Parallel Interface
To connect a printer to the computer, you need an IBM- compatible printer cable. If you are not sure which one you need, consult your Epson dealer. Once you have a printer cable, follow these steps to connect your printer to the parallel interface on the computer: 1. - Page 23 Connect the other end of the cable to the printer as shown below. To secure the cable, squeeze the clips at each side of the printer connector and click them into place. 5. Plug the printer’s power cable into an electrical outlet. Be sure to turn off DIP switch 1 on the back panel as described below under “Setting the DIP Switches”...
-
Page 24: Serial Interface
Serial interface If you have a printer or another peripheral with a serial interface, connect it to the serial (RS-232C) port at the back of the computer. The Equity LT uses a DB-9P connector, so be sure you have an IBM AT-compatible cable (or an adapting cable that converts the 9-pin output to the standard 25-pin output). -
Page 25: Setting The Dip Switches
Note If you plan to connect a color monitor or an external diskette drive to your computer, do it at this point. For instructions on connecting the monitor, see Appendix A, “Options and Maintenance.” For instructions on connecting an external drive, see the instructions that came with the drive you bought. -
Page 26: Keyboard Dip Switches
A DIP switch is either on (up) or off (down). To change a setting, use a hard, thin object, such as a small screwdriver. Keyboard DIP switches To access the DIP switches above the keyboard, you need to open the cover shown below. Press the raised tab back and lift up at the same time to expose the DIP switches. -
Page 27: Keyboard Dip Switch Functions
The system functions controlled by these switches are listed in Table l-l and then described below. Table 1-1. Keyboard DIP switch functions Switch 1, LCD reverse or normal- computer whether to display text on the screen in normal mode or reverse. In normal mode on the standard model characters are dark on a light background. -
Page 28: Back Panel Dip Switches
Back panel DIP switches The second set of DIP switches are on the left side of the back panel. The system functions controlled by these switches are listed in Table 1-2 and then described below. 1-2. Back panel DIP switch functions Table Use external diskette drive Use parallel printer... -
Page 29: Turning On The Computer
Do not attempt to dismantle any part of the computer. If there is a hardware problem you cannot solve after reading Appendix B on troubleshooting or performing the system diagnostics in Appendix D, consult your Epson dealer. 1-14 you have connected... -
Page 30: Turning On The Power
Never turn off your computer while a disk drive light is on. This can destroy data stored on disk or make a whole disk unusable. Always wait at least five seconds after you turn the power off before you turn it on again. Turning the power off and on rapidly can damage the computer’s circuitry. -
Page 31: Adjusting Screen Contrast And Brightness
The power indicator above the keyboard lights up, and after a few seconds, the computer begins to perform an internal self test. This is a diagnostics program the computer runs whenever you turn it on. The power-on diagnostics self test checks the RAM (random access memory), keyboard, system board, and peripherals before the computer begins normal operation. -
Page 32: Initial Screen Display
If your screen is the backlit model, you can use the brightness switch to adjust the intensity of the backlighting. To make the backlighting brighter, move the switch up. To decrease the brightness, move the switch down. To preserve the life of the screen (and the computer’s battery), do not make the screen any brighter than you need to see the text clearly. - Page 33 Insert the diskette into the drive until it clicks into place. When the diskette is all the way in, the release button pops out. (For more instructions, see “Inserting and removing diskettes” in Chapter 3.) 3. Press any key. The computer automatically loads the operating system.
-
Page 34: Copying System Diskettes
The screen displays the MS-DOS version number and copyright information, and then the MS-DOS command prompt: A > This means the operating system is ready for you to enter a command. The command prompt identifies the current operating drive: A, B, or C. It displays on the screen whenever you load MS-DOS, complete an MS-DOS command, or exit an application program. -
Page 35: Copying With One Diskette Drive
Type: DISKCOPY A: B: and press Enter. Insert SOURCE Insert TARGET Press any key when ready . . . Drive A already contains the diskette you want to copy (the source) and drive B contains the blank diskette (the target), so just press any key. If the diskette in drive B is not formatted, the DISKCOPY program formats it. - Page 36 Insert SOURCE Press any key when ready . . . Drive A already contains the diskette you want to copy (the source), so just press any key. The DISKCOPY program copies the contents of the diskette to the computer’s memory. Note Because the 720KB MS-DOS diskette holds more data than can fit in the computer’s 640KB of memory, the computer...
-
Page 37: Running The Setup Program
Remove the MS-DOS system diskette from drive A and insert the copy diskette in the drive. Then press any key. The program copies the remaining files from the computer’s memory to the copy diskette. When the copy is complete, you see this prompt: another diskette (Y/N)? Copy Press Y so you can make a copy of the reference diskette. -
Page 38: Setting The Real-Time Clock
and press The Setup menu displays on the screen: Enter. Exit Real-time clock Backlight period Primary serial port Secondary serial port 1 select function, Setting the real-time clock Your computer automatically keeps track of the time and date using a real-time clock. Because the clock is backed up by a separate battery, it keeps track of the time and date even while the computer is turned off. -
Page 39: Changing The Backlight Period
Enter the time in the exact form shown in the box, using two digits for each part; the program automatically inserts the colons (:). For example, to set the time for 3:15 pm, enter the following: 1 5 1 5 0 0 When the time is correct, press invalid time (a number greater than 23 for the hours or 59 for the minutes or seconds), the time does not change. -
Page 40: Changing The Serial Port (Rs-232C) Settings
of time. The default time period is two minutes. You can change it to a time between one-half minute to five minutes, in half-minute increments. If you do not want the backlighting to be turned off at all, select no time limit so it remains on unless you turn off the computer. - Page 41 If you are using only the built-in serial port, you need to be concerned only with the primary serial port-and only then if you want to change the default parameters for communication. For example, if you have a serial printer attached to the built-in serial port, you can use the Primary serial port option to match the computer’s parameters to the printer’s switch settings so that you do not need to use the MS-DOS MODE...
- Page 42 The cursor block is on the the speed of communication, press the following: 110 bps 150 bps 1200 bps 2400 4800 9600 bps 19200 bps 38400 Use 1 and t to move the cursor block to the desired communication speed and press To set the type of parity check, press 1 to select and press The screen displays the following:...
-
Page 43: Leaving The Setup Program
Leaving the Setup program When you finish using the Setup program, press t until the cursor block is on Exit and press list of the current settings you just made. Check the list to make sure all the information is correct. Below the list you see this menu: Change settings without saving... -
Page 44: Preparing A Hard Disk For Use
Chapter 2 Preparing a Hard Disk for Use If you have the hard disk model Equity LT, follow the instructions in this chapter to prepare it before using it for the first time. WARNING Do not perform any of these procedures if your hard disk has already been prepared for use or has data stored on otherwise, you will erase all the data on the hard disk. -
Page 45: Creating The Ms-Dos Partition
Then you can use the COPY command to copy files from the reference diskette to the hard disk. All of these procedures are described in this chapter. Note If you plan to use an operating system other than MS-DOS, you need to use that operating system to partition the hard disk and copy the system files to it. -
Page 46: Formatting The Ms-Dos Partition
Press Y to use the entire hard disk for MS-DOS and press The screen displays the following message and Enter. prompt: will now restart System Insert DOS diskette in drive A: Press any key when ready . . . Press any key to restart the system (the MS-DOS diskette is already in drive A). - Page 47 Note 001 and US are the country code and keyboard code, respectively, for the United States. If you want to substitute other codes, see your MS-DOS manual. The screen displays this message and prompt: is used to install DOS the first time. SELECT SELECT erases everything on the specified target and then installs DOS.
-
Page 48: Copying The Reference Files To The Hard Disk
When all the files are copied, the A> prompt redisplays. The SELECT procedure is complete. Note The SELECT procedure described above copies all the files from your system diskette to the root directory of drive C. You may, however, want to store these files in separate subdirectories so they are easier to find. -
Page 49: Drive Assignments
Turn off the computer, wait at least five seconds, and then turn it back on. After the computer completes the power-on self test, the screen displays the date prompt. Press to accept the date and time shown. The C> prompt displays, indicating that the system has successfully loaded from your hard disk. -
Page 50: Using The Equity Lt
Chapter 3 Using the Equity LT This chapter covers some basic procedures for using your Equity LT computer. Using the AC Adapter The Equity LT can be powered by either its internal battery pack or the AC adapter. When you connect the AC adapter to the computer and to an electrical outlet, the power to the computer is supplied by the outlet. - Page 51 You need to recharge the battery at these times: Before you use the computer for the first time If the battery has not been used for a long time If the low battery indicator light starts flashing (see “LED Indicators” below). After the low battery light starts to flash, you have a maximum of 15 minutes before the power is completely gone.
-
Page 52: Led Indicators
LED Indicators Above the keyboard on the right side are seven LED (light emitting diode) indicators that provide information about the computer’s operation. LED is on whenever the computer is on. The POWER color of the light indicates the current execution speed. (See “Selecting Execution Speed”... -
Page 53: Opening And Closing The Screen
Opening and Closing the Screen When you are not using the computer or you want to move it, turn it off and then close the screen, as shown below, so it locks into the bottom part of the computer. When you want to open the screen, slide the latch release button on either side (shown below) toward you. -
Page 54: Using The Handle
Using the Handle The Equity LT has a convenient carrying handle. To use the handle, pull it out from the bottom of the computer as shown below. Be sure the screen is closed whenever you carry the computer by its handle. Selecting Execution Speed The Equity LT can operate at two execution speeds: 4.77 MHz or 10 MHz. -
Page 55: Resetting The Computer
When the computer is running at 4.77 MHz, the power LED is orange. At 10 MHz, the light is green. Resetting the Computer You can reset the computer to reload the operating system or to restart a program. You may also need to reset if an error occurs and the computer does not respond to anything you type. -
Page 56: Caring For The Backlit Screen
Turn off any peripheral devices and then turn off the Equity LT. Wait five seconds and then switch the power back on. Caring for the Backlit Screen If you have the backlit model of the LCD screen, you need to be aware of a few things. The electroluminescent element in the screen that provides the backlighting draws more power from the battery than the standard screen. -
Page 57: Special Keys
Table 3-1. Special keys Purpose Moves the cursor one tab to the right in normal mode and one tab to the left in Shift mode. Caps Lock Changes the letter keys from lower- to uppercase; changes back to lowercase when pressed again. The numeric/symbol keys on the top row of the keyboard are not affected. -
Page 58: The Equity Lt Character Set
ASCII codes. In some cases, if you try to print these characters on a standard printer, you get italic characters instead. Most Epson printers support this character set used by IBM and compatible computers (the character set the Equity LT uses) as a standard feature, and you can adapt others. -
Page 59: Choosing Diskettes For The Equity Lt
stores the data you enter as magnetic patterns on these circular tracks. A small read/write head in the disk drive interprets the magnetic patterns. When a diskette is in a drive, the metal plate above the access area moves aside to expose the diskette surface to the read/write head. -
Page 60: Caring For Disks And Disk Drives
You need to format new diskettes before you can use them with an operating system. Formatting erases all the data on a diskette and prepares it to receive new data, so be sure to format only new blank diskettes or diskettes that contain data you want to erase. -
Page 61: Inserting And Removing Diskettes
Never wipe, brush, or try to clean diskettes in any way. Store diskettes properly in their plastic cases. If your computer has a hard disk, take these additional precautions: Never turn off the power to the computer or the hard disk when the hard disk drive light is on. -
Page 62: Making Backup Copies
Slide the diskette into the drive until it clicks into place. To remove a diskette, press the release button to release the diskette. When it pops out of the drive, pull out the diskette and store it properly, such as in a special diskette container. -
Page 63: Using A Single Diskette Drive
The write-protect device is a small switch on the lower-right corner on the back, shown in the figure below. To write- protect the diskette, slide the switch down toward the edge of the diskette so there is a hole where the switch used to be. To remove the write-protection, move the switch up toward the center of the diskette so the hole is covered. -
Page 64: Turning Off The Computer
Turning Off the Computer Before you turn off your computer, save your data, exit the program you are using, and then remove all diskettes from the disk drives. Turn off any peripherals (such as a printer, a monitor, or an external diskette drive), and then turn off the computer. -
Page 65: Using Ms-Dos With The Equity Lt
Chapter 4 Using MS-DOS With the Equity LT Your Equity LT comes with version 3.2 of MS-DOS, the disk operating system by Microsoft? In this chapter, you’ll learn some of the basic procedures for using MS-DOS with your computer. MS-DOS manages the routine work of your system, such as keeping the computer’s memory organized, controlling screen displays, accepting keyboard input, and directing external communication. -
Page 66: Starting And Exiting Ms-Dos
Enter an MS-DOS command Store data Change the default drive Format a diskette for storing data Copy an entire diskette or selected files List the contents of a diskette Create and use subdirectories Start an application program. Starting and Exiting MS-DOS Remember, before you can run an MS-DOS application program, MS-DOS itself must be running in memory. -
Page 67: Entering Ms-Dos Commands
Now you see the MS-DOS command prompt, which tells you that MS-DOS is loaded and indicates the current drive followed by a greater-than symbol: A > If MS-DOS loads from the hard disk, the screen displays: c > This prompt tells you that you can now enter commands to instruct MS-DOS to perform tasks and run application programs. -
Page 68: Storing Data
If you press Enter you see this message: Bad command or file name Then MS-DOS re-displays the command prompt so you can try again. Just type the correct command line and press Storing Data All your work and programs are stored in files on your diskettes or hard disk. -
Page 69: Changing The Default Drive
as its name, size, location, and the date and time you last updated the file. If you do not create any other directories on your diskette, you will always be working in the root directory. This is often the case when using a diskette rather than a hard disk. The root directory is the main directory on a disk and is identified by a backslash (\). -
Page 70: Formatting Diskettes
Formatting Diskettes Before you can store data on a new diskette, the diskette must be formatted. Formatting prepares the diskette so MS-DOS can write to it. You need to do this only once, before you use the diskette for the first time. You can also reformat previously used diskettes. -
Page 71: Formatting With One Diskette Drive
When the diskette is completely formatted, you see messages such as these (for a 720KB diskette): Format complete 730112 bytes total disk space 730112 bytes available on disk Format another (Y/N)? At this point, you can either press Y and another diskette, or press MS-DOS system prompt. -
Page 72: Copying Data
DISKCOPY command, or you can back up individual files using the COPY command. Epson also provides a disk utility program called DU that you can use to copy diskettes;... -
Page 73: Copying With One 3 + -Inch Diskette Drive
and press Enter. diskettes: Insert SOURCE diskette in drive A: Insert TARGET diskette in drive B: Press any key when ready . . Insert the diskette you want to copy from in drive A and the diskette you want to copy to in drive B. Then press any key. - Page 74 MS-DOS displays these messages: Insert SOURCE diskette in drive A: Press any key when ready . . . If the MS-DOS diskette is in drive A, remove it. Then insert the diskette you want to copy from in the drive and press any key.
- Page 75 When the copy is completed, you see this message: Copy another diskette (Y/N)? Your diskette has now been copied and you can either make another copy or leave the DISKCOPY command. Press Y to perform another copy or DISKCOPY command. Copying with one 5 f -inch diskette drive Follow the steps below to make a copy of a 360KB diskette in an external 5 + -inch diskette drive.
-
Page 76: Using The Copy Command
Remove the diskette from drive B and insert the blank diskette in the drive. DISKCOPY checks to see if the new diskette is formatted. If it is not, DISKCOPY formats the diskette. You see the message: Formatting while copying The copy operation begins when the format is complete. You see these messages: 40 tracks Copying... - Page 77 If an existing file on the target diskette has the same name as the file you are copying from the source diskette, the copy replaces the file on the target diskette. Because there is no warning that the file on the target diskette is being replaced, be very careful that you do not accidentally erase a file you want to keep.
-
Page 78: Listing The Contents Of A Diskette
Listing the Contents of a Diskette You will often want to see which files are stored on your diskettes or hard disk. For example, before you format a used diskette and erase its contents, always check the contents of the diskette to be sure you will not erase any valuable files. -
Page 79: Creating Subdirectories
Copying from one subdirectory to another. Each subdirectory has a name, and any file in any subdirectory can be identified and accessed using a pathname. The root directory is always designated by a backslash (\). The name of the subdirectory can have up to eight characters, using letters or numbers or both, but not punctuation marks. -
Page 80: Changing Directories
Press Then type the following and press of each line: CON: \ MEMOS \ MEMO1 COPY This is the first memo. Press F6. Now you have one file in each of the subdirectories. (The COPY command with CON: copies what you enter from the keyboard to a file.) To display the names of these new subdirectories in the root directory, type... -
Page 81: Using Pathnames
Type DIR and press LETTERS subdirectory. You should see the following: < D I R > < D I R > LETTER1 Now you can use the LETTER1 file. For example, to display the contents of the file on the screen, type the following and press Enter: TYPE LETTER1... -
Page 82: Copying From One Subdirectory To Another
subdirectories just as you have to specify the drive or log onto a different drive to access files on different disks. Copying from one subdirectory to another You can also copy files from one subdirectory to another with the COPY command. Simply specify the pathname for the file you want to copy and for the subdirectory to which you want the copy to go. -
Page 83: Ms-Dos Commands And The Equity Lt
You can prevent this problem from occurring by using the Epson LIGHTON utility (on your Reference diskette). First load your memory resident program and then enter the LIGHTON command (type LIGHTON and press order is very important. -
Page 84: Options And Maintenance
Appendix A Options and Maintenance This appendix describes how to connect a color monitor to the computer and how to replace the backlit screen element. It also explains how to turn off the hard disk if you are running the computer on its battery. Connecting a Color Monitor If you bought a color monitor to use with your Equity LT, follow the instructions below to connect it to the computer. -
Page 85: Replacing The Backlit Screen Element
If the plug has retaining screws, tighten them with a screwdriver. If necessary, plug the monitor’s power cable first into the power inlet on the monitor. (Some monitors come with permanently attached power cables.) Then plug the power cable into an electrical outlet. Turn off DIP switch 4 above the keyboard to let the computer know you will be using a monitor instead of the LCD screen. - Page 86 Set the switch tops aside in a safe place. Use the screwdriver to remove the plastic cover on each of the arms that hold the screen, as shown below. When the covers on both arms are off, pull the screen straight up, out of the arms.
- Page 87 Turn the screen over and lay it on a flat surface (such as a table) so you are looking at the back. Locate the small plastic screw cover on each side of the screen, near the bottom. As shown below, use a small screwdriver to lift out each of the covers.
- Page 88 Carefully lift off the front cover of the screen as shown below and set it aside. On either side of the screen is a screen latch mechanism (shown below). Lift out the one on right side and set it aside in a safe place. You can leave the one on the left side in place.
- Page 89 10. Also on the right side, near the top, is a connector that connects the power supply to the screen. Unplug it as shown below. 11. Carefully lift up the power supply and set it next to the screen as shown below. It is connected by cables so you cannot remove it completely.
- Page 90 12. Grasp the tan-colored tab from which you unplugged the connector and carefully pull it out of the screen. This removes the electroluminescent element, as shown below. The element is flexible, so it is all right if you bend it slightly as you pull it out.
- Page 91 Replace the latch mechanism you removed in step 9. Be careful to seat it properly, as shown below. Also be sure the one on the left side is properly aligned. 17. When all the components are seated inside the screen, replace the front cover you removed in step 8.
-
Page 92: Turning Off The Hard Disk
Turning Off the Hard Disk To avoid drive access problems, it is best to leave the hard disk switch on at all times. However, if you are using the computer without the AC adapter, you may want to turn the hard disk off when you are not using it to conserve the charge of the computer’s battery. - Page 93 When you load MS-DOS f rom the hard disk, the operating system is copied to the computer’s memory; however, all the MS-DOS programs remain only on drive C and are not copied to memory. When you turn off the hard disk, the computer no longer has a drive C.
- Page 94 After you log on to drive A, you can turn off the hard disk. Continue using the application program, working on drive A. When you want to save your text on the hard disk, turn it on. Enter the command for saving the text on drive C. The hard disk may take up to 10 seconds to perform the operation because it needs to reinitialize itself.
-
Page 95: B Troubleshooting
Appendix D. If you cannot resolve the problem, consult an Epson dealer about servicing the computer. WARNING If you need to turn off the computer for any reason, always wait at least five seconds before you turn it back on. -
Page 96: The Lcd Screen Is Blank
If the power light still does not come on, turn off the power switch. Check to see that the AC adapter is securely connected to both the computer and an electrical outlet. Then turn the power back on. If the computer still does not start up, check the electrical outlet. -
Page 97: The Computer Does Not Respond
Remove any diskettes, then turn off the power switches on the monitor and the main unit. Check that the monitor’s power cable is securely connected to the monitor and to an electrical outlet, and that the monitor cable is properly connected to both the monitor and the main unit. -
Page 98: Diskette Problems
1. Turn off the computer. Connect the AC adapter to the computer and to an electrical outlet and let the battery charge for at least 12 hours. 3. Disconnect the AC adapter. Turn on the computer, but do not insert a diskette and do not use the computer. -
Page 99: Hard Disk Problems
If you have not done so and your hard disk does not function properly, have an authorized Epson service center check your hard disk. Never open the airtight container that encloses the recording disk. -
Page 100: Printer Problems
To operate properly, some programs require the computer to run at 4.77 MHz. Try changing the CPU speed with the switch above the keyboard. See “Selecting Execution Speed” in Chapter 3. Printer Problems Your printer manual describes methods to solve most printer problems. -
Page 101: Power-On Diagnostics
Appendix C Power-on Diagnostics The built-in memory (ROM) of your computer contains a series of diagnostics programs. These programs are run automatically by the system every time you turn on the power. The diagnostics programs check the internal devices such as ROM, RAM, keyboard controller, timer, video controller, and floppy disk driver. -
Page 102: Clock And Cmos Ram Check
If an I/O or checksum error occurs, you see this message: xxxx0 ROM error where xxxx is the number of the segment of the bad I/O ROM on an option card. Clock and CMOS RAM Check When the system device check is completed successfully, the computer checks the timer and CMOS RAM. -
Page 103: Keyboard Controller And Keyboard Check
If there are faulty RAM chips in your system, you see this message: xxxx0 201 -Memory error Keyboard Controller and Keyboard Check The computer checks the keyboard controller and keyboard for problems such as failure of one of the keys to release. If there are any errors in the connection between the keyboard and the computer, this error message is displayed: 301 -Keyboard stuck error... -
Page 104: Hard Disk Controller And Hard Disk Check
Hard Disk Controller and Hard Disk Check The computer next checks the hard disk controller and drive unit. If a malfunction is found in the hard disk con- troller, you see one of these error messages: 1701-A 1701-B 1701-E If an error is found in the hard disk drive unit, one of these error messages is displayed: 1701-C 1701-D... -
Page 105: Performing System Diagnostics
Appendix D Performing System Diagnostics This appendix describes how to check the operation of the main unit and peripheral devices of your Equity LT. You check these devices using the diagnostics program on your reference diskette. Run diagnostics if you are unsure whether a device is performing correctly. -
Page 106: Selecting A Test
After these items are checked, you see a list of the devices available for testing: DEVICE LIST 1 - System board - Memory 3 - Keyboard 5 - Video adapter and display 6 - Floppy disk drives and controller 9 - Parallel port (printer interface) 11 - Serial port (RS-232C port) 14 - Dot-matrix printer 17 - Hard disk drive and controller... -
Page 107: Resuming From An Error
To perform the test multiple times, press 2 and see this prompt: Terminate checking if an error detected (Y/N)? Press Y and to terminate checking if the device produces Enter an error, or press an error. You see this prompt: How many times (1-9999): Type the number of times you wish to repeat the test;... -
Page 108: System Board Check
They ensure that the CPU instruction set is functioning correctly. If an error occurs, write down the error code and message, or print them out, and contact your Epson dealer. Attempting to correct system board errors yourself may violate your warranty agreement. -
Page 109: Keyboard Check
The final message is usually: 640 KB OK an error is reported, write down the error code and message, or print them out, and contact your Epson dealer. Attempting to correct memory errors yourself may violate your warranty agreement. -
Page 110: Video Adapter And Display Check
MS-DOS manual. If any key is incorrect, press the error code and message, or print them out, and contact your Epson dealer. Video Adapter and Display Check Use this option to check the operation of the LCD or monitor connected to your computer. -
Page 111: Video Adapter Check
(Video adapter check) is performed. If an error occurs during any of these tests, record the error code and message, or print them out. Then contact your Epson dealer. When you finish running the video adapter and display... -
Page 112: Attribute Check
If the colors are not correct, adjust the controls on your display monitor. If they are still incorrect, press Contact your Epson dealer to verify any monitor problems. Character set check To check your 80-column character set, press 3 and The character fonts that are included in the internal character generator are displayed. -
Page 113: 40-Column Character Set Check
If the characters displayed match the illustration, press and then If you find a problem with the characters on Enter. the screen, press 40-column character set check To check your 40-column character set, press 4 and then The character fonts that are included in the internal Enter. -
Page 114: 640 X 200 Graphics Mode Check
The same pattern is displayed again; this time the squares are cyan, white, and magenta, and the background is red. These colors are called Color Set 1. If these are also correct, press Y and then Enter If any colors are displayed incorrectly, check the adjustment of your monitor and be sure that both ends of the cable are plugged in firmly. -
Page 115: Screen Paging Check
Screen paging check To check the screen paging of your monitor, press 7 and Enter. The video RAM on the video adapter is divided into eight independent display pages. This test checks the eight pages by first filling all eight with a number corresponding to the page, and then displaying each page in turn. -
Page 116: Color Video Check
Color video check Option 8, Color video check, displays 16 different screens, each a different color, and a message indicating the color. The screens show the following colors in the order specified below: Black Blue - Green - Cyan 6 - Magenta 7 - Brown 8 - White To start this test, select option 8 from the menu;... -
Page 117: Floppy Disk Drives And Controller Check
Floppy Disk Drives and Controller Check Use this option to test the performance of the floppy disk (diskette) drives inside or connected to your computer. This test includes several checks that allow you to identify particular problems related to your diskette drives. To run these tests, you need a formatted diskette so the tests can write data on the disk in the drive. -
Page 118: Starting The Floppy Disk Drive Check
Check which drive (A/B)? Press and then If any errors occur during the checks, record the error code and message and contact your Epson dealer. Always have the diskette drive serviced by your Epson dealer. D-14 Enter Enter. -
Page 119: Sequential Seek Check
When you finish running the floppy disk drive check, press 0 and to return to the OPERATION MENU. Enter Sequential seek check This test checks the ability of the read/write heads to locate any part of the diskette. This action by a read/write head is called a seek. -
Page 120: Speed Check
Use only a formatted blank diskette for this test. Any data present may be erased. If using drive A, remove your Reference Disk. Enter Y to start this check. Enter N to return to the menu. If you are using drive A, remove the reference diskette and insert the blank diskette you prepared in the drive;... -
Page 121: Run All Above Checks
Run all above checks To run all the tests on the menu in sequence, press 5 and Enter. When you choose this option, all checks for the diskette drive(s) and controller are performed automatically in sequential order. Although you do not start each test, you must still supply the appropriate responses to progress from one test to the next. - Page 122 insert a special loop-back connector into the RS-232C port so that the computer can check individual pins of the port. Contact your dealer if you need a loop-back connector. Note that a different connector is required to test the parallel port. When you select option 11 from the DEVICE LIST, you see these prompts: Attach loop-back connector to serial port.
-
Page 123: Alternate Serial Port Check
Once again, if any data received does nor march the data a verify error occurs, and the computer reports the transmitted and received data at the rime of the error. Alternate Serial Port Check If you have turned on DIP switch 4 on the back panel, select option 12 to test the serial communications (RS-232C) port. -
Page 124: Hard Disk Drive And Controller Check
The dot graphics data is sent to the printer using a command (ESC K) compatible with Epson and IBM printers. If this pattern is printed correctly, you can use the MS-DOS GRAPHICS program to print our copies of graphics screens. -
Page 125: Seek Check
If you specified to run the hard disk drive check multiple times, this menu does not display and only the first three tests are performed. Seek check This test checks the ability of the read/write heads to locate any part of the hard disk. This action by a read/write head is called a seek. -
Page 126: Error Detection And Correction Check
You do not see a cylinder count during the test. If no errors occur, the program returns to the menu. If an error is reported, consult your dealer. Error detection and correction check This test checks the ability of the hard disk drive to detect a read/write error and to correct the data accordingly. -
Page 127: Run All Above Checks
The cylinder number counts down to 0. At the end of the test, you see a table of the results of the test. For example, for a 20MB hard disk with three bad tracks, you see the following: BAD TRACKS ..........0 READ ERROR TRACKS.. -
Page 128: Error Codes And Messages
Error Codes and Messages Table D-1 lists all the error codes and messages that may appear during diagnostic checks. Table D-1. Error codes and messages Error code Message System board V30 CPU ERROR 8254 TIMER COUNTER REGISTER ERROR 8254 TIMER COUNTER ERROR 8237 DMA CONTROLLER REGISTER ERROR 8237 DMA REFRESH ERROR 8048 SELF DIAGNOSTIC ERROR... - Page 129 Error code Message Alternate serial port ERROR DTR DSR, DSR ALWAYS HIGH/LOW 1201 ERROR RTS CTS, CTS ALWAYS HIGH/LOW 1201 1202 TIME OUT ERROR 1203 VERIFY ERROR Dot-matrix printer 1401 status: error-type Hard disk drive and controller 1701-A hard disk controller error (RAM) hard disk controller error (interrupt) 1701-B 1701-C...
-
Page 130: Equity Lt Specifications
Appendix E Equity LT Specifications CPU and Memory pPD70116 V30 microprocessor; 4.77 or 10 16-bit CPU MHz clockrate, switch-selectable 20-bit address and 16-bit data bus Main memory 640KB RAM (with parity) on main board R O M Controllers Floppy disk Hard disk Interfaces Parallel... -
Page 131: Power Supply
Clock/calendar/ Power Supply Mass Storage Keyboard Environmental Requirements Temperature Humidity Real-time clock, calendar, and 50-byte CMOS RAM for configuration; battery backup Internal, rechargeable NiCad battery pack; 5 to 7 hours usage AC adapter; 15 volts Three drives maximum: two internal 3 t -inch diskette drives or one internal 3 t -inch diskette drive plus one 20MB hard disk drive;... -
Page 132: Physical Characteristics
Physical Characteristics Depth Width Height Weight Power Requirements Options LCD screen Modem Carrying case Cigarette lighter adapter Equity LT Specifications 12.2” (310 mm) 13.6” (345 mm) 3.2” (79 mm) Dual diskette drive system: 12.6 lb (5.72 kg) with standard LCD 13.1 lb (5.94 kg) with backlit LCD Hard disk drive system: 13.7 lb (6.22 kg) with standard LCD... -
Page 133: F Glossary
Appendix F Glossary Application program A software program designed to perform a specific task, such as a word processing or spreadsheet program. ASCII American Standard Code for Information Interchange. A standardized coding system for representing characters, such as numbers, letters, and graphic symbols. An ASCII character occupies one byte of storage. - Page 134 Byte A sequence or group of eight bits that represents one character. Character Anything that can print in a single space on the page or the screen. Includes numbers, letters, punctuation marks, and graphic symbols. CMOS Complementary Metal-Oxide Semiconductor. A method for making silicon chips.
- Page 135 Data Information stored or processed by a computer. Data diskette A formatted diskette used to store files. Data length The number of bits per character in serial communications. Default Values or settings that take effect when the computer is turned on or reset. A default value stays in effect unless you override it temporarily by changing a setting or you reset the default value itself.
- Page 136 Disk drive The physical device that allows the computer to read from and write to a disk. A diskette drive has a disk slot into which you insert a diskette. A hard disk is permanently fixed inside the main unit. Diskette A flat piece of flexible plastic coated with magnetic material and used to store data permanently.
-
Page 137: Main Unit
GW-BASIC Microsoft’s extended version of the Beginner’s All-purpose Symbolic Instruction Code. A programming language designed to be easy to use and understand. Hard disk The enclosed unit used to store data permanently. Unlike a diskette, it is fixed in place. It can process data more rapidly and store many more files than a diskette. - Page 138 Megabyte (MB) A unit used to measure storage space (in a computer’s memory or on a disk). One megabyte equals 1,048,576 bytes. Memory The area where your computer stores data. Memory contents can be permanent and inalterable (ROM) or temporary (RAM). Microprocessor A small version of a CPU contained on one semiconductor chip.
- Page 139 Parity Data signals sent during communications to detect errors in transmitting or receiving data. Partition To divide a hard disk drive into separate sections for use by different operating systems. Peripheral A device (such as a printer or a modem) connected to a computer that depends on the computer for its operation.
- Page 140 Reset To reload a computer’s operating system so you can retry a task or begin using a different operating system. Resetting clears RAM. Read Only Memory. A portion of memory that can only be read and cannot be used for temporary storage. ROM retains its contents even when you turn off the power.
- Page 141 Subdirectory A directory or group of files that branches down from another subdirectory or from the root directory. Switch An option added to an MS-DOS command that redirects the way the command works. Switches must be preceded by a / (forward slash). For example, if you add the /S switch to a FORMAT command, MS-DOS installs the operating system on the diskette as it formats it.
-
Page 142: Index
AC adapter, connecting, 1-5-6, 3-2 power cord, 1-2, 1-5 using, 1, 3-1 -2, 3-12 AC power indicator, 1-6 Alternate serial port check, D-19 Application program, 1-14, 3-6, 4-18 ASCII codes, 3-9 Asynchronous, E-1 Attribute check, D-8 Auto-boot, MS-DOS, 2-5-6 AUTOEXEC.BAT command, 4-18 Backlighting, turning off, 1-22, 1-24-27, 3-7... - Page 143 Copying, disks, 1-19-22, 3-10, 3-13, 4 - 8 - 1 2 reference files, 2-5 system files, 2-4 Country code, 2-4 CPU, E-l CPU chip, D-4 CPU speed, selecting, 3-5 switch, 3-5, B-6 CPU SPEED Creating MS-DOS partition, 2 - 2 - 3 Creating subdirectories, 4-14 -16 CRT interface, E-1...
- Page 144 Extended character set, 3-9 Extension, file, 4-4 External diskette drive, 1, 1-8, 1-10, 1-14, 2-5 FDISK program, 2-1-2 File extension, 4-4 Filename, 4-4 Floppy disk drive and controller check, D-13 -17 drive check, C-3 random seek check, D-15 sequential seek check, D-15 speed check, D-16 write, read check, D-15 -16 Formatting diskette, 3-11,...
- Page 145 Low battery, 3-2, B-3 -4 BAT indicator, 3-2-3, Magnetic surface, disks, 3-9 Main memory, 1, 1-21, E-1 Mass storage, 3-3, E-2 Mass storage LED, 3-3 Memory, 1, 1-21, E-1 See also RAM Memory check, D-4 -5 Messages, D-24 -25 Microprocessor, E-l MODE command, 1-9, 4-19 Modem, 1, 1-14, E-3 Monitor,...
- Page 146 RAM (random access memory), 1, 1-17, C-1, E-1 RAM checks, C-2 Random seek check, D-15 Read-only memory (ROM), C-l, E-l Read, verify, D-22 Read/write heads, 3-10 Real-time clock, 1-22 -24 Recharging battery, 1, 3-1 -2 Reference diskette, 1-2, 2-5 Reference files, copying, 2-5 Registration card, 1-2 Release button, 1-18, 3-13 Removing diskette, 3-13...
- Page 147 Unpacking, 1-1 -2 Using AC adapter, 3-1 -2, 3-12 Using battery, 3-1 -2 Using Equity LT, 3-1 Using handle, 1-1 -2 Video adapter, display check, adapter check, D-7 attribute check, D-8 character set checks, D-8 -9 color video check, D-12 graphics mode checks, D-9 -10 screen paging check, D-11...
- Page 148 Steps to Setting Up the Equity LT Unpacking Connecting a Printer Turning On the Computer Copying System Diskettes DISKCOPY A: B: 7 Connecting the Screen Charging the Battery Setting the DIP Switches Loading MS-DOS Running Setup Exit Real-time clock Backlight period Primary serial port Secondary serial port 06-4.5...
- Page 150 H Organization of this manual W Technical accuracy Completeness of instructions Clarity of concepts and wording W Quality of examples W Quantity of examples Comments: Address: State: Please cut out and mail in. Thank you! EPSON Fair Excellent Good •J Zip: Poor...
- Page 151 EPSON America, Inc. Lomita Blvd. 2780 Torrance CA 90505 PLACE STAMP HERE...