Table of Contents
Advertisement
Advertisement
Table of Contents

Related Manuals for AEG EDC 6620


Summary of Contents for AEG EDC 6620
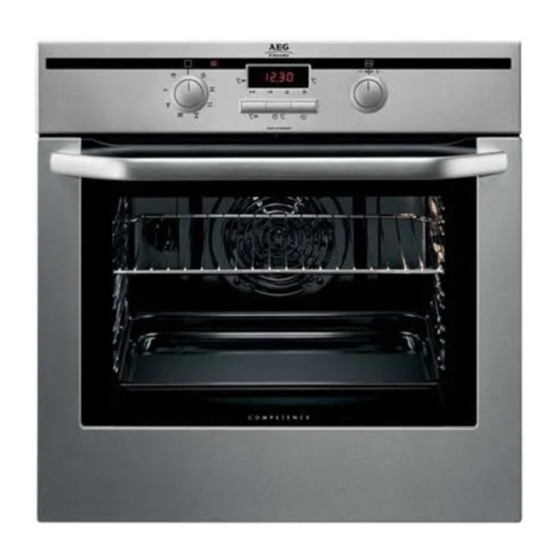
- Page 1 COMPETENCE B3741-4 Built-In Electric Oven Operating Instructions...
-
Page 2: Dear Customer
Dear Customer, Please read these user instructions carefully and keep them to refer to later. Please pass the user instructions on to any future owner of the appli- ance. The following symbols are used in the text: Safety instructions Warning! Information that affects your personal safety. Important! Information that prevents damage to the appliance. -
Page 3: Table Of Contents
Switching the Oven On and Off ........ - Page 4 Oven door glass ........
-
Page 5: Operating Instructions
• Warning: Risk of burns! The interior of the oven becomes hot dur- ing use. • Using ingredients containing alcohol in the oven may create an alco- hol-air mixture that is easily ignited. -
Page 6: Disposal
How to avoid damage to the appliance • Do not line the oven with aluminium foil and do not place baking trays, pots, etc. on the oven floor, as the heat that builds up will dam- age the oven enamel. -
Page 7: Description Of The Appliance
Description of the Appliance General Overview Control Panel Oven Functions Control panel Oven Power Indicator Temperature / Time Display Temperature / Time Selection Function buttons Door handle Full glass door... -
Page 8: Oven Features
For dishes, cake tins, items for roasting and grilling. All-purpose tray For moist cakes, roasts or for use as a baking tray or a pan to collect fat. Top heat and heating elements Oven shelf runners, removable Oven lighting Bottom Heat... -
Page 9: Before Using For The First Time
Before Using for the first time Setting and changing the time The oven only operates when the time has been set. When the appliance has been con- nected to the electrical supply or when there has been a power cut,... -
Page 10: Initial Cleaning
Initial Cleaning Before using the oven for the first time you should clean it thoroughly. Caution: Do not use any caustic, abrasive cleaners! The surface could be damaged. To clean metal fronts use commercially available cleaning agents. 1. Turn the oven function switch to oven lighting 2. -
Page 11: Using The Oven
Using the Oven Switching the Oven On and Off Oven Power Indicator Oven Functions Switching the oven on Turn the oven functions control knob to the desired function. The oven power indicator lights up. The temperature display shows the sug- gested temperature for the oven function selected. -
Page 12: Switching The Oven Off
Cooling fan When the oven is switched on, the fan comes on automatically to keep the surfaces the appliance cool. When the oven is switched off, the fan continues to operate to cool the appliance down, then switches itself... -
Page 13: Heat Indicator
Indicates warming up When the oven function has been switched on the bars that slowly light up one after the other indicate how far the oven has heated up. Fast heat indicator When the fast heat function has been switched on... -
Page 14: Speedcook
After an oven function is selected, using the additional function Speedcook time. Important: Do not put the food to be cooked into the oven, until Speedcook is completed and the oven is operating using the desired function. 1. Set the desired oven function (e. g., Conventional change the suggested temperature. -
Page 15: Oven Functions
For baking cakes with crispy or crusty bases. For automatic pyrolytic cleaning of the oven. It burns off residues in the oven, which can then be re- moved with a cloth when the oven has cooled down. The oven is heated to approximately 500 ×C. -
Page 16: Inserting The Shelf And Tray
Inserting the Shelf and Tray Anti-tip device All slide-in units have a small bulge on the left and right. This bulge is an anti-tip device and must always point to the rear of the oven. Inserting tray: The anti-tip device must point to- wards the rear of the oven. -
Page 17: Clock Functions
Clock function indicators Clock Functions Change display Cook time To set how long the oven is to be in use. End time To set when the oven is to switch off again. Countdown To set a countdown. A signal sounds after the time has elapsed. - Page 18 5 seconds. After that the function indicator is then lit. The set time begins to run in the background. • When the clock functions Cook time completed, the oven functions dial must be turned back to ”0“. • Using the Display temperature and the time.
- Page 19 Countdown 1. Press the Select button repeated- ly until the function indicator Countdown flashes. 2. Using the control knob set the desired countdown (max. 99.00minutes). The function indicator Countdown lights up. When 90% of the time set has elapsed, an audible signal sounds. When the time has elapsed, ”0.00“...
- Page 20 Cook time 1. Select the oven function and tem- perature. 2. Press the Select ly until the function indicator Cook time flashes. 3. Using the the desired cooking time (max. 09.59hours). The function indicator Cook time lights up and the oven comes on immediately.
- Page 21 End time 1. Select the oven function and temperature. 2. Press the Select button repeated- ly until the End time dicator flashes. 3. Using the control knob set the desired switch-off time. The function indicator End time lights up and the oven comes on immediately.
- Page 22 In this case, at 13:05. And switches itself off again when the cook time entered has elapsed. In this case, at 14:05. and End time combined can be used simultaneously, if the oven is function, function, set and End time...
-
Page 23: Other Functions
2. In addition press the Select Oven’s child safety device The oven is fitted with a child safety device. As soon as the child safety device is activated, the oven cannot be switched on. For the child safety device to be activated, none of the oven functions must be currently selected. -
Page 24: Oven Safety Cut-Out
1. Turn the 2. In addition press the Select the display. The child safety device is now deactivated and the oven is again ready for use. Oven safety cut-out If not switched off after a certain time, or if the temperature is not modified, the oven switches off automatically. -
Page 25: Uses, Tables And Tips
3 1 cake tin: e.g. oven level 1 2 baking trays: e. g. oven levels 1 and 3 or Conventional , dark metal and non-stick tins are suitable. bright metal tins are also suitable. is only possible on one level. - Page 26 • Insert the tray with the bevel at the front. • With Conventional bake with two tins next to one another on the oven shelf at the same time. This does not significantly increase baking time. When frozen foods are used the trays inserted may distort during cook- ing.
-
Page 27: Baking Table
Baking table Type of baking Baking in tins Ring cake or brioche Madeira cake/Fruitcakes Sponge cake Flan base - short pastry Flan base - sponge mix- ture Apple pie Apple pie (2tins Ø20cm, diagonally off set) Apple pie (2tins Ø20cm, diagonally off set) Savoury flan (e. - Page 28 Pastries made with egg white, meringues Macaroons Biscuits made with yeast dough Puff pastries Rolls Small cakes (20per tray) 1) Pre-heat the oven 2) Use the all-purpose tray or roasting tray 3) Baking on 2 levels possible Ovenfunction Conventional Conventional Conventional Conventional...
-
Page 29: Tips On Baking
Too much liquid in the mixture Use less liquid Cake is too dry Oven temperature too low Baking time too long Cake browns unevenly Oven temperature too high and baking time too short Mixture is unevenly distributed Spread the mixture evenly on Cake is not done... -
Page 30: Table For Bakes And Gratins
Dish Pasta bake Lasagne Vegetables au gratin Baguettes topped with melted cheese Sweet bakes Fish bakes Stuffed vegetables 1) Pre-heat the oven Frozen Ready Meals Table Food to be cooked Frozen pizza Chips (300-600 g) Baguettes Fruit flans 1) Comments: Turn chips 2 or 3 times during cooking... -
Page 31: Roasting
• Baste large roasts and poultry with their juices several times during roasting. This will give better roasting results. • You can switch the oven off about 10 minutes before the end of the roasting time, in order to utilise the residual heat. -
Page 32: Roasting Table
Roasting table Type of meat Beef Pot roast Roast beef or fillet - rare - medium - well done Pork Shoulder, neck, ham joint Chop, spare rib Meat loaf Porkknuckle (pre- cooked) Veal Roast veal Knuckle of veal Lamb Leg of lamb, roast lamb Saddle of lamb Quantity... - Page 33 Chicken, poulard 1-1.5 kg Duck 1.5-2 kg Goose 3.5-5 kg 2.5-3.5 kg Turkey 4-6 kg Fish (steamed) Whole fish 1-1.5 kg 1) Pre-heat the oven Temper- Shelf Ovenfunction ature position Conven- tional Conven- 210-220 1:15-1:45 tional Conven- 200-210 1:30-2:15...
-
Page 34: Wide Grilling
• The empty oven should always be pre-heated with the grill func- tions for 5 minutes. • For grilling, use both the oven shelf and the roasting tray together. • The grilling times are guidelines. • Grilling is particularly suitable for flat pieces of meat or fish. -
Page 35: Defrosting
Defrosting Oven function: Defrost • Unwrap the food and place it on a plate on the oven shelf. • Do not cover with a plate or bowl, as these can substantially lengthen the defrosting time. • For defrosting, place the shelf in the 1st oven level from the bot- tom. -
Page 36: Making Preserves
• As soon as the liquid starts to pearl in the first jars (after about 35- 60 minutes with 1 litre jars), switch the oven off or reduce the tem- perature to 100°C (see table). -
Page 37: Preserves Table
Unripe gooseberries Stone fruit Pears, quinces, plums Vegetables Carrots Mushrooms Cucumbers Mixed pickles Kohlrabi, peas, asparagus Beans 1) Leave standing in oven when switched off Cooking time Temperature until simmering in°C in mins. 160-170 35-45 160-170 35-45 160-170... -
Page 38: Cleaning And Care
Pyroluxe is used. 1. For cleaning, turn the oven light on. 2. After every use, wipe the oven with a solution of washing-up liquid and allow to dry. In the event of stubborn dirt, clean using Pyroluxe. -
Page 39: Pyrolytic Cleaning
If you use the oven shelf runners that are available as special accesso- ries, these must be removed before pyrolytic cleaning. If there are still oven shelf runners in the oven, ’C1’ will appear in the time display. The pyrolysis process then cannot be started due to a safety cut-out that protects the oven shelf runners. -
Page 40: Side Rails
Side rails To clean the sides of the oven, the left and right side rails can be re- moved from the oven. Taking out the side rails 1. Loosen the screw. 2. Pull the rails away from the wall at the back of the oven and swing them forwards (1). -
Page 41: Oven Lighting
– Switch off the oven! – Remove the fuses in the fuse box or switch off the circuit breaker. Place a cloth on the oven floor to protect the oven light and glass cov- Replacing the oven light bulb/ cleaning the glass cover 1. -
Page 42: Oven Door
Oven Door The oven door of your appliance may be removed for cleaning. Removing the oven door 1. Open the oven door completely. 2. Completely fold back the brass- coloured clamping lever on both door hinges. 3. Grip the oven door with both hands... -
Page 43: Oven Door Glass
Oven door glass The oven door is fitted with four sheets of glass set next to one anoth- er. The inner sheets can be removed for cleaning. Caution: The following steps are to be performed only when the oven door has been removed. If the glass is removed while the door is at- tached, the leighter weight may cause it to spring up and cause injury. - Page 44 Push it into the frame. The glass plates must be firmly at- tached. Re-attach the door to the oven...
-
Page 45: What To Do If
What to do if … Problem The oven does not heat up The oven lighting is not op- erating The pyrolysis function is not working (“C1“ is shown in the time display) The oven door is locked The following appears in... - Page 46 Advice on cookers with metal fronts: Because of the cold surface at the front of the cooker, opening the oven door during (or just after) baking or roasting may cause the glass to steam up. Possible cause...
-
Page 47: Service
Service In the event of technical faults, please first check whether you can remedy the problem yourself with the help of the operating instruc- tions (section “What to do if…”). If you were not able to remedy the problem yourself, please contact the Customer Care Department or one of our service partners. - Page 48 From the Electrolux Group. The world´s No.1 choice. The Electrolux Group is the world´s largest producer of powered appliances for kitchen, cleaning and outdoor use. More than 55 million Electrolux Group products (such as refrigerators, cookers, washing machines, vacuum cleaners, chain saws and lawn mowers) are sold each year to a value of approx. USD 14 billion in more than 150 countries around the world.