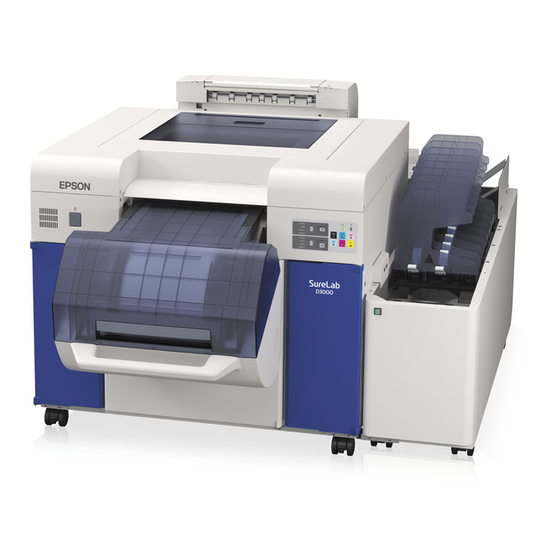
Epson SureLab D3000 - Double Roll Operation Manual
Printer driver operation guide
Hide thumbs
Also See for SureLab D3000 - Double Roll:
- Operation manual (148 pages) ,
- Administrator's manual (92 pages) ,
- Brochure (12 pages)
Table of Contents
Advertisement
Quick Links
Advertisement
Table of Contents

Related Manuals for Epson SureLab D3000 - Double Roll


Summary of Contents for Epson SureLab D3000 - Double Roll
- Page 1 SL-D3000 Printer Driver Operation Guide...
-
Page 2: Copyrights And Trademarks
Seiko Epson Corporation’s operating and maintenance instructions. Seiko Epson Corporation shall not be liable for any damages or problems arising from the use of any options or any consumable products other than those designated as Original EPSON Products or Epson Approved Products by Seiko Epson Corporation. -
Page 3: Table Of Contents
Contents Contents Installing the Printer Driver You cannot print (because the printer does not work) . System Requirements......4 The printer sounds like it is printing, but nothing Supported Operating Systems . -
Page 4: Installing The Printer Driver
Installing the Printer Driver Installing the Printer Driver System Requirements Supported Operating Systems Install the printer driver on the Client PC that will perform printing. The printer driver can be installed under the following operating systems. Make sure that the Client PC meets the following conditions. Operating system Windows XP Professional (SP3) Windows 7 Professional (SP1) 32 and 64 bit versions... -
Page 5: Connection Configuration
Installing the Printer Driver Connection Configuration The Client PC can be connected directly to the printer, or it can be connected to the printer via a Printer PC. Client PC Printer Client PC Printer PC Printer In either situation, the printer driver should be installed on the Client PC. When multiple Client PCs are connected, install the printer driver on each Client PC that will use the printer driver. - Page 6 Installing the Printer Driver Note: If the above requirements are not met, the printer driver may not be installed correctly, and problems could occur in the printer's system application. See the "SL-D3000 Administrator's Guide" for more information on installing the printer's system application.
-
Page 7: Installing The Printer Driver
Installing the Printer Driver Installing the Printer Driver Note: O Note the following points when installing. Do not disconnect the USB cable or the LAN cable connecting the printer to the PC. Do not turn off the printer or the PC. The printer has completed its Post-operation Check. - Page 8 Installing the Printer Driver If the Adobe RGB ICC profile is not installed, the following screen is displayed. Follow the on-screen instructions to install the profile. If the Adobe RGB ICC profile is already installed, the screen from step is displayed. When the Adobe RGB ICC profile installation is complete, the printer model selection screen is displayed.
- Page 9 This completes this section. Tip: The printer driver's name is registered as "EPSON SL-D3000". Specify this name when printing from other applications. In system configurations that do not use a Printer PC, the "Print Monitor for SL-D3000" driver is registered for use with...
-
Page 10: Printer Driver Functions
Printer Driver Functions Printer Driver Functions The printer driver is software that allows you to print using information and instructions from other applications. The main functions of the printer driver are described below. O Converts print data received from applications into printable data and sends it to the printer. O Specifies print settings such as the media type and size on the settings screen. - Page 11 Printer Driver Functions Item Explanation Print Settings Paper Type Select the Paper Type according to the paper being used. Image Quality Select the print quality from Standard (720 dpi) and High Image Quality (1440 dpi). Normally, select Standard. Select High Image Quality when you want to print at a higher resolution.
-
Page 12: Page Layout Screen
Printer Driver Functions Page Layout Screen Item Explanation Orientation Click Portrait or Landscape to select the print orientation. This should match the orientation set in the application. Copies Copies Specify the number of copies. Collate Select to print multiple-page documents in sets when printing two or more pages of data. -
Page 13: Configuration Screen
Printer Driver Functions Configuration Screen Item Explanation Language Select the language used for the printer driver. Auto Select automatically selects Japanese or English depending on the language of the operating system. Unit Settings Select the unit displays. -
Page 14: Basic Printing Methods
Basic Printing Methods Basic Printing Methods Printing from PhotoShop The following section explains how to print image data on your computer using Adobe Photoshop CS5 as an example. Operations may differ depending on the application being used. For more details, see the instruction manual supplied with your application. - Page 15 Basic Printing Methods Specify the image size and resolution. Select Constrain Proportions, and then match the Width and Height to the paper size to be printed. Specify the Resolution. Here, 360 pixel/inch is set as an example. After making the settings, click OK. Tip: You can create fine prints by setting multiples of the Resolution as the printer's Image Quality resolution.
- Page 16 Basic Printing Methods Select this printer from Printer on the Print screen, and then click Print Settings. Make the necessary settings. Paper Type: Select the paper type to be used for printing. Image Quality: Normally, select Standard. Select High Image Quality when you want to print at a higher resolution.
- Page 17 Basic Printing Methods On the Print screen, you can set items such as the orientation and position, as well as make color management settings while checking the image. Tip: O When the printer driver's Color is set to Color Controls (default), select Document as the Color Management setting, and Printer Manages Colors as the Color Handling setting.
- Page 18 Basic Printing Methods Select this printer, and then click Print. Print data is sent to the printer. If you selected Print Preview in step 6, the preview screen is displayed. Tip: Depending on the application you are using, this screen may not be displayed. After performing step 8, print data is sent to the printer.
-
Page 19: Canceling Printing
Follow the steps below to open the Print Queue screen. For Windows 7, click Start - Devices and Printers, and then double-click the EPSON SL-D3000 icon. For Windows XP, click Start - Control Panel - Printers and Other Hardware - Printers and Faxes, and then double-click the "EPSON SL-D3000"... -
Page 20: Displaying The Printer Driver Help
Basic Printing Methods Displaying the Printer Driver Help See the printer driver's online help for more details on each printer driver screen and each item. Displaying Help 1 Click Help on the printer driver's setting screen. The Help is displayed. From here you can use the contents page to view all of the Help items. -
Page 21: Printing Using The Printer Driver Functions
Printing Using the Printer Driver Functions Printing Using the Printer Driver Functions Color Color Settings You can perform color management in the following three ways by using the printer driver for this printer. Choose the best method according to the application you are using, the operating system environment, the aim of the print, and so on. -
Page 22: Color Controls For Tone
Printing Using the Printer Driver Functions Color Controls for Tone You can select sRGB or Adobe RGB to adjust the color space. You can also manually adjust the color tones while viewing a preview of the image. O sRGB: Normally, select sRGB. O Adobe RGB: Select when printing data that contains Adobe RGB color space information. - Page 23 Printing Using the Printer Driver Functions On the Main screen, select Color Controls from Color, and then click Advanced..Select the Color Correction Method. Make the necessary settings. See the printer driver's online help for more details on each item. Tip: You can adjust the color while checking the sample image on the left side of the screen.
-
Page 24: Color Management Using The Application
Printing Using the Printer Driver Functions Color Management Using the Application (No Color Adjustment) Print from applications that support color management. Enable the color management settings in the application, and disable the printer driver's color adjustment function. Make the settings for color adjustment using the application. Example of Adobe Photoshop CS5 Open the Print screen. -
Page 25: Color Management Using The Printer Driver (Icm)
Printing Using the Printer Driver Functions Color Management Using the Printer Driver (ICM) Use image data in which an input profile has been embedded. The application must also support ICM. Make the settings for color adjustment using the application. Depending on the type of application, make the settings following the table below. Application Color Management Settings Adobe Photoshop CS5... - Page 26 Printing Using the Printer Driver Functions On the Main screen, select ICM from Color. Specify other items to suit your needs, and then print. This completes this section.
-
Page 27: Borderless Printing
Printing Using the Printer Driver Functions Borderless Printing This function allows you to print your data without margins on all four sides. The printer driver enlarges the print data to a size slightly larger than the paper size and prints the enlarged image. The sections which extend beyond the paper edges are not printed;... - Page 28 Printing Using the Printer Driver Functions Select Borderless. Specify other items to suit your needs, and then print. This completes this section.
-
Page 29: Printing On Custom Paper
Printing Using the Printer Driver Functions Printing on Custom Paper You can also print on paper sizes that are not already available in the printer driver. You can register the following sizes. Width 4, 5, 6, 8, 8.27, 10, 12 inches (102, 127, 152, 203, 210, 254, 305 mm) Length 3.5 to 48 inches (89 to 1219 mm) Note:... - Page 30 Printing Using the Printer Driver Functions On the User Defined Paper Size screen, enter the name for the paper size, specify the size you want to use, and then click Save. Tip: O To change the paper size you registered, select the paper size name from the list on the left. O To delete the user-defined size you registered, select the paper size name from the list on the left, and then click Delete.
-
Page 31: Previewing An Image
Printing Using the Printer Driver Functions Previewing an Image You can display a preview of your image before printing. Display the printer driver's Main screen. U“Basic Printing Methods” on page 14 On the Main screen, specify necessary printing items such as Paper Type, Paper Source, and Paper Size. Select Print Preview. - Page 32 Printing Using the Printer Driver Functions Specify other items to suit your needs, and then print. The Print Preview screen is displayed. Check the image on the Print Preview screen. As well as enlarging or reducing the image by using Zoom, you can also enlarge the image by using Magnify to check the image in more detail.
-
Page 33: Saving Printer Driver Settings
Printing Using the Printer Driver Functions Saving Printer Driver Settings You can save the settings to suit your preferences, and then apply them when printing. Specify each item for the Main screen and the Page Layout screen that you want to save as your Favorite Setting. -
Page 34: Setting Back Printing
Printing Using the Printer Driver Functions Setting Back Printing This function allows you to print information used for printing on the back of the paper. Back printing is only available when the Back printing unit is installed. Display the printer driver's Page Layout screen. U“Basic Printing Methods”... -
Page 35: Configuration
Configuration Configuration Setting the Display Language and Units This function allows you to select the display language and units for the printer driver. Display the printer driver's Configuration screen. To open the printer driver, right-click this printer's icon in the Devices and Printers folder, and then click Print Settings. -
Page 36: Problem Solver
Problem Solver Problem Solver When an Error Message is Displayed If an error should occur with the printer (it is not working properly), the control panel light turns on and a message is displayed on the screen informing you of the problem. If you encounter an error message, check the solution on the screen and perform the necessary steps to fix the problem. - Page 37 U“You cannot print (because the printer does not work)” on page 36 The "Driver Version" shown on the test page is the version number of the Windows internal driver. This differs from the Epson printer driver version that you installed.
-
Page 38: Prints
Problem Solver The printer sounds like it is printing, but nothing prints Problem Solution The print head moves, but nothing prints. Confirm the printer operation. See "SL-D3000 Operation Guide" to print a nozzle check pattern, and check the operations and print status for the printer. The nozzle check pattern is not printed Perform head cleaning. -
Page 39: Uninstalling The Printer Driver
Go to the Control Panel and click Uninstall a program (or Add or Remove Programs). Select "EPSON SL-D3000 Printer Uninstall" as the software you want to remove, and then click Uninstall/Change (or Change/Remove/Add or Remove). Select Printer Uninstall for this printer. - Page 40 Uninstalling the Printer Driver Select the target printer icon, and then click OK. Follow the on-screen instructions to continue. When the removal confirmation message is displayed, click Yes. Restart the computer if you are reinstalling the printer driver.