Table of Contents
Advertisement
Quick Links
Advertisement
Table of Contents
Troubleshooting

Related Manuals for Epson WorkForce Pro WP-4515


Summary of Contents for Epson WorkForce Pro WP-4515
- Page 1 User’s Guide NPD4578-01 EN...
-
Page 2: Copyright And Trademarks
The information contained herein is designed only for use with this Epson product. Epson is not responsible for any use of this information as applied to other products. - Page 3 WP-4511/4515/4521/4525/4530/4531/4535/4540/4545/4590/4595 User’s Guide Copyright and Trademarks IN NO EVENT SHALL SAM LEFFLER OR SILICON GRAPHICS BE LIABLE FOR ANY SPECIAL, INCIDENTAL, INDIRECT OR CONSEQUENTIAL DAMAGES OF ANY KIND, OR ANY DAMAGES WHATSOEVER RESULTING FROM LOSS OF USE, DATA OR PROFITS, WHETHER OR NOT ADVISED OF THE POSSIBILITY OF DAMAGE, AND ON ANY THEORY OF LIABILITY, ARISING OUT OF OR IN CONNECTION WITH THE USE OR PERFORMANCE OF THIS SOFTWARE.
- Page 4 OF THE USE OF THIS SOFTWARE, EVEN IF ADVISED OF THE POSSIBILITY OF SUCH DAMAGE. General Notice: Other product names used herein are for identification purposes only and may be trademarks of their respective owners. Epson disclaims any and all rights in those marks.
- Page 5 WP-4511/4515/4521/4525/4530/4531/4535/4540/4545/4590/4595 User’s Guide Copyright and Trademarks Copyright © 2012 Seiko Epson Corporation. All rights reserved.
-
Page 6: Guidelines
* These functions are only supported by WP-4515/WP-4525/WP-4595. Note for WP-4590/WP-4595: For PS3/PCL models, you need to download the software from the Epson’s website. Contact customer support in your region for more details on obtaining the printer driver and system requirements such as supported operating systems. -
Page 7: Illustrations Used In This Guide
WP-4511/4515/4521/4525/4530/4531/4535/4540/4545/4590/4595 User’s Guide Guidelines Illustrations used in this guide The illustrations in this guide are from a similar product model. Although they may differ from your actual product, the method of operation is the same. Menu names used in this guide Although the menus, setting items, or option names displayed on the LCD screen may differ from your actual product, the method of operation is the same. -
Page 8: Safety Instructions
WP-4511/4515/4521/4525/4530/4531/4535/4540/4545/4590/4595 User’s Guide Safety Instructions Safety Instructions Important Safety Instructions Read all of the instructions in this section before using the product. Also, be sure to follow all warnings and instructions marked on the product. Setting up the product Observe the following when setting up the product: ❏... -
Page 9: Choosing A Place For The Product
WP-4511/4515/4521/4525/4530/4531/4535/4540/4545/4590/4595 User’s Guide Safety Instructions ❏ If damage occurs to the plug, replace the cord set or consult a qualified electrician. If there are fuses in the plug, make sure you replace them with fuses of the correct size and rating. Choosing a place for the product Observe the following when choosing a place for the product: ❏... -
Page 10: Using The Product With A Wireless Connection
WP-4511/4515/4521/4525/4530/4531/4535/4540/4545/4590/4595 User’s Guide Safety Instructions ❏ If you are not going to use the product for a long period, be sure to unplug the power cord from the electrical outlet. ❏ Do not press too hard on the document table when placing the originals. Using the product with a wireless connection ❏... -
Page 11: Precautions On The Touch Panel
Do not operate using sharp or pointed objects such as ball point pens, sharp pencils, and so on. The cover of the touch panel is made of glass and could break if it receives a heavy impact. Contact Epson support if the glass chips or cracks, and do not touch or attempt to remove the broken glass. -
Page 12: Protecting Your Personal Information
WP-4511/4515/4521/4525/4530/4531/4535/4540/4545/4590/4595 User’s Guide Safety Instructions Protecting Your Personal Information This product allows you to store names and telephone numbers in its memory even when the power is turned off. Use the following menu to erase the memory if you give the product to someone else or dispose of it. F Setup >... -
Page 13: Table Of Contents
WP-4511/4515/4521/4525/4530/4531/4535/4540/4545/4590/4595 User’s Guide Contents Contents Into the rear MP tray..... 31 Copyright and Trademarks Loading Envelopes......33 Copyright and Trademarks. - Page 14 Setup mode menu list....123 Starting Epson Scan Driver....95 Copy Mode.
- Page 15 For Mac OS X......162 Using scanning software other than Epson The Paper Jams......164 Scan driver.
- Page 16 Technical Support Web Site....217 Contacting Epson Support....217 Before Contacting Epson.
-
Page 17: Getting To Know Your Product
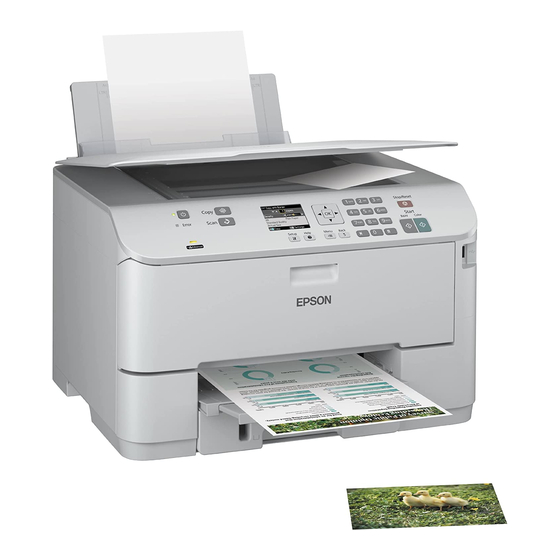
WP-4511/4515/4521/4525/4530/4531/4535/4540/4545/4590/4595 User’s Guide Getting to Know Your Product Getting to Know Your Product Product Parts Note: The illustrations in this section are from a similar product model. Although they may differ from your actual product, the method of operation is the same. ADF cover * Automatic Document Feeder (ADF) * Edge guide *... - Page 18 WP-4511/4515/4521/4525/4530/4531/4535/4540/4545/4590/4595 User’s Guide Getting to Know Your Product Edge guides Stopper Output tray extension Output tray Edge guides Rear MP tray Feeder guard Document cover Document glass Control panel USB connector for external storage device...
- Page 19 WP-4511/4515/4521/4525/4530/4531/4535/4540/4545/4590/4595 User’s Guide Getting to Know Your Product Ink cartridge slots Front cover Print head LINE port * EXT. port * External USB port LAN port Maintenance box Rear unit AC inlet * These parts are only available for the fax model.
-
Page 20: Guide To The Control Panel
WP-4511/4515/4521/4525/4530/4531/4535/4540/4545/4590/4595 User’s Guide Getting to Know Your Product Guide to the Control Panel Control panel design varies depending on location. Note: Although the menus, setting items, or option names displayed on the LCD screen may differ from your actual product, the method of operation is the same. - Page 21 WP-4511/4515/4521/4525/4530/4531/4535/4540/4545/4590/4595 User’s Guide Getting to Know Your Product Buttons Function Displays the speed dial/group dial list in fax mode.*1 Displays the last number dialed. When entering numbers in fax mode, this inserts a pause symbol (-) that acts as a brief pause during dialing.*1 Enters setup mode.
-
Page 22: For Wp-4540/Wp-4545
WP-4511/4515/4521/4525/4530/4531/4535/4540/4545/4590/4595 User’s Guide Getting to Know Your Product Function Press u or d to select the menu item. The highlight section moves up or down. Displays the available buttons and functions. Press l or r to set the density. Press u or d to set the number of copies. The ADF icon is displayed when there is a document loaded in the Automatic Document Feeder (ADF). - Page 23 WP-4511/4515/4521/4525/4530/4531/4535/4540/4545/4590/4595 User’s Guide Getting to Know Your Product Buttons Function Turns the Auto Answer mode on or off. Shows the next or previous menus. l, r Cancels/returns to the previous menu. Activates the setting you have selected. Starts copying/scanning/faxing in black and white. Starts copying/scanning/faxing in color.
-
Page 24: Power Saving Function
WP-4511/4515/4521/4525/4530/4531/4535/4540/4545/4590/4595 User’s Guide Getting to Know Your Product Power Saving Function After 13 minutes of inactivity, the screen turns black to save energy. Press any button to return the screen to its previous state. Restarting Automatically After a Power Failure If a power failure occurs while the product is in fax standby mode or printing, it restarts automatically and then beeps. -
Page 25: Paper Handling
You can achieve good results with most types of plain paper. However, coated papers provide superior prints because they absorb less ink. Epson provides special papers that are formulated for the ink used in Epson ink jet printers, and recommends these papers to ensure high-quality results. - Page 26 10 * Envelope Envelope #10 * Envelope DL * Envelope C6 * Envelope C4 * Epson Bright White Ink Jet Paper 50 * Epson Matte Paper - Heavyweight Epson Photo Quality Ink Jet Paper Epson Premium Glossy Photo Paper 10 × 15 cm (4 × 6 in.) 13 ×...
-
Page 27: Storing Paper
The availability of paper varies by location. Storing paper Return unused paper to the original package as soon as you finish printing. When handling special media, Epson recommends storing your prints in a resealable plastic bag. Keep unused paper and prints away from high temperature, humidity, and direct sunlight. - Page 28 WP-4511/4515/4521/4525/4530/4531/4535/4540/4545/4590/4595 User’s Guide Paper Handling Pull out the paper cassette. Note: If the output tray has been ejected, close it before pulling out the paper cassette. Slide the edge guides to the sides of the paper cassette.
- Page 29 ❏ Fan and align the edges of the paper before loading. ❏ For plain paper, do not load paper above the line just under the d arrow mark inside the edge guide. For Epson special media, make sure the number of sheets is less than the limit specified for the media.
- Page 30 WP-4511/4515/4521/4525/4530/4531/4535/4540/4545/4590/4595 User’s Guide Paper Handling Slide the edge guides to the edges of the paper. Keep the cassette flat and insert it back into the product carefully and slowly. Slide out the output tray and raise the stopper.
-
Page 31: Into The Rear Mp Tray
WP-4511/4515/4521/4525/4530/4531/4535/4540/4545/4590/4595 User’s Guide Paper Handling Note: ❏ After loading paper, set paper size for each paper source. Paper will be fed from appropriate paper source based on setting. To set paper size, press Setup. Then select Printer Setup and Paper Size Loaded. “Paper Size Loaded”... - Page 32 WP-4511/4515/4521/4525/4530/4531/4535/4540/4545/4590/4595 User’s Guide Paper Handling Pull up the rear MP tray. While holding the feeder guard forward, pinch and slide the edge guide. Fan a stack of paper, then tap it on a flat surface to even the edges. Load paper with the printable side up, at the center of the rear MP tray. The printable side is often whiter or brighter than the other side.
-
Page 33: Loading Envelopes
& ❏ For plain paper, do not load paper above the line just under the d arrow mark inside the edge guide. For Epson special media, make sure the number of sheets is less than the limit specified for the media. - Page 34 WP-4511/4515/4521/4525/4530/4531/4535/4540/4545/4590/4595 User’s Guide Paper Handling Pull up the rear MP tray. While holding the feeder guard forward, pinch and slide the edge guide. Load envelopes short edge first with the flap facing down and at the center of the rear MP tray.
-
Page 35: Placing Originals
WP-4511/4515/4521/4525/4530/4531/4535/4540/4545/4590/4595 User’s Guide Paper Handling Note: ❏ The thickness of envelopes and their ability to fold vary widely. If the total thickness of the stack of envelopes exceeds 10 mm, press down on the envelopes to flatten them before loading. If print quality declines when a stack of envelopes is loaded, load one envelope at a time. - Page 36 WP-4511/4515/4521/4525/4530/4531/4535/4540/4545/4590/4595 User’s Guide Paper Handling Caution: To prevent paper jams, avoid the following documents. For these types, use the document glass. ❏ Documents held together with paper clips, staples, etc. ❏ Documents that have tape or paper stuck to them. ❏...
-
Page 37: Document Glass
WP-4511/4515/4521/4525/4530/4531/4535/4540/4545/4590/4595 User’s Guide Paper Handling Note: ❏ For 2-up Copy layout, place the original as shown. ❏ When you use the copy function with the Automatic Document Feeder (ADF), the print settings are fixed at Reduce/ Enlarge - Actual Size, Paper Type - Plain Paper, and Paper Size - A4. The print is cropped if you copy an original larger than A4. - Page 38 WP-4511/4515/4521/4525/4530/4531/4535/4540/4545/4590/4595 User’s Guide Paper Handling Note: See the following sections if any problems occur with the scanning area or the scanning direction when using EPSON Scan. “The edges of your original are not scanned” on page 186 & “Multiple documents are scanned into a single file” on page 186 &...
-
Page 39: Printing
Note for Windows users: ❏ Your printer driver automatically finds and installs the latest version of the printer driver from Epson’s Web site. Click the Driver Update button in your printer driver’s Maintenance window, and then follow the on-screen instructions. If the button does not appear in the Maintenance window, point at All Programs or Programs in the Windows Start menu, and check in the Epson folder. -
Page 40: Getting Information Through Online Help
Depending on your application, the Page Setup menu may not appear in the File menu. Print Click Print on the File menu of your application. Epson Printer For Mac OS X 10.6, click System Preferences on the Apple menu and then click Print & Fax. Utility 4 Select your printer from the Printers list box, click Options &... -
Page 41: Basic Printing
The table below lists the settings you should choose for your paper. For this paper Select this paper type setting Plain paper* plain papers Epson Bright White Ink Jet Paper Thick paper* Thick-Paper Epson Ultra Glossy Photo Paper* Epson Ultra Glossy... -
Page 42: Basic Printer Settings For Windows
After loading paper, set paper size for each paper source. Paper will be fed from appropriate paper source based on setting. “Paper Size Loaded” on page 122 & When using special Epson paper, refer to the section below. “Introduction to Using, Loading, and Storing Media” on page 25 &... -
Page 43: Basic Printer Settings For Mac Os X 10.5 Or 10.6
WP-4511/4515/4521/4525/4530/4531/4535/4540/4545/4590/4595 User’s Guide Printing Select the appropriate Document Size setting. You can also define a custom paper size. For details, see the online help. Select Portrait (tall) or Landscape (wide) to change the orientation of your print. Note: Select Landscape when printing on envelopes. Select the appropriate Paper Type setting. - Page 44 WP-4511/4515/4521/4525/4530/4531/4535/4540/4545/4590/4595 User’s Guide Printing Select the printer you are using as the Printer setting, and then make suitable settings. Note: ❏ Select Landscape when printing on envelopes. ❏ Depending on your application, you may not be able to select some of the items in this dialog. If so, click Page Setup on the File menu of your application, and then make suitable settings.
-
Page 45: Basic Printer Settings For Mac Os X 10.4
WP-4511/4515/4521/4525/4530/4531/4535/4540/4545/4590/4595 User’s Guide Printing Select Print Settings from the pop-up menu. Make the settings that you want to use to print. See the online help for more details on Print Settings. “Selecting the correct paper type ” on page 41 &... - Page 46 WP-4511/4515/4521/4525/4530/4531/4535/4540/4545/4590/4595 User’s Guide Printing Access the Page Setup dialog. “Accessing the printer driver for Mac OS X” on page 40 & Select the printer you are using as the Format for setting and then make suitable settings. Note: Select Landscape when printing on envelopes. Click OK to close the Page Setup dialog.
-
Page 47: Canceling Printing
WP-4511/4515/4521/4525/4530/4531/4535/4540/4545/4590/4595 User’s Guide Printing Select Print Settings from the pop-up menu. Make the settings that you want to use to print. See the online help for more details on Print Settings. “Selecting the correct paper type ” on page 41 &... -
Page 48: For Mac Os X
Printing Using EPSON Status Monitor 3 Access the EPSON Status Monitor 3. “Using EPSON Status Monitor 3” on page 160 & Click the Print Queue button. The Windows Spooler appears. Right-click on the job you want to cancel and then select Cancel. - Page 49 Note for Windows: Manual 2-sided printing is available only when EPSON Status Monitor 3 is enabled. To enable the status monitor, access the printer driver and click the Maintenance tab followed by the Extended Settings button. In the Extended Settings window, check the Enable EPSON Status Monitor 3 check box.
- Page 50 Plain paper Legal*, Letter, A4, Executive*, B5, A5*, A6* Thick paper Letter*, A4* Epson Bright White Ink Jet Paper * Manual 2-sided printing only. Note: ❏ Only use papers that are suitable for 2-sided printing. Otherwise, the print quality may deteriorate.
-
Page 51: Printer Settings For Windows
WP-4511/4515/4521/4525/4530/4531/4535/4540/4545/4590/4595 User’s Guide Printing Printer settings for Windows Make adjustments to basic settings. “Basic printer settings for Windows” on page 42 & Select 2-Sided Printing check box. Note: When using automatic printing, make sure the Auto check box is checked. - Page 52 WP-4511/4515/4521/4525/4530/4531/4535/4540/4545/4590/4595 User’s Guide Printing Click Settings to open the 2-Sided Printing Settings window. To print folded booklets using the 2-sided printing option, select the Booklet check box, and choose Center Binding or Side Binding. Note: Center Binding is not available with manual printing. Select which edge of the document will be bound.
- Page 53 WP-4511/4515/4521/4525/4530/4531/4535/4540/4545/4590/4595 User’s Guide Printing Choose mm or inch as the Unit setting. Then specify the width of the binding margin. Portrait Landscape * : Folding edge ** : Margin When folded booklets are printed using the 2-sided printing option, a margin of the specified width will appear on both sides of the fold.
- Page 54 WP-4511/4515/4521/4525/4530/4531/4535/4540/4545/4590/4595 User’s Guide Printing Select one of the Select Document Type settings. This automatically adjusts Print Density and Increase Ink Drying Time. Note: If you are printing high-density data, such as graphs, we recommend adjusting settings manually. Click OK to return to the Main window. Make sure all of the settings are correct, and then click OK to close the printer settings window.
- Page 55 WP-4511/4515/4521/4525/4530/4531/4535/4540/4545/4590/4595 User’s Guide Printing Select Two-sided Printing Settings from the pop-up menu. Select Long-Edge binding or Short-Edge binding from the Two-sided Printing pop-up menu. Select one of the Document Type settings. This automatically adjusts Print Density and Increased Ink Drying Time.
-
Page 56: Fit To Page Printing
WP-4511/4515/4521/4525/4530/4531/4535/4540/4545/4590/4595 User’s Guide Printing Select Two-sided Printing Settings from the pop-up menu. Select Long-Edge binding or Short-Edge binding from the Two-sided Printing pop-up menu. Select one of the Document Type settings. This automatically adjusts Print Density and Increased Ink Drying Time. - Page 57 WP-4511/4515/4521/4525/4530/4531/4535/4540/4545/4590/4595 User’s Guide Printing Fit to Page printing automatically resizes your page to the paper size you select. You can also resize your page manually. Printer settings for Windows Make adjustments to basic settings. “Basic printer settings for Windows” on page 42 &...
- Page 58 WP-4511/4515/4521/4525/4530/4531/4535/4540/4545/4590/4595 User’s Guide Printing Click OK to close the printer settings window. After completing the steps above, print one test copy and examine the results before printing an entire job. Printer settings for Mac OS X 10.5 or 10.6 Make adjustments to basic settings. “Basic printer settings for Mac OS X 10.5 or 10.6”...
-
Page 59: Pages Per Sheet Printing
WP-4511/4515/4521/4525/4530/4531/4535/4540/4545/4590/4595 User’s Guide Printing Select Paper Handling from the pop-up menu. Select Scale to fit paper size as the Destination Paper Size. Select the appropriate paper size from the pop-up menu. Click Print to start printing. Pages Per Sheet Printing Pages Per Sheet printing allows you to print two or four pages on single sheets of paper. - Page 60 WP-4511/4515/4521/4525/4530/4531/4535/4540/4545/4590/4595 User’s Guide Printing Select 2-Up or 4-Up as Multi-Page. Click Page Order button to open the Page Order Settings window. Select from the following settings. Page Order Allows you to specify the order in which the pages will be printed on the sheet of paper. Some settings may be unavailable, depending on the Orientation setting on the Main window.
- Page 61 WP-4511/4515/4521/4525/4530/4531/4535/4540/4545/4590/4595 User’s Guide Printing Click OK to return to the Main window. Click OK to close the printer settings window. After completing the steps above, print one test copy and examine the results before printing an entire job. Printer settings for Mac OS X 10.5 or 10.6 Make adjustments to basic settings.
-
Page 62: Poster Printing (For Windows Only)
WP-4511/4515/4521/4525/4530/4531/4535/4540/4545/4590/4595 User’s Guide Printing Printer settings for Mac OS X 10.4 Make adjustments to basic settings. “Basic printer settings for Mac OS X 10.4” on page 45 & Select Layout from the pop-up menu. Select from the following settings: Pages per Sheet Prints multiple pages of your document on a single sheet of paper. -
Page 63: Printer Settings
WP-4511/4515/4521/4525/4530/4531/4535/4540/4545/4590/4595 User’s Guide Printing Note: This feature is not available for Mac OS X. Printer settings Make adjustments to basic settings. “Basic printer settings for Windows” on page 42 & Select 2x1 Poster, 2x2 Poster, 3x3 Poster, or 4x4 Poster as Multi-Page. - Page 64 WP-4511/4515/4521/4525/4530/4531/4535/4540/4545/4590/4595 User’s Guide Printing Click Settings to adjust the way your poster will be printed. The Poster Settings window opens. Make the following settings: Print Cutting Prints guide lines for cutting. Guides Overlapping Slightly overlaps the panels and prints alignment markers so that the panels can be Alignment aligned more precisely.
- Page 65 WP-4511/4515/4521/4525/4530/4531/4535/4540/4545/4590/4595 User’s Guide Printing How to make a poster from your prints The following is an example of how to create a poster with 2x2 Poster selected for Multi-Page and Overlapping Alignment Marks selected for Print Cutting Guides. Cut off the margin of Sheet 1 along a vertical line through the center of the top and bottom cross-marks: Place the edge of Sheet 1 on top of Sheet 2 and align the cross-marks, then temporarily tape the two sheets together from the back: Cut the taped sheets in two along a vertical line through the alignment markers (this time, a line to the left of the...
-
Page 66: Watermark Printing (For Windows Only)
WP-4511/4515/4521/4525/4530/4531/4535/4540/4545/4590/4595 User’s Guide Printing Align the edges of the paper using the alignment markers and tape them together from the back: Repeat the instructions from step 1 to step 4 to tape Sheets 3 and 4 together. Repeat the instructions from step 1 to step 4 to tape the top and bottom edges of the paper: Cut off the remaining margins. -
Page 67: Printing The Watermark
WP-4511/4515/4521/4525/4530/4531/4535/4540/4545/4590/4595 User’s Guide Printing Printing the watermark Make adjustments to basic settings. “Basic printer settings for Windows” on page 42 & Click the More Options tab, choose the desired watermark from the Watermark list, then click Settings. If you want to create your own watermark, see the online help. -
Page 68: Sharing Your Printer
Using the PostScript Printer Driver and the PCL6 Printer Driver For PS3/PCL models, you need to download the software from the Epson’s website. Contact customer support in your region for more details on obtaining the printer drivers and system requirements such as supported operating systems. -
Page 69: Scanning
Let’s scan a document to get used to the process. Place your document. “Placing Originals” on page 35 & Start Epson Scan. ❏ Windows: Double-click the Epson Scan icon on the desktop. ❏ Mac OS X: Select Applications > Epson Software > EPSON Scan. Select Home Mode. - Page 70 WP-4511/4515/4521/4525/4530/4531/4535/4540/4545/4590/4595 User’s Guide Scanning Select Text/Line Art as the Document Type setting. Click Preview.
- Page 71 WP-4511/4515/4521/4525/4530/4531/4535/4540/4545/4590/4595 User’s Guide Scanning Click Scan. Click OK. Your scanned image is saved.
-
Page 72: Image Adjustment Features
WP-4511/4515/4521/4525/4530/4531/4535/4540/4545/4590/4595 User’s Guide Scanning Image Adjustment Features Epson Scan offers a variety of settings for improving color, sharpness, contrast, and other aspects affecting image quality. See the Help for more details on Epson Scan. Histogram Provides a graphical interface for adjusting highlight, shadow, and gamma levels individually. - Page 73 WP-4511/4515/4521/4525/4530/4531/4535/4540/4545/4590/4595 User’s Guide Scanning Descreening Removes rippled patterns (known as moiré) that can appear in subtly shaded image areas such as skin tones. Color Restoration Restores the colors in faded photos automatically. Backlight Correction Removes shadows from photos that have too much background light. Dust Removal Removes dust marks from your originals automatically.
-
Page 74: Basic Scanning
WP-4511/4515/4521/4525/4530/4531/4535/4540/4545/4590/4595 User’s Guide Scanning Color Enhance Enhance a certain color. You can select from red, blue, or green. Basic Scanning Scanning from the Control Panel Scanning to a USB storage device Place your original(s). “Placing Originals” on page 35 & Connect the USB device to your product. -
Page 75: Scanning To A Folder
❏ It may be easier to configure the settings on a computer connected to the product using Epson softwares (Epson WebConfig or Epson NetConfig). These softwares also allow you to create a list of folder settings so that you can quickly select a folder from the list and import existing folder settings from other Epson products. -
Page 76: Scanning To An Email
Epson WebConfig, see the Network Guide. ❏ It may be easier to configure the settings on a computer connected to the product using Epson softwares (Epson WebConfig or Epson NetConfig). These softwares also allow you to create a contact list so that you can quickly select recipients from the list and import existing contact lists from other Epson products. - Page 77 ❏ If you select POP before SMTP, you need to enter the POP3 server port number and the POP3 server address. ❏ You can make the timezone settings on Epson WebConfig. To access Epson WebConfig, see the Network Guide. Select Email Server Connection Check to run a test to confirm that the email server is working properly.
- Page 78 WP-4511/4515/4521/4525/4530/4531/4535/4540/4545/4590/4595 User’s Guide Scanning Press OK. Note: You can also add email address entries to a group allowing you to send an email to multiple recipients at the same time. Follow the instructions below. Select Group Address Setup in step 4. Select Add Group.
-
Page 79: Scanning To A Computer
WP-4511/4515/4521/4525/4530/4531/4535/4540/4545/4590/4595 User’s Guide Scanning Enter the subject of the email to which you want to attach the scanned file. Note: A predetermined message, “Attached Scan Data”, is automatically entered as the body of the email. Select Address01 and enter an email address. To add another email address, press d and then select another address number. - Page 80 WP-4511/4515/4521/4525/4530/4531/4535/4540/4545/4590/4595 User’s Guide Scanning Select an item. “Scan mode menu list” on page 127 & Select your PC. Note: If the product is connected to a network, you can select the PC to which you want to save the scanned image. Press Start.
-
Page 81: Scanning In Home Mode
Note: ❏ In Home Mode, you can only scan from the document glass. ❏ See the Help for more details on Epson Scan. Place your original(s). “Document glass” on page 37 &... -
Page 82: Scanning In Office Mode
In the File Save Settings window, select the Type setting and then click OK. Note: If the Show this dialog box before next scan check box is cleared, Epson Scan starts scanning immediately without displaying the File Save Settings window. - Page 83 WP-4511/4515/4521/4525/4530/4531/4535/4540/4545/4590/4595 User’s Guide Scanning Select Office Mode from the Mode list. Select the Image Type setting. Select the Document Source setting. Select the size of your original as the Size setting. Select an appropriate resolution for your original(s) as the Resolution setting. Click Scan.
-
Page 84: Scanning In Professional Mode
In the File Save Settings window, select the Type setting and then click OK. Note: If the Show this dialog box before next scan check box is cleared, Epson Scan starts scanning immediately without displaying the File Save Settings window. - Page 85 WP-4511/4515/4521/4525/4530/4531/4535/4540/4545/4590/4595 User’s Guide Scanning Select Professional Mode from the Mode list. Select the type of original(s) you are scanning as the Document Type setting. Select the Document Source setting. If you select Reflective as the Document Type setting, select Photo or Document as the Auto Exposure Type setting.
-
Page 86: Previewing And Adjusting The Scan Area
& Note for the Automatic Document Feeder (ADF): ❏ The ADF loads your first document page, and then Epson Scan prescans it and displays it in the Preview window. The ADF then ejects your first page. Place your first document page on top of the rest of the pages, and then load the entire document into the ADF. -
Page 87: Creating A Marquee
❏ Some of the settings that you change after previewing an image are reset if you change the preview mode. ❏ Depending on your document type and the Epson Scan mode you are using, you may not be able to change the preview type. -
Page 88: Various Types Of Scanning
❏ If you draw multiple marquees, make sure you click All in the Preview window before you scan. Otherwise, only the area inside the last marquee you drew will be scanned. Various Types of Scanning Scanning a Magazine First of all, place your magazine and start Epson Scan. - Page 89 “Starting a Scan” on page 69 & Select Home Mode from the Mode list. Select Magazine as the Document Type setting. Click Preview. Adjust the exposure, brightness, and other image quality settings. See the Help for more details on Epson Scan.
-
Page 90: Scanning Multiple Documents To A Pdf File
WP-4511/4515/4521/4525/4530/4531/4535/4540/4545/4590/4595 User’s Guide Scanning Click Scan. Select PDF as the Type setting, and then click OK. Your scanned image is saved. Scanning Multiple Documents to a PDF File First of all, place your document and start Epson Scan. - Page 91 WP-4511/4515/4521/4525/4530/4531/4535/4540/4545/4590/4595 User’s Guide Scanning “Starting a Scan” on page 69 & Select Professional Mode from the Mode list. Select the Document Source setting.
- Page 92 See the Help for more details on Epson Scan. Click Scan. Select PDF as the Type setting, and then click OK. Note: If the Show Add Page dialog after scanning check box is cleared, Epson Scan automatically saves your document without displaying the Add Page Confirmation window.
- Page 93 Select this button if you want to delete or reorder any of the pages. Then use the icons on the bottom of the Editing Page window to select, rotate, reorder, and delete pages. See the Help for more details on Epson Scan. Click OK when you are finished editing your pages.
-
Page 94: Scanning A Photo
WP-4511/4515/4521/4525/4530/4531/4535/4540/4545/4590/4595 User’s Guide Scanning Scanning a Photo First of all, place your photo on the document glass and start Epson Scan. “Starting a Scan” on page 69 & Select Home Mode from the Mode list. Select Photograph as the Document Type setting. -
Page 95: Software Information
How to start ❏ Windows: Double-click the EPSON Scan icon on the desktop. Or, select the start button icon or Start > All Programs or Programs > EPSON > EPSON Scan > EPSON Scan. ❏ Mac OS X: Select Applications > Epson Software > EPSON Scan. -
Page 96: Starting Other Scanning Software
How to start ❏ Windows: Select the start button or Start > All Programs or Programs> Epson Software > Event Manager. ❏ Mac OS X: Select Applications > Epson Software, and then double-click the Launch Event Manager icon. - Page 97 WP-4511/4515/4521/4525/4530/4531/4535/4540/4545/4590/4595 User’s Guide Scanning How to start ❏ Windows: Select the start button or Start > All Programs or Programs > ABBYY FineReader folder > ABBYY FineReader. ❏ Mac OS X: Select Applications, and then double-click ABBYY FineReader. Presto! PageManager This software lets you scan, manage, and share your photos or documents.
-
Page 98: Copying
& If you want to print on this paper Choose this Paper Type on the LCD screen Plain paper Plain Paper Epson Bright White Ink Jet Paper Plain Paper Epson Matte Paper - Heavyweight Matte Epson Premium Glossy Photo Paper Prem. -
Page 99: 2-Sided Copying
WP-4511/4515/4521/4525/4530/4531/4535/4540/4545/4590/4595 User’s Guide Copying Set the density. Enter the x Menu. Select Paper and Copy Settings. Select the appropriate copy settings. For WP-4540/WP-4545: Press OK to finish making settings. For WP-4511/WP-4515/WP-4521/WP-4525/WP-4530/WP-4531/WP-4535/WP-4590/WP-4595: Press x Menu to finish making settings. Press one of the x Start buttons to start copying. 2-Sided Copying With duplex copying, you can create double-sided or single-sided copies from double-sided or single-sided originals. -
Page 100: Collate Copying
WP-4511/4515/4521/4525/4530/4531/4535/4540/4545/4590/4595 User’s Guide Copying Select the type of 2-sided copying. Setting Description 1>1-Sided Normal copying. 1>2-Sided Two single-sided originals are printed onto each side of a single sheet of paper. 2>1-Sided Each side of a double-sided original is printed onto one side of a single sheet of paper. 2>2-Sided Each side of a double-sided original is printed onto each side of a single sheet of paper. -
Page 101: Layout Copying
WP-4511/4515/4521/4525/4530/4531/4535/4540/4545/4590/4595 User’s Guide Copying Set the density. Enter the x Menu. Select Paper and Copy Settings. Select Collate Copying. Select On. For WP-4540/WP-4545: Press OK to finish making settings. For WP-4511/WP-4515/WP-4521/WP-4525/WP-4530/WP-4531/WP-4535/WP-4590/WP-4595: Press x Menu to finish making settings. Press one of the x Start buttons to start copying. Layout copying With the layout function, you can copy two single-sided originals onto a single page. -
Page 102: Copy Mode Menu List
WP-4511/4515/4521/4525/4530/4531/4535/4540/4545/4590/4595 User’s Guide Copying For WP-4540/WP-4545: Press OK to finish making settings. For WP-4511/WP-4515/WP-4521/WP-4525/WP-4530/WP-4531/WP-4535/WP-4590/WP-4595: Press x Menu to finish making settings. Press one of the x Start buttons to start copying. Copy Mode Menu List Refer to the section below for the Copy mode menu list. “Copy mode menu list”... -
Page 103: Faxing
Use the following procedure to run the utility. Windows Click the start button (Windows 7 and Vista) or click Start (Windows XP), point to All Programs, select Epson Software, and then click FAX Utility. (Server OS is not supported.) Mac OS X Click System Preference, click Print &... -
Page 104: Sharing Line With Phone Device
WP-4511/4515/4521/4525/4530/4531/4535/4540/4545/4590/4595 User’s Guide Faxing Sharing line with phone device Connect a phone cable leading from a telephone wall jack to the LINE port. Remove the cap. - Page 105 WP-4511/4515/4521/4525/4530/4531/4535/4540/4545/4590/4595 User’s Guide Faxing Connect a phone or answering machine to the EXT. port. Note: ❏ See the following for other connection methods. ❏ For details, see the documentation that came with your devices. Connecting to DSL Telephone wall jack Splitter DSL modem...
-
Page 106: Checking The Fax Connection
WP-4511/4515/4521/4525/4530/4531/4535/4540/4545/4590/4595 User’s Guide Faxing Connecting to ISDN (one phone number) ISDN wall jack Terminal adapter or ISDN router Connecting to ISDN (two phone numbers) ISDN wall jack Terminal adapter or ISDN router Checking the fax connection Follow the instructions below to check the fax connection. Use the l, r, u, or d buttons to change the LCD screen view to find the menu, setting item, or option you want to enter. -
Page 107: Setting Up Fax Features
WP-4511/4515/4521/4525/4530/4531/4535/4540/4545/4590/4595 User’s Guide Faxing Select Check Fax Connection. Press one of the x Start buttons to print the report. Note: If an errors are reported, try the solutions in the report. Setting Up Fax Features Setting up speed dial entries You can create a speed dial list allowing you to select fax recipient numbers quickly when faxing. -
Page 108: Setting Up Group Dial Entries
WP-4511/4515/4521/4525/4530/4531/4535/4540/4545/4590/4595 User’s Guide Faxing Enter a name to identify the speed dial entry. You can enter up to 30 characters. Note for WP-4521/WP-4525/WP-4530/WP-4531/WP-4535/WP-4590/WP-4595: For details on using the virtual keyboard, refer to the section below. “Using the LCD screen” on page 21 &... -
Page 109: Creating Header Information
WP-4511/4515/4521/4525/4530/4531/4535/4540/4545/4590/4595 User’s Guide Faxing For WP-4540/WP-4545: Press to add the speed dial entry to the group dial. Note for WP-4540/WP-4545: Press again to cancel adding the speed dial entry that you selected. For WP-4521/WP-4525/WP-4530/WP-4531/WP-4535/WP-4590/WP-4595: Press r to add the speed dial entry to the group dial. Note for WP-4521/WP-4525/WP-4530/WP-4531/WP-4535/WP-4590/WP-4595: Press l to cancel adding the speed dial entry that you selected. -
Page 110: Changing Fax Output Setting To Print
WP-4511/4515/4521/4525/4530/4531/4535/4540/4545/4590/4595 User’s Guide Faxing For WP-4540/WP-4545: Press OK. For WP-4521/WP-4525/WP-4530/WP-4531/WP-4535/WP-4590/WP-4595: Select Done. Select Your Phone Number. Use the numeric keypad with other buttons on the control panel to enter your phone number. You can enter up to 20 digits. Note for WP-4540/WP-4545: ❏... -
Page 111: Selecting Paper Source To Print Fax
WP-4511/4515/4521/4525/4530/4531/4535/4540/4545/4590/4595 User’s Guide Faxing Press OK. Select Yes. Selecting paper source to print fax Follow the instructions below to select the paper source to print the fax. Use the l, r, u, or d buttons to change the LCD screen view to find the menu, setting item, or option you want to enter. Enter F Setup mode. -
Page 112: Sending Faxes Using Speed Dial/Group Dial
WP-4511/4515/4521/4525/4530/4531/4535/4540/4545/4590/4595 User’s Guide Faxing Use the keys on the numeric keypad to enter the fax number, and then press OK. You can enter up to a maximum of 64 digits. Note: ❏ To separate phone numbers, enter a space by pressing ❏... -
Page 113: Sending Faxes By Broadcasting
WP-4511/4515/4521/4525/4530/4531/4535/4540/4545/4590/4595 User’s Guide Faxing Place your original in the Automatic Document Feeder or on the document glass. “Placing Originals” on page 35 & Enter K Fax mode. For WP-4540/WP-4545: Press Speed Dial or Group Dial. For WP-4521/WP-4525/WP-4530/WP-4531/WP-4535/WP-4590/WP-4595: Press Speed Dial. Note for WP-4521/WP-4525/WP-4530/WP-4531/WP-4535/WP-4590/WP-4595: Press Speed Dial to switch the speed dial list or group dial list. - Page 114 WP-4511/4515/4521/4525/4530/4531/4535/4540/4545/4590/4595 User’s Guide Faxing Select Broadcast Fax. Note: To select recipients from a speed or group dial list, go to step 9. Press Enter a fax number. Press OK. Press d, and then add the fax number. Note: ❏ To add another number, repeat steps 5 through 8. ❏...
-
Page 115: Sending A Fax At A Specified Time
WP-4511/4515/4521/4525/4530/4531/4535/4540/4545/4590/4595 User’s Guide Faxing Press d, and then add the fax number. Note: ❏ To add another number, repeat steps 5 and 6. ❏ If you do not need to add recipients from the speed dial/group dial lists, press OK and go to step 10. Press Speed Dial. -
Page 116: Sending A Fax From A Connected Phone
WP-4511/4515/4521/4525/4530/4531/4535/4540/4545/4590/4595 User’s Guide Faxing Select On. Set the time that you want to send the fax, and then press OK. Press y Back to return to the fax send screen. Press the x Start (B&W) button to reserve a fax. Note: If you need to cancel faxing at the time you specified, press y Stop/Reset. -
Page 117: Receiving Faxes
WP-4511/4515/4521/4525/4530/4531/4535/4540/4545/4590/4595 User’s Guide Faxing Receiving Faxes Receiving faxes automatically The product automatically receives and prints faxes in Auto Answer mode. Note: ❏ Depending on the Fax Output settings, the received fax is saved as a data or printed. “Changing Fax Output setting to print” on page 110 &... -
Page 118: Receiving Faxes Manually
WP-4511/4515/4521/4525/4530/4531/4535/4540/4545/4590/4595 User’s Guide Faxing Receiving faxes manually If your phone is connected to the product, and Auto Answer mode has been set to Off, you can receive fax data after the connection is made. Note: ❏ Depending on the Fax Output settings, the received fax is saved as data or printed. “Changing Fax Output setting to print”... -
Page 119: Printing Reports
WP-4511/4515/4521/4525/4530/4531/4535/4540/4545/4590/4595 User’s Guide Faxing Enter K Fax mode. Enter the x Menu. Select Polling. Enter the fax number. Press one of the x Start buttons to receive the fax. Note: ❏ If Fax Output is set to Save, the received fax data is automatically saved as data, and you do not have to proceed to step 7. -
Page 120: Fax Mode Menu List
WP-4511/4515/4521/4525/4530/4531/4535/4540/4545/4590/4595 User’s Guide Faxing Fax Mode Menu List Refer to the section below for the Fax mode menu list. “Fax mode menu list” on page 130 &... -
Page 121: Using The Control Panel
❏ To turn off the Lock Settings or change the password, carry out steps 1 and 2 above, and follow the on-screen instructions. ❏ If you forget the password, contact Epson Support. “Where To Get Help” on page 217 &... -
Page 122: Power Off Timer
WP-4511/4515/4521/4525/4530/4531/4535/4540/4545/4590/4595 User’s Guide Using the Control Panel Power Off Timer Note: This function is not available for Fax model. You can adjust the time before Power Management is applied. Any increase will affect the printer’s energy efficiency. Please consider the environment before making any change. Enter F Setup mode. -
Page 123: Print Status Sheet
WP-4511/4515/4521/4525/4530/4531/4535/4540/4545/4590/4595 User’s Guide Using the Control Panel Select Paper Size Notice. Select On or Off. Print Status Sheet Prints a sheet showing the current product settings and installed options. This sheet can be useful to confirm whether options have been installed correctly. Enter F Setup mode. - Page 124 WP-4511/4515/4521/4525/4530/4531/4535/4540/4545/4590/4595 User’s Guide Using the Control Panel Menu Setting Item Description Printer Setup Paper Size Loaded & See “Paper Size Loaded” on page 122 Thick Paper Turn on when printing on thick paper. Dry Time Sets the dry time when 2-sided printing. Sound On, Off Power Off Timer...
- Page 125 WP-4511/4515/4521/4525/4530/4531/4535/4540/4545/4590/4595 User’s Guide Using the Control Panel Menu Setting Item Description Fax Settings Send Settings Resolution: Select this option to change the resolution for fax data you are sending. Quality: Select this option to change the quality for fax data you are sending. Contrast: Select this option to change the contrast for fax data you are sending.
-
Page 126: Copy Mode
WP-4511/4515/4521/4525/4530/4531/4535/4540/4545/4590/4595 User’s Guide Using the Control Panel Menu Setting Item Description Print PS3 Status Sheet & See “Print PS3 Status Sheet” on page 123 Lock Settings On, Off, Change Password & See “Lock Settings” on page 121 Restore Default Settings Fax Send/Receive Settings Initializes Fax Send/Receive settings to the factory default settings. -
Page 127: Scan Mode
WP-4511/4515/4521/4525/4530/4531/4535/4540/4545/4590/4595 User’s Guide Using the Control Panel Menu Setting and Options Paper and Copy Settings 2-Sided Copying 1>1-Sided, 1>2-Sided, 2>1-Sided, 2>2-Sided Collate Copying Off, On Layout With Border, 2-up Copy Reduce/Enlarge Custom Size, Actual Size, Auto Fit Page, 10 x 15 cm->A4, A4->10 x 15 cm, 13 x 18->10 x 15, 10 x 15->13 x 18, A5->A4, A4->A5 Paper Size A4, A5, 10 x 15 cm(4 x 6 in), 13 x18 cm(5 x 7 in) - Page 128 WP-4511/4515/4521/4525/4530/4531/4535/4540/4545/4590/4595 User’s Guide Using the Control Panel Menu Setting and Options Scan to Network Folder/ Save to Communication Mode Select Network Folder (SMB) or FTP. FTP > r Save to Enter a path to the folder in which scanned images are saved. You can use an IP address or a host name to specify the PC.
-
Page 129: Scan Settings
Available for computers running English versions of Windows 7 or Vista. * You can also configure these settings on a computer connected to the product using Epson softwares (Epson WebConfig or Epson NetConfig). To access Epson WebConfig, see the Network Guide. You can download the latest versions of Epson NetConfig from the Epson website. -
Page 130: Fax Mode
WP-4511/4515/4521/4525/4530/4531/4535/4540/4545/4590/4595 User’s Guide Using the Control Panel Fax Mode Fax mode menu list Note: ❏ These functions are only available for Fax capable models. ❏ Depending on the model, some functions may not be available. Menu Setting item Description Send Settings Resolution Select this option to change the resolution for fax data you are sending. -
Page 131: Error Messages
Turn the printer off and then back on. Make sure that no paper is again. For details, see your documentation. still in the printer. If the error message still appears, contact Epson support. Printer error. Turn power off and then on again. For details, see your documentation. - Page 132 Recovery Mode The firmware update has failed. You will need to re-attempt the firmware update. Ready a USB cable and visit your local Epson website for further instructions. One side will be printed. You can only use XXX size plain Press the y button to cancel printing, or press one of the x Start paper for 2-sided print.
- Page 133 WP-4511/4515/4521/4525/4530/4531/4535/4540/4545/4590/4595 User’s Guide Using the Control Panel Error Messages Solutions SMTP server communication error. Make sure the product is connected to the network. For details, see the Network Guide. POP3 server communication error. When you are using the Scan to Network Folder/FTP function, check that the entered folder path, the user name, and the Communication error.
-
Page 134: Installing Option
WP-4511/4515/4521/4525/4530/4531/4535/4540/4545/4590/4595 User’s Guide Installing Option Installing Option 250-Sheet Paper Cassette Unit Installing the paper cassette unit Follow the steps below to install the paper cassette unit. Turn the product off and unplug the power cord and all the interface cables. Caution: Make sure to unplug the power cord from the product to prevent getting an electric shock. -
Page 135: Uninstalling The Cassette Unit
WP-4511/4515/4521/4525/4530/4531/4535/4540/4545/4590/4595 User’s Guide Installing Option Align the corners of the product and the unit, then lower the product gently onto the unit so that the connector and two pins on the top of the unit fit into the terminal and the holes on the bottom of the product respectively. Reconnect all the interface cables and the power cord. -
Page 136: Replacing Consumables
For Windows Note: ❏ Epson cannot guarantee the quality or reliability of non-genuine ink. If non-genuine ink cartridges are installed, the ink cartridge status may not be displayed. ❏ When an ink cartridge is running low, the Low Ink Reminder screen automatically appears. You can also check the ink cartridge status from this screen. - Page 137 This is because a mixture of color inks is used to create black. ❏ If EPSON Status Monitor 3 does not appear, access the printer driver and click the Maintenance tab and then the Extended Settings button. In the Extended Settings window, check the Enable EPSON Status Monitor 3 check box.
- Page 138 Click the EPSON Status Monitor button. The EPSON Status Monitor appears. Note: ❏ The graphic displays the ink cartridge status when EPSON Status Monitor was first opened. To update the ink cartridge status, click Update. ❏ Epson cannot guarantee the quality or reliability of non-genuine ink. If non-genuine ink cartridges are installed, the ink cartridge status may not be displayed.
-
Page 139: Precautions On Ink Cartridge Replacement
❏ For maximum ink efficiency, only remove an ink cartridge when you are ready to replace it. Ink cartridges with low ink status may not be used when reinserted. ❏ Other products not manufactured by Epson may cause damage that is not covered by Epson’s warranties, and under certain circumstances, may cause erratic printer behavior. -
Page 140: Replacing An Ink Cartridge
WP-4511/4515/4521/4525/4530/4531/4535/4540/4545/4590/4595 User’s Guide Replacing Consumables ❏ To ensure you receive premium print quality and to help protect your print head, a variable ink safety reserve remains in the cartridge when your printer indicates to replace the cartridge. The yields quoted for you do not include this reserve. -
Page 141: Maintenance Box
Read all of the instructions in this section before replacing the maintenance box. ❏ Epson recommends the use of a genuine Epson maintenance box. The use of a non-genuine maintenance box may cause damage that is not covered by Epson’s warranties, and under certain circumstances, may cause erratic printer behavior. -
Page 142: Replacing A Maintenance Box
WP-4511/4515/4521/4525/4530/4531/4535/4540/4545/4590/4595 User’s Guide Replacing Consumables ❏ Do not touch the green IC chip on the side of the maintenance box. ❏ Keep out of reach of children, and do not drink the ink. ❏ Do not tilt the used maintenance box until it is placed in the plastic bag provided. ❏... - Page 143 WP-4511/4515/4521/4525/4530/4531/4535/4540/4545/4590/4595 User’s Guide Replacing Consumables Insert the maintenance box into place as far as it will go. Push the button on either side of the rear unit at the same time, and then reattach the unit. Press OK. Maintenance box replacement is complete.
-
Page 144: Maintaining Your Printer And Software
Make sure that no warnings or errors are displayed on the LCD screen. Make sure that A4-size paper is loaded in the rear MP tray or the paper cassette. Access the Epson Printer Utility 4 dialog. “Accessing the printer driver for Mac OS X” on page 40 &... -
Page 145: Using The Control Panel
WP-4511/4515/4521/4525/4530/4531/4535/4540/4545/4590/4595 User’s Guide Maintaining Your Printer and Software Using the control panel Follow the steps below to check the print head nozzles using the printer control panel. Use the l, r, u, or d buttons to change the LCD screen view to find the menu, setting item, or option you want to enter. -
Page 146: Using The Head Cleaning Utility For Windows
If print quality has not improved after repeating this procedure about four times, leave the printer on and wait for at least six hours. Then run the nozzle check again and repeat the head cleaning if necessary. If print quality has still not improved, contact Epson support. Note only for printers without fax function: If print quality has not improved after repeating this procedure about four times, turn the printer off and wait for at least six hours. -
Page 147: Using The Head Cleaning Utility For Mac Os X
Follow the steps below to clean the print head using the Head Cleaning utility. Make sure that no warnings or errors are displayed on the LCD screen. Access the Epson Printer Utility 4. “Accessing the printer driver for Mac OS X” on page 40 &... -
Page 148: Aligning The Print Head
If print quality has not improved after repeating this procedure about four times, leave the printer on and wait for at least six hours. Then run the nozzle check again and repeat the head cleaning if necessary. If print quality has still not improved, contact Epson support. Note only for printers without fax function: If print quality has not improved after repeating this procedure about four times, turn the printer off and wait for at least six hours. -
Page 149: Using The Print Head Alignment Utility For Mac Os X
Make sure that no warnings or errors are displayed on the LCD screen. Make sure A4-size paper is loaded in paper cassette 1. Access the Epson Printer Utility 4 dialog. “Accessing the printer driver for Mac OS X” on page 40 &... -
Page 150: Setting/Changing Time And Region
WP-4511/4515/4521/4525/4530/4531/4535/4540/4545/4590/4595 User’s Guide Maintaining Your Printer and Software Select the most solid pattern. Enter the pattern number for #1. Repeat step 7 for all patterns. Finish aligning the print head. Setting/Changing Time and Region Follow the steps below to set the time and region using the printer control panel. Use the l, r, u, or d buttons to change the LCD screen view to find the menu, setting item, or option you want to enter. -
Page 151: Making Printer Settings
If you have installed the printer driver, you can make various printer settings from your computer using the setting utility. Note: For PS3/PCL models, you need to download the software from the Epson’s website. Power Off Timer Setting Note: ❏ This option is only available for printers without a fax. -
Page 152: Paper Size Loaded Setting
Maintaining Your Printer and Software Click the Apply button. For Mac OS X Access the Epson Printer Utility 4 dialog box. “Accessing the printer driver for Mac OS X” on page 40 & Click the Printer Settings button. The Printer Settings screen appears. -
Page 153: Cleaning The Printer
WP-4511/4515/4521/4525/4530/4531/4535/4540/4545/4590/4595 User’s Guide Maintaining Your Printer and Software Click the Printer Settings button. The Printer Settings screen appears. Select the paper size for each paper source as the Paper Size Loaded. Press the Apply button. Cleaning the Printer Cleaning the exterior of the printer To keep your printer operating at its best, clean it thoroughly several times a year by using the following instructions. -
Page 154: Cleaning The Interior Of The Printer
WP-4511/4515/4521/4525/4530/4531/4535/4540/4545/4590/4595 User’s Guide Maintaining Your Printer and Software ❏ Do not press the surface of the document glass with any force. ❏ Be careful not to scratch or damage the surface of the document glass, and do not use a hard or abrasive brush to clean it. -
Page 155: Checking And Installing Your Software
Checking the software installed on your computer To use the functions described in this User’s Guide, you need to install the following software. ❏ Epson Driver and Utilities ❏ Epson Event Manager Follow the steps below to check that the software is installed on your computer. -
Page 156: Installing The Software
Check the list of currently installed programs. For Mac OS X Double-click Macintosh HD. Double-click the Epson Software folder in the Applications folder and check the contents. Note: ❏ The Applications folder contains software provided by third parties. ❏ To check that the printer driver is installed, click System Preferences on the Apple menu and then click Print & Fax. - Page 157 WP-4511/4515/4521/4525/4530/4531/4535/4540/4545/4590/4595 User’s Guide Maintaining Your Printer and Software Disconnect the product’s interface cable from your computer. Do one of the following. Windows 7, Vista, and Server 2008: Click the start button and select Control Panel. Windows XP and Server 2003: Click Start and select Control Panel. Do one of the following.
-
Page 158: For Mac Os X
❏ Depending on the application, the Installer may be separated from the Uninstaller. Quit all running applications. Double-click the Uninstall Center icon in the Epson folder in your Mac OS X hard drive. Select the check boxes for the software you want to uninstall, such as your product’s driver and the application, from the list displayed. -
Page 159: Troubleshooting For Printing
Note for Windows users: If EPSON Status Monitor 3 does not appear, access the printer driver and click the Maintenance tab and then the Extended Settings button. In the Extended Settings window, check the Enable EPSON Status Monitor 3 check box. -
Page 160: Checking Printer Status
❏ Double-click the printer shortcut icon on your Windows taskbar. To add a shortcut icon to the taskbar, see the following section: “From the shortcut icon on the taskbar” on page 40 & ❏ Open the printer driver, click the Maintenance tab, then click the EPSON Status Monitor 3 button. - Page 161 When you access EPSON Status Monitor 3, the following window appears: Note: ❏ If EPSON Status Monitor 3 does not appear, access the printer driver and click the Maintenance tab and then the Extended Settings button. In the Extended Settings window, check the Enable EPSON Status Monitor 3 check box.
-
Page 162: For Mac Os X
❏ Print Queue: You can view Windows Spooler by clicking Print Queue. If a problem occurs during printing, EPSON Status Monitor 3 will pop up and display an error message. For more information, click Technical Support to access the online User’s Guide. - Page 163 EPSON Status Monitor will lead you step by step through the ink cartridge or maintenance box replacement procedure. You can also use this utility to check the ink cartridge status before printing. EPSON Status Monitor displays the ink cartridge status at the time it was opened. To update the ink cartridge status, click Update.
-
Page 164: The Paper Jams
WP-4511/4515/4521/4525/4530/4531/4535/4540/4545/4590/4595 User’s Guide Troubleshooting for Printing The Paper Jams Warning: Never touch the buttons on the control panel while your hand is inside the printer. Check the error message, and then try the following solutions in order from the top. Error Messages Solution Paper jam. -
Page 165: Removing Jammed Paper From The Rear Unit
WP-4511/4515/4521/4525/4530/4531/4535/4540/4545/4590/4595 User’s Guide Troubleshooting for Printing Error Messages Solution Paper jam in the Automatic Document Feeder (ADF). “Removing jammed paper from the Automatic Document & Remove the jammed paper. Feeder (ADF)” on page 168 Paper jam in the Automatic Document Feeder (ADF). Remove the jammed paper. -
Page 166: Removing Jammed Paper From The Front Cover And The Output Tray
WP-4511/4515/4521/4525/4530/4531/4535/4540/4545/4590/4595 User’s Guide Troubleshooting for Printing Carefully remove the jammed paper. Push the button on either side of the rear unit at the same time, and then reattach the unit. Removing jammed paper from the front cover and the output tray Open the front cover. -
Page 167: Removing Jammed Paper From The Paper Cassette(S)
WP-4511/4515/4521/4525/4530/4531/4535/4540/4545/4590/4595 User’s Guide Troubleshooting for Printing Close the front cover. If the jammed paper remains near the output tray, carefully remove the paper. Removing jammed paper from the paper cassette(s) Note: The illustrations in this section show how to remove jammed paper from paper cassette 1. When removing jammed paper from paper cassette 2, repeat the instructions described below. -
Page 168: Removing Jammed Paper From The Automatic Document Feeder (Adf)
WP-4511/4515/4521/4525/4530/4531/4535/4540/4545/4590/4595 User’s Guide Troubleshooting for Printing Keep the cassette flat and insert it back into the printer carefully and slowly. Removing jammed paper from the Automatic Document Feeder (ADF) Remove the stack of paper from the ADF input tray. Open the ADF cover. Caution: Make sure you open the ADF cover before removing jammed paper. - Page 169 WP-4511/4515/4521/4525/4530/4531/4535/4540/4545/4590/4595 User’s Guide Troubleshooting for Printing Close the ADF cover. Open the document cover. Carefully remove the jammed paper. Close the document cover. Raise the ADF input tray.
-
Page 170: Preventing Paper Jams
❏ For plain paper, do not load paper above the line just under the H or c arrow mark inside the edge guide. For Epson special media, make sure the number of sheets is less than the limit specified for the media. -
Page 171: Print Quality Problems
WP-4511/4515/4521/4525/4530/4531/4535/4540/4545/4590/4595 User’s Guide Troubleshooting for Printing Make the settings that you want to use to print. Click OK to close the printer settings window, and then print your file. Print Preview window opens. Select a page that has already been printed in the page list box on the left side, and then select Remove Page from the Print Options menu. -
Page 172: Horizontal Banding
❏ For best results, use up ink cartridge within six months of opening the package. ❏ Try to use genuine Epson ink cartridges. ❏ Check the ink cartridge status by using EPSON Status Monitor 3 (Windows) or EPSON Status Monitor (Mac OS “Checking the ink cartridge status” on page 136 &... -
Page 173: Incorrect Or Missing Colors
❏ Run the Nozzle Check utility and then clean any print heads which produced a defective nozzle check result. “Checking the Print Head Nozzles” on page 144 & ❏ Check the ink cartridge status by using EPSON Status Monitor 3 (Windows) or EPSON Status Monitor (Mac OS “Checking the ink cartridge status” on page 136 &... -
Page 174: Miscellaneous Printout Problems
WP-4511/4515/4521/4525/4530/4531/4535/4540/4545/4590/4595 User’s Guide Troubleshooting for Printing ❏ If the paper is curled toward the printable side, flatten it or curl it slightly in the opposite direction. ❏ Make sure the paper type selected in the printer driver is appropriate for the type of paper loaded in the printer. “Selecting the correct paper type ”... -
Page 175: Inverted Image
WP-4511/4515/4521/4525/4530/4531/4535/4540/4545/4590/4595 User’s Guide Troubleshooting for Printing Inverted image ❏ For Windows, clear the Mirror Image check box from the More Options window of your printer driver, or turn off the Mirror Image setting in your application. For Mac OS X, clear the Mirror Image check box in Print Settings in the Print dialog box of your printer driver, or turn off the Mirror Image setting in your application. -
Page 176: Printing Is Too Slow
❏ For plain paper, do not load paper above the line just under the H or c arrow mark inside the edge guide. For Epson special media, make sure the number of sheets is less than the limit specified for the media. -
Page 177: Multiple Pages Feed
❏ For plain paper, do not load paper above the line just under the H or c arrow mark inside the edge guide. For Epson special media, make sure the number of sheets is less than the limit specified for the media. -
Page 178: The Printer Does Not Print
WP-4511/4515/4521/4525/4530/4531/4535/4540/4545/4590/4595 User’s Guide Troubleshooting for Printing The Printer Does Not Print The LCD screen or all lights are off ❏ Press the P button to make sure the printer is on. ❏ Turn off the printer and make sure that the power cord is securely plugged in. ❏... -
Page 179: An Ink Error Is Indicated After You Replace The Cartridge
WP-4511/4515/4521/4525/4530/4531/4535/4540/4545/4590/4595 User’s Guide Troubleshooting for Printing An ink error is indicated after you replace the cartridge Open the front cover. Remove and reinsert the ink cartridge and then continue with the ink cartridge installation. Close the front cover firmly. Increasing the Print Speed (For Windows Only) Print speed may be increased by selecting certain settings in the Extended Settings window when the printing speed is slow. -
Page 180: Other Problem
WP-4511/4515/4521/4525/4530/4531/4535/4540/4545/4590/4595 User’s Guide Troubleshooting for Printing The following dialog box appears. Select the following check boxes and print speed may be increased. ❏ High Speed Copies ❏ Always spool RAW datatype ❏ Page Rendering Mode ❏ Print as Bitmap For more details on each item, see the online help. Other Problem Printing plain papers quietly When plain paper is selected as the Paper Type setting and Normal is selected as the Quality setting in the printer... - Page 181 WP-4511/4515/4521/4525/4530/4531/4535/4540/4545/4590/4595 User’s Guide Troubleshooting for Printing For Windows, select the Quiet Mode check box in the Main window of your printer driver. For Mac OS X 10.5 or later, select On from the Quiet Mode. To display the Quiet Mode, click through the following menus: System Preferences, Print &...
-
Page 182: Troubleshooting For Scanning
❏ Make sure you select the correct product if a scanner list appears when starting to scan. Windows: When you start Epson Scan using the EPSON Scan icon, and the Select Scanner list is displayed, make sure you select the model of your product. -
Page 183: Using The Button
& ❏ Mac OS X: Make sure you are logged on as the user who installed the scanning software. Other users must first start Epson Scanner Monitor in the Applications folder and then press a button to scan. How to unblock Epson Event Manager Click Start or the start button, and then point to Control Panel. -
Page 184: Using Scanning Software Other Than Epson Scan Driver
Programs and Services list. Click OK. Using scanning software other than Epson Scan driver ❏ If you are using any TWAIN-compliant programs, such as Adobe Photoshop Elements, make sure that the correct product is selected as the Scanner or Source setting. -
Page 185: Problems With Scanned Images
WP-4511/4515/4521/4525/4530/4531/4535/4540/4545/4590/4595 User’s Guide Troubleshooting for Scanning ❏ Scanning at a high resolution takes a long time. Problems With Scanned Images Scan quality is unsatisfactory Scan quality can be improved by changing the current settings or adjusting the scanned image. “Image Adjustment Features” on page 72 &... -
Page 186: The Scanning Area Or Direction Is Unsatisfactory
WP-4511/4515/4521/4525/4530/4531/4535/4540/4545/4590/4595 User’s Guide Troubleshooting for Scanning ❏ Rotate your original document. ❏ Rotate the scanned image using the application software after scanning. ❏ Select the Descreening check box. ❏ In Professional Mode, change a resolution setting and scan again. Uneven color, smears, dots, or straight lines appear in your image You may need to clean the interior of the product. -
Page 187: Problems Remain After Trying All Solutions
Click Configuration, select the Preview tab, and then clear the Auto Photo Orientation check box. Then, place your documents correctly. Problems Remain After Trying All Solutions If you have tried all the solutions and have not solved the problem, initialize the Epson Scan settings. Click Configuration, select the Other tab, and then click Reset All. -
Page 188: Troubleshooting For Copying
❏ To clean the inside of the product, make a copy without placing a document on the document glass/ADF. ❏ Try to use the genuine Epson ink cartridges and paper recommended by Epson. Your print is faint or has gaps ❏... -
Page 189: Your Print Is Grainy
WP-4511/4515/4521/4525/4530/4531/4535/4540/4545/4590/4595 User’s Guide Troubleshooting for Copying ❏ Make sure the printable side (the whiter or glossier side) of the paper is facing in the right direction. “Loading Paper” on page 27 & ❏ When you select Standard Quality or Best as the Quality setting, select Off as the Bidirectional setting. Bidirectional printing decreases print quality. -
Page 190: Troubleshooting For Faxing
WP-4511/4515/4521/4525/4530/4531/4535/4540/4545/4590/4595 User’s Guide Troubleshooting for Faxing Troubleshooting for Faxing Cannot send fax ❏ Make sure the phone cable is connected correctly and check that the phone line works. You can check the line status by using the Check Fax Connection function. “Connecting to a Phone Line”... -
Page 191: Quality Problems (Receiving)
WP-4511/4515/4521/4525/4530/4531/4535/4540/4545/4590/4595 User’s Guide Troubleshooting for Faxing ❏ If the fax you sent was faint or not clear, change the Resolution (or Quality depending on your model) or Contrast in the fax settings menu. “Setup mode menu list” on page 123 &... -
Page 192: Ink And Paper
T6784 T7034 Note: ❏ Not all cartridges are available in all regions. ❏ For WP-4515/WP-4525/WP-4595, Epson recommends the T701 or T702 ink cartridges. ❏ For WP-4535/WP-4545, Epson recommends the T702 or T703 ink cartridges. Color Black, Cyan, Magenta, Yellow Cartridge life For best results, use up ink cartridge within six months of opening the package. -
Page 193: Maintenance Box
Epson offers specially-designed paper and other print media for all your printing needs. Note: ❏ The availability of paper varies by location. ❏ You can find the part numbers for the following Epson special papers on the Epson support Web site. “Technical Support Web Site” on page 217 &... -
Page 194: Option
10 × 15 cm (4 × 6 in.), 13 × 18 cm (5 × 7 in.) Epson Matte Paper - Heavyweight Epson Photo Quality Ink Jet Paper Option 250-Sheet Paper Cassette Unit/PXBACU1 You can use the following 250-Sheet Paper Cassette Unit/PXBACU1. -
Page 195: Technical Specifications
Note: ❏ Since the quality of any particular brand or type of paper may be changed by the manufacturer at any time, Epson cannot attest to the quality of any non-Epson brand or type of paper. Always test samples of paper stock before purchasing large quantities or printing large jobs. - Page 196 16:9 wide size (102 × 181 mm) 100 × 148 mm Letter 8 1/2 × 11 in. Legal 8 1/2 × 14 in. Paper types Plain paper or special paper distributed by Epson Thickness 0.08 to 0.11 mm (0.003 to 0.004 in.) (for plain paper) Weight 64 g/m²...
-
Page 197: Printable Area
WP-4511/4515/4521/4525/4530/4531/4535/4540/4545/4590/4595 User’s Guide Product Information Printable area Highlighted portions show printable area. Single sheets: Envelopes: Minimum margin Media type Single sheets Envelopes 3.0 mm (0.12 in.) 3.0 mm (0.12 in.) 3.0 mm (0.12 in.) 5.0 mm (0.20 in.) *1 3.0 mm (0.12 in.) 3.0 mm (0.12 in.) *2 *1 The recommended margin for Envelope C4 is 9.5 mm. -
Page 198: Scanner Specifications
WP-4511/4515/4521/4525/4530/4531/4535/4540/4545/4590/4595 User’s Guide Product Information Scanner specifications Note: Specifications are subject to change without notice. Scanner type Flatbed color Photoelectric device 10200 × 14040 pixels at 1200 dpi Effective pixels Scanning area may be restricted if resolution setting is large. 216 ×... -
Page 199: Network Interface Specification
WP-4511/4515/4521/4525/4530/4531/4535/4540/4545/4590/4595 User’s Guide Product Information Speed Up to 33.6 kbps Resolution Monochrome Standard: 203 × 98 dpi Fine: 203 × 196 dpi Photo: 203 × 196 dpi Color Fine: 200 × 200 dpi Photo: 200 × 200 dpi Error correction mode CCITU/ITU Group 3 fax with error correction mode Speed dial numbers Up to 60... -
Page 200: Electrical
WP-4511/4515/4521/4525/4530/4531/4535/4540/4545/4590/4595 User’s Guide Product Information Dimensions Storage Width: 460 mm (18.1 inches) Depth: 420 mm (16.5 inches) Height: 341 mm (13.4 inches) Printing* Width: 460 mm (18.1 inches) Depth: 654 mm (25.7 inches) Height: 383 mm (15.1 inches) Approx. 13.8 kg (30.4 lb) without the ink cartridges and the power cord. Weight * With the output tray extension extended. - Page 201 WP-4511/4515/4521/4525/4530/4531/4535/4540/4545/4590/4595 User’s Guide Product Information Input voltage range 90 to 264 V 50 to 60 Hz Rated frequency range 49.5 to 60.5 Hz Input frequency range Rated current 0.7 to 0.35 A Power consumption Standalone Approx. 17 W (ISO/IEC24712) copying Approx.
-
Page 202: Environmental
WP-4511/4515/4521/4525/4530/4531/4535/4540/4545/4590/4595 User’s Guide Product Information 100-240 V Model 90 to 264 V Input voltage range 50 to 60 Hz Rated frequency range Input frequency range 49.5 to 60.5 Hz Rated current 0.7 to 0.35 A Power consumption Standalone Approx. 19 W (ISO/IEC24712) copying Ready mode Approx. -
Page 203: Standards And Approvals
Manufacture: Marvell Semiconductor Inc. Type: SP88W8786-MD0-2C2T00 This product conforms to Part 15 of the FCC Rules and RSS-210 of the IC Rules. Epson cannot accept responsibility for any failure to satisfy the protection requirements resulting from a non-recommended modification of the product. - Page 204 EN60950-1 For European users: We, Seiko Epson Corporation, hereby declare that the equipment Models, C451A and C451E, are in compliance with the essential requirements and other relevant provisions of Directive 1999/5/EC. For use only in Ireland, UK, Austria, Germany, Liechtenstein, Switzerland, France, Belgium, Luxemburg, Netherlands, Italy, Portugal, Spain, Denmark, Finland, Norway, Sweden, Iceland, Cyprus, Greece, Slovenia, Bulgaria, Czech, Estonia, Hungary, Latvia, Lithuania, Poland, Romania, Slovakia, and Malta.
-
Page 205: Interface
WP-4511/4515/4521/4525/4530/4531/4535/4540/4545/4590/4595 User’s Guide Product Information WP-4511/WP-4515 European model: Low voltage directive 2006/95/EC EN60950-1 EMC directive 2004/108/EC EN55022 Class B EN61000-3-2 EN61000-3-3 EN55024 Interface Hi-Speed USB (Device Class for computers) Hi-Speed USB (Mass storage class for external storage) External USB Device The Maximum capacities Devices 1.3 GB... - Page 206 WP-4511/4515/4521/4525/4530/4531/4535/4540/4545/4590/4595 User’s Guide Product Information Font Name Bodoni, Bodoni Italic, Bodoni Bold, Bodoni Bold Italic, Bodoni Poster, Bodoni Poster Compressed ITC Bookman Light, ITC Bookman Light Italic, ITC Bookman Demi, ITC Bookman Demi Italic Carta Chicago Clarendon, Clarendon Light, Clarendon Bold CooperBlack, CooperBlack Italic Copperplate Gothic 32BC , Copperplate Gothic 33BC Coronet...
-
Page 207: Pcl5 Mode
WP-4511/4515/4521/4525/4530/4531/4535/4540/4545/4590/4595 User’s Guide Product Information Font Name Times Roman, Times Italic, Times Bold, Times Bold Italic Univers, Univers Oblique, Univers Bold, Univers Bold Oblique, Univers Light, Univers Light Oblique UniversCondensed, UniversCondensed Oblique, UniversCondensed Bold, UniversCondensed Bold Oblique UniversExtended , UniversExtended Oblique, UniversExtended Bold, UniversExtended Bold Oblique Wingdings ITC ZapfChancery Medium Italic ITC ZapfDingbats... -
Page 208: Pcl6 Mode
WP-4511/4515/4521/4525/4530/4531/4535/4540/4545/4590/4595 User’s Guide Product Information Font Name Family HP Equivalent Swiss 721 Narrow SWA Medium, Bold, Oblique, Bold Oblique Helvetica Narrow Zapf Calligraphic 801 SWA Medium, Bold, Italic, Bold Italic Palatino Geometric 711 SWA Medium, Bold, Oblique, Bold Italic ITC Avant Garde Gothic Revival 711 SWA Light, Demi Bold, Light Italic, Demi Bold ITC Bookman... - Page 209 WP-4511/4515/4521/4525/4530/4531/4535/4540/4545/4590/4595 User’s Guide Product Information Font Name Symbol Set FixedPitch 850 Regular FixedPitch 850 Bold FixedPitch 850 Italic FixedPitch 810 Dark FixedPitch 810 Dark Bold FixedPitch 810 Dark Italic FixedPitch 810 Dark Bold Italic Dutch 801 Dutch 801 Bold Dutch 801 Italic Dutch 801 Bold Italic Zapf Humanist 601 Zapf Humanist 601 Bold...
- Page 210 WP-4511/4515/4521/4525/4530/4531/4535/4540/4545/4590/4595 User’s Guide Product Information Font Name Symbol Set Aldine 430 Bold Italic Calligraphic 401 Flareserif 821 Medium Flareserif 821ExtraBold Swiss 721 SWM Swiss 721 SWM Bold Swiss 721 SWM Italic Swiss 721 SWM Bold Italic Dutch 801 SWM Dutch 801 SWM Bold Dutch 801 SWM Italic Dutch 801 SWM Bold Italic Swiss 721 SWA...
- Page 211 WP-4511/4515/4521/4525/4530/4531/4535/4540/4545/4590/4595 User’s Guide Product Information Font Name Symbol Set Revival 711 Demi SWA Bold Italic Century 702 SWA Century 702 SWA Bold Century 702 SWA Italic Century 702 SWA Bold Italic Dutch 801 SWA Dutch 801 SWA Bold Dutch 801 SWA Italic Dutch 801 SWA Bold Italic Chancery 801 Medium SWA Italic Symbol SWM...
-
Page 212: Symbol Sets
WP-4511/4515/4521/4525/4530/4531/4535/4540/4545/4590/4595 User’s Guide Product Information Symbol sets Introduction to symbol sets Your printer can access a variety of symbol sets. Many of these symbol sets differ only in the international characters specific to each language. Note: Since most software handles fonts and symbols automatically, you will probably never need to adjust the printer’s settings. However, if you are writing your own printer control programs, or if you are using older software that cannot control fonts, refer to the following sections for symbol set details. - Page 213 WP-4511/4515/4521/4525/4530/4531/4535/4540/4545/4590/4595 User’s Guide Product Information Available typefaces Symbol set name: PsMath (5M) Math-8 (8M) 19 Typefaces FixedPitch 810 ANSI ASCII (0U) Dutch 801 Swiss 742 FixedPitch 850 David BT Miryam BT Narkis Tam BT Naskh BT Koufi BT Ryadh BT Pc866Cyr (3R) Pc866Ukr (14R) FixedPitch 810...
-
Page 214: In The Pcl6 Mode
WP-4511/4515/4521/4525/4530/4531/4535/4540/4545/4590/4595 User’s Guide Product Information Zapf Humanist 601 Ribbon 131 Clarendon 701 Swiss 742 Condensed Incised 901 Aldine 430 Calligraphic 401 Flareserif 821 Swiss 721 SWM Dutch 801 SWM Swiss 721 SWA Swiss 721 Narrow SWA Zapf Calligraphic 801 SWA Geometric 711 SWA Revival 711 SWA Century 702 SWA... - Page 215 WP-4511/4515/4521/4525/4530/4531/4535/4540/4545/4590/4595 User’s Guide Product Information Symbol Set Name Attribute Font Classification Microsoft Publishing ISO 8859/10 Latin 6 DeskTop Math-8 Roman-8 Windows 3.1 Latin 2 Pc1004 ISO 8859-15 Latin 9 PC-Turkish Windows 3.0 PS Text PC-8 PC-8 D/N MC Text PC-850 PcEur858 Pi Font PC852...
- Page 216 WP-4511/4515/4521/4525/4530/4531/4535/4540/4545/4590/4595 User’s Guide Product Information Symbol Set Name Attribute Font Classification PC-851, Greek ISO 8859/5 Cyrillic PC-8, Greek ISO 8859/7 Greek PC-866 UKR Hebrew7 ISO 8859/8 Hebrew Hebrew8 PC-862, Hebrew Arabic8 HPWARA PC-864, Arabic...
-
Page 217: Where To Get Help
Depending on the product, the dial list data for fax and/or network settings may be stored in the product’s memory. Due to breakdown or repair of a product, data and/or settings may be lost. Epson shall not be responsible for the loss of any data, for backing up or recovering data and/or settings even during a warranty period. -
Page 218: Help For Users In Europe
User’s Guide Where To Get Help Help for Users in Europe Check your Pan-European Warranty Document for information on how to contact Epson support. Help for Users in Taiwan Contacts for information, support, and services are: World Wide Web (http://www.epson.com.tw) Information on product specifications, drivers for download, and products enquiry are available. -
Page 219: Help For Users In Australia
Epson Helpdesk Epson Helpdesk is provided as a final backup to make sure our clients have access to advice. Operators on the Helpdesk can aid you in installing, configuring and operating your Epson product. Our Pre-sales Helpdesk staff can provide literature on new Epson products and advise where the nearest dealer or service agent is located. -
Page 220: Help For Users In Thailand
Information on product specifications, drivers for download, Frequently Asked Questions (FAQ), Sales Enquiries, and Technical Support via e-mail are available. Epson HelpDesk (Phone: (65) 6586 3111) Our HelpDesk team can help you with the following over the phone: ❏ Sales enquiries and product information ❏... - Page 221 WP-4511/4515/4521/4525/4530/4531/4535/4540/4545/4590/4595 User’s Guide Where To Get Help World Wide Web (http://www.epson.co.id) ❏ Information on product specifications, drivers for download ❏ Frequently Asked Questions (FAQ), Sales Enquiries, questions through e-mail Epson Hotline ❏ Sales enquiries and product information ❏ Technical support...
-
Page 222: Help For Users In Hong Kong
To obtain technical support as well as other after-sales services, users are welcome to contact Epson Hong Kong Limited. Internet Home Page Epson Hong Kong has established a local home page in both Chinese and English on the Internet to provide users with the following information: ❏ Product information ❏... -
Page 223: Help For Users In India
603-56288333 Help for Users in India Contacts for information, support, and services are: World Wide Web (http://www.epson.co.in) Information on product specifications, drivers for download, and products enquiry are available. Epson India Head Office - Bangalore Phone: 080-30515000 Fax: 30515005 Epson India Regional Offices:... -
Page 224: Help For Users In The Philippines
For Service (CDMA & Mobile Users) - 3900 1600 (9AM - 6PM) Prefix local STD code Help for Users in the Philippines To obtain technical support as well as other after sales services, users are welcome to contact the Epson Philippines Corporation at the telephone and fax numbers and e-mail address below:... - Page 225 Email Server Settings..............124 problems..................183 Enlarge....................127 Buttons Enlarging pages................56 control panel................20 Envelopes loading..................33 printable area................197 Epson paper.....................25 Canceling printing................47 Epson Event Manager..............96 Mac OS X..................48 Error messages................131 Windows..................47 Errors Check Fax Connection............106, 125 copy....................188 Cleaning fax....................190 print head...................145 print....................159 Clock....................150 scan.....................182 Collate Copying..............100, 127...
- Page 226 Mac OS X...................147 Windows..................146 Network/Wi-Fi Settings...............124 Header....................109 Nozzle check..................144 Help control panel................145 Epson..................217 Mac OS X...................144 Epson Event Manager..............96 Windows..................144 Epson Scan...................95 Home Mode..................81 Horizontal banding..............172 Office Mode..................82 Operation check................159 Image Adjustment................72 Incorrect characters..............174 Initialize..................187 Pages per sheet printing..............59 Paper checking ink cartridge status in Mac OS X......137...
- Page 227 Scan to PC..................129 Problems Scan to PC (Email)...............129 banding..................172 Scan to PC (PDF)................129 blank pages................175 Scan to PC (WSD)................129 blurry prints................173 Scan to USB Device..............127 contacting Epson..............217 Scanning software copy....................188 bundle software................96 diagnosing..................159 uninstalling................156 fax....................190 Send Fax Later...............115, 130 incorrect characters..............174 Send Settings.................125, 130...
- Page 228 WP-4511/4515/4521/4525/4530/4531/4535/4540/4545/4590/4595 User’s Guide Index mechanical.................199 paper...................195 printer..................195 scanner..................198 standards and approvals............203 Speed increasing................176, 179 Speed Dial..................112 Speed Dial List................130 Speed Dial Setup..............107, 130 Status lights..................182 Status Monitor Mac OS X...................162 Windows..................160 Symbol sets introduction................212 PCL6 mode................214 System requirements..............194 Technical support.................217 Text printing documents..............41 Thick Paper..................124...