Table of Contents
Advertisement
Owner's Manual and
Installation Instructions
®
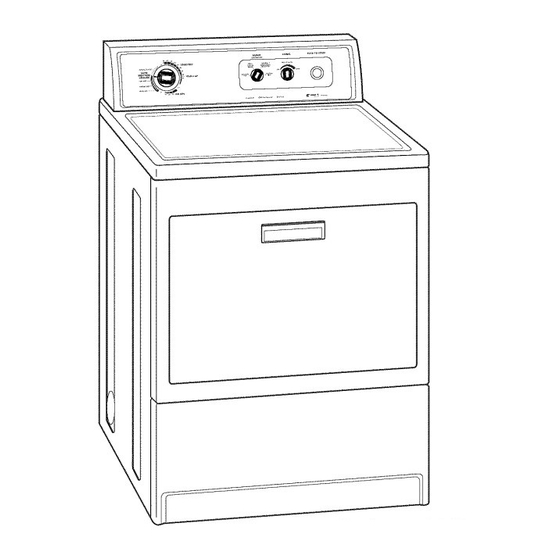
27-Inch Wide
ELECTRIC DRYERS
m rm.
m
rt
IMPORTANT:
Read and follow
all safety
and operating
instructions
before first use of this product.
Your dryer may look different
from the dryer shown.
Sears,
Roebuck
and Co., Hoffman
Estates,
IL 60179
U.S.A.
www.sears.com
3405602A
PRINTED
IN US.A
8/99
Advertisement
Table of Contents

Related Manuals for Kenmore 11069912990


Summary of Contents for Kenmore 11069912990
- Page 1 Owner's Manual and Installation Instructions ® 27-Inch Wide ELECTRIC DRYERS m rm. Your dryer may look different from the dryer shown. IMPORTANT: Read and follow all safety and operating instructions before first use of this product. Sears, Roebuck and Co., Hoffman Estates, IL 60179 U.S.A.
-
Page 2: Troubleshooting
Kenmore dryer in the safest and most economical way. Model If you need more information about the care and operation of Kenmore appliances call your nearest Sears store. You will need Serial No. the complete model and serial numbers when requesting information. - Page 3 Warranty Warranty Full Year Service Mechanical Electrical Parts Warranty service is available by contacting your nearest Sears Service Center in the For one year from the date of purchase, United States. if this dryer is installed and operated according to the instructions in this manu- This warranty applies...
- Page 4 Your safety and the safety of others is very important. We have provided many important safety messages in this manual and on your appliance. Always read and obey all safety messages. This is the safety alert symbol. This symbol alerts you to hazards that can kill or hurt you and others.
-
Page 5: Important Safety
IMPORTANT SAFETY INSTRUCTIONS WARNING To reduce the risk of fire, electric shock, or injury to persons when using the dryer, follow basic precautions, including the following: • Read all instructions before using • Do not repair or replace any part of the dryer. - Page 6 INSTALLATION OVERVIEW For a complete list of tools and parts needed, see pages 6-8. A. SELECT LOCATION FORYOUR DRYER (pgs. 9-11) Standard Installation (p. 9) Recessed Area/Closet Installation Instructions (p. 10) B. INSTALL LEVELING LEGS (p. 12) Tools Needed: Parts Needed: (supplied with dryer) wrench 4 ieveIing iegs...
- Page 7 MAKE ELECTRICAL CONNECTION (pgs. 13-23) If using a power cord: Tools Needed: Parts Needed: X-inch nut #2 Phillips head _rain relief driver (shown) screwdriver or socket wrench New 3- or 4-wire, 30-amp., U.L.-listed power supply cord kit (includes strain relief) Flashlight (optional depending on installation) If making...
- Page 8 D, CONNECT EXHAUST (pgs. 24-28) Tools Needed: Parts Needed: Duct tape Tin snips 4-inch heavy or 4-inch metal elbow(s) flexible metal vent (optional depending on installation) Flashlight Flat-bladed (optional depending screwdriver on installation) 4-inch outlet (4) 4-inch exhaust hood diameter clamps...
- Page 9 A. SELECT LOCATION FOR YOUR DRYER .i'{,Jal_{,J_Ja " Iq iIq i'14 Selecting the proper location for your dryer makes installation easy and Explosion Hazard gives the best drying perfor- Keep flammable materials and vapors, mance. such as gasoline, away from dryer. STANDARD INSTALLATION Place dryer at least 18 inches...
-
Page 10: Dryer Dimensions
RECESSED AREA/CLOSET DRYER DIMENSIONS INSTALLATION INSTRUCTIONS Most installations will require at least 5-inch clearance behind the dryer for the Check governing codes and ordinances. dryer vent. This dryer may be installed in a recessed Location must be large enough to fully area or closet. - Page 11 MOBILE HOME EXHAUST Dryer exhaust vent must not be connected or secured with REQUIREMENTS screws or other The dryer must not be installed where devices which it can be exposed to water and/or extend into the weather. Proper operation of dryer cycles interior of the requires...
-
Page 12: Install Leveling Legs
B. INSTALL LEVELING LEGS STEP 4. Start to screw the legs into the holes by hand. Use a wrench to finish turning the legs until diamond marking is no longer visible. This is when we recommend you start checking the dryer Leveling your dryer... -
Page 13: Electrical Requirements
ELECTRICAL REQUIREMENTS MAKE ELECTRICAL CONNECTION OrteJiirj'e_m "I_ _,,, It is your responsibility: • To contact a qualified electrical installer. The proper electrical connection ensures a safe installation that • To assure that the electrical installation meets local code requirements. is adequate and in conformance with A three-wire... - Page 14 I. THREE-WIRE ELECTRICAL Local codes may permit the use of a U.L.-listed, 120/240-volt minimum, CONNECTION TO RECEPTACLE 30-ampere, dryer power supply cord Use a 3-wire power supply cord: kit (pigtail). Power supply cord should be type SRD or SRDT and be at least four feet long.
- Page 15 STEP 3. Attach a _-inch, U.L.-listed, GROUNDING INSTRUCTIONS strain relief to the hole below terminal This appliance must be grounded. block opening. Strain relief should have a In the event of malfunction tight fit with dryer cabinet and be in a hor- breakdown, grounding will reduce...
- Page 16 I1. THREE-WIRE ELECTRICAL GROUNDING INSTRUCTIONS CONNECTION (DIRECT WIRE) This appliance must be connected Prepare cable as directed: a grounded metal, permanent wiring system; or an equipment-grounding conductor must be run with the circuit conductors and connected to the equipment-grounding terminal lead on the appliance.
- Page 17 STEP 2.Remove hold-down screw and STEP 4a. Place the hook-shaped terminal block c over. of the wire over the terminal block screw. The open side of the hook should face Hold-down screw to the right. Squeeze hook end of wire together to form a loop.
- Page 18 ALTERNATE CONNECTION: STEP 4. Connect the other two wires If local codes do not permit to outer terminal block screws. Securely connection of a frame-grounding tighten all electrical connections. conductor to the neutral wire: STEP 5. Tighten the strain relief screws. STEP 1.
- Page 19 III. MAKE FOUR-WIRE Local codes may permit the use of ELECTRICAL CONNECTION a U.L.-listed, 120/240-volt minimum, TO RECEPTACLE 30-ampere, dryer power supply cord kit (pigtail). Power supply cord should Use a 4-wire power supply cord: type SRD or SRDT and be at least four feet long.
-
Page 20: Grounding Instructions
STEP 3. Attach a _-inch, U.L-listed strain GROUNDING INSTRUCTIONS relief to the hole below terminal block This appliance must be grounded. opening. Strain relief should have In the event of malfunction a tight fit with dryer cabinet and be in a breakdown, grounding will reduce... - Page 21 STEP 5.Connect neutral grounding wire and theneutral wire (white o rcenter) ofpower supply c ord under thecenter screw ofterminal block. STEP 6.Connect theother t woinsulated wires toouter t erminal block s crews. STEP 7.Connect thegrounding wire (green) ofthepower supply c ord tothe external grounding conductor screw.
- Page 22 IV. FOUR-WIRE ELECTRICAL GROUNDING INSTRUCTIONS CONNECTION (DIRECT WIRE) This appliance must be connected a grounded metal, permanent wiring Prepare cable as directed: system; or an equipment-grounding conductor must be run with the circuit conductors and connected to the equipment-grounding terminal lead on the appliance.
- Page 23 STEP 3. Attach a _-inch, U.L.-listed strain STEP 6. Place the hook-shaped end of relief to the hole below terminal block the wire over the terminal block screw. The open side of the hook should face opening. Strain relief should have a tight fit with dryer cabinet and be in a horizon-...
- Page 24 D. CONNECT EXHAUST • If using an existing exhaust system, disconnect vent from the dryer and I _e_l_[e1_ "[_ i[_ _"' clean one section at a time until you reach the exhaust hood. To clean out lint, you can use the hose attachment A properly exhausted dryer...
- Page 25 ROUTE THE VENT Typical installations exhaust from the rear of the dryer. Avoid pushing the dryer tightly against a wall. This can crush or kink the vent. Use the straightest path you can, where possible. Avoid 90 ° turns. Fire Hazard Cover unused exhaust...
-
Page 26: Determine Ventlength
DETERMINE VENTLENGTH STANDARD OFFSET CONNECTION8 Maximum E xhaust Lengths: Using 4-inch heavy metal vent: • NOTE: Do not secure exhaust vent Rear Exhaust. The maximum length the rear exhaust system depends on the joints with screws. Screws can catch lint type of vent, the number of elbows, and slow the drying... - Page 27 STEP 4. Connect vent to elbow. Tape the STEP 5. Place a clamp on each end of joint with duct tape. Tighten clamp. vent elbow. Install one end of elbow vent, the other end to the exhaust hood. STEP 5. Install one end of elbow on vent, Tape joints...
- Page 28 OFFSET CONNECTIONS NOTE: Vent systems come in many WITH CLOSE CLEARANCES varieties. Select the type that best fits your installation. Three of the When your exhaust vent is in a close most common types of installations clearance behind the dryer, or if you are are illustrated here.
-
Page 29: Final Steps
It will help assure that you have a proper installation and increase your satisfaction with your Kenmore dryer. [] Check that all parts you removed [] Ensure that dryer is level by placing from the parts packages are now a level on top of the dryer. Check side- installed. -
Page 30: Starting Your Dryer
Fire Hazard Explosion Hazard Keep flammable materials and No washer can completely remove oil. vapors, such as gasoline, away from dryer, Do not dry anything that has ever had Do not dry anything that has ever had any type of oil on it (including cooking anything flammable on it (even after oils). -
Page 31: Cycle Descriptions
CYCLE DESCRIPTIONS • If you do not unload the dryer, it goes into WRINKLE GUARD ® automatically. For an explanation of WRINKLE Ftuo,_Iel_Jo ;I_1 i[_ _e GUARD ® , see page NOTE: On some models, WRINKLE The automatic cycles save you time GUARD ®... - Page 32 FABRIC/TEMPERATURE CONTROL FABRIC TEMPERATURE Proper use of this control helps KNIT / NORMAL ensure that fabrics are dried at the CASUAL PERM PRESS MEDIUM MEDIUM HIGH • • right temperature for maximum life. Use this control to select the drying •...
- Page 33 USING AIR DRY/AIR FLUFF To use AIR FLUFF: • Set Cycle Selector Control for the number of minutes you want in the TIMED DRY Cycle. Using these cycles gives you all the • Set FABRIC/Temperature Control to AIR FLUFR benefits of hang drying with a shorter...
- Page 34 END=OF-CYCLE SIGNAL C ONTROL PUSH TO START BUTTON Use this control to start the dryer. I rteJ_i_{oj_i "I:-] i[_ i'[-" Be sure the dryer door is closed. Opening the door stops the dryer. It Your dryer sounds a signal when will not start again until you close the a drying cycle is finished.
- Page 35 WRINKLE wearing of garments. GUARD ® will tumble the clothes without heat for about 15 seconds periodically Kenmore dryers help prevent overdrying throughout the cycle. so you get outstanding fabric care. In • On dryers with WRINKLE GUARD ®...
- Page 36 HEATED TUMBLE FREE DRYER RACK STEP 3. Place wet items on top of the rack. Allow space around items for air to Your dryer may include a dryer rack. If circulate. The rack does not move, but the your dryer does not have a rack, you can drum will rotate.
-
Page 37: Sorting Clothes
CHOOSING LOAD SIZES • Mix large items with smaller items. Load the dryer by the amount of space items Follow these recommendations to help take up, not by their weight. Do not over- save on utility bills and prolong the life load the dryer. -
Page 38: Drying Tips
DRYING TIPS USING DRYER FABRIC SOFTENERS Dryer fabric softeners are recommended for reducing static cling. Always follow package instructions carefully. • Put one fabric softener sheet on top of the load before starting the dryer. De not add a fabric softener sheet after the drying... -
Page 39: Cleaning Your Dryer
CLEANING YOUR DRYER To clean dryer drum: STEP 1. Make a paste with detergent and very warm water and apply to a soft cloth. Continue with STEPS 2-4. Proper care of your dryer can extend its life and help you avoid costly service... -
Page 40: Cleaning The Lint Screen
CLEANING THELINTSCREEN Wash Lint Screen As Needed Laundry detergents and fabric soft- Remove L intBefore Every Load eners can cause a residue buildup The lint screen is located in the door the lint screen. Wash the lint screen opening. Remove lint before starting with a nylon brush if it becomes... -
Page 41: Removing Accumulated Lint
REMOVING A CCUMULATED LINT MOVING CARE Toremove a ccumulated lintfrom • Disconnect power. exhaust vent: • Make sure leveling legs are secure in dryer base. STEP 1.Disconnect exhaust vent from • Use masking tape to secure dryer door. the dryer. STEP 2. -
Page 42: Changing The Drum Light
CHANGING THE DRUM LIGHT STEP 8. Place the top of the lens onto the top of the holder. Rotate the bottom The dryer light automatically turns of the lens down until it is in place. inside the dryer drum when you open Replace screw. - Page 43 Most laundering problems are easily solved if you understand the cause. Using the charts below will save you time and money by helping you avoid unnecessary service calls. Problem Possible Cause Solution Clean Iint screen. Not Drying Lint screen is clogged with lint. Satisfactorily Restricted air movement.
- Page 44 Problem Possible Cause Solution Dryer Will Using a regular fuse. Replace with a time-delay fuse. Not Run Dryer door not firmly closed. Close dryer door tightly. (ton't) PUSH TO START Button Press PUSH TO START Button again. not firmly pressed. Controls not set in an Reset controls in an ON position.
- Page 45 KENMORE D RYERS "We Service What WeSell" i sourassurance that y oucandepend onSears f or service. Your Kenmore appliance hasadded v alue when you consider that Sears has service units nationwide, staffed with professional technicians trained on all appliances Sears sells.
- Page 49 In U.S.A. or Canada for in-home major brand repair service: Call 24 hours a day, 7 days a week 1-800-4-MY-HOME 5°(1-800-469-4663) Para pedir servicio de reparacibn a domicilio - 1-800-676-5811 Au Canada pour tout le service - 1-877-LE-FOYEF_ M(1-877-533-6937) For the repair or replacement parts you need: Call 6 a.m.