NEC SHIELDPRO FC-N21S User Manual
Ruggedised notebook computer
Hide thumbs
Also See for SHIELDPRO FC-N21S:
- Brochure & specs (16 pages) ,
- Quick start manual (21 pages)

Related Manuals for NEC SHIELDPRO FC-N21S


Summary of Contents for NEC SHIELDPRO FC-N21S
- Page 1 NEC Ruggedised Notebook Computer FC-N21S User’s Manual Shortcut to Table of Contents...
- Page 2 Information in this document is subject to change without notice. No part of this manual may be reproduced in any form without the prior written permission of NEC Australia. Microsoft and Windows are registered trademarks or trademarks of Microsoft Corporation in the United States and other countries.
-
Page 3: Notes On Use
Unplug the power cord. Indicates an instruction to unplug the power cord. Connect grounding conductor. Indicates an instruction to connect the grounding conductor. NEC ShieldPRO FC-N21S Ruggedised Notebook Computer User’s Guide 0318-00002 Ver. 2.0 Dec 2008 – Page i... -
Page 4: General Warnings
If you find any labels totally/partially removed or illegible due to damage, contact your ShieldPRO supplier. NEC ShieldPRO FC-N21S Ruggedised Notebook Computer User’s Guide 0318-00002 Ver. 2.0 Dec 2008 – Page ii... -
Page 5: Installation Environment Warnings
Do not use or store the product in a place of extremely high or low temperature or extreme temperature change. NEC ShieldPRO FC-N21S Ruggedised Notebook Computer User’s Guide 0318-00002 Ver. 2.0 Dec 2008 – Page iii... -
Page 6: Power Supply And Power Cord Warnings
Use only the specified AC adapter and AC cord. Never attempt to disassemble or modify the AC adapter. Doing so may cause an electric shock, smoke, and/or fire. NEC ShieldPRO FC-N21S Ruggedised Notebook Computer User’s Guide 0318-00002 Ver. 2.0 Dec 2008 – Page iv... -
Page 7: Battery Warnings
Do not disassemble the battery. Doing so may cause a fire and/or an electric shock. Dispose of used batteries according to the instructions. Do not drop the battery. Doing so may cause damage to the battery. NEC ShieldPRO FC-N21S Ruggedised Notebook Computer User’s Guide 0318-00002 Ver. 2.0 Dec 2008 – Page v... -
Page 8: Miscellaneous Warnings
If this product causes radio disturbance to other devices during the use of a wireless feature, disable the wireless feature or stop using this product. Failure to follow this instruction may influence other devices and cause malfunction. NEC ShieldPRO FC-N21S Ruggedised Notebook Computer User’s Guide 0318-00002 Ver. 2.0 Dec 2008 – Page vi... -
Page 9: Caution During Operation
The bottom face of this product gets hot during and immediately after operation. Do not place it on your lap for a long time to avoid low-temperature burn injury. NEC ShieldPRO FC-N21S Ruggedised Notebook Computer User’s Guide 0318-00002 Ver. 2.0 Dec 2008 – Page vii... -
Page 10: Miscellaneous Cautions
Do not leave any object made of rubber or vinyl in contact with the product. Do not wrap the product in a vinyl bag or leave rubber bands or the like on the product. Doing so may cause transformation of the product surface. NEC ShieldPRO FC-N21S Ruggedised Notebook Computer User’s Guide 0318-00002 Ver. 2.0 Dec 2008 – Page viii... - Page 11 NOTES: 1) No part of this manual may be reproduced in any form without the prior written permission of NEC Australia. 2) The contents of this manual may be revised without prior notice. 3) All efforts have been made to ensure the accuracy of all information in this manual. If you notice any part that is unclear, incorrect, or omitted in this manual, contact your ShieldPRO supplier.
-
Page 12: Exporting Notice
This model of ShieldPRO (including software) is Australian market specific, and has not been certified for standards of any other country. NEC Australia assumes no liability arising from the use of this product in any other country than Australia. In addition, no maintenance, service and technical support for this product are provided in any other country than Australia. -
Page 13: Emc Notice
EMC Notice EMC compliance has been attained using cables (except the LAN cable) of a length of less than 3 metres. (EMC directive 89/336/EEC). NEC ShieldPRO FC-N21S Ruggedised Notebook Computer User’s Guide 0318-00002 Ver. 2.0 Dec 2008 – Page xi... -
Page 14: Vcci Notice
The radio wave output of this product is lower than the reference value defined in "Radio Frequency-Exposure Protection Standard (RCR STD-38)" by Association of Radio Industries and Businesses. NEC ShieldPRO FC-N21S Ruggedised Notebook Computer User’s Guide 0318-00002 Ver. 2.0 Dec 2008 – Page xii... -
Page 15: Federal Communications Commission (Fcc) Notice
Connect the equipment into an outlet on a circuit different from that to which the receiver is connected. Consult the dealer or an experienced radio/TV technician for help. NEC ShieldPRO FC-N21S Ruggedised Notebook Computer User’s Guide 0318-00002 Ver. 2.0 Dec 2008 – Page xiii... -
Page 16: Wireless Lan Notice
20 cm (8 inches). WARNING ShieldPRO series products are not designed for use with high-gain directional antennas. Use of such antennas with these products is illegal. NEC ShieldPRO FC-N21S Ruggedised Notebook Computer User’s Guide 0318-00002 Ver. 2.0 Dec 2008 – Page xiv... -
Page 17: Use On Aircraft Caution
Low band 5.25 - 5.35 GHz is for indoor use only 5.47 - 5.725 GHz is current not allowed in Czech Republic and France. NEC ShieldPRO FC-N21S Ruggedised Notebook Computer User’s Guide 0318-00002 Ver. 2.0 Dec 2008 – Page xv... -
Page 18: Telephone Line Connection
RENs, contact the local telephone company. If this NEC equipment causes harm to the telephone network, the telephone company will notify you in advance that temporary discontinuance of service may be required. If advance notice isn't practical, the telephone company will notify the customer as soon as possible. -
Page 19: Transfer To Third Party
(both available at stores) should be used in order to avoid the trouble explained above. NEC shall not assume any liability for such data disclosure caused by your failure to take the necessary measures. 1.14.2. -
Page 20: Text Conventions
If the handling information is ignored, the product may be damaged and/or software used in the product may not operate normally. This manual also uses the following symbols. Symbol Description Supplement of the text. Reference page. NEC ShieldPRO FC-N21S Ruggedised Notebook Computer User’s Guide 0318-00002 Ver. 2.0 Dec 2008 – Page xviii... -
Page 21: Typographical Conventions Concerning Keyboard Operation
When several keys are combined, it is indicated using the plus sign (+), press and hold the first key, press another key, and then release all the keys. An illustration may be used to indicate keys. NEC ShieldPRO FC-N21S Ruggedised Notebook Computer User’s Guide 0318-00002 Ver. 2.0 Dec 2008 – Page xix... -
Page 22: Table Of Contents
Text Conventions ........................xviii 2.1. Symbols in the Text ..................... xviii 2.2. Typographical Conventions Concerning Keyboard Operation ........xix Contents ..........................xx System Overview ........................1 NEC ShieldPRO FC-N21S Ruggedised Notebook Computer User’s Guide 0318-00002 Ver. 2.0 Dec 2008 – Page xx... - Page 23 Using the ShieldPRO Computer ..................... 21 5.1. Opening and Closing the LCD Display Panel ..............21 5.1.1. Opening the LCD Display Panel ................21 NEC ShieldPRO FC-N21S Ruggedised Notebook Computer User’s Guide 0318-00002 Ver. 2.0 Dec 2008 – Page xxi...
- Page 24 Typing the euro symbol ..................43 5.8. Touch Pad ........................45 5.8.1. Touch Pad Settings ....................45 5.9. Touch Panel ........................47 5.9.1. Touch Panel Settings ....................47 NEC ShieldPRO FC-N21S Ruggedised Notebook Computer User’s Guide 0318-00002 Ver. 2.0 Dec 2008 – Page xxii...
- Page 25 SD use in different ShieldPRO states ..............63 5.15.4. SD Data Protection ....................64 5.15.5. Installing or Removing SD Card in/from SD Card Slot ..........64 NEC ShieldPRO FC-N21S Ruggedised Notebook Computer User’s Guide 0318-00002 Ver. 2.0 Dec 2008 – Page xxiii...
- Page 26 Processor settings ....................74 6.2.1.5. System memory ....................74 6.2.1.6. Extended memory ....................74 6.2.1.7. Language ......................74 6.2.2. Primary Master Submenu ..................75 NEC ShieldPRO FC-N21S Ruggedised Notebook Computer User’s Guide 0318-00002 Ver. 2.0 Dec 2008 – Page xxiv...
- Page 27 6.7. Boot Menu ........................94 6.7.1. Boot Order Configuration ..................94 Installing OS and Applications ....................95 7.1. Windows XP Pre-installed Model ................... 95 NEC ShieldPRO FC-N21S Ruggedised Notebook Computer User’s Guide 0318-00002 Ver. 2.0 Dec 2008 – Page xxv...
- Page 28 Deletion procedure ................... 110 7.4.5. LAN Drivers ......................110 7.4.5.1. Supported operating systems ................110 7.4.5.2. Installation procedure ..................110 7.4.5.3. Deletion procedure ................... 111 NEC ShieldPRO FC-N21S Ruggedised Notebook Computer User’s Guide 0318-00002 Ver. 2.0 Dec 2008 – Page xxvi...
- Page 29 7.4.11.1. Overview ......................119 7.4.11.2. Supported operating systems ................119 7.4.11.3. Installation procedure ..................119 7.4.11.4. Usage ....................... 119 7.4.11.5. Deletion procedure ................... 119 Security ..........................121 NEC ShieldPRO FC-N21S Ruggedised Notebook Computer User’s Guide 0318-00002 Ver. 2.0 Dec 2008 – Page xxvii...
- Page 30 10.1. Troubleshooting ......................139 10.1.1. Flowchart ......................139 10.1.2. Actions Taken to Solve Problems (Tips) ............... 140 10.1.2.1. Take proper actions calmly ................140 NEC ShieldPRO FC-N21S Ruggedised Notebook Computer User’s Guide 0318-00002 Ver. 2.0 Dec 2008 – Page xxviii...
- Page 31 Outside Dimensions..................... 160 11.2.1. ShieldPRO ......................160 11.2.2. Spare Battery FC-N011 ..................162 11.2.3. AC Adapter FC-N012 .................... 164 11.2.4. Hard Disk Drive FC-HD60KN ................165 NEC ShieldPRO FC-N21S Ruggedised Notebook Computer User’s Guide 0318-00002 Ver. 2.0 Dec 2008 – Page xxix...
-
Page 33: System Overview
Key pitch: 17.55 mm Key stroke: 2.4 mm backlit keyboard : 2.0mm Customised Order Options: a/ Backlit keyboard b/ Keyboard cover Pointing device Touch pad NEC ShieldPRO FC-N21S Ruggedised Notebook Computer User’s Guide 0318-00002 Ver. 2.0 Dec 2008 – Page 1... - Page 34 Designed based on EMC direct (EN55022 and EN61000-6-2) (Note 24) and low voltage direct (EN60950-1) (Note 24) standards. Power design based on standard UL60950-1 NEC ShieldPRO FC-N21S Ruggedised Notebook Computer User’s Guide 0318-00002 Ver. 2.0 Dec 2008 – Page 2...
- Page 35 284(W) × 255(D) × 48(H) mm (excluding projections and bumper) Weight Approx 2.5 kg (including standard battery) Installed OS Microsoft Windows XP Professional (Service Pack 2) NEC ShieldPRO FC-N21S Ruggedised Notebook Computer User’s Guide 0318-00002 Ver. 2.0 Dec 2008 – Page 3...
- Page 36 Super AG and Atheros XR (extended Range). The wireless LAN (5 GHz) conforms to IEEE802.11a The wireless LAN (5 GHz) can only be used indoors due to relevant radio laws. NEC ShieldPRO FC-N21S Ruggedised Notebook Computer User’s Guide 0318-00002 Ver. 2.0 Dec 2008 – Page 4...
- Page 37 A, AA and AAA means achievement rates equal to or larger than 100% and less than 200%, equal to or larger than 200% and less than 500% and equal to or larger than 500%, respectively. NEC ShieldPRO FC-N21S Ruggedised Notebook Computer User’s Guide 0318-00002 Ver. 2.0 Dec 2008 – Page 5...
-
Page 38: Selection Menu Table
Service Packs is disabled. First partition: 20GB (NTFS) (Software already installed at shipment occupies about 5GB in the first partition.) Second partition: Remaining memory (NTFS) NEC ShieldPRO FC-N21S Ruggedised Notebook Computer User’s Guide 0318-00002 Ver. 2.0 Dec 2008 – Page 6... -
Page 39: Environmental Specification (Main Unit)
ShieldPRO. * ShieldPRO may not operate continuously under the described environmental conditions in which ShieldPRO is installed. NEC ShieldPRO FC-N21S Ruggedised Notebook Computer User’s Guide 0318-00002 Ver. 2.0 Dec 2008 – Page 7... - Page 40 In addition, if ShieldPRO is equipped with one or more NEC or commercial options, the most severe environmental condition among those for ShieldPRO and the options is applied. While ShieldPRO is stored in a place at ambient temperature of 0ºC or lower, the clock in ShieldPRO may drift.
-
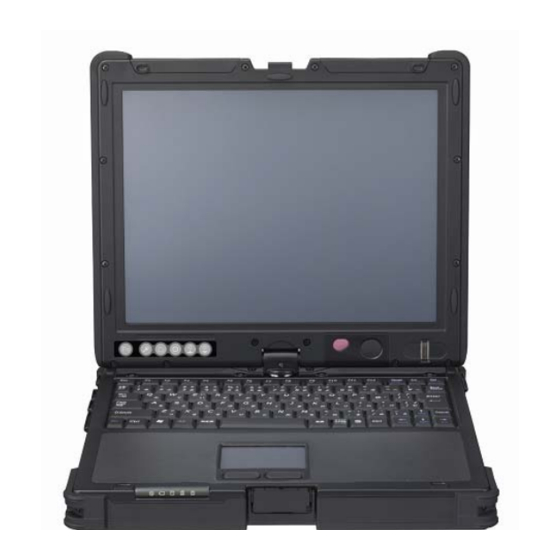
Page 41: Exterior View
The hard disk drive, expanded RAM board and battery pack can be replaced, and are accessible on the base of ShieldPRO. NEC ShieldPRO FC-N21S Ruggedised Notebook Computer User’s Guide 0318-00002 Ver. 2.0 Dec 2008 – Page 9... -
Page 42: Names And Features Of Shieldpro
You can assign any key codes to these buttons through BIOS. Keyboard Touch pad Used for wireless LAN. Wireless LAN antenna NEC ShieldPRO FC-N21S Ruggedised Notebook Computer User’s Guide 0318-00002 Ver. 2.0 Dec 2008 – Page 10... - Page 43 Solid green: Numeral lock feature enabled OFF: Numeral lock feature disabled Press the Fn+ Num Lk button to toggle between the two states NEC ShieldPRO FC-N21S Ruggedised Notebook Computer User’s Guide 0318-00002 Ver. 2.0 Dec 2008 – Page 11...
-
Page 44: Outside Sections
Disk drive storage area Stores disk drives (installed). (11) Expanded memory storage area Stores expanded RAM board. (12) Built-in speaker (monaural) Monaural speaker for sound replay. NEC ShieldPRO FC-N21S Ruggedised Notebook Computer User’s Guide 0318-00002 Ver. 2.0 Dec 2008 – Page 12... - Page 45 Accepts a PC card (PCMCIA of type II) (18) Modular connector for phone line Connects with phone line (2 Wire). Connects with LAN (19) LAN (1000BASE-T) connector (1000BASE-T/100BASE-TX/10BASE-T) cable. NEC ShieldPRO FC-N21S Ruggedised Notebook Computer User’s Guide 0318-00002 Ver. 2.0 Dec 2008 – Page 13...
-
Page 46: Installation Notes
Avoid using ShieldPRO if cables are stretched and/or objects are put on cables. 5. Insert connectors securely. Inserting connectors loosely may cause ShieldPRO and peripheral devices not to operate at all or operate deficiently. NEC ShieldPRO FC-N21S Ruggedised Notebook Computer User’s Guide 0318-00002 Ver. 2.0 Dec 2008 – Page 14... -
Page 47: Notes On Handling Of Hdd
The magnet may destroy data saved in magnetic media. Do not put devices sensitive to magnetism (including floppy disks) close to the magnet. NEC ShieldPRO FC-N21S Ruggedised Notebook Computer User’s Guide 0318-00002 Ver. 2.0 Dec 2008 – Page 15... -
Page 48: Use Of Shieldpro In An Industrial Environment
In an environment at a low temperature, the battery driving time is shortened. When ShieldPRO is in the tablet mode or the battery charging state, the AC adapter should be used in NEC ShieldPRO FC-N21S Ruggedised Notebook Computer User’s Guide 0318-00002 Ver. 2.0 Dec 2008 – Page 16... -
Page 49: Shock Resistance
If ShieldPRO is operated continuously for a long period, the lifespan of parts in ShieldPRO may be reduced. Therefore, NEC may charge for the repair of ShieldPRO within the warranty period if subjected to continuous operation for a long period. -
Page 50: Cleaning
Do not use volatile organic solvents including thinner and benzene and chemical rags to clean the fingerprint sensor. Do not use a sharp object such as a ballpoint pen to clean the fingerprint sensor. NEC ShieldPRO FC-N21S Ruggedised Notebook Computer User’s Guide 0318-00002 Ver. 2.0 Dec 2008 – Page 18... -
Page 51: Carriage And Storage Of Shieldpro
-20 to 45ºC for storage for three months or shorter -20 to 20ºC for storage for a year or shorter Do not leave the battery for three months or longer without recharging. NEC ShieldPRO FC-N21S Ruggedised Notebook Computer User’s Guide 0318-00002 Ver. 2.0 Dec 2008 – Page 19... -
Page 52: Disposal Of Devices
Do no put the battery close to fire or soak it with water. Failure to follow this instruction may cause the battery to catch on fire, fume or explode. NEC ShieldPRO FC-N21S Ruggedised Notebook Computer User’s Guide 0318-00002 Ver. 2.0 Dec 2008 – Page 20... -
Page 53: Using The Shieldpro Computer
If latch B is hooked improperly, check if the guide on the LCD display is aligned with the guide support on the base unit. NEC ShieldPRO FC-N21S Ruggedised Notebook Computer User’s Guide 0318-00002 Ver. 2.0 Dec 2008 – Page 21... -
Page 54: Tablet Mode
If latch B is hooked incorrectly, check if the guide on the LCD display is aligned with the guide support on the base unit. NEC ShieldPRO FC-N21S Ruggedised Notebook Computer User’s Guide 0318-00002 Ver. 2.0 Dec 2008 – Page 22... -
Page 55: Power Functions
Because working data is saved in memory, ShieldPRO can immediately return to the original state when the computer is returned from suspend (standby) state. NEC ShieldPRO FC-N21S Ruggedised Notebook Computer User’s Guide 0318-00002 Ver. 2.0 Dec 2008 – Page 23... -
Page 56: Power Lamp
To switch on ShieldPRO from the power-off state Wait for five seconds or longer after power-off before turning the power on. 1. Turn off peripheral devices. NEC ShieldPRO FC-N21S Ruggedised Notebook Computer User’s Guide 0318-00002 Ver. 2.0 Dec 2008 – Page 24... - Page 57 Power-off procedure using the power switch 1. Save all documents, and exit all applications. 2. Press the power switch (or power button plus power lock button). NEC ShieldPRO FC-N21S Ruggedised Notebook Computer User’s Guide 0318-00002 Ver. 2.0 Dec 2008 – Page 25...
-
Page 58: Suspend (Standby) And Resume
1. Press the power switch in suspend (standby) state. 2. The power lamp illuminates green and ShieldPRO recovers from suspend (standby) state (or resumes). NEC ShieldPRO FC-N21S Ruggedised Notebook Computer User’s Guide 0318-00002 Ver. 2.0 Dec 2008 – Page 26... - Page 59 The power is turned off forcibly by pressing the power switch for four seconds or longer. NEC ShieldPRO FC-N21S Ruggedised Notebook Computer User’s Guide 0318-00002 Ver. 2.0 Dec 2008 – Page 27...
- Page 60 The data existing before suspend (standby) state cannot be restored. If an application generates any of the above situations, do not use suspend (standby) state feature. NEC ShieldPRO FC-N21S Ruggedised Notebook Computer User’s Guide 0318-00002 Ver. 2.0 Dec 2008 – Page 28...
-
Page 61: Hibernate State And Recovering From Hibernate State
Any of the following actions during storage of working data in transition to or recovery from hibernate state cannot assure the integrity of the working data: NEC ShieldPRO FC-N21S Ruggedised Notebook Computer User’s Guide 0318-00002 Ver. 2.0 Dec 2008 – Page 29... - Page 62 If ShieldPRO cannot be resumed by pressing the power switch momentarily, press the power switch continuously for four seconds or longer. The power lamp disappears and the power is turned NEC ShieldPRO FC-N21S Ruggedised Notebook Computer User’s Guide 0318-00002 Ver. 2.0 Dec 2008 – Page 30...
- Page 63 Then the settings in the BIOS Setup Menu may cause the unit to return to the factory default values. Reset the settings for the BIOS Setup Menu again if required. NEC ShieldPRO FC-N21S Ruggedised Notebook Computer User’s Guide 0318-00002 Ver. 2.0 Dec 2008 – Page 31...
-
Page 64: Ac Adapter
The AC adapter operates in the range between 100 and 240 VAC. The AC adapter charges the battery while it is connected to AC power NEC ShieldPRO FC-N21S Ruggedised Notebook Computer User’s Guide 0318-00002 Ver. 2.0 Dec 2008 – Page 32... - Page 65 ShieldPRO. Removing the plugs in the reserve order may cause the AC adapter and/or ShieldPRO to be damaged. Always hold the plug of the AC adapter when removing. Do not pull by the cord. NEC ShieldPRO FC-N21S Ruggedised Notebook Computer User’s Guide 0318-00002 Ver. 2.0 Dec 2008 – Page 33...
-
Page 66: Battery
1. Leave ShieldPRO in the power-off state and disconnect the AC adapter. 2. Turn ShieldPRO upside down. NEC ShieldPRO FC-N21S Ruggedised Notebook Computer User’s Guide 0318-00002 Ver. 2.0 Dec 2008 – Page 34... -
Page 67: Charging Battery
To charge the battery, first connect the AC adapter to ShieldPRO and then to a power outlet. The battery charge LED on ShieldPRO illuminates in orange to indicate that the battery is now being NEC ShieldPRO FC-N21S Ruggedised Notebook Computer User’s Guide 0318-00002 Ver. 2.0 Dec 2008 – Page 35... -
Page 68: Refreshing The Battery
5. Charge the battery fully (until the battery charge lamp turns from ‘orange’ to unlit). 6. Turn on the power. If the NEC logo screen appears, press [F2] to display the BIOS Setup Menu. 7. Unplug the power cord from the AC outlet and remove the AC adapter from ShieldPRO. -
Page 69: Checking Remaining Battery Level
"Total time remaining" may be different from the actual operation time depending on the loading on ShieldPRO. For Windows XP, the dialog box shown below appears to allow you to check the remaining battery level. NEC ShieldPRO FC-N21S Ruggedised Notebook Computer User’s Guide 0318-00002 Ver. 2.0 Dec 2008 – Page 37... -
Page 70: Recycling Batteries
To store batteries, place them in a rugged case and put the lid on the case. Store batteries in a place where they cannot get wet. Do not leave batteries in the sun. NEC ShieldPRO FC-N21S Ruggedised Notebook Computer User’s Guide 0318-00002 Ver. 2.0 Dec 2008 – Page 38... -
Page 71: Low Battery Charge Level
It takes longer to charge the battery fully at a low temperature than to charge it fully at a normal temperature. The time taken to charge the battery fully may vary depending on conditions under which ShieldPRO is used. NEC ShieldPRO FC-N21S Ruggedised Notebook Computer User’s Guide 0318-00002 Ver. 2.0 Dec 2008 – Page 39... - Page 72 Information Technology Industries Association. The actual battery lifespan varies depending on the operation environment, peripheral devices, the brightness of the LCD display and the system settings. NEC ShieldPRO FC-N21S Ruggedised Notebook Computer User’s Guide 0318-00002 Ver. 2.0 Dec 2008 – Page 40...
-
Page 73: Tablet Buttons
The possible label size is as follows. Prepare the label if required. 3 mm 60 mm 5.6.3. Changing Button Assignment See "6 Setting BIOS" for instructions on how to change the Tablet button assignment. NEC ShieldPRO FC-N21S Ruggedised Notebook Computer User’s Guide 0318-00002 Ver. 2.0 Dec 2008 – Page 41... -
Page 74: Keyboard
Raises the brightness of the LCD display. Fn + F8 Lowers the brightness of the LCD display. Fn + F9 Raises the volume of the speakers. NEC ShieldPRO FC-N21S Ruggedised Notebook Computer User’s Guide 0318-00002 Ver. 2.0 Dec 2008 – Page 42... -
Page 75: Typing The Euro Symbol
6. Select [United States-International] from the field [Keyboard layout/IME:]. 7. Click [OK]. 8. Select [English (United States) – United States-International] from the field [Default input language]. NEC ShieldPRO FC-N21S Ruggedised Notebook Computer User’s Guide 0318-00002 Ver. 2.0 Dec 2008 – Page 43... - Page 76 9. Click [OK]. 10. Click [OK]. After restarting Windows, the Euro symbol "€" can be entered by pressing Ctrl + Alt + 5. NEC ShieldPRO FC-N21S Ruggedised Notebook Computer User’s Guide 0318-00002 Ver. 2.0 Dec 2008 – Page 44...
-
Page 77: Touch Pad
In addition, the size and speed of the pointer on the screen may be changed. NEC ShieldPRO FC-N21S Ruggedised Notebook Computer User’s Guide 0318-00002 Ver. 2.0 Dec 2008 – Page 45... - Page 78 2. You can set the operations of the touch pad by selecting the [Buttons], [Pointers] and/or [Pointer Options] tabs. The features of the touch pad can be enabled/disabled by changing the BIOS settings. NEC ShieldPRO FC-N21S Ruggedised Notebook Computer User’s Guide 0318-00002 Ver. 2.0 Dec 2008 – Page 46...
-
Page 79: Touch Panel
[Mouse]. The [Mouse Properties] dialog box appears. 2. You can set operations of the touch panel by selecting the [Buttons], [Pointers] and/or [Pointer Options] tabs. NEC ShieldPRO FC-N21S Ruggedised Notebook Computer User’s Guide 0318-00002 Ver. 2.0 Dec 2008 – Page 47... -
Page 80: Touch Panel Calibration
1. Click [Start] [All Programs] [Gunze TPDD] [Calibrate]. 2. Click the four sides specified with red mark × on the screen with the stylus for calibration. NEC ShieldPRO FC-N21S Ruggedised Notebook Computer User’s Guide 0318-00002 Ver. 2.0 Dec 2008 – Page 48... -
Page 81: Display Feature
12.1-in. TFT (Thin-Film Transistor) colour LCD display of resolution 1024×768 XGA (Extended Video Graphics Array). Concurrent display of both LCD display and external monitor. Some Operating Systems may limit display modes. NEC ShieldPRO FC-N21S Ruggedised Notebook Computer User’s Guide 0318-00002 Ver. 2.0 Dec 2008 – Page 49... -
Page 82: Display Resolution
[Display]. The [Display Properties] dialog box appears. 2. Select the [Settings] tab to set the resolution and/or the number of colours of the screen. NEC ShieldPRO FC-N21S Ruggedised Notebook Computer User’s Guide 0318-00002 Ver. 2.0 Dec 2008 – Page 50... -
Page 83: Connecting An External Monitor
Press Fn + F3 to restore the LCD display. Some Operating Systems or settings may not allow the monitor change by using hot keys Fn + F3. NEC ShieldPRO FC-N21S Ruggedised Notebook Computer User’s Guide 0318-00002 Ver. 2.0 Dec 2008 – Page 51... -
Page 84: Communication Feature
4. Click [OK]. Then click [OK] again. 5. Enter the settings for the dialup connection depending on used applications (including Internet Explorer and Hyper Terminal). NEC ShieldPRO FC-N21S Ruggedised Notebook Computer User’s Guide 0318-00002 Ver. 2.0 Dec 2008 – Page 52... -
Page 85: Lan
Highlight [Internet Protocol (TCP/IP)] connection. 3. Click [Properties]. 4. The [Local Area Connection Properties] dialog box appears. Enter the settings appropriate for the connected network. NEC ShieldPRO FC-N21S Ruggedised Notebook Computer User’s Guide 0318-00002 Ver. 2.0 Dec 2008 – Page 53... -
Page 86: Remote Power-On Feature
Check [Allow this device to bring the computer out of standby.]. Once these settings are implemented, it is possible for a network management computer to remotely activate ShieldPRO over the LAN. NEC ShieldPRO FC-N21S Ruggedised Notebook Computer User’s Guide 0318-00002 Ver. 2.0 Dec 2008 – Page 54... -
Page 87: Wireless Lan
Stealing communication data Malicious outsiders may intentionally intercept radio waves to steal communication data as follows: Personal information including IDs, passwords and credit card numbers NEC ShieldPRO FC-N21S Ruggedised Notebook Computer User’s Guide 0318-00002 Ver. 2.0 Dec 2008 – Page 55... -
Page 88: Security Enabled By Shieldpro
In most cases, wireless LAN cards and wireless access points have proper security features to cope with these problems. NEC recommends that customers provide proper settings for security as their own responsibility. 5.12.3.2. Security enabled by ShieldPRO The wireless LAN installed in ShieldPRO has the following security features. -
Page 89: Activating The Wireless Lan
5.12.3.3. Activating the Wireless LAN For Windows XP: Press Fn + F2 to enable the wireless feature. Pressing Fn + F2 again will disable the wireless feature. NEC ShieldPRO FC-N21S Ruggedised Notebook Computer User’s Guide 0318-00002 Ver. 2.0 Dec 2008 – Page 57... -
Page 90: Serial Port
ShieldPRO does not support serial devices that require power from the serial port. Use serial devices that source external AC power or their own batteries. NEC ShieldPRO FC-N21S Ruggedised Notebook Computer User’s Guide 0318-00002 Ver. 2.0 Dec 2008 – Page 58... -
Page 91: Usb (Usb 2.0)
Connecting some USB devices may cause the icon for removing hardware to appear on the system tray at the lower right corner of the screen. NEC ShieldPRO FC-N21S Ruggedised Notebook Computer User’s Guide 0318-00002 Ver. 2.0 Dec 2008 – Page 59... -
Page 92: Connect/Disconnect-Proof Enhanced Connector
Connect/disconnect-proof enhanced connector USB connector (1) is the connect/disconnect-proof enhanced connector. This is a robust USB connector that provides 10,000 combinations of connections and disconnections. NEC ShieldPRO FC-N21S Ruggedised Notebook Computer User’s Guide 0318-00002 Ver. 2.0 Dec 2008 – Page 60... -
Page 93: Pc Card (Pcmcia)
4. Click [Close] to close the [Safely Remove Hardware] or [Remove Hardware] dialog box. 5. If you press the eject button, the card will be partly ejected. 6. Pull out the PC card from the slot. NEC ShieldPRO FC-N21S Ruggedised Notebook Computer User’s Guide 0318-00002 Ver. 2.0 Dec 2008 – Page 61... - Page 94 Unless the PC card is removed using this procedure, ShieldPRO may operate improperly. NEC ShieldPRO FC-N21S Ruggedised Notebook Computer User’s Guide 0318-00002 Ver. 2.0 Dec 2008 – Page 62...
-
Page 95: Sd Card
Do not insert or remove an SD card before the Windows login or desktop screen appears. Do not access the SD card for about 30 seconds after ShieldPRO has resumed from suspend (standby) or hibernate state. NEC ShieldPRO FC-N21S Ruggedised Notebook Computer User’s Guide 0318-00002 Ver. 2.0 Dec 2008 – Page 63... -
Page 96: Sd Data Protection
NEC assumes no responsibility for direct and indirect faults including loss of data saved by customers. NEC recommends that, if an SD card is to be disposed of, it is destroyed physically using such a tool as a hammer to prevent personal data from being recovered. -
Page 97: Microphone Input Terminal
5.18. Built-in Speaker ShieldPRO is equipped with a monaural speaker (of 0.5 W output) in the base of the chassis. See “4.5.2 Outside sections”. NEC ShieldPRO FC-N21S Ruggedised Notebook Computer User’s Guide 0318-00002 Ver. 2.0 Dec 2008 – Page 65... -
Page 98: I/O Interfaces
CADR<3> CADR<2> CADR<1> CADR<0> CADATA<0> CADATA<1> CADATA<2> IOIS16# CD1# CADATA<11> CADATA<12> CADATA<13> CADATA<14> CADATA<15> CE2# IORD# IOWR# CADR<17> CADR<18> CADR<19> CADR<20> CADR<21> CAVCC CAVPP NEC ShieldPRO FC-N21S Ruggedised Notebook Computer User’s Guide 0318-00002 Ver. 2.0 Dec 2008 – Page 66... - Page 99 CADR<22> CADR<23> CADR<24> CADR<25> RESET WAIT# INPACK# REG# SPKR# CHSTS# CADATA<8> CADATA<9> CADATA<10> CD2# NEC ShieldPRO FC-N21S Ruggedised Notebook Computer User’s Guide 0318-00002 Ver. 2.0 Dec 2008 – Page 67...
-
Page 100: Modem
AC-GND 3, 4 5.19.5. Headphone Output Interface Pin number Signal name Pin alignment AGND LEFT RIGHT 5.19.6. Microphone Input Interface Connector: Mini jack (female) NEC ShieldPRO FC-N21S Ruggedised Notebook Computer User’s Guide 0318-00002 Ver. 2.0 Dec 2008 – Page 68... -
Page 101: Analog Rgb Interface
Connector: D-sub 15-pin connector (female) Pin number Signal name Pin alignment GREEN 5 4 3 2 1 BLUE 15 14 13 12 11 VP50 DDCA HSYNC VSYNC DDCL NEC ShieldPRO FC-N21S Ruggedised Notebook Computer User’s Guide 0318-00002 Ver. 2.0 Dec 2008 – Page 69... -
Page 102: Serial Interface (Com1)
D– 1 2 3 4 5.19.10. SD Interface Connector: SD-slot 12-pin connector (female) Pin number Signal name Pin alignment CD/DATA3 MEDIA_3V DATA0 DATA1 DATA2 NEC ShieldPRO FC-N21S Ruggedised Notebook Computer User’s Guide 0318-00002 Ver. 2.0 Dec 2008 – Page 70... -
Page 103: Setting Bios
Press F2 to enter the BIOS Setup Utility. Press <F2> to SETUP or Press <F12> to Network boot. The dialog box shown below appears. NEC ShieldPRO FC-N21S Ruggedised Notebook Computer User’s Guide 0318-00002 Ver. 2.0 Dec 2008 – Page 71... -
Page 104: Automatic Save Changes And Exit
Returns the setting values to those before changes. This does not exit the BIOS Setup Utility. Save Changes Saves the setting values resulting from changes. This does not exit the BIOS Setup Utility. NEC ShieldPRO FC-N21S Ruggedised Notebook Computer User’s Guide 0318-00002 Ver. 2.0 Dec 2008 – Page 72... -
Page 105: Loading The Bios Setup Defaults
9. Select [Yes] to save the default settings and press Enter. 10. The system saves the default values and exits the BIOS SETUP Utility. NEC ShieldPRO FC-N21S Ruggedised Notebook Computer User’s Guide 0318-00002 Ver. 2.0 Dec 2008 – Page 73... -
Page 106: Menus
6.2.1.6. Extended memory The capacity of the extended memory. 6.2.1.7. Language Specify the language used in BIOS. You can select either Japanese or English. NEC ShieldPRO FC-N21S Ruggedised Notebook Computer User’s Guide 0318-00002 Ver. 2.0 Dec 2008 – Page 74... -
Page 107: Primary Master Submenu
If you change settings, the new information resulting from the change is displayed after rebooting. Option Parameter Description SMART Monitoring [Enabled] or [Disabled] appears if the [SMART Monitoring] is enabled or disabled. NEC ShieldPRO FC-N21S Ruggedised Notebook Computer User’s Guide 0318-00002 Ver. 2.0 Dec 2008 – Page 75... -
Page 108: Advanced Menu
Set to [POST screen] to display the Power-On Self-Test (POST) screen without displaying the NEC logo. Logo screen Set to [Logo screen] to display the NEC logo and shorten the Non screen booting time. Set to [Non screen] to display neither the POST nor NEC logo screens. -
Page 109: Fn/Left Ctrl Key Replacement
If "Space Available" appears, the area where DMI event log information is stored has empty space. If "Full" appears, the area where DMI event log information is stored has no empty space. NEC ShieldPRO FC-N21S Ruggedised Notebook Computer User’s Guide 0318-00002 Ver. 2.0 Dec 2008 – Page 77... -
Page 110: Pci Configuration Submenu
Enables or disables the USB2.0 controller. Enabled Set to [Disabled] to disable the USB2.0 controller. USB devices operate in the USB1.1 specification. *Shaded value: Factory-setting NEC ShieldPRO FC-N21S Ruggedised Notebook Computer User’s Guide 0318-00002 Ver. 2.0 Dec 2008 – Page 78... -
Page 111: I/O Device Configuration Submenu
OS setting.) If this option is set to [Enabled], the screen content is enlarged to full screen. NEC ShieldPRO FC-N21S Ruggedised Notebook Computer User’s Guide 0318-00002 Ver. 2.0 Dec 2008 – Page 79... - Page 112 Set to [Disabled] not to provide S.M.A.R.T. monitoring for IDE devices. Enabled Set to [Enabled] to provide S.M.A.R.T. monitoring for IDE devices. *Shaded value: Factory-setting NEC ShieldPRO FC-N21S Ruggedised Notebook Computer User’s Guide 0318-00002 Ver. 2.0 Dec 2008 – Page 80...
-
Page 113: Tablet Button Submenu
Ctrl + Alt + Del 0100 h Screen rotation E06D h Enter 005A h LCD brightness UP 0107 h LCD brightness Down 0108 h 0076 h NEC ShieldPRO FC-N21S Ruggedised Notebook Computer User’s Guide 0318-00002 Ver. 2.0 Dec 2008 – Page 81... - Page 114 [FC Button 1] and [FC Button 2] can run the execution command (or application start) registered on the [FC Button Setup utility] dialog box. NEC ShieldPRO FC-N21S Ruggedised Notebook Computer User’s Guide 0318-00002 Ver. 2.0 Dec 2008 – Page 82...
-
Page 115: Security Menu
To change a password that’s already been set, enter the current password in field [Enter Current Password], then press Enter, you will be able to enter a new password as above. NEC ShieldPRO FC-N21S Ruggedised Notebook Computer User’s Guide 0318-00002 Ver. 2.0 Dec 2008 – Page 83... -
Page 116: Set User Password
Set to [Enabled] so the user password cannot change if the user password is used to enter the setup menu. Enabled *Shaded value: Factory-setting NEC ShieldPRO FC-N21S Ruggedised Notebook Computer User’s Guide 0318-00002 Ver. 2.0 Dec 2008 – Page 84... -
Page 117: Password On Boot
This option allows you to set the security of the HDD. If you move the cursor to this option and press Enter, the relevant setting submenu appears on the screen. NEC ShieldPRO FC-N21S Ruggedised Notebook Computer User’s Guide 0318-00002 Ver. 2.0 Dec 2008 – Page 85... - Page 118 Random(2) 00h) Writes [random data random data 00] in the entire HDD area. The erase HDD procedure conforms to the method recommended by NSA. NEC ShieldPRO FC-N21S Ruggedised Notebook Computer User’s Guide 0318-00002 Ver. 2.0 Dec 2008 – Page 86...
-
Page 119: No-Execute Memory Protection
DEP (Data Execution Prevention) can prevent illegal programs and data from being executed by the hardware. DEP disables computer viruses from writing or running program codes illegally. NEC ShieldPRO FC-N21S Ruggedised Notebook Computer User’s Guide 0318-00002 Ver. 2.0 Dec 2008 – Page 87... -
Page 120: Security Chip Configuration
To release passwords, start the BIOS SETUP Utility, enter the existing supervisor password in [Set Supervisor Password] in the Security Menu and press Enter without entry of new password. NEC ShieldPRO FC-N21S Ruggedised Notebook Computer User’s Guide 0318-00002 Ver. 2.0 Dec 2008 – Page 88... - Page 121 If you forget your password, you cannot cancel it. Accordingly, if a password is set, manage it carefully. NEC ShieldPRO FC-N21S Ruggedised Notebook Computer User’s Guide 0318-00002 Ver. 2.0 Dec 2008 – Page 89...
-
Page 122: Power Management Menu
Set to [Standard] to operate the CPU in the normal power consumption state. Set to [Maximum] to operate the CPU in the maximum power consumption state. NEC ShieldPRO FC-N21S Ruggedised Notebook Computer User’s Guide 0318-00002 Ver. 2.0 Dec 2008 – Page 90... - Page 123 NOTE: Even if [Wake on Ring] is set to [Disabled] in BIOS SETUP, power-on may occur due to arrival of other data if the modem is not set as shown above. NEC ShieldPRO FC-N21S Ruggedised Notebook Computer User’s Guide 0318-00002 Ver. 2.0 Dec 2008 – Page 91...
-
Page 124: System Menu
HDD Power Management Disabled Specify the HDD power management. Enabled Set to [Disabled] to turn on the HDD power forcibly at system booting. NEC ShieldPRO FC-N21S Ruggedised Notebook Computer User’s Guide 0318-00002 Ver. 2.0 Dec 2008 – Page 92... - Page 125 *Shaded value: Factory-setting *POST is an acronym for Power-On Self-Test, a self-diagnosis feature done by BIOS when ShieldPRO is booted by power-on or reset operation. NEC ShieldPRO FC-N21S Ruggedised Notebook Computer User’s Guide 0318-00002 Ver. 2.0 Dec 2008 – Page 93...
-
Page 126: Boot Menu
4: PCI LAN: ET1310 PXE --------------------------------- Onboard LAN device Excluded from boot order : USB KEY: --------------------------------------------------- USB KEY device : USB HDD: --------------------------------------------------- USB HDD device NEC ShieldPRO FC-N21S Ruggedised Notebook Computer User’s Guide 0318-00002 Ver. 2.0 Dec 2008 – Page 94... -
Page 127: Installing Os And Applications
Some device drivers are only available to Service Pack 2. Deleting Service Pack 2 may cause some drivers to operate incorrectly. The latest information on Windows XP can be found on the following web site: http://www.microsoft.com/windows/products/windowsxp NEC ShieldPRO FC-N21S Ruggedised Notebook Computer User’s Guide 0318-00002 Ver. 2.0 Dec 2008 – Page 95... -
Page 128: Changing Owner And/Or Organisation By Modifying Registry
In the standard ShieldPRO, the first and second partitions of the installed HDD are formatted at shipment from factory. Capacity (1st HDD) First partition Second partition NEC ShieldPRO FC-N21S Ruggedised Notebook Computer User’s Guide 0318-00002 Ver. 2.0 Dec 2008 – Page 96... -
Page 129: Repairing System
Follow the procedure below to start Windows in the safe mode: 1. Start Windows XP. 2. While the computer is booting, repeatedly tap F8 button to display the [Windows Advanced Options Menu]. NEC ShieldPRO FC-N21S Ruggedised Notebook Computer User’s Guide 0318-00002 Ver. 2.0 Dec 2008 – Page 97... -
Page 130: Repairing System To [Last Known Good Configuration]
Restore point. For details, click [Start] [Help and Support] to see the information. (You can search with the keyword "system repair" for detailed information) NEC ShieldPRO FC-N21S Ruggedised Notebook Computer User’s Guide 0318-00002 Ver. 2.0 Dec 2008 – Page 98... -
Page 131: Using Recovery Disks To Reload System
Tools to be prepared The following tools are required for reloading from Recovery CD: ShieldPRO Recovery CD’s A CD-R/RW drive with USB interface NEC ShieldPRO FC-N21S Ruggedised Notebook Computer User’s Guide 0318-00002 Ver. 2.0 Dec 2008 – Page 99... - Page 132 1. Turn on ShieldPRO with the CD drive connected and Recovery Disk (1) in the CD drive. 2. Wait for NEC logo screen to disappear. 3. If the message “Press Any key to boot from CD..” appears, press the Enter button to boot from the Recovery CD.
-
Page 133: Recovering Settings Made After Purchase After Reloading
The hard disk drive in ShieldPRO can be returned to the Windows XP defaults as long as it does not have a hardware fault. Re-installation can recover a damaged system to its primary Windows NEC ShieldPRO FC-N21S Ruggedised Notebook Computer User’s Guide 0318-00002 Ver. 2.0 Dec 2008 – Page 101... -
Page 134: Re-Installing Windows Procedure
Record the Product key from the Windows label on the bottom of the ShieldPRO unit. Clear the BIOS supervisor and user passwords in the security menu. See “6.4.1.3 Set supervisor password”. NEC ShieldPRO FC-N21S Ruggedised Notebook Computer User’s Guide 0318-00002 Ver. 2.0 Dec 2008 – Page 102... - Page 135 Windows Re-installation Procedure (using supplied Windows XP CD) 1. Turn on ShieldPRO. 2. Wait for NEC logo screen to disappear. 3. When the message “Press Any key to boot from CD..” appears, press the Enter button to boot from the Windows CD.
- Page 136 Tablet buttons, Audio device, LAN, Modem, FC Button). Load the drivers for these functions. Insert the CD labelled “Drivers for FC-N21S” into the CD Drive. NEC ShieldPRO FC-N21S Ruggedised Notebook Computer User’s Guide 0318-00002 Ver. 2.0 Dec 2008 – Page 104...
-
Page 137: Change To Keyboard Or Mouse Of Different Key Layout
5. Select the language of the keyboard layout to be added from the [Input language] list. 6. If [Keyboard layout/IME] has only a single option, click the option. NEC ShieldPRO FC-N21S Ruggedised Notebook Computer User’s Guide 0318-00002 Ver. 2.0 Dec 2008 – Page 105... -
Page 138: Recovering Settings Made After Purchase After Re-Installation
Reconnect peripherals purchased separately if any and reconfigure settings for the peripherals again. Also configure the network settings. In addition, reinstall applications purchased separately. NEC ShieldPRO FC-N21S Ruggedised Notebook Computer User’s Guide 0318-00002 Ver. 2.0 Dec 2008 – Page 106... -
Page 139: Installing Supplied Drivers And Applications
Supported operating systems Microsoft Windows XP, English Ver. (SP2) 7.4.2.2. Installation procedure 1. Start ShieldPRO. 2. Right click [Start] [Explore]. 3. Navigate to C:\WINXP\DRV\VGA. NEC ShieldPRO FC-N21S Ruggedised Notebook Computer User’s Guide 0318-00002 Ver. 2.0 Dec 2008 – Page 107... -
Page 140: Deletion Procedure
In the case where Windows is re-installed on your ShieldPRO, these drivers must be reloaded. 7.4.3.1. Supported operating systems Microsoft Windows XP, English Ver. (SP2) NEC ShieldPRO FC-N21S Ruggedised Notebook Computer User’s Guide 0318-00002 Ver. 2.0 Dec 2008 – Page 108... -
Page 141: Installation Procedure
In the case where Windows is re-installed on your ShieldPRO, these drivers must be reloaded. 7.4.4.1. Supported operating systems Microsoft Windows XP, English Ver. (SP2) 7.4.4.2. Installation procedure 1. Start ShieldPRO. 2. Right click [Start] [Explore]. NEC ShieldPRO FC-N21S Ruggedised Notebook Computer User’s Guide 0318-00002 Ver. 2.0 Dec 2008 – Page 109... -
Page 142: Deletion Procedure
4. Click on Reinstall Driver button in the General Tab. 5. At the [Hardware Update Wizard] screen select “No not this time” and click Next. NEC ShieldPRO FC-N21S Ruggedised Notebook Computer User’s Guide 0318-00002 Ver. 2.0 Dec 2008 – Page 110... -
Page 143: Deletion Procedure
5. At the [Intel PROSet/Wireless Installer] screen, select “I accept the terms in the agreement” and press Next. 6. Select a “Typical” setup type and press Next. NEC ShieldPRO FC-N21S Ruggedised Notebook Computer User’s Guide 0318-00002 Ver. 2.0 Dec 2008 – Page 111... -
Page 144: Deletion Procedure
10. Use the default folder to install the driver. Press Next. 11. Press Finish to conclude the setup. 12. Reboot ShieldPRO to load the driver. 13. Click [Start] [Control Panel] [System] [Hardware] [Device Manager]. NEC ShieldPRO FC-N21S Ruggedised Notebook Computer User’s Guide 0318-00002 Ver. 2.0 Dec 2008 – Page 112... -
Page 145: Deletion Procedure
In the case where Windows is re-installed on your ShieldPRO, these drivers must be reloaded. 7.4.8.1. Supported operating systems Microsoft Windows XP, English Ver. (SP2) NEC ShieldPRO FC-N21S Ruggedised Notebook Computer User’s Guide 0318-00002 Ver. 2.0 Dec 2008 – Page 113... -
Page 146: Installation Procedure
Even if the HDD is removed from ShieldPRO, the encryption key protects the data in the HDD. 7.4.9.2. Supported operating systems Microsoft Windows XP, English Ver. (SP2) NEC ShieldPRO FC-N21S Ruggedised Notebook Computer User’s Guide 0318-00002 Ver. 2.0 Dec 2008 – Page 114... -
Page 147: Bios Setting Procedure
Set supervisor and user passwords to restrict access to the BIOS SETUP Utility. 2. After power-on of ShieldPRO, the BIOS start screen (with NEC logo displayed at the centre) appears. When the message "Press <F2> to SETUP or Press <F12> to Network boot."... -
Page 148: Starting Procedure
6. Follow the directions on the dialog box to uninstall the Infineon TPM Professional Package utility. 7. When the uninstallation is complete, reboot ShieldPRO. 8. Undo the BIOS Utility settings from section “7.4.9.3 BIOS setting procedure”. NEC ShieldPRO FC-N21S Ruggedised Notebook Computer User’s Guide 0318-00002 Ver. 2.0 Dec 2008 – Page 116... -
Page 149: Fc Button Setting Tool
[FCBTN] and highlight the fckbfilter.inf file. Press the Open button. 15. Press the OK button. 16. Ensure the Model field of the window displays “NEC FC Keyboard Driver”” and press Next. 17. Press Yes at the Warning window. 18. If a [Hardware Installation] window appears indicating the Windows Logo test has not been passed, press Continue Anyway. -
Page 150: Deletion Procedure
2. Click [Start] [Control Panel] [System] [Hardware] [Keyboards]. 3. Right click on “NEC FC Keyboard Driver” and press Uninstall. 4. Press OK to uninstall the driver. 5. Reboot ShieldPRO 6. On resumption, the “Standard 101/102……Keyboard” will be installed 7.4.10.5. Usage You can assign any of the tablet buttons [FC button 1] and [FC button 2] on the BIOS SETUP Utility. -
Page 151: Overview
7.4.11.5. Deletion procedure 1. Start Windows. 2. Click [Start] [Settings] [Control Panel]. 3. Double-click [Add or Remove Program]. 4. Click [Protector Suite QL] and [Change]. NEC ShieldPRO FC-N21S Ruggedised Notebook Computer User’s Guide 0318-00002 Ver. 2.0 Dec 2008 – Page 119... - Page 152 Data saved in the biometric device (chip for fingerprint sensor) is not erased even if the built-in HDD is erased. See "C:\WINXP\DRV\Fingerprint Sensor\doc\0409\Manual.pdf" to uninstall the fingerprint authentication utility in the proper procedure. NEC ShieldPRO FC-N21S Ruggedised Notebook Computer User’s Guide 0318-00002 Ver. 2.0 Dec 2008 – Page 120...
-
Page 153: Security
The HDD master password is required to release the HDD user password. The HDD user password authenticates your PC and the HDD installed in the PC. For the setting procedure, see "6.4.1.8 HardDisk security ". NEC ShieldPRO FC-N21S Ruggedised Notebook Computer User’s Guide 0318-00002 Ver. 2.0 Dec 2008 – Page 121... -
Page 154: I/O Lock Feature
BIOS SETUP Utility. To use the I/O lock feature, set supervisor and user passwords to limit accessing to the BIOS SETUP Utility. NEC ShieldPRO FC-N21S Ruggedised Notebook Computer User’s Guide 0318-00002 Ver. 2.0 Dec 2008 – Page 122... -
Page 155: Login Password
If a user with an administrator account changes a password for a user, the user loses all the passwords stored for EFS encrypted files, personal certificate, and web site or network resources. NEC ShieldPRO FC-N21S Ruggedised Notebook Computer User’s Guide 0318-00002 Ver. 2.0 Dec 2008 – Page 123... -
Page 156: Security Chip
To use the security chip, it is recommended to set supervisor and user passwords to restrict accessing to the BIOS SETUP Utility. See "7.4.9 Infineon Security Platform" for details. NEC ShieldPRO FC-N21S Ruggedised Notebook Computer User’s Guide 0318-00002 Ver. 2.0 Dec 2008 – Page 124... -
Page 157: Fingerprint Authentication Password
For the attached utility, see "7.4.11 Fingerprint Authentication Utility (not provided in standard product) ". NEC ShieldPRO FC-N21S Ruggedised Notebook Computer User’s Guide 0318-00002 Ver. 2.0 Dec 2008 – Page 125... -
Page 158: Antitheft Lock
The antitheft lock hole has the size of 3mm×7mm, select a security cable fit to the hole. Even with the security cable you need to take sufficient care in management and treatment of important data. NEC ShieldPRO FC-N21S Ruggedised Notebook Computer User’s Guide 0318-00002 Ver. 2.0 Dec 2008 – Page 126... -
Page 159: Options
4. Remove the battery pack from ShieldPRO. See "5.5.1 Installing and Replacing the Battery" for the removal procedure. 5. Remove the screws (4) fixing the memory slot cover and remove the memory slot cover. NEC ShieldPRO FC-N21S Ruggedised Notebook Computer User’s Guide 0318-00002 Ver. 2.0 Dec 2008 – Page 127... - Page 160 If it is not fully inserted, the connector may be damaged in the next step. 7. Push the board down into ShieldPRO until a click occurs. NEC ShieldPRO FC-N21S Ruggedised Notebook Computer User’s Guide 0318-00002 Ver. 2.0 Dec 2008 – Page 128...
-
Page 161: Extended Ram Board Removal Procedure
1. Remove the memory slot cover according to steps 1 to 5 in "Installation Procedure of Extended RAM Board". Push the hooks outward to release the lock and let the board rise. NEC ShieldPRO FC-N21S Ruggedised Notebook Computer User’s Guide 0318-00002 Ver. 2.0 Dec 2008 – Page 129... -
Page 162: Extended Ram Confirmation Procedure
To use a feature in hibernate state after memory extension, empty capacity is required in the HDD. Check the capacity of the HDD. NEC ShieldPRO FC-N21S Ruggedised Notebook Computer User’s Guide 0318-00002 Ver. 2.0 Dec 2008 – Page 130... -
Page 163: Hard Disk Drive Fc-Hd60Kn (Standard)
2. Unplug the power cord from the AC outlet and remove the AC adapter from ShieldPRO. 3. Close the LCD display panel and turn ShieldPRO upside down. NEC ShieldPRO FC-N21S Ruggedised Notebook Computer User’s Guide 0318-00002 Ver. 2.0 Dec 2008 – Page 131... -
Page 164: Hdd Installation Procedure
2. Replace the connector cover and drive the screw (1) to fix the cover. 3. Insert remaining cable into the space shown in the photo below and install the HDD with the take-out support pulled out. NEC ShieldPRO FC-N21S Ruggedised Notebook Computer User’s Guide 0318-00002 Ver. 2.0 Dec 2008 – Page 132... - Page 165 5. Install the battery pack in ShieldPRO and connect the AC adapter to ShieldPRO. See "5.5.1 Installing and Replacing the Battery" for the battery installation procedure. NEC ShieldPRO FC-N21S Ruggedised Notebook Computer User’s Guide 0318-00002 Ver. 2.0 Dec 2008 – Page 133...
-
Page 166: Hard Disk Drive For Wide Temperature Range Fc-Hd40Kn
78 (W) × 120 (D) × 19 (H) mm Weight Approx 116g Interface UltraATA Follow the instructions in Sections 9.2.2 and 9.2.3 for removal or installation of the HDD. NEC ShieldPRO FC-N21S Ruggedised Notebook Computer User’s Guide 0318-00002 Ver. 2.0 Dec 2008 – Page 134... -
Page 167: Spare Battery Fc-N011 (Standard Type)
95.7 (W) × 93.1 (D) × 19.3 (H) mm (*excluding projections) Weight 330 grams 9.4.2. Handling FC-N011 FC-N011 is not charged fully at purchase. Users are recommended to charge the battery before use. NEC ShieldPRO FC-N21S Ruggedised Notebook Computer User’s Guide 0318-00002 Ver. 2.0 Dec 2008 – Page 135... -
Page 168: Handling Of Battery In Use Or Charging
The recommended replacement period of FC-N011 is one year. If a battery used for longer than a year is installed, ShieldPRO may operate for a shorter period. If a battery is deemed to be unusable, see “5.5.5 Recycling Batteries”. NEC ShieldPRO FC-N21S Ruggedised Notebook Computer User’s Guide 0318-00002 Ver. 2.0 Dec 2008 – Page 136... -
Page 169: Ac Adapter Fc-N012
Cable length 1.8 m (AC cord: 2 m) Outside dimension 115.4 (W) × 51 (D) × 28 (H) mm Weight 0.46 kg (including AC cord) NEC ShieldPRO FC-N21S Ruggedised Notebook Computer User’s Guide 0318-00002 Ver. 2.0 Dec 2008 – Page 137... -
Page 170: Battery Charger Fc-N013 (Not Available In Australia)
Storage –20 to 70ºC 145 (W) × 110 (D) × 29 (H) mm *Excluding projections (including Outer dimension cover and feet) Weight 0.15 kg NEC ShieldPRO FC-N21S Ruggedised Notebook Computer User’s Guide 0318-00002 Ver. 2.0 Dec 2008 – Page 138... -
Page 171: Maintenance
Has ShieldPRO booted normally? If the NEC Logo screen does not appear (excluding the case where BIOS is set not to display the NEC Logo screen) or message "Operating system not found" appears in ShieldPRO booting, a hardware error may have occurred. -
Page 172: Actions Taken To Solve Problems (Tips)
Windows help 1. Click [Start] [Help and Support] to display the [Help and Support Centre] dialog box. NEC ShieldPRO FC-N21S Ruggedised Notebook Computer User’s Guide 0318-00002 Ver. 2.0 Dec 2008 – Page 140... -
Page 173: Recover Bios Settings To Factory Defaults
You can return the BIOS settings to the factory default values by using the following procedure: 1. Turn on ShieldPRO. 2. Press F2 on the NEC Logo screen. The BIOS Setup Utility Menu screen appears. 3. Press F9. A confirmation message appears. -
Page 174: Restore System
For other noises, take the action described in 1 above. 10.1.3.2. Power-on Nothing appears on the display screen. When the power lamp is OFF: NEC ShieldPRO FC-N21S Ruggedised Notebook Computer User’s Guide 0318-00002 Ver. 2.0 Dec 2008 – Page 142... - Page 175 CD-R/RW with DVD-ROM drive to check the HDD status. Confirm that the HDD is set on the Boot Menu on the BIOS Setup Menu. NEC ShieldPRO FC-N21S Ruggedised Notebook Computer User’s Guide 0318-00002 Ver. 2.0 Dec 2008 – Page 143...
- Page 176 Windows was shut down improperly or cannot be started normally due to some start error. Restart Windows in the safe mode according to "7.3.1 Starting Windows XP in safe mode". NEC ShieldPRO FC-N21S Ruggedised Notebook Computer User’s Guide 0318-00002 Ver. 2.0 Dec 2008 – Page 144...
-
Page 177: Battery
Check the BIOS Setup Menu to confirm that the video memory is configured properly. If an external monitor is used, confirm that the monitor supports the desired resolution. NEC ShieldPRO FC-N21S Ruggedised Notebook Computer User’s Guide 0318-00002 Ver. 2.0 Dec 2008 – Page 145... - Page 178 Press Alt + Tab to alter the task. When the command prompt (MS-DOS Action prompt) is active, the screen does not appear after recovery from suspend (standby) state. NEC ShieldPRO FC-N21S Ruggedised Notebook Computer User’s Guide 0318-00002 Ver. 2.0 Dec 2008 – Page 146...
-
Page 179: Hardware Devices
The HDD indicator does not blink but remains Data files stored in the HDD may be fragmented. Action Optimise the files by using a tool such as Windows defragmenter. NEC ShieldPRO FC-N21S Ruggedised Notebook Computer User’s Guide 0318-00002 Ver. 2.0 Dec 2008 – Page 147... -
Page 180: File Storage
Data cannot be stored in the SD card. Check if the write-protect switch on the SD card is Action set to [LOCK]. If so, release it. NEC ShieldPRO FC-N21S Ruggedised Notebook Computer User’s Guide 0318-00002 Ver. 2.0 Dec 2008 – Page 148... -
Page 181: Keyboard, Mouse And Touch Pad
For details, ask your network administrator. Ensure the BIOS settings have enabled the LAN controller NEC ShieldPRO FC-N21S Ruggedised Notebook Computer User’s Guide 0318-00002 Ver. 2.0 Dec 2008 – Page 149... - Page 182 "read only" by default. Other users can read data from the drive or folder but cannot write data to it. NEC ShieldPRO FC-N21S Ruggedised Notebook Computer User’s Guide 0318-00002 Ver. 2.0 Dec 2008 – Page 150...
-
Page 183: Wireless Lan
Pressing F12 does not execute the network In this case, press F12 on the NEC logo screen Action boot process. several times. If the network boot process is still not executed, change the interval at which F12 is pressed. Operation of ShieldPRO is unstable. - Page 184 Double-clicking the icon of a remote PC in Check if shared folders and printers exist in Action [Network Computer] does not show the PC remote PCs. information. NEC ShieldPRO FC-N21S Ruggedised Notebook Computer User’s Guide 0318-00002 Ver. 2.0 Dec 2008 – Page 152...
-
Page 185: Pc Card
ShieldPRO and then on again. If you are using an application or peripheral device where this is the case, do not enter ShieldPRO into suspend (standby) state. NEC ShieldPRO FC-N21S Ruggedised Notebook Computer User’s Guide 0318-00002 Ver. 2.0 Dec 2008 – Page 153... - Page 186 Press Ctrl + Alt + Del to abort the application forcibly and turn off the power forcibly by holding the power button down for four seconds or longer. NEC ShieldPRO FC-N21S Ruggedised Notebook Computer User’s Guide 0318-00002 Ver. 2.0 Dec 2008 – Page 154...
-
Page 187: Software
Confirm that the volume level is not set too low. Press Fn + F9 to turn up the volume. NEC ShieldPRO FC-N21S Ruggedised Notebook Computer User’s Guide 0318-00002 Ver. 2.0 Dec 2008 – Page 155... -
Page 188: External Cd-R/W With Dvd-Rom Drives
The floppy disk drive indicator remains ON. Action Confirm that the floppy disk is not damaged physically. Confirm that the floppy disk is inserted properly. NEC ShieldPRO FC-N21S Ruggedised Notebook Computer User’s Guide 0318-00002 Ver. 2.0 Dec 2008 – Page 156... -
Page 189: Passwords
Ask a person with an administrator account of ShieldPRO to create a new password. If you forget the supervisor password, contact your ShieldPRO Supplier NEC ShieldPRO FC-N21S Ruggedised Notebook Computer User’s Guide 0318-00002 Ver. 2.0 Dec 2008 – Page 157... -
Page 190: Miscellaneous
Contact your ShieldPRO supplier. NEC ShieldPRO FC-N21S Ruggedised Notebook Computer User’s Guide 0318-00002 Ver. 2.0 Dec 2008 – Page 158... -
Page 191: Appendices
Microsoft ACPI-Compliant System IRQ10 Touch panel/modem/SMBus controller IRQ11 Fingerprint sensor/LAN/PC card bus controller IRQ12 Touch pad IRQ13 Math coprocessor IRQ14 Primary IDE IRQ15 Secondary IDE NEC ShieldPRO FC-N21S Ruggedised Notebook Computer User’s Guide 0318-00002 Ver. 2.0 Dec 2008 – Page 159... -
Page 192: Outside Dimensions
11.2. Outside Dimensions 11.2.1. ShieldPRO (284 excluding projections and bumper) (48 excluding projections Unit: mm and bumper) NEC ShieldPRO FC-N21S Ruggedised Notebook Computer User’s Guide 0318-00002 Ver. 2.0 Dec 2008 – Page 160... - Page 193 Rotation of LCD display panel * Excluding projections (including rubber feet and protect rubbers at 4 corners) Unit: mm Body with LCD display panel positioned upright (node type) NEC ShieldPRO FC-N21S Ruggedised Notebook Computer User’s Guide 0318-00002 Ver. 2.0 Dec 2008 – Page 161...
-
Page 194: Spare Battery Fc-N011
Body with LCD display panel back and flat down * Excluding projections (including rubber feet and protect rubbers at 4 corners) Unit: mm 19.3 100.7 490.3 11.2.2. Spare Battery FC-N011 NEC ShieldPRO FC-N21S Ruggedised Notebook Computer User’s Guide 0318-00002 Ver. 2.0 Dec 2008 – Page 162... - Page 195 Unit: mm Weight: Approx 0.33 kg NEC ShieldPRO FC-N21S Ruggedised Notebook Computer User’s Guide 0318-00002 Ver. 2.0 Dec 2008 – Page 163...
-
Page 196: Ac Adapter Fc-N012
AC Adapter FC-N012 * Excluding projections 115.4 51.0 Unit: mm Weight: approx 0.46 kg AC cable length Approx 1.8 m Power cord length Approx 2 m NEC ShieldPRO FC-N21S Ruggedised Notebook Computer User’s Guide 0318-00002 Ver. 2.0 Dec 2008 – Page 164... -
Page 197: Hard Disk Drive Fc-Hd60Kn
11.2.4. Hard Disk Drive FC-HD60KN 18.65 77.7 Unit: mm Weight: about 0.12 kg NEC ShieldPRO FC-N21S Ruggedised Notebook Computer User’s Guide 0318-00002 Ver. 2.0 Dec 2008 – Page 165... - Page 198 User’s Manual NEC Factory Computer FC-NOTE Series ShieldPRO 0318-00002 Ver. 2.0 Dec 2008 Printed on Recycled Paper...