HP Kayak XU User Manual
Hp kayak xu: users guide
Hide thumbs
Also See for Kayak XU:
- Technical reference manual (82 pages) ,
- Supplementary manual (26 pages) ,
- User manual (190 pages)
Table of Contents
Advertisement
Advertisement
Table of Contents

Related Manuals for HP Kayak XU

Summary of Contents for HP Kayak XU
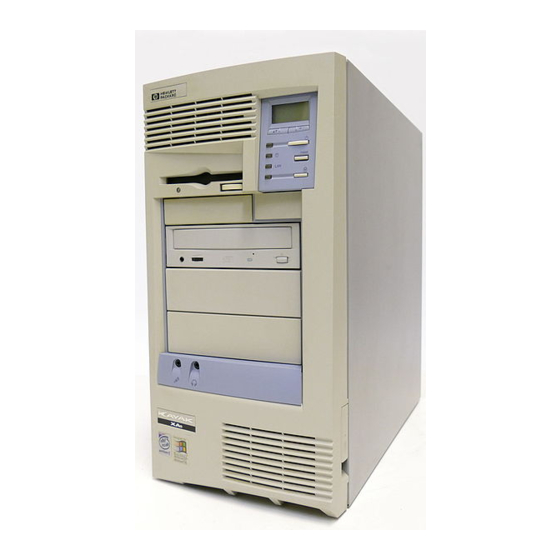
- Page 1 HP Kayak XU PC Workstation User’s Guide...
- Page 2 Notice The information contained in this document is subject to change without notice. Hewlett-Packard makes no warranty of any kind with regard to this material, including, but not limited to, the implied warranties of merchantability and fitness for a particular purpose. Hewlett-Packard shall not be liable for errors contained herein or for incidental or consequential damages in connection with the furnishing, performance, or use of this material.
- Page 3 User’s Guide...
- Page 4 Welcome to Your HP Kayak XU PC Workstation Congratulations on the purchase of your new Hewlett-Packard Kayak XU PC Workstation. Your high-performance PC Workstation is equipped with: One or two Pentium II 266 or 300 MHz processors in slots for easy •...
- Page 5 BIOS support for ISA “Plug and Play” accessory board configuration. • NOTE The Pentium II processor installed in your HP Kayak XU PC Workstation provides the best performance when used with 32-bit operating systems and applications. Who This Manual Is For This manual is for anyone who wants to: Set up the PC Workstation for the first time.
-
Page 6: Important Safety Information
To avoid electric shock, do not open the power supply. There are no user-serviceable parts inside. This HP PC Workstation is a class 1 laser product. Do not attempt to make any adjustment to the laser units. Important Ergonomic Information It is strongly recommended that you read the ergonomic information before using your PC Workstation. -
Page 7: Table Of Contents
Stopping Your PC Workstation ....... . . Using Your HP Enhanced Keyboard ......13 Setting Passwords . - Page 8 2 How to Install Accessories Inside Your PC Workstation Supported HP Accessories ....... . .
- Page 9 HP Summary Screen ........
- Page 10 Network Features ......... . . The HP FastRAID Option ........
- Page 11 Hewlett-Packard Information Services..... . . 107 HP Forum on CompuServe ........
- Page 12 English...
-
Page 13: Setting Up And Using Your Pc Workstation
Setting Up and Using Your PC Workstation... -
Page 14: Unpacking Your Pc Workstation
Manuals and driver kit. • NOTE Device drivers, HP utilities, and an online Network Administrator Guide are preloaded on your system and provided in a driver kit. 2 Place the PC Workstation on (or under) a sturdy desk with easily accessible power outlets and enough space for the keyboard, mouse, and any other accessories. -
Page 15: Connecting The Mouse, Keyboard, Display And Printer
1 Setting Up and Using Your PC Workstation Connecting the Mouse, Keyboard, Display and Printer Connecting the Mouse, Keyboard, Display and Printer Connect the mouse, keyboard, and display to the back of the PC workstation. The connectors are shaped to go in one way only. Tighten the display cable attachment screws. -
Page 16: Connecting To A Network
Let your Network Administrator know that you are connecting your PC Workstation to the network. Enable the LAN connection through the Advanced menu of the HP Setup program (see page 92). Refer also to the online Network Administrator Guide (provided with the driver kit) for further instructions on setting up your PC Workstation for a LAN connection. -
Page 17: Connecting Audio Accessories
(microphone, speakers, and audio system) are not supplied with your PC Workstation. Volume can be controlled through the Audio Front Panel, the HP enhanced keyboard, or the software volume control. WARNING To avoid discomfort from unexpected noise, always turn down the volume before connecting headphones or speakers. -
Page 18: Connecting An External Scsi Accessory
1 Setting Up and Using Your PC Workstation Connecting an External SCSI Accessory Connecting an External SCSI Accessory Your PC Workstation is equipped with Ultra wide 16-bit SCSI and Ultra narrow 8-bit connectors for internal devices and an Ultra narrow 8-bit SCSI connector for internal or external devices. - Page 19 The total length of the external SCSI cables should not exceed 3 meters (approximately 10 feet). Contact your dealer to order shielded HP SCSI cables to connect external SCSI accessories. See page 32 for information on how to connect internal SCSI devices.
-
Page 20: Connecting The Power Cords
1 Setting Up and Using Your PC Workstation Connecting the Power Cords Connecting the Power Cords 1 Remove any warning labels that may be covering the computer’s power connector on the rear of the computer. 2 Connect the power cords to the display and the computer. (The connectors are shaped to go in one way only.) Computer Power Connector Grounded Outlet... -
Page 21: Your Pc Workstation's Hardware Control Panel
1 Setting Up and Using Your PC Workstation Your PC Workstation’s Hardware Control Panel Your PC Workstation’s Hardware Control Panel The hardware control panel is located on the front of your PC Workstation. Hard Disk Activity Light Network Activity Light Power On/Off Button and LED PC Lock Button... -
Page 22: Starting And Stopping Your Pc Workstation
Test (POST) while the PC Workstation’s logo is displayed. If you wish to view the POST details, press to get the HP Summary Screen. If there is an error in the POST, the error will automatically be displayed. For details, see “If a POST Error Message is Displayed”... -
Page 23: Starting Your Pc Workstation For The First Time
(If necessary, the name of the user can be modified later.) The current date and time. • The type of printer (for example, HP LaserJet 5L). This is shown • on the front of the printer. You also need to enter the connection used by the printer. -
Page 24: Creating Back-Up Diskettes
It is very important that you create master diskettes for your preloaded application software and an Emergency Repair Disk for the operating system as soon as possible. HP recommends that you use new diskettes. If you need to restore the preloaded application software on your PC Workstation, you can use these diskettes to do so. -
Page 25: Using Your Hp Enhanced Keyboard
1 Setting Up and Using Your PC Workstation Using Your HP Enhanced Keyboard Using Your HP Enhanced Keyboard The HP enhanced keyboard includes soft keys you can use to: Display and configure the actions assigned to keys. • Perform one-touch shortcuts to start applications, open files, or •... - Page 26 Using Your HP Enhanced Keyboard Menu Key Pressing the Menu soft key displays the soft key section of the HP enhanced keyboard on your screen. Click any of the keys on the screen to display the action assigned to an individual key or to change or assign an action to a key.
- Page 27 NOTE By default, the volume on your system can be controlled with the Mute and Volume keys on the keyboard or through the HP Volume Control software. The volume control on the audio front panel is disabled. For more information on controlling audio on your system, see the...
-
Page 28: Setting Passwords
User password, to provide two levels of protection for your PC Workstation. You set both passwords using the Security menu in the Setup program (see “The HP Summary Screen and Setup Program” on page 92). Setting an Administrator Password Set the Administrator (or Supervisor) password to protect the PC Workstation’s configuration in Setup. -
Page 29: Setting A User Password
• locked—you must type the password and press to unlock the keyboard (see “The HP Summary Screen and Setup Program” on page 92). If you have set both an Administrator password and a User password, and you enter the Setup program by using the User password, you will be restricted in your ability to change setup items. -
Page 30: Additional Information And Help
1 Setting Up and Using Your PC Workstation Additional Information and Help Additional Information and Help Additional information about your PC Workstation is supplied in the HP online help located on your PC Workstation’s hard disk drive. It includes: Working in comfort—guidance on ergonomic issues. •... -
Page 31: Recycling An Old Hp Pc Workstation
PC Workstation has been designed to respect the environment as much as possible. HP can take an old computer back for recycling when it reaches the end of its useful life. In several countries, HP has a product take-back program. Collected equipment is sent to one of HP’s recycling facilities in Europe or the... - Page 32 1 Setting Up and Using Your PC Workstation Recycling an Old HP PC Workstation...
-
Page 33: How To Install Accessories Inside Your Pc Workstation
How to Install Accessories Inside Your PC Workstation This chapter explains how to install accessories, such as extra memory, accessory boards, and additional disk drives, in your PC Workstation. -
Page 34: Supported Hp Accessories
2 How to Install Accessories Inside Your PC Workstation Supported HP Accessories Supported HP Accessories This chapter describes how to install memory, mass storage devices, and accessory boards in your computer. Main Memory Upgrades Internal Mass (DIMM slots for ECC SDRAM):... -
Page 35: Removing And Replacing The Cover
2 How to Install Accessories Inside Your PC Workstation Removing and Replacing the Cover Removing and Replacing the Cover WARNING For your safety, never remove the PC Workstation’s cover without first removing the power cord from the power outlet, and any connection to a telecommunications network. -
Page 36: Moving The Power Supply
HP UltraFlow Airflow Guide Retaining button 4 Press the retaining buttons on each side of the HP UltraFlow airflow guide and lift it out of the PC Workstation’s case. 5 Unscrew the four self-retaining screws at the back of the power supply. - Page 37 1 Check that all internal cables are safely routed. Supply after Installing 2 Slide the power supply back into the computer. Accessories 3 Tighten the four self-retaining screws. 4 Replace the HP UltraFlow airflow guide. 5 Reconnect the fan to the system board. English...
-
Page 38: Installing Memory
1 Disconnect the computer’s power cord and any LAN or telecommunications cable. 2 Remove the computer’s cover (see page 23). 3 Remove the fan connection to the system board. Fan connection to system board HP UltraFlow Airflow Guide Retaining button English... - Page 39 2 How to Install Accessories Inside Your PC Workstation Installing Memory 4 Press the retaining buttons on each side of the HP UltraFlow airflow guide and lift it out of the PC Workstation’s case. 5 Remove the Ultra wide 16-bit SCSI cable from the system board and then from the (one or two) hard disk drives.
- Page 40 12 Install any other accessories if necessary, then replace all units and reconnect all cables and power cords. Replace the cover (see page 23). 13 Check the HP Summary Screen to verify the new configuration. (Refer to “The HP Summary Screen and Setup Program” on page 92.)
-
Page 41: Installing More Memory On The Video Adapter
2 How to Install Accessories Inside Your PC Workstation Installing Memory Installing More Memory on the Video Adapter Your PC Workstation is equipped with a video adapter that supports 2D and 3D graphics. If you need to have more video memory to display more colors, higher resolutions, or for increased speed, you can install more video memory on the video adapter. - Page 42 Video Adapter Additional accessories, including memory upgrades and a video MPEG module, are available for your video adapter. However, these accessories Accessories Available cannot be ordered from HP. Contact your dealer for more details about from Other Sources these accessories. English...
-
Page 43: Installing Mass Storage Devices
2 How to Install Accessories Inside Your PC Workstation Installing Mass Storage Devices Installing Mass Storage Devices If you need extra mass storage space for your application software, you can install additional mass storage devices. The computer has two internal shelves (for hard disk drives) and five front-access drive shelves (for front-access disk drives and hard disk drives). -
Page 44: Connecting Devices
2 How to Install Accessories Inside Your PC Workstation Installing Mass Storage Devices Connecting Devices If you add an IDE Zip drive, hard disk drive, CD-ROM drive, CD-RW drive, or tape drive, you need to connect it to power and data cables. The data cables and connectors provided are shown below: 16-bit SCSI with five 68-pin SCSI connectors 34-pin connector... - Page 45 2 How to Install Accessories Inside Your PC Workstation Installing Mass Storage Devices Which Data Connectors Your PC Workstation has the following cables and connectors on the system board which may be used by mass storage devices: to Use A cable for Ultra wide 16-bit SCSI with five connectors. •...
- Page 46 (“RAID 0” configuration), it can instead be configured to provide mirroring for extra data security (“RAID 1” configuration). For more information, refer to “The HP FastRAID Option” on page 84. Before Installing an Refer to the drive’s installation guide to see if you must set jumpers or if IDE Hard Disk there is a special installation procedure to follow.
-
Page 47: Installing A Hard Disk Drive In An Internal Shelf
2 Remove the computer’s cover (see page 23). 3 Remove the fan connection to the system board (see the illustration on page 24). 4 Press the retaining buttons on each side of the HP UltraFlow airflow guide and lift it out of the PC Workstation’s case. English... - Page 48 2 How to Install Accessories Inside Your PC Workstation Installing Mass Storage Devices 5 Slide the power supply out to improve access to the internal shelf (see page 24). 6 Slide the drive into position in the first internal shelf and align the screw holes in the drive with the four self-retaining screws in the drive shelf.
- Page 49 2 How to Install Accessories Inside Your PC Workstation Installing Mass Storage Devices 8 Locate the appropriate data cable for the hard disk drive. IDE drives should be connected to a free IDE connector on the IDE cable (you can add up to two IDE devices). 9 Connect the power cable and the data cable to the rear of the drive.
-
Page 50: Installing A Hard Disk Drive In A Front-Access Shelf
3 Remove the fan connection to the system board (see the illustration on page 24). 4 Press the retaining buttons on each side of the HP UltraFlow airflow guide and lift it out of the PC Workstation’s case. 5 Slide out the power supply to provide better access to the disk drive cables (see page 24). - Page 51 2 How to Install Accessories Inside Your PC Workstation Installing Mass Storage Devices 8 Slide the drive tray into the drive shelf and secure it. Slide the drive tray into the drive shelf 9 Locate the appropriate data cable for the disk drive. IDE drives should be connected to a free IDE connector on the IDE cable (you can add up to...
-
Page 52: Completing The Installation Of A Hard Disk Drive
11 Slide the power supply back into position, and tighten the four self- retaining screws (see page 25). 12 Replace the HP UltraFlow airflow guide and reconnect the fan to the system board (see the illustration on page 24). 13 Install any other accessories before replacing the cover and completing the installation. -
Page 53: Installing A Drive In A Front-Access Shelf
2 How to Install Accessories Inside Your PC Workstation Installing Mass Storage Devices 3 If an error message appears, follow the instructions provided by the Error Message Utility. When prompted, press to run the Setup program. 4 Select the Advanced menu, and the IDE Devices submenu. In the Primary Master item, check that the details for the device have been correctly detected by the Setup program. - Page 54 2 How to Install Accessories Inside Your PC Workstation Installing Mass Storage Devices 4 If installing a drive in a 5.25-inch wide shelf, remove the drive tray and put it in a safe place. Remove the drive tray if installing a 5.25-inch drive Slide the drive...
- Page 55 2 How to Install Accessories Inside Your PC Workstation Installing Mass Storage Devices 7 Locate the appropriate data cable for the device. Flexible Disk Drive Cable IDE drives should be connected to a free IDE SCSI drives can be channel cable connector connected to any free (you can add up to two connector on the 16-bit...
-
Page 56: Completing The Installation Of A Drive
2 How to Install Accessories Inside Your PC Workstation Installing Mass Storage Devices 10 Remove the plastic panel from the cover by pulling the panel from the left and unhinging its right-hand side. Store the panel in a safe place. Unclip and lift out the plastic panel 11 Install any other accessories before replacing the cover and... -
Page 57: Installing Accessory Boards
2 How to Install Accessories Inside Your PC Workstation Installing Accessory Boards Installing Accessory Boards The PC Workstation has the following accessory board slots: Slot AT 2 (the bottom slot) for full-length 16-bit ISA boards • Slot AT 1/PCI 4 for either a 16-bit ISA board or a full-length 32-bit •... -
Page 58: Configuring Accessory Boards
2 How to Install Accessories Inside Your PC Workstation Installing Accessory Boards When is selected, the BIOS will automatically configure any bootable Plug and Play accessories, and the system will automatically configure all remaining Plug and Play accessories. However, if you install a non-Plug and Play accessory board, you must use the Add New Hardware wizard to determine a conflict-free setting for the board. -
Page 59: Installing The Board
2 How to Install Accessories Inside Your PC Workstation Installing Accessory Boards Installing the Board 1 Before installing the board, turn to page 45 for important Plug and Play configuration information. NOTE PCI boards are configured automatically when installed in the PC Workstation. - Page 60 2 How to Install Accessories Inside Your PC Workstation Installing Accessory Boards 6 Hold the board horizontally by its “top” edge. Slide it into the board guide of the chosen slot. Do not bend the board. Slide the accessory board into position 7 Align the board’s connector with the slot’s socket.
- Page 61 2 How to Install Accessories Inside Your PC Workstation Installing Accessory Boards 2 In the Setup program, select the Advanced menu and the PCI Configuration submenu. A list of IRQs and the devices that use them are displayed. Highlight the IRQ field you want to change, for example IRQ 11 3 You can use the space bar or press...
-
Page 62: Installing A Processor
HP UltraFlow Airflow Guide Retaining button 4 Press the retaining buttons on each side of the HP UltraFlow airflow guide and lift it out of the PC Workstation’s case. 5 Slide out the power supply to improve access to the processor sockets (see page 24) and carefully place the PC Workstation on its side. - Page 63 Processor 9 Insert the VRM for the processor in the VRM socket. 10 Replace the transparent section of the HP UltraFlow airflow guide covering the processor sockets. 11 Slide the power supply back into the computer and tighten the four self-retaining screws.
- Page 64 2 How to Install Accessories Inside Your PC Workstation Installing a Processor Completing the 1 Verify that the system board bus speed switches are correctly configured for the processor. Installation of a Processor Switch 1 Switch 2 Switch 3 Switch 4 Switch 5 Processor Speed...
-
Page 65: Troubleshooting Your Pc Workstation
Troubleshooting Your PC Workstation This chapter deals with problems you may encounter when using your PC Workstation. -
Page 66: Solving Problems
Power-on-Self-Test (POST). Refer to page 92 for more information. HP Diagnostics An HP Hardware Diagnostic utility is either preloaded on your hard disk drive or available on the World Wide Web. With this utility, you can diagnose any hardware-related problems that may arise with your PC Workstation. -
Page 67: If Your Pc Workstation Does Not Start Properly
3 Troubleshooting Your PC Workstation If Your PC Workstation Does Not Start Properly If Your PC Workstation Does Not Start Properly Use this section if your PC Workstation does not start properly when you turn it on, and you experience one of the following symptoms: Your PC Workstation’s display is blank and there are no error •... -
Page 68: If A Post Error Message Is Displayed
Press to ignore the message and continue. • Press to run Setup and correct a system configuration error. HP • recommends that you correct the error before proceeding, even if the PC Workstation appears to start successfully. Press to accept (validate) the change and update Setup’s... - Page 69 3 Troubleshooting Your PC Workstation If Your PC Workstation Does Not Start Properly Press to see more details about the message. After viewing • these details, you will be returned to the original POST display screen. If the message is actually a change to the configuration you have made (for example, you have just removed some memory), you can then press to accept the change and update Setup’s...
-
Page 70: If You Cannot Turn Off Your Pc Workstation
Check if you are in a suspend/sleep mode, in which case a “power- • off” would risk a loss of information/data (refer to the Power Menu in the HP Setup program). If you press the On/Off button for four seconds, the system will be •... -
Page 71: If Your Pc Workstation Has A Hardware Problem
The HP Hardware Diagnostics utility helps you diagnose any hardware- related problems with your PC Workstation. The utility is either preloaded on your hard disk as part of the HP TopTOOLS application, or is available on the World Wide Web at: http://www.hp.com/go/pcsupport/... - Page 72 Support Ticket To produce a complete record of your system’s configuration and test results, you need to create a Support Ticket. You can then send this, via email or fax, to your local or HP-dedicated Support Agent. English...
-
Page 73: If Your Display Does Not Work Properly
To correct this problem: Blurred or Unreadable Select the correct display by referring to the display options section • in the HP-provided online user setup information that came with your PC Workstation. Alternatively, select the correct display by using the procedures in •... -
Page 74: If Your Keyboard Does Not Work
(and mouse). You can change this setting in the Setup program. Refer to the Power Menu in the HP Setup program. If Your Mouse Does Not Work Ensure that the mouse is correctly connected. -
Page 75: If Your Printer Does Not Work
3 Troubleshooting Your PC Workstation If Your PC Workstation Has a Hardware Problem If Your Printer Does Not Work Make sure the printer’s power switch is ON. • Verify that the power cord is plugged into the power outlet and the •... - Page 76 SCSI ID. Run the ArrayConfig™ utility to check the array configuration. • Use the ArrayConfig utility (and not HP Setup) to check that the • array has been selected as the boot device. For further details and troubleshooting advice, refer to “The HP FastRAID Option”...
-
Page 77: If The Cd-Rom Drive Has A Problem
3 Troubleshooting Your PC Workstation If Your PC Workstation Has a Hardware Problem If the CD-ROM Drive Has a Problem WARNING Be sure to disconnect the power cord and any telecommunication cables from your computer before you remove the cover to check the cable connections or jumper settings. - Page 78 3 Troubleshooting Your PC Workstation If Your PC Workstation Has a Hardware Problem CD-ROM Drive Does Check that the cables have been properly connected. • Check that a CD is inserted in the drive. Not Work • Verify that the CD-ROM is declared in the Setup program (select the •...
-
Page 79: If Your Pc Workstation Has A Software Problem
3 Troubleshooting Your PC Workstation If Your PC Workstation Has a Software Problem If Your PC Workstation Has a Software Problem If You Have Forgotten Your Password If you forget the User Password and the Administrator (or Supervisor) password is set and known: 1 Restart the PC Workstation. -
Page 80: If You Can't Start The Setup Program
PC Workstation is unplugged for more than one week (the external battery connector is shown on page 87; the instructions are provided on page 70). Contact your HP dealer for complete information about installing an external battery. -
Page 81: If Your Application Software Does Not Work
If You Have a Network Problem If you have a problem with your PC Workstation’s network, run the HPIEDIAG utility provided on the HP CD-ROM that contains the LAN drivers, supplied with your PC Workstation. This utility should be run from a minimal DOS system, without any LAN drivers loaded—achieve... -
Page 82: Installing An External Battery
If the installed battery stops working, you can install an external battery in the PC Workstation. You can order this from your HP-authorized reseller. The battery is not covered by the HP Warranty. Install the external battery as follows: 1 After removing the computer’s cover, connect the external battery cable to the battery connector on the system board (see page 87 for the location of the external battery connector on the system board). -
Page 83: Technical Information
Technical Information This chapter provides technical information about your PC Workstation and includes information on the HP Setup program. -
Page 84: Features
4 Technical Information Features Features Feature: Description: Processor (standard) Pentium II (single or dual) Cache Memory • Level-One: 16 KB code, 16 KB data (integrated in processor package) • Level-Two: 512 KB Main memory (size/speed) Upgradeable to 512 MB (SDRAM) Video •... - Page 85 • One external start connector • External battery connector Accessory slots • One AGP (Accelerated Graphics Port) slot • Three 32-bit PCI slots (one with an HP RAIDport) • One 16-bit ISA (Industry Standard Architecture) slot • One combination ISA or PCI slot Keyboard/Mouse •...
-
Page 86: System Specifications
4 Technical Information System Specifications System Specifications Power Consumption Information Full power mode (maximum) 260 W Typical consumption One processor installed: approximately 100 W Two processors installed: approximately 150 W 2.2 W (The power supply in your PC Workstation continues to supply power to the CMOS memory, even when switched off.) NOTE When the PC Workstation is turned off with the power button on the... -
Page 87: Irqs, Dmas, And I/O Addresses Used By Your Pc Workstation
4 Technical Information System Specifications IRQs, DMAs, and I/O Addresses Used by Your PC Workstation The IRQ, DMA, and I/O address mappings shown here are for a basic configuration. The resources used by your PC Workstation may vary, depending on which accessory boards are bundled with the PC Workstation. - Page 88 4 Technical Information System Specifications I/O Addresses used by 0000 - 000F DMA controller 1 PC Workstation 0020 - 0021 Master interrupt controller 002E - 002F Configuration registers 0040 - 0043 Timer 1 0060, 0064 Keyboard controller 0061 Port B (speaker, NMI status and control) 0070 Bit 7: NMI mask register 0070 - 0071...
-
Page 89: Audio Features
4 Technical Information System Specifications Audio Features Feature: Description: Digitized Sounds • SoundBlaster Pro • Compatible with AdLib • 16-bit and 8-bit stereo sampling from 4 kHz to 55.2 kHz • Programmable sample rates with 1 Hz resolution • Hardware Full Duplex Conversion •... - Page 90 4 Technical Information System Specifications Feature: Description: Mixer • AC’97 and MPC-3 audio mixer • Input mixing sources: MIDI, microphone, LINE IN, CD Audio, AUX Audio, and digitized sounds • Output mixing of all audio sources to the LINE OUT or integrated PC Workstation speaker •...
-
Page 91: Video Features
4 Technical Information System Specifications Video Features 2D Resolution and Pixel Depth Resolution Bits/Pixel 4 MB Bits/Pixel 8, 12, 16 MB 640x480 8, 16, 24, 32 8, 16, 24, 32 800x600 8, 16, 24, 32 8, 16, 24, 32 1024x768 8, 16, 24, 32 8, 16, 24, 32 1152x864... - Page 92 Refer to the User’s Guide supplied with your display for details of the refresh rates supported by your display. This resolution is not preset on the HP displays. NOTE The video drivers and adapter card supplied for your operating system will determine the available video resolutions and the number of displayable colors.
-
Page 93: Scsi Features
• Multiple internal and external SCSI devices • Automatic switching to non-Ultra for external SCSI devices (10 MB per second) • SCAM support HP FastRAID • Acceleration of Ultra Wide 16-bit SCSI only • Top performance with two superfast 4.5 GB 10,000 rpm hard disks •... -
Page 94: Disk Striping Features (Fastraid)
4 Technical Information System Specifications Disk Striping Features (FastRAID) Feature: Description: Computer bus 32-bit PCI local bus and HP FastRAID socket connector Host bus data transfer rate Up to 133 MB per second Device protocol Ultra wide 16-bit SCSI Advanced HP FastRAID •... -
Page 95: Network Features
4 Technical Information System Specifications Network Features Feature: Description: LAN Controller AMD AM79C971/Presidio 3 Physical Layer Level One LXT970 RJ45 Connector 10BT/100TX autonegotiation Option Flash Support up to 256 KBs Remote Boot Protocols integrated in System BIOS ExStart Connector • Connection to CPU board •... -
Page 96: The Hp Fastraid Option
PC’s hard drives. Rather than focussing on data protection, as with server-based RAID technologies, HP FastRAID brings top performance to your computer. If you purchased your computer with the HP FastRAID option, an Adaptec ARO-1130 PCI RAIDport adapter will have been pre- ™... - Page 97 World Wide Web: refer to page 109 for access details, choose Drivers, and then locate the support documentation for your PC Workstation. (If you purchased the HP FastRAID option as an accessory, the guide is a separate paper booklet.) Note that the ArrayConfig utility must be run from a bootable diskette.
-
Page 98: The Pc Workstation's Rear Connectors
4 Technical Information The PC Workstation’s Rear Connectors The PC Workstation’s Rear Connectors 9-pin Serial Port Connectors: Port B (left)/Port A (right) 25-pin Parallel Port Connector Keyboard (right) and Mouse (left) Connectors MIDI/Joystick Connector USB Connectors (two) 8-bit SCSI Connector 3.5 mm Audio jacks 15-pin VGA Display Connector (on video adapter board) English... -
Page 99: System Connectors And Switches
4 Technical Information System Connectors and Switches System Connectors and Switches System Board Connectors External System Board Battery Fan (airflow guide) Power 16-bit SCSI switches VRM 1 Status Panel VRM 2 Memory Modules Processor 1 IDE Connector External Start Processor 2 Internal speaker RAIDport AGP Slot... -
Page 100: Internal Audio Connectors
4 Technical Information System Connectors and Switches Internal Audio Connectors The PC Workstation’s system board has several connectors that allow you to internally connect to other devices. This includes: A CD audio connector • An auxiliary (AUX) connector • An Audio Front Panel connector •... - Page 101 4 Technical Information System Connectors and Switches Audio Front Panel The Audio Front Panel Connector, labeled “Audio Front Panel,” is a 10-pin connector that links the system board with the multimedia Connector Front Panel. It has the following functions: Master volume adjustment from 0% (Mute) to 100% (Maximal Gain). •...
-
Page 102: System Board Switches
Switches 1 through 5 are used for processor settings (see page 52) and should not be changed. Replacing the processor with a different processor is not supported by HP. Switches 6 to 10 are used as shown in the following table:... - Page 103 4 Technical Information System Connectors and Switches Switch Use Switch to: 6 - CONFG Retain or clear the configuration stored in EEPROM: • UP to retain configuration — DEFAULT • DOWN to clear configuration. 7 - PSWRD Enable or clear (and disable) User and System Administrator Passwords stored in EEPROM: •...
-
Page 104: The Hp Summary Screen And Setup Program
PC Workstation. 2 While the startup logo appears on your display, press . This takes you to the HP Summary Screen. (To go immediately into the Setup program, and bypass the Summary Screen, press instead of ). -
Page 105: Saving Your Changes And Leaving Setup
4 Technical Information The HP Summary Screen and Setup Program P h o e n i x B I O S S e t u p U t i l i t y M a i n A d v a n c e d... -
Page 106: Configuring Your Network Connection
Configuring Your Network Connection Use the information in this section if your PC Workstation comes with an HP-supplied integrated network solution. You must use the PC Workstation's Setup program (described on page 92) to change the integrated Ethernet interface settings. The following table summarizes which network options you can set using the Setup program. -
Page 107: Selecting The Boot Device Priority
4 Technical Information Configuring Your Network Connection 2 Press to highlight the line Boot Devices Security and press to select the submenu. 3 Highlight the line Start from Network and press to change the option to Enabled. 4 You can disable the other boot options to prevent the PC Workstation from booting if the network or server ever fails: a Press to go to the Start From Floppy line. -
Page 108: Configuring A Scsi Accessory Using Scsiselect
Ultra SCSI (8-bit), and 00:09h then press . This screen does not appear unless both SCSI channels are enabled through HP Setup (and does not appear if the FastRAID option is installed). Next, the Options menu is displayed. SCSISelect(TM) Utility v1.xxx Would you like to configure the host adapter, or run the SCSI disk utilities? Select the option and press <Enter>. - Page 109 4 Technical Information Configuring a SCSI Accessory Using SCSISelect Configure/View It is recommended that you do not change these settings. Interface Settings Menu SCSISelect(TM) Utility v1.xxx Configuration SCSI Bus Interface Definitions Host Adapter SCSI ID ....7 SCSI Parity Checking .
- Page 110 4 Technical Information Configuring a SCSI Accessory Using SCSISelect (only if HP FastRAID is installed) • Array 1000 BIOS This option is enabled by default, and instructs the system to use the special BIOS for the FastRAID option. If you disable this option and reboot, the system will use its normal BIOS and FastRAID will be disabled.
- Page 111 4 Technical Information Configuring a SCSI Accessory Using SCSISelect SCSI Device This menu lets you configure parameters for each SCSI device on the SCSI bus. To configure a specific SCSI device, you need to know which Configuration Menu SCSI ID it uses. To know the SCSI ID of a specific SCSI device, you can run the SCSI Disk Utilities (refer to page 102).
- Page 112 4 Technical Information Configuring a SCSI Accessory Using SCSISelect • Initiate Wide Negotiation This option determines whether the SCSI channel attempts 16-bit data transfer instead of 8-bit data transfer. By default, it is set to unless FastRAID is installed, when it is set to •...
- Page 113 4 Technical Information Configuring a SCSI Accessory Using SCSISelect • Plug and Play Scam Support When enabled, this option automatically configures Plug and Play compatible SCSI devices. For SCSI devices that do not support Plug and Play, set this option to .
- Page 114 4 Technical Information Configuring a SCSI Accessory Using SCSISelect SCSI Disk Utilities When the SCSI Disk Utilities are selected from the initial Options menu, the SCSISelect utility scans the SCSI bus and lists all the SCSI devices on the SCSI bus. The list shows the SCSI ID and name of each SCSI device.
-
Page 115: Hewlett Packard Support And Information Services
Hewlett Packard Support and Information Services... -
Page 116: Introduction
To ensure that your desktop system maintains its reliability and to keep you up-to-date with the latest developments, HP and a worldwide network of trained and authorized resellers provide a comprehensive range of service and... -
Page 117: Your Hp-Authorized Reseller
Authorized Resellers can also answer questions regarding non-HP hardware, software and systems as well as answer queries about usage not intended for, or not common for, the HP PC Workstation. Authorized HP Resellers can also offer consulting services tailored to your specific needs regarding product development or custom installations. -
Page 118: Hp Support Assistant Cd-Rom
5 Hewlett Packard Support and Information Services HP Support Assistant CD-ROM HP Support Assistant CD-ROM HP Support Assistant is a yearly subscription service on two CD-ROMs: one for software; the other for support documentation. The software CD-ROM is updated monthly and contains the latest HP drivers and utilities. -
Page 119: Hewlett-Packard Information Services
This service provides information about your HP PC Workstation, and allows you to communicate with other HP users through an on-line user forum. HP users share their knowledge and experience with you, and you will be able to ask, or answer, technical questions about your HP PC Workstation, and HP products. -
Page 120: Hp Forum On America Online
• This will load the HP Home Page directly onto your screen. In the HP Forum you can ask and answer questions about HP products and you can also download drivers, software application notes, or utilities for HP products. -
Page 121: Hp Audio Tips (Usa Only)-Hp Automated Support Directory
Dial 1 (800) 333-1917 and press 3 to access HP Audio Tips. HP World Wide Web Site The HP World Wide Web site gives you access to information about HP, its products, including product data sheets, service and support information, electronic newsletters and technical tips. You can also download the latest versions of drivers, BIOS and software utilities. -
Page 122: Ordering Drivers And Bios On Diskette
Contact your authorized HP reseller for assistance in selecting the • appropriate driver. If your reseller is unable to help you, call HP FIRST for the most up- • to-date list of drivers. English... -
Page 123: Hp Support Services
HP or HP-authorized service outlet. HP telephone support for your PC Workstation is available during the first year of your hardware warranty. This service will also provide technical assistance with the basic configuration and setup of your PC Workstation and for the bundled or pre-loaded operating system. -
Page 124: Hewlett-Packard Telephone Support
5 Hewlett Packard Support and Information Services Hewlett-Packard Telephone Support Hewlett-Packard Telephone Support HP North American Assistance from the HP North American Customer Support Center is Customer Support available Monday to Friday, 7:00 am to 6:00 pm Mountain time. Center... -
Page 125: Lifeline Telephone Support
The charge begins AFTER you have been put in contact with a support technician. If your problem is found to be covered by the HP Hardware Warranty, no charge will be applied. In the US please call the appropriate number listed below. -
Page 126: Hp Network Phone-In Support Service (Nps)
• Increase network uptime. • You can purchase the HP NPS service as an annual contract, billable in advance annually, bi-annually, quarterly, or at an hourly rate. This contract service provides unlimited toll-free access to HP Response Center Engineers (RCEs). -
Page 127: Summary
Service Covers Period Response When Purchase covered time available from Basic Parts and labor for HP Three years from Next working day No charge. At time of Warranty products: date of purchase. for on-site. purchase. first year on-site, second and third year return to HP. -
Page 128: Hewlett-Packard Marketing Headquarters
Should you wish to contact Hewlett-Packard, check your local telephone directory for the HP Sales and Service Office near you. If you cannot find a convenient HP office, you can write to one of the major HP Sales and Service Offices or one of the Worldwide Marketing Headquarters listed here. -
Page 129: Glossary
Glossary 8-bit SCSI Also called narrow SCSI. BBS Bulletin Board System. A Ultra narrow SCSI provides data computer that uses a modem and transfer rates of up to 20 MB per software to serve as an information second. source for other computers equipped with a modem. - Page 130 Glossary computer. It is used to store expansion slot A slot inside the information that must be maintained, computer, connected to the system such as your computer’s board, that can be used for accessory configuration. boards. controller A device that enables extended memory Memory which another device (such as a hard disk) can be addressed by the processor in...
- Page 131 Glossary jumper An electrically-conductive MPEG Motion Picture Expert part that is used to connect two or Group. A standard for video sequence more points on a circuit board. compression. You can play back Commonly used to select MPEG files from the WEB or a video configuration options.
- Page 132 Glossary Polyphonic More than one voice SCAM SCSI Configured played simultaneously. Automatically. A protocol which automatically assigns device IDs to SCSI devices which support SCAM. Plug and Play Plug and Play is an architecture designed to simplify installation and configuration of new SCSI Small Computer System devices in a PC.
- Page 133 Glossary µ terminator A resistor at the end of a -law A method of data compression data connection cable that prevents that enables the sampling of sound at the signal from reflecting back along a resolution of 16 bits, but that the cable.
- Page 134 English...
-
Page 135: Index
AGP slot on system board, 87 compression, defined, 117 disk drives, installing, 31 A-law, defined, 117 CompuServe disk striping, 34, 84 America Online, the HP Forum, 108 free introductory membership, 107 features, 82 ARO-1130 adapter, 84 HP forum, 107 display, connecting, 3... - Page 136 Index extended MIDI format, defined, 118 HP customer information key, 15 ISA Configuration Utility, 45 external battery, installing, 70 HP Diagnostics, 59 external start connector on system HP Forum board, 87 on America Online, 108 jumper, defined, 119 on CompuServe, 107...
- Page 137 NT Lock, 9 processor, on system board, 87 VRM, on system board, 87 Q-Sound, defined, 120 soft key OLE, defined, 119 HP customer information, 15 Internet, 14 RAID option and RAIDport, 84 lock/suspend, 14 parallel port connector, 3 RAM, defined, 120...
- Page 138 62 mouse, 62 PC Workstation, 53 printer, 63 Setup, 68 software, 67 unpacking the PC Workstation, 2 URL for HP World Wide Web site, 109 using FastRAID, 84 video controller, defined, 121 video memory, installing, 29 video resolutions, 79...
-
Page 139: Regulatory Statements And Warranty
Regulatory Statements and Warranty... -
Page 140: Regulatory Statements
HEWLETT-PACKARD 5 Avenue Raymond Chanas 38320 Eybens FRANCE Declares that the product: Product Name: HP Kayak XU PC Workstation Model Number: Conforms to the following Product Specifications: SAFETY International: IEC 950: 1991+A1+A2+A3 +A4 Europe: EN 60950: 1992+A1+A2+A3 CISPR 22: 1993... - Page 141 • connect the equipment into an outlet on a circuit different from that to which the receiver is connected • consult the dealer or an experienced radio/TV technician for help. Hewlett-Packard’s system certification tests were conducted with HP-supported peripheral devices and HP shielded cables, such as those you receive with your system. Changes or modifications not expressly approved by Hewlett-Packard could void the user’s authority to operate the equipment.
- Page 142 Notice for the United Kingdom The HP PC Workstation is approved under approval number NS/G/1234/J/100003 for indirect connection to Public Telecommunication Systems within the United Kingdom. Hinweis für Deutschland: Geräuschemission Lärmangabe nach Maschinenlärmverordnung - 3 GSGV (Deutschland) LpA < 70 db am Arbeitsplatz normaler Betrieb nach EN27779: 11.92.
- Page 143 If the product is not normally sold by HP in the country of use, it must be returned to the country of purchase for service.
- Page 144 Response time for HP on-site service in an HP Service Travel Area is normally next business day (excluding HP holidays) for HP Travel Zones 1-3 (generally 100 miles or 160 Km from the HP office). Response time is second business day for Zones 4 and 5 (200 miles, 320 Km); third business day for Zone 6 (300 miles, 480 Km); and negotiated beyond Zone 6.
- Page 145 CD-ROM and/or support utility software may only be used for restoring the hard disk of the HP computer with which the product recovery CD-ROM was originally provided.(ii) The use of any operating system software by Microsoft contained in any such product recovery CD-ROM shall be governed by the Microsoft End User License Agreement (EULA).
- Page 146 Customer’s remedy shall be a refund or repair. Should HP be unable to replace the media within a reasonable amount of time, Customer’s alternate remedy shall be a refund of the purchase price upon return of the product and all copies.
- Page 147 Your HP PC Workstation’s Physical Characteristics Characteristics: Description: Weight (excl. keyboard and display) 11.34 kilograms (25.2 pounds). Dimensions 42 cm (D) by 21.1 cm (W) by 41.5 cm (H) (16.48 inches by 8.29 inches by 16.27 inches). Footprint 0.09 m (0.95 sq ft)
- Page 148 If you want to ... Setup HP User’s Guide Set up your computer Setting Up and Using Your PC Workstation Reference HP Help Learn how to use your HP PC Workstation’s hardware Start Help Contents and software Operating System Online Help Start...
- Page 149 Book Spine Note to printer: Please center this spine text on the spine. I.e. centered in this direction:...