
Related Manuals for Haier HSU-12HVE03


Summary of Contents for Haier HSU-12HVE03
- Page 1 HSU-07HV03/R2(DB) HSU-09HV03/R2(DB) HSU-12HVE03/R2(DB) HSU-18HVE03/R2(DB) HSU-22HVE03/R2(DB) No, 0010503017...
-
Page 2: Table Of Contents
Contents Cautions Parts and functions Operation Maintenance 22-26 Trouble shooting... -
Page 3: Cautions
Safety Instructions and Warnings Before disposing an old air conditioner that Before starting the air conditioner, read the goes out of use, please make sure it's inop- information given in the User's Guide caref- erative and safe. Unplug the air conditioner ully. - Page 4 3. If the fuse of indoor unit on PC board is broken,please change it with the type of T. 3.15A/ 250V. If the fuse of outdoor unit is broken,change it with the type of T.25A/250V...
-
Page 5: Safety Instruction
Do not attempt to install the air conditioner by yourself because improper works may cause electric shock, fire, water leakage. lnstallation in a inadequate place may cause accidents. Do not install in the following place. CAUTION Do not install in the... - Page 6 PROHIBITION PROHIBITION CAUTION Take fresh air occasionally especially Do not operate the switch with Do not use for the purpose of storage of food, art work, precise equipment, when gas appliance is running at the wet hand. breeding, or cultivation.
-
Page 7: Parts And Functions
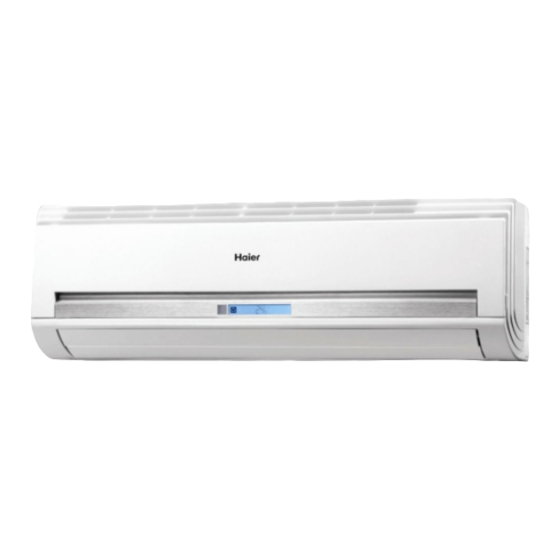
Vertical flap (adjust up and down air flow. Power plug Don't adjust it manually) Horizontal louver (adjust left and right air flow) For 18k 22k unit, the power plug is on the outdoor unit Outdoor unit HSU-07HV03/R2(DB) HSU-18HVE03/R2(DB) HSU-09HV03/R2(DB) HSU-22HVE03/R2(DB) -
Page 8: Parts And Functions
Used to set clock and timer setting. to reset the remote controller normal. NOTE:(1) The following functions and related displays are not available: 18 30 (2) Cooling only unit do not have functions and displays related with heating. - Page 9 If the remote controller can't run normally during operation, please remove the batteries and reload several minutes later. Hint: Remove the batteries in case unit won't be in usage for a long period. If there are any display after taking-out, just need to press reset key.
-
Page 10: Operation
The anion generator in the air conditioner can generate a lot of anion effectively balance the quantity of position and anion in the air and also to kill bacteria and speed up the dust sediment in the room and finally clean the air in the room. -
Page 11: Auto Operation
Remote controller: AUTO COOL HEAT Then Select Auto operation On the displaying board,colorful displaying bar will be white. TEMP 3.Fan speed selection Press FAN button. For each press, fan speed changes as follows: HEALTH Remote controller: SWING MODE H.AIR. AUTO SLEEP FRESH Air conditioner is running under displayed fan speed. -
Page 12: Cool Operation
C,if kept depressed, it will decrease SLEEP FRESH rapidly CLOCK Select a desired temperature. TIMER 4.Fan speed selection Press FAN button. For each press, fan speed changes as follows: Remote controller: LOCK LIGHT CODE RESET AUTO Air conditioner is running under displayed fan speed. -
Page 13: Dry Operation
FRESH decrease 1 C,if kept depressed, it will decrease CLOCK rapidly TIMER Select a desired temperature. 4.Fan speed selection Press FAN button. For each press, fan speed changes as LOCK LIGHT CODE RESET follows: Remote controller: AUTO Air conditioner is running under displayed fan speed. -
Page 14: Fan Operation
"), the unit stops. CLOCK TIMER About FAN operation In FAN operation mode, the unit will not operate in COOL or HEAT mode but only in FAN mode ,AUTO is LOCK LIGHT CODE RESET not available in FAN mode.And temp.setting is disabled. -
Page 15: Heat Operation
Remote controller: AUTO Air conditioner is running under displayed fan speed IN HEAT mode, warm air will blow out after a short period of the time due to cold-draft prevention function. When FAN is set to AUTO, the air conditioner automatically adjusts the fan speed according to room temperature. -
Page 16: Air Flow Direction Adjustment
: remote controller: Pos.1 Pos.2 Pos.3 Pos.4 Pos.5 Pos.6 Pos.7 Pos.8 The horizontal louvers will swing according to the above positions. Note:When restart after remote turning off, the remote controller will automatically memorize the previous set swing position. -
Page 17: Sleep Operation
C further. decrease by 2 C further. After more The unit will run for further 6 hours then stops. another 3 hours, temp. rises by 1 Temp. is higher than temp. setting so that room further. The unit will run for further 3 temperature won't be too Iow for your sleep. -
Page 18: Timer On/Off Operation
After replacing batteries or a power failure happens, time setting should be reset. Remote controller possesses memory function, when use TIMER mode next time, just press SET button after mode selecting if time setting is the same as previous one. - Page 19 " on the remote controller stops flashing. CLOCK " " starts flashing. TIMER Time displayed: Unit starts or stops at x hour x min. 5.Time setting for TIMER OFF Just press HOUR button ,follow the same procedure in LOCK LIGHT...
- Page 20 HEALTH SWING MODE H.AIR. SOFT Operation SLEEP FRESH You can use this function when silence is needed for rest or reading. CLOCK TIMER Selecting of SOFT operation Press POWER/SOFT button. Every time the button is pressed,display changes as follows: BLANK...
-
Page 21: Health Airflow Operation
2).Press the button of health airflow again, appears on the display. The above inlet and outlet grills of the air cond- itioner are closed and the airflow is blown vertically from the TEMP nether inlet and outlet grills. Avoid the strong airflow blows direct to the body. -
Page 22: Emergency And Test Operation
Removal of the restriction of emergency or test operation Press the emergency operation switch once more, or manipulate through the remote controller; the "Pi" sound, the emergency or test operation is terminated. When the remote controller is manipulated, it gets the system back to the normal operation mode. -
Page 23: Maintenance
Use the timer effectively during operation During cooling operation prevent the penetration of direct sunlight with curtain or blind Use the louvers effectively If the unit is not to be used for a long time, turn off the power supply main switch. -
Page 24: Air Filter Cleaning
Maintenance For Smart Use of The Air Conditioner WARNING Before maintenance,be sure to turn off the system and the circuit breaker. Remote Controller Indoor Body Wipe the air conditioner by using a soft and dry cloth.For serious stains,use a neutral detergent diluted with water.Wring the water... -
Page 25: Maintenance
The photocatalyst air purifying filter will be solarized in fixed time. In normal family, it will be solarized every 6 months. The solarization time will last no less than 8 hours under the state of abundant sun. - Page 26 To Keep Your Air conditioner in Good Condition after Season. Operate in cooling mode for 2-3 hours. To prevent breeding mold or bad smell, be sure to operate at the designated temperature or 30 C,cooling mode and High speed fan mode for 2-3 hours.
-
Page 27: Cleaning The Standard Air Filter
Before Setting in High season Cleaning the standard air filter. Operation without filter may cause troubles.Be sure to attach both right and left filters prior to the operation. Each of them are of different shapes. Connecting the earthing cable. Caution Incomplete earthing may cause an electric shock. -
Page 28: Trouble Shooting
This noise is generated by the inspection casing expanding or shrinking because of temperature changes. Should there be a big noise from air flow in unit operation, air filter may be too dirty. This is because the system circulates smells Smells are generated. - Page 29 Indice Precauzioni per l'uso Denominazione dei componenti Tasti e display del telecomando Funzionamento Manutenzione Guida alla ricerca dei guasti...
-
Page 30: Precauzioni Per L'uso
• Le precauzioni di sicurezza di seguito elencate si suddividono in PERICOLO e ATTENZIONE. La voce PERICOLO riguarda precauzioni che, se non seguite, possono portare a serie conseguenze, quali morte, gravi lesioni, ecc. Tuttavia, anche la vo- ce ATTENZIONE riguarda precauzioni che, se non osservate, possono causare seri problemi, a seconda della situazione. - Page 31 • Se il cavo dell’alimentazione è danneggiato, deve essere sostituito da personale del servizio assistenza o comunque da per- sonale qualificato. • Se il fusibile sulla scheda elettronica dell'unità interna salta, sostituirlo con uno di tipo T.3.15A/250V. Se il fusibile sulla sche- da elettronica dell'unità esterna salta, sostituirlo con uno di tipo T.25A/250V.
-
Page 32: Denominazione Dei Componenti
Spina di alimentazione Alette verticali (per regolare la direzione destra/sinistra del flusso d’aria) Per il modello 22 la spina di alimentazione si trova sull’unità esterna. Unità esterna HSU-07HV03/R2(DB) HSU-09HV03/R2(DB) HSU-18HV 03/R2(DB) HSU-12HV 03/R2(DB) HSU-22HV 03/R2(DB) -
Page 33: Tasti E Display Del Telecomando
Controlla l'accensione e lo spegnimento degli indicatori luminosi sul pannello dell’unità interna. 3. Tasto CODE Per selezionare il codice A o B. Si prega di selezionare A. 4. Tasto TIMER Per impostare le funzioni "TIMER ON", "TIMER OFF", "TIMER ON- OFF". - Page 34 20. Indicatore invio segnale 21. Indicatore funzione Power/Soft 22. Indicatore direzione del flusso d'aria sinistra/destra 23. Indicatore temperatura impostata 24. Indicatore Timer Off (il climatizzatore si arresta dopo il perio- do impostato) 25. Indicatore orarioTimer/Sleep 26. Tasti TEMP (impostazione temperatura) Per impostare la temperatura ambiente desiderata.
-
Page 35: Funzionamento
• Dopo aver acceso il climatizzatore, puntare il telecomando direttamente verso il sensore di ricezione segnali sull’unità interna. • La distanza tra la testina di trasmissione del segnale e il sensore di ricezione non deve essere superiore ai 7 metri e non de- vono esserci ostacoli. - Page 36 • In modalità Deumidificazione, quando la temperatura ambiente supera di 2°C la temperatura impostata, l'unità inizia a funzio- nare con velocità del ventilatore bassa, indipendentemente dalla velocità del ventilatore impostata. • In modalità Riscaldamento, l'aria calda viene emessa solo dopo un breve periodo di tempo per evitare l'effetto "cold-draft" (aria fredda).
- Page 37 Arrestare il display sul simbolo della modalità Ventilazione. Sul pannello dell'u- nità interna, la barra luminosa si colora di rosa. TEMP (3) Selezione della velocità del ventilatore Premere il tasto FAN; ad ogni pressione, la velocità del ventilatore varia come segue: HEALTH BASSA...
- Page 38 LIGHT CODE RESET 1) Direzione del flusso d’aria basso/alto Premere il tasto SWING (freccette su/giù); ad ogni pressione, la direzione del flusso d’aria varia come segue in base alla modalità operativa in uso: Raffreddamento/Deumidificazione/Ventilazione: Posizione 1 Posizione 2 Posizione 3...
-
Page 39: Funzione Sleep
LIGHT CODE RESET ratura ambiente si abbasserà di altri due gradi. Dopo altre 3 ore, la tempera- tura ambiente si alzerà di 1°C. Mantenendo questa stessa temperatura, l’uni- tà funzionerà per altre tre ore e poi si arresterà automaticamente. La temperatura ambiente è più bassa rispetto a quella impostata in modo che non sia troppo caldo durante la notte. - Page 40 • Dopo aver sostituito le batterie, o in caso di interruzione di corrente, è necessario reimpostare il Timer. • Il telecomando possiede una funzione memoria, quindi, quando si utilizza la modalità Timer la volta successiva, dopo aver sele- zionato la modalità operativa è sufficiente premere il tasto SET se l’impostazione del Timer è uguale alla volta precedente.
- Page 41 (3) Impostazione dell’orario per TIMER ON HEALTH Premere i tasti HOUR per l’impostazione dell’orario SWING Ad ogni pressione, l’ora indicata aumenta di 1 minuto. Se il tasto viene te- H.AIR. MODE nuto premuto l’ora cambierà rapidamente. SLEEP FRESH Ad ogni pressione, l’ora indicata diminuisce di 1 minuto.
- Page 42 • Come conseguenza del funzionamento intensivo (Power) per un breve periodo di tempo, può succedere che la temperatura ambiente non sia uniforme. • La modalità Soft può non risultare sufficientemente potente da mantenere per lungo tempo la temperatura ambiente ai livelli impostati.
- Page 43 (2) Attivazione funzione Health Funzione ionizzazione Premere una volta il tasto HEALTH, sul display del telecomando appare il sim- bolo " ": lo ionizzatore si attiva. Premendo nuovamente il tasto HEALTH, il simbolo "...
- Page 44 • In modalità Raffreddamento, è preferibile selezionare la posizione • In Raffreddamento e Deumidificazione, se il climatizzatore è in funzio- ne da molto tempo con un alto tasso di umidità nell'ambiente, si pos- sono formare delle gocce di condensa sulle alette dell'unità interna.
- Page 45 Per attivare la funzione Auto-restart (riavvio automatico dopo un'interruzione di corrente), premere il tasto SLEEP dieci volte in 5 secondi, si sentirà un suono "biiip" per quattro volte. Per disattivare la funzione, premere nuovamente il tasto SLEEP dieci volte in 5 secondi, si sentirà un suono "biiip" per due volte.
-
Page 46: Manutenzione
Utilizzare il Timer in maniera efficace In modalità Raffreddamento In modalità Raffreddamento, impedire che il sole entri direttamenre nella stanza utilizzando tende o persiane Se il climatizzatore non viene usato per un lungo periodo di Utilizzare i deflettori in maniera efficace tempo, staccare l'alimentazione elettrica... - Page 47 Manutenzione Per un uso corretto del climatizzatore ATTENZIONE Prima di effettuare la pulizia, togliere la spina dalla presa di corrente o staccare l'interruttore dell'alimentazione elettrica generale. Pulizia del telecomando Pulizia dell'unità interna Non utilizzare acqua, si prega di usare un panno asciutto.
- Page 48 • Il filtro purificatore anti-batterico è posizionato sulla parte sinistra dell'unità interna, mentre il filtro purificatore a rigenerazione solare è posizionato sulla parte destra. • I filtri a rigenerazione solare devono essere esposti al sole a intervalli regolari; in genere, ogni 6 mesi vanno esposti alla luce solare diretta per almeno 8 ore.
- Page 49 1. Far funzionare il climatizzatore in modalità Raffreddamento per 2-3 ore Per impedire la formazione di muffe o cattivi odori, far funzionare il climatizzatore per 2-3 ore alla temperatura impostata di 30°C, in modalità Raffreddamento e con il ventilatore ad alta velocità.
-
Page 50: Guida Alla Ricerca Dei Guasti
• Vi sono troppe fonti di calore o troppe persone nella stanza? In caso di segnalazione di allarme o comunque di mancato funzionamento potrebbe non trattarsi di un guasto ma di una nor- male protezione dell’apparecchio da cause esterne. Per ripristinare il corretto funzionamento è necessario togliere tensione per almeno 3 minuti e successivamente ridare tensione all’impianto.