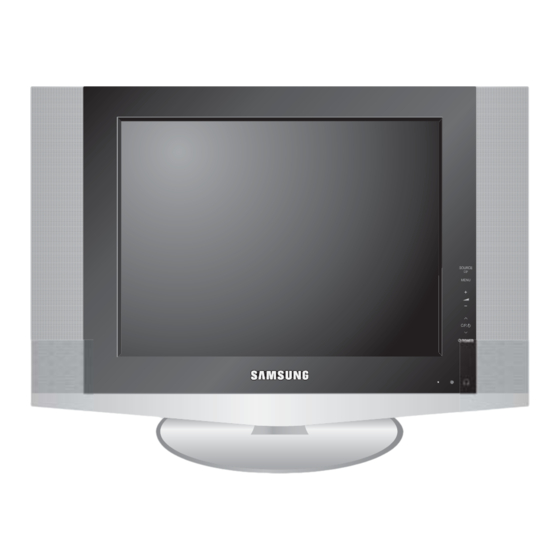
Samsung LA15S51B Service Manual
Tft-lcd tv
Hide thumbs
Also See for LA15S51B:
- Owner's instructions manual (55 pages) ,
- Owner's instructions manual (55 pages)

Related Manuals for Samsung LA15S51B


Summary of Contents for Samsung LA15S51B
-
Page 1: Table Of Contents
TFT-LCD TV Chassis Model SP15SO LA15S51B SERVICE Manual TFT-LCD TV CONTENTS 1. Precautions 2. Product Specifications 3. Disassembly & Reassembly 4. Alignment & Adjustments 5. Troubleshooting 6. Exploded View & Parts List 7. Electrical Parts List 8. Block Diagram 9. Wiring Diagram 10. - Page 2 Samsung Electronics Co.,Ltd. - This Service Manual is a property of 416, Maetan-3Dong, Yeongtong-Gu, Suwon City, Samsung Electronics Co., Ltd. Gyeonggi-Do, Korea, 443-742 Any unauthorized use of Manual can be Printed in Korea punished under applicable International P/N : BN82-00131F-00 and/or domestic law.
-
Page 3: Precautions
1 Precautions 1 Precautions Follow these safety, servicing and ESD precautions to prevent damage and to protect against potential hazards such as electrical shock. 1-1 Safety Precautions 1-1-1 Warnings For continued safety, do not attempt to modify the circuit board. Disconnect the AC power and DC Power Jack before servicing. - Page 4 1 Precautions 1-2 Servicing Precautions WARNING: An electrolytic capacitor installed with the wrong polarity might explode. Caution: Before servicing units covered by this service manual, read and follow the Safety Precautions section of this manual. Note: If unforeseen circumstances create conflict between the following servicing precautions and any of the safety precautions, always follow the safety precautions.
-
Page 5: Product Specifications
2 Product Specifications 2 Product Specifications 2-1 Specifications Description Item LCD Panel TFT-LCD panel, RGB vertical stripe, normaly white, 15-Inch viewable, 0.297 mm pixel pitch Scanning Frequency Horizontal : 30 kHz ~ 69 kHz (Automatic) Vertical : 50 Hz ~ 75 Hz (Automatic) Display Colors 16.2 Million colors Maximum Resolution... - Page 6 2 Product Specifications 2-2 Pin Assignments 2-2-1 DVD 2-2-2 S-Video Separate RCA Green Pb (Cb) RCA Blue Pr (Cr) RCA Red Audio L RCA White Audio R RCA Red 2-2-4 D-SUB 2-2-3 A/V Separate RCA Yellow CVBS Audio L Green RCA White Blue Audio R...
- Page 7 2 Product Specifications 2-3 Timing Chart - This section of the service manual describes the timing that the computer industry recognizes as standard for computer-generated video signals. Table 2-1 Timing Chart VESA Mode 800/75 Hz, VGA2/ VGA3/ 640/75 Hz, 56Hz, 1024/60Hz 1024/75Hz 70 Hz...
- Page 8 2 Product Specifications Memo...
-
Page 9: Disassembly & Reassembly
3 Disassembly and Reassembly 3 Disassembly and Reassembly This section of the service manual describes the disassembly and reassembly procedures for the LA15S51B TFT-LCD TV. WARNING: This monitor contains electrostatically sensitive devices. Use caution when handling these components. 3-1 Disassembly Cautions: 1. - Page 10 3 Disassembly and Reassembly 3. Remove 11 screws from the boards and lift up the boards. 4. Remove 6 screws from the shield PCB. 5. Lift up the shield PCB and lift up the LCD panel.
- Page 11 3 Disassembly and Reassembly 3-2 Replacement Order of Lamp Assemblies 1. After confirm there is nothing on the desk, turn the LCD module over and put it on a flat desk set to the ground. 2. Remove 2 screws for the lamp unit.
- Page 12 3 Disassembly and Reassembly 3. Slide the lamp unit out. Please take out the lamp Slide the lamp unit out. unit from the LCD module. Slide the lamp unit out. 4. Please fix the new lamp units on the LCD module : opposite process 2 and 3.
- Page 13 4 Alignments and Adjustments 4 Alignments and Adjustments 4-1 General Alignment Instuction 1. Usually, a color LCD TV needs only slight touch-up adjustment upon installation. Check the basic characteristics such as height, horizontal and vertical sync. 2. Use the specified test equipment or its equivalent. 3.
- Page 14 4 Alignments and Adjustments 4-2 Factory Mode Adjustments 4-2-1 Entering Factory Mode 1. To enter “Service Mode” Press the remote -control keys in this sequence : - If you do not have Factory remote - control - If you have Factory remote - control 4-2-2 Factory Mode Tree...
- Page 15 4 Alignments and Adjustments...
- Page 16 4 Alignments and Adjustments 7. Test Pattern (Test Pattern of VCTi) 1) VCTi 2) Toshiba 3) Gray Bar 4) Gray 5) Green 6) Color Bar 7) Cross 8. Bus Stop - Bus stop is used data communication. 9. Chcek Sum - Display the current check sum size of the MICOM.
- Page 17 4 Alignments and Adjustments 4-2-4 Calibration...
- Page 18 4 Alignments and Adjustments Memo...
-
Page 19: Troubleshooting
5 Troubleshooting 5 Troubleshooting 5-1 No Power Does proper DC 14V/5V Check CN803 Pin3, Pin9 in I/P appear at Pin 3. Pin 9 of Board. CN100? Does proper DC A5V Check IC101 and IC105. appear at FT144? Does proper B3.3V Check IC111. - Page 20 5 Troubleshooting Does proper DC 5V_P appear Check IC104. at Pin 2 of IC104? Does proper DC 9V_S Check IC110. appear at FT127? Does proper DC B5V Check IC108. appear at FT131? Check IC704 and IC802.
- Page 21 5 Troubleshooting WAVEFORMS...
- Page 22 5 Troubleshooting 5-2 No Picture (TV, Video, S-Video, DVD) Check C800(TV) Check C822(Video) Check the input signal. Check C824(S-Video) Check C821(DVD)? Check the IC802. WAVEFORMS...
- Page 23 5 Troubleshooting 5-3 No Sound Does the signal appear at Pin 110 (Tuner sound signal) (RF) Check Tu01 (TV Tuner). Pin 113, 114 (VCR sound) (Video) Check the CN913. (DVD) Check the CN901. Pin 115, 116 (DVD) Pin 117, 118 (PC) of IC802 (VCTj)? Does the signal appear at Pin Check IC802.
- Page 24 5 Troubleshooting Memo...
-
Page 25: Exploded View & Parts List
6 Exploded View & Parts List 6 Exploded View and Parts List - You can search for updated part codes through ITSELF web site. URL : http://itself. sec. samsung.co.kr (OPTION) (OPTION) - Page 26 6 Exploded View & Parts List Memo...
-
Page 27: Electrical Parts List
7 Electrical Parts List 7 Electrical Parts List You can search for updated part codes through ITSELF web site. URL : http://itself.sec.samsung.co.kr/ Level Loc. No. Code No. Description & Specification Q'ty SA/SNA LA15S51BX/XSA LA15S51B,Q11A/15A91-GSP,15,LCD-TV,AUSTRA M0001 BN90-00710B ASSY COVER FRONT;SP15EO S.N.A... - Page 28 7 Electrical Parts List Level Loc. No. Code No. Description & Specification Q'ty SA/SNA ...3 CN913 3722-001846 JACK-PIN;2P,8.3MM,AU,WHT/RED,- ...3 CN901 3722-002143 JACK-PIN;5P,NI,GRN/BLU/RED/WHT/RED,STRAI ...3 CIS3 BN40-00049A TUNER;TMQZ6-416A,VE15,PAL BG,PAL HYPER,3 ...3 T0174 BN97-00511E ASSY SMD;SP15SO S.N.A ..4 CIS5 0202-001375 SOLDER-CREAM;RMA-20-21L,S63,-,Sn63/Pb36. S.N.A ..4 D200 0401-001056 DIODE-SWITCHING;MMBD4148SE,100V,200MA,SO...
- Page 29 7 Electrical Parts List Level Loc. No. Code No. Description & Specification Q'ty SA/SNA ..4 Q801 0501-000280 TR-SMALL SIGNAL;KSA1182,PNP,150mW,SOT-23 ..4 Q802 0501-000280 TR-SMALL SIGNAL;KSA1182,PNP,150mW,SOT-23 ..4 Q803 0501-000280 TR-SMALL SIGNAL;KSA1182,PNP,150mW,SOT-23 ..4 Q804 0501-000280 TR-SMALL SIGNAL;KSA1182,PNP,150mW,SOT-23 ..4 Q200 0501-000342 TR-SMALL SIGNAL;KSC1623-Y,NPN,200mW,SOT- ..4 Q600 0501-000342 TR-SMALL SIGNAL;KSC1623-Y,NPN,200mW,SOT-...
- Page 30 7 Electrical Parts List Level Loc. No. Code No. Description & Specification Q'ty SA/SNA ..4 R859 2007-000070 R-CHIP;0ohm,5%,1/10W,TP,1608 ..4 R860 2007-000070 R-CHIP;0ohm,5%,1/10W,TP,1608 ..4 R862 2007-000070 R-CHIP;0ohm,5%,1/10W,TP,1608 ..4 R863 2007-000070 R-CHIP;0ohm,5%,1/10W,TP,1608 ..4 R866 2007-000070 R-CHIP;0ohm,5%,1/10W,TP,1608 ..4 R882 2007-000070 R-CHIP;0ohm,5%,1/10W,TP,1608 ..4 R883 2007-000070 R-CHIP;0ohm,5%,1/10W,TP,1608 ..4...
- Page 31 7 Electrical Parts List Level Loc. No. Code No. Description & Specification Q'ty SA/SNA ..4 R950 2007-000074 R-CHIP;100ohm,5%,1/10W,TP,1608 ..4 R951 2007-000074 R-CHIP;100ohm,5%,1/10W,TP,1608 ..4 R952 2007-000074 R-CHIP;100ohm,5%,1/10W,TP,1608 ..4 R954 2007-000074 R-CHIP;100ohm,5%,1/10W,TP,1608 ..4 R955 2007-000074 R-CHIP;100ohm,5%,1/10W,TP,1608 ..4 R956 2007-000074 R-CHIP;100ohm,5%,1/10W,TP,1608 ..4 R957 2007-000074 R-CHIP;100ohm,5%,1/10W,TP,1608 ..4...
- Page 32 7 Electrical Parts List Level Loc. No. Code No. Description & Specification Q'ty SA/SNA ..4 R516 2007-000090 R-CHIP;10Kohm,5%,1/10W,TP,1608 ..4 R605 2007-000090 R-CHIP;10Kohm,5%,1/10W,TP,1608 ..4 R606 2007-000090 R-CHIP;10Kohm,5%,1/10W,TP,1608 ..4 R608 2007-000090 R-CHIP;10Kohm,5%,1/10W,TP,1608 ..4 R610 2007-000090 R-CHIP;10Kohm,5%,1/10W,TP,1608 ..4 R614 2007-000090 R-CHIP;10Kohm,5%,1/10W,TP,1608 ..4 R615 2007-000090 R-CHIP;10Kohm,5%,1/10W,TP,1608 ..4...
- Page 33 7 Electrical Parts List Level Loc. No. Code No. Description & Specification Q'ty SA/SNA ..4 R926 2007-000570 R-CHIP;220OHM,1%,1/10W,TP,1608 ..4 R737 2007-000608 R-CHIP;240ohm,5%,1/10W,TP,1608 ..4 R826 2007-000643 R-CHIP;270ohm,5%,1/10W,TP,1608 ..4 R829 2007-000643 R-CHIP;270ohm,5%,1/10W,TP,1608 ..4 R832 2007-000643 R-CHIP;270ohm,5%,1/10W,TP,1608 ..4 R899 2007-000659 R-CHIP;27ohm,5%,1/10W,TP,1608 ..4 R169 2007-000708 R-CHIP;3.9Kohm,1%,1/10W,TP,1608 ..4...
- Page 34 7 Electrical Parts List Level Loc. No. Code No. Description & Specification Q'ty SA/SNA ..4 C217 2203-000189 C-CER,CHIP;100nF,+80-20%,25V,Y5V,1608 ..4 C607 2203-000189 C-CER,CHIP;100nF,+80-20%,25V,Y5V,1608 ..4 C609 2203-000189 C-CER,CHIP;100nF,+80-20%,25V,Y5V,1608 ..4 C615 2203-000189 C-CER,CHIP;100nF,+80-20%,25V,Y5V,1608 ..4 C620 2203-000189 C-CER,CHIP;100nF,+80-20%,25V,Y5V,1608 ..4 C745 2203-000189 C-CER,CHIP;100nF,+80-20%,25V,Y5V,1608 ..4 C754 2203-000189 C-CER,CHIP;100nF,+80-20%,25V,Y5V,1608 ..4...
- Page 35 7 Electrical Parts List Level Loc. No. Code No. Description & Specification Q'ty SA/SNA ..4 C907 2203-000783 C-CER,CHIP;0.33nF,5%,50V,C0G,1608 ..4 C908 2203-000783 C-CER,CHIP;0.33nF,5%,50V,C0G,1608 ..4 C911 2203-000783 C-CER,CHIP;0.33nF,5%,50V,C0G,1608 ..4 C913 2203-000783 C-CER,CHIP;0.33nF,5%,50V,C0G,1608 ..4 C931 2203-000783 C-CER,CHIP;0.33nF,5%,50V,C0G,1608 ..4 C932 2203-000783 C-CER,CHIP;0.33nF,5%,50V,C0G,1608 ..4 C902 2203-000815 C-CER,CHIP;0.033nF,5%,50V,C0G,1608 ..4...
- Page 36 7 Electrical Parts List Level Loc. No. Code No. Description & Specification Q'ty SA/SNA ..4 C729 2203-005005 C-CER,CHIP;100nF,10%,16V,X7R,1608 ..4 C730 2203-005005 C-CER,CHIP;100nF,10%,16V,X7R,1608 ..4 C731 2203-005005 C-CER,CHIP;100nF,10%,16V,X7R,1608 ..4 C732 2203-005005 C-CER,CHIP;100nF,10%,16V,X7R,1608 ..4 C733 2203-005005 C-CER,CHIP;100nF,10%,16V,X7R,1608 ..4 C734 2203-005005 C-CER,CHIP;100nF,10%,16V,X7R,1608 ..4 C735 2203-005005 C-CER,CHIP;100nF,10%,16V,X7R,1608 ..4...
- Page 37 7 Electrical Parts List Level Loc. No. Code No. Description & Specification Q'ty SA/SNA ..4 C519 2402-000176 C-AL,SMD;10uF,20%,16V,GP,TP,4.3x4.3x5.4 ..4 C838 2402-000176 C-AL,SMD;10uF,20%,16V,GP,TP,4.3x4.3x5.4 ..4 C833 2402-001006 C-AL,SMD;4.7uF,20%,25V,GP,TP,3.6x6.3x3..4 C840 2402-001006 C-AL,SMD;4.7uF,20%,25V,GP,TP,3.6x6.3x3..4 C841 2402-001006 C-AL,SMD;4.7uF,20%,25V,GP,TP,3.6x6.3x3..4 C842 2402-001006 C-AL,SMD;4.7uF,20%,25V,GP,TP,3.6x6.3x3..4 C843 2402-001006 C-AL,SMD;4.7uF,20%,25V,GP,TP,3.6x6.3x3.
- Page 38 7 Electrical Parts List Level Loc. No. Code No. Description & Specification Q'ty SA/SNA ..4 F103 2901-001114 FILTER-EMI SMD;25VDC,2.0ADC,-,100nF,3.2x ..4 F103 2901-001114 FILTER-EMI SMD;25VDC,2.0ADC,-,100nF,3.2x ..4 F103 2901-001114 FILTER-EMI SMD;25VDC,2.0ADC,-,100nF,3.2x ..4 F103 2901-001114 FILTER-EMI SMD;25VDC,2.0ADC,-,100nF,3.2x ..4 F103 2901-001114 FILTER-EMI SMD;25VDC,2.0ADC,-,100nF,3.2x ..4 F103 2901-001114 FILTER-EMI SMD;25VDC,2.0ADC,-,100nF,3.2x...
- Page 39 S.N.A ...3 M0132 BN96-01272A ASSY MISC P-SCREW;VE15UO S.N.A M0045 BN96-02098G ASSY ACCESSORY;LA15S51BX/XSA,SP15KS,20 S.N.A ...3 T0524 6902-000110 BAG PE;LDPE,T0.05,L356,W240,TRP,28,2,PE S.N.A ...3 M0596 BN68-00816H MANUAL USERS-00;LA15S51B,SAMSUNG,E,ASIA S.N.A ...3 ACCESSORY BP68-00274B MANUAL-02,WARRANTY CARD;VD ALL MODEL,Aus S.N.A ...3 AA68-03242G MANUAL-SAFETY GUIDE;All Model,SAMSUNG,En S.N.A 7-13...
- Page 40 7 Electrical Parts List Memo 7-14...
-
Page 41: Block Diagram
8 Block Diagrams 8 Block Diagram - This Document can not be used without Samsung’s authorization. 8-1 Signal Path Block Diagram... - Page 42 8 Block Diagrams 8-2 Input Power Block Diagram...
-
Page 43: Wiring Diagram
9 Schematic Diagrams 9 Wiring Diagram... - Page 44 9 Schematic Diagrams Memo...
-
Page 45: Pcb Layout
10 PCB Layout 10 PCB Layout 10-1 Main PCB Layout Loc. No. Description Loc. No. Description DIODE D953 DIODE-SWITCHING 84.2 D954 DIODE-SWITCHING 79.0 D101 DIODE-RECTIFIER 45.0 122.1 D955 DIODE-SWITCHING 75.4 D102 DIODE-RECTIFIER 62.5 132.4 D956 DIODE-SWITCHING 73.5 D200 DIODE-SWITCHING 155.4 110.7 D957 DIODE-SWITCHING... - Page 46 10 PCB Layout Memo 10-2...
-
Page 47: Schematic Diagrams
11 Schematic Diagrams 11 Schematic Diagrams - This Document can not be used without Samsung's authorization. 11-1 Input Power Sound Schematic Diagram B3.3V IC105 A1.8V IC101 A3.3V AP1117D-18A C111 IC111 AP1117D-33A 100uF AP1117D-33A IN 3 TP127 C163 C217 100nF C114... - Page 48 11 Schematic Diagrams 11-2...
- Page 49 11 Schematic Diagrams - This Document can not be used without Samsung's authorization. 11-2 Video Decoder Schematic Diagram VSU P3.3DIG B3.3V FT108 C127 10uF SGM32F1E104-2A R835 R858 C117 2.7Kohm 100nF R8103 VSU P3.3DAC Q805 FT107 C124 C317 C316 2SC2412K-Q 10uF 470pF 1.5nF...
- Page 50 11 Schematic Diagrams 11-4...
- Page 51 11 Schematic Diagrams - This Document can not be used without Samsung's authorization. 11-3 Output Scaler, LVDS Schematic Diagram B_OUT(0:7) B_OUT(3) T321 B_OUT(2) T322 B_OUT(1) T323 B_OUT(0) T324 T325 T326 G_OUT(0:7) G_OUT(7) T327 G_OUT(6) T328 G_OUT(5) T329 G_OUT(4) T330 G_OUT(3)
- Page 52 11 Schematic Diagrams - This Document can not be used without Samsung's authorization. 11-4 Power Supply, Inverter Board Schematic Diagram R809 3.9ohm 1/2W SVC561D-10A VX802S 11-6...
- Page 53 11 Schematic Diagrams - This Document can not be used without Samsung's authorization. 11-5 Power Supply, Inverter Board Schematic Diagram 11-7...
- Page 54 11 Schematic Diagrams Memo 11-8...