Advertisement
Quick Links
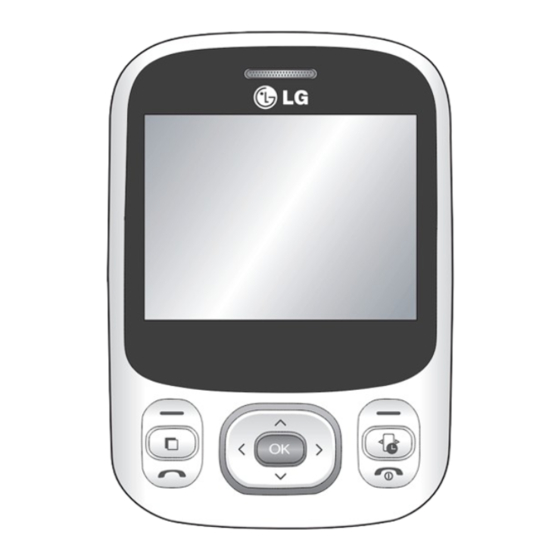
LG-C320 User Guide
Some of the content of this manual may differ from your phone
depending on the software of the phone or your service provider.
P/N: MFL67003501(1.0)
Installing the SIM Card and Charging the Battery
Installing the SIM Card
When you subscribe to a cellular network, you are provided with a plug-in SIM card loaded with your subscription details, such as
your PIN, any optional services available and many others.
Important! › The plug-in SIM card can be easily damaged by scratches or bending, so be careful when handling, inserting or
removing the card. Keep all SIM cards out of the reach of small children.
Illustrations
1
2
1
Open the battery cover
2
Remove the battery
3
Insert your SIM
4
Insert your battery
5
Close the battery cover
4
5
6
Charge your battery
› If the phone won't turn on, or if
the display freezes or doesn't
respond, follow the instructions
for installing the battery again.
Do not remove the battery when the phone is switched off , as this may damage the phone.
WARNING:
Video Camera
Music
Shooting a quick video
MP3 Player
Your LG-C320 has a built-in music player so you can play all
1
Press Menu and select Camera and choose Video Camera. The
video camera's viewfinder will appear on screen.
your favourite music.
2
Point the camera to the subject of your recording.
NOTE:
3
Press OK to start the recording. Rec will appear at the bottom
•
Before using music player, you will need to transfer music
of the viewfinder. Press
again to stop recording.
file onto your phone.
After you've shot your video
•
Music player supports codec types as follows: MP3, WMA,
A still image representing your captured video will appear
AAC. Music player does not necessarily support all features
on screen.
and variations of file formats.
After recording a video clip, you can check the menu as follow:
To access the music player, press Menu and select Music and
Videos - View the pictures and videos you have taken in your
select MP3 player. From here you can access to:
Album.
Last played song - View all of the songs you have played recently.
Play - Play the file.
All songs - Contains all of the songs you have on your phone.
New - Press to shoot another video straight away.
My Playlists - Contains all playlists you have created.
Send - Send the video as Message, as an E-mail or via
Artists - Allows you to view all tracks sorted by artist.
Bluetooth.
Albums - Allows you to view all tracks sorted by album.
Delete - Delete the video you have just made. The viewfinder
Genres - Allows you to view all tracks sorted by genre.
will reappear.
Shuffle all songs - Allows you to play all of the songs in random
order.
Validity period - Choose how long your messages are stored at
Validity period - Choose how long your message is stored at
the message centre.
the message centre.
Message types - Convert your Text into Voice, Fax, X.400 or Email.
Slide duration - Choose how long your slides appear on screen.
Character encoding - Choose how your characters are
Creation mode - Allows you to select the contents type
encoded. This affects the size of your message and therefore
supported by MMS.
data costs.
Delivery time - Configures the delivery time of message to
Send long text as - Choose whether to send your message
the recipient. The multimedia message centre will deliver the
as Multiple SMS or MMS when you enter a text longer than 2
message after the delivery time.
pages in the message field.
MMS centre - Allows you to configure network information
such as the multimedia service centre and the internet profile
Changing your multimedia message settings
to send a multimedia message.
Press Menu, select Messaging, then choose Settings and
Multimedia message. You can make changes to:
Phonebook
Retrieval mode - Choose to automatically or manually
Searching for a contact
download multimedia messages depending on whether you
are at home or roaming.
1
Press Menu and select Phonebook.
Retrieval mode - Choose to automatically or manually
2
Using the keypad enter the first letter of the name of the
download multimedia messages depending on whether you
contact you want to call.
are at home or roaming.
3
To scroll through the contacts and their different numbers use
Delivery report - Choose to request or allow a delivery report.
the navigation keys.
Read reply - Choose to request or allow a read reply.
Adding a new contact
Priority - Choose the priority level of your multimedia message.
1
Press Menu and select Phonebook.
Getting to Know Your Phone
Earpiece
Multitasking key
Allows access to Home screen, Main menu, and
running appliactions.
Send key
•
Dials a phone number and answers a call.
In standby mode: Shows the history of calls.
•
Alpha numeric keys
In standby mode: Input numbers to
•
dial Hold down
- International calls
- Connect voice mail centre
to
- Speed dials
- Hold the key dow n to go Silent mode
In editing mode: Enter numbers & characters
•
www.lg.com
Bluetooth QD ID B016956
Calling
Making a Call
1
Make sure your phone is on.
2
You can use the keypad. To delete press the
3
Press
to begin the call.
4
To end the call, press
.
3
TIP! To enter + when making an international call, press
and hold 0.
Making a call from your Contacts
It's easy to call anyone whose number you have stored in your
Phonebook.
6
1
Press Menu to open the main menu. Select Phonebook.
2
Using the keypad, enter the first letter of the contact you want
to call and scroll to the Phonebook.
3
Press
to begin the call.
Answering and rejecting a call
When your phone rings, press Accept or press
the call.
While your phone is ringing you can press Silent to mute the
Games and Applications
Allows access to pre-installed and downloaded games and
applications.
E-Mail
Sending an email using your new account
To send/receive an email, you should set up an email account.
1
Press Menu, select E-Mail and choose the account you want
to use.
2
Choose Create new E-mail and a new email window will
open.
3
Write a subject line then press OK.
4
Enter your message using the keypad.
FM Radio
Listening to the Radio
1
Press Menu and select Music, then choose FM radio.
2
Select the channel number of the station you would like to
listen to.
2
Press Option and select New contact.
3
Choose whether to store your new contact on your Handset
or USIM card.
4
Enter the information you want in the fields provided and
select Done.
Tools
Setting your Alarm
1
To access the Alarm clock press menu, and select Tools and
chose Alarm clock.
2
To set a new alarm select New alarm. Set the time, repeat,
alert type, alert tone, volume, snooze interval. A memo can be
added to the alarm as well.
3
When the details are entered, press Done to save the alarm.
Adding an event to your calendar
1
To access the Calander press menu, and select Tools and chose
Organiser then select Calander.
2
Select the date you would like to add an event to. You can
choose a date either by scrolling to it using the navigation
keys or by selecting Options and Go to date in order to enter
a date.
Soft keys (Left soft key / Right soft key)
•
These keys perform the function Indicated in the
bottom of the display.
Main LCD
Widget menu
Allows access to some useful widgets and links.
End key
Switch on/off (hold down)
•
•
End or reject a call.
Confirm key / OK key
•
Selects menu options and confirms actions.
Navigation key
•
In standby mode:
Briefly: Profile selector
Briefly: Phonebook
Briefly: Message Inbox
Briefly: Camera
In menu: Scroll up & down.
•
ringing. This is useful if you have forgotten to change your
profile to silent for a meeting.
Press
or select Reject in order to reject an incoming call.
NOTE: In call when speaker is activated, the speaker icon
key.
is displayed with red colour strike, when the speaker is
deactivated speaker icon is displayed without red colour cross.
Speed dialing
You can assign a speed dial number to a contact you call
frequently.
1
Press Menu to open the main menu. Select Phonebook, then
select Option and Speed dials.
2
Your voicemail is preset to speed dial 1 and you cannot
change this. Select any other number either by using the
navigation keys and selecting Set or by pressing the hard
key number.
3
Your Phonebook will open. Select the contact you' d like
to assign to that number using the navigation keys then
Press Select. To call a speed dial number, press and hold the
to answer
assigned number until the contact appears on screen. The call
will begin automatically and there is no need to press
.
NOTE: If you are in an area with bad radio reception, you may
have difficulty listening to the radio.
A headset must be inserted to use the FM Radio.
Browser
Accessing the web
You can launch the WAP browser and access the homepage of
the activated profile on web settings. You can also manually
enter a URL address and access the associated WAP page.
1
Press Menu and select Boost Live.
2
To go straight to the browser home page, select Home.
Alternately, select Enter address and type in the URL, followed
by Connect.
NOTE: You will incur extra cost by connecting to these
services and downloading content. Check data charges with
your network provider.
Messaging
Your LG-C320 includes functions related to SMS (Short Message
Service), MMS (Multimedia Message Service) as well as the
3
To add a New schedule select New schedule
4
Enter the details of the task, including the catagory, subject,
location, start time, finish time, alarm, and repeat.
5
When the details are entered, press Done to save the schedule.
Adding an item to your task list
1
To access the Tasks press menu, and select Tools and chose
Organiser then select Tasks.
2
To set a new task select New task.
3
Enter the details of the task, including the subject, due date,
memo, and priority.
4
When the details are entered, press Done to save the task.
Adding a memo
1
To access the Memo press menu, and select Tools and chose
Organiser then select Memo.
2
To set a new memo select New memo.
3
Enter the details of the memo.
4
When the details are entered, press Save to save the memo.
5
To lock a memo, move to the memo, using the navigation
keys, press Options then Lock.
Note: you will need the Security code to unlock the memo.
Headset
Side keys
•
In standby mode: Controls
Charger/USB cable connector
the ring volume.
•
During a call: Earpiece
TIP: Please ensure the
volume adjustment
phone is powered on ,
•
During playing MP3 music:
external memory card
Audio volume adjustment
is inserted and in idle
mode before connecting
the USB cable for Mass
Storage.
Camera lens
Note: The LG-C320 supports upto a 16GB
SIM card holder
micro SD card.
Viewing your Calls
Camera
You can only check the log of missed, received and dialed calls
Taking a quick photo
if the network supports Calling Line Identification (CLI) within
1
Press Menu and select Camera and Camera.
the service area.
2
Point the camera to the subject of your photo and press OK
Changing the call settings
to take the Photo.
You can set call-specific functions. Press Menu, select Settings
After taking a photo
and choose Call.
Your captured photo will appear on the screen. The image
Call divert - Choose whether to divert your calls.
name is shown on the screen with five icons on the bottom.
Call barring - Select which calls you would like to be barred.
Images - View the pictures and videos you have taken in your
Call waiting - Be alerted when you have a call waiting.
Album.
Fixed dial numbers - Choose a list of numbers that can be
Send - Send the photo as Message, as an E-mail or via
called from your phone.
Bluetooth.
Excuse message - Before you reject an incoming call, you can
New - Take another photo straight away.
use "Excuse messages" to send a message to explain why you
Set as - Use the image as Wallpaper, as a Contact image, or in
do not receive an incoming call.
your Start up image or Shut down image.
Common call settings - Allows access to Answer mode, Send my
Delete - Delete the photo you have just taken. The viewfinder
number, Minute minder, Auto redial, Send DTMF tones, Save new
will reappear.
number, Bluetooth answer mode, Hang up mode, Call reject.
network's service messages. To use these functions, press Menu
WARNING: Image, Sound, Video, New slide, Subject,
and select Messaging.
Business card, Schedule or My business card is added to the
Sending a message
message editor, it will be automatically converted to MMS
1
Press Menu, select Messaging and choose Write new
mode and you will be charged accordingly.
message.
Entering text
2
A new message editor will open. Message editor combines SMS
and MMS in one intuitive mode that is easy to switch between.
You can enter alphanumeric characters using the phone's
keypad. For example, storing names in contacts, writing a
The default setting of the message editor is SMS mode.
message and creating scheduling events in the calendar all
3
Enter your message using the keypad. See Entering text on
require entering text. The following text input methods are
the right for more information on how to enter text.
available in the phone: Abc mode, and 123 mode.
4
Select Options and choose Insert to add an Image, Video,
Sound, Template, Emoticon, Name & Number, New slide,
NOTE: Some fields may allow only one input mode (e.g.
Subject or More (Business card/Schedule/Memo/Tasks/My
telephone number in contact fields).
business card).
5
Choose Send to.
Changing your text message settings
6
Choose a contact from the list of contacts or enter the phone
Press Menu, select Messaging, then choose Settings and Text
number.
message. You can make changes to:
7
Select Send.
Text message centre - Enter the details for your message centre.
Delivery report - Choose to receive confirmation that your
message have been delivered.
Date finder
2 To find out the time of specific city, press Options and select
Date finder is a handy tool to help you calculate what the date
New city.
will be once a certain number of days have passed.
Settings
Voice recoder
Changing your profiles
Use your Voice recorder to record voice memos or other sounds.
1
Press Menu and select Settings.
Sending a voice recording
2
Select Profiles and then choose the profile you want to edit.
Once you have finished recording, select Options.
3
Select Options and choose Personalise.
Using your calculator
4
You can change all of the tones, its volumes and alert options
1
Press Menu and select Tools, then choose Calculator.
from here.
2
Press the numeric keys to input numbers.
Using Flight Mode
Using the stopwatch
When Flight mode is activated, you will not be able to make
1 Press Menu and select Tools, then choose Stopwatch.
calls, connect to the Internet or send messages.
2 Select Start to begin the timer.
Changing your Device settings
Converting Units
1
Press Menu and select Settings.
1 Press Menu and select Tools, then choose Unit converter.
2
Select Device settings and choose from the list below.
2 Choose whether you would like to convert Currency, Area,
Date and time - Adjust your date and time settings or choose
Length, Weight, Temperature, Volume or Velocity.
whether to update the time automatically or to use the daylight
Adding a city to your World clock
saving option.
1 Press Menu and select Tools, then choose World clock.
Power save - Choose to switch the factory set power saving
settings On or Off.
Battery cover
Battery pack
Advertisement

Related Manuals for LG C320


Summary of Contents for LG C320
- Page 1 Sending a message A headset must be inserted to use the FM Radio. Your LG-C320 has a built-in music player so you can play all Press Menu and select Camera and choose Video Camera. The message editor, it will be automatically converted to MMS Press Menu, select Messaging and choose Write new video camera’s viewfinder will appear on screen.
- Page 2 AUSTRALIA or NEW ZEALAND. (4) If the Customer does not notify LG of the alleged defect or malfunction of the Product • Call roadside assistance or a special nonemergency wireless 4.