Table of Contents
Advertisement
Quick Links
Advertisement
Table of Contents

Related Manuals for Motorola PELCO Optera IMM12036-1ES


Summary of Contents for Motorola PELCO Optera IMM12036-1ES
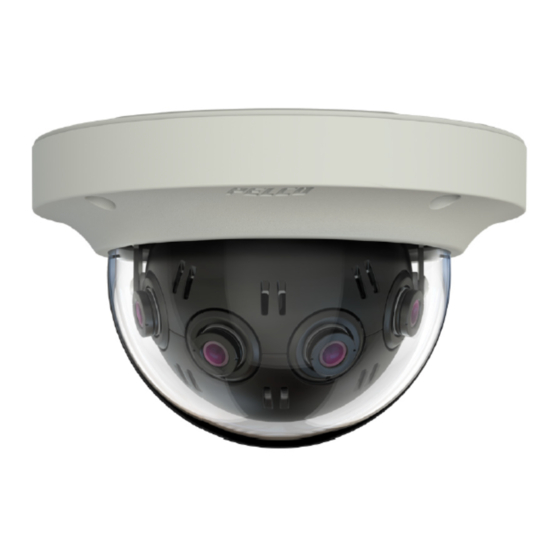
- Page 1 Optera™ Operations Manual Document number: C2284M Publication date: 08/20...
-
Page 2: Table Of Contents
Optera™ Operations Manual Table of Contents Important Notices Regulatory Notices Radio and Television Interference Warranty Statement Legal Notice Audio Notice Video Quality Caution Frame Rate Notice Regarding User Selected Options Open Source Software Power Source Accessing the Camera Accessing Camera Settings Accessing the Live Video Page Live Video Controls Using the System Menu... - Page 3 Optera™ Operations Manual Setting Security/Authentication Configuring TLS Enabling SSH Configuring Traffic Shaping Configuring 802.1x Security Configuring SNMP Configuring the SMTP Server Configuring SNMP V2c Configuring SNMP V3 Firewall Configuration Configuring Firewall Settings Using the Imaging Menu Configuring General Imaging Settings Configuring Exposure Settings Setting White Balance Using the Window Blanking Feature...
- Page 4 Optera™ Operations Manual Analytic Configuration Configuring Profile Settings Applying Select Behaviors Configuring an Analytic Profile Running Profiles Setting Up and Operating Pelco Camera Link C2284M 08/20...
-
Page 5: Important Notices
Optera™ Operations Manual Important Notices Regulatory Notices FCC Rules. This device complies with Part 15 of the Operation is subject to the following two conditions: (1) this device may not cause harmful interference, and (2) this device must accept any interference received, including interference that may cause undesired operation. -
Page 6: Open Source Software
Optera™ Operations Manual lowering the resolution, reducing the picture rate, or both. A picture degraded by having a reduced resolution may result in an image that is less clear or even indiscernible. A picture degraded by reducing the picture rate has fewer frames per second, which can result in images that appear to jump or move more quickly than normal during playback. -
Page 7: Accessing The Camera
Optera™ Operations Manual Accessing the Camera Note: For security purposes, it is required that you create a user account when you access the camera for the first time. In its out-of-the-box configuration, the camera has no user name and password assigned. In this state the camera does not allow for video to stream or configurations to change. -
Page 8: Accessing The Live Video Page
Optera™ Operations Manual Accessing the Live Video Page The live video page provides access to video streams and, where applicable, to PTZ controls. The camera defaults to the live video page, but can be accessed by clicking Live at the upper right corner of the window. -
Page 9: Using The System Menu
Optera™ Operations Manual Using the System Menu System menu contains general system time settings, and on screen display settings. It also provides access to basic system information, and the backup, restore, and restart functions. Options may vary depending on your camera model. From the System menu, you can also access snapshots generated by event handlers. -
Page 10: Tiled Mode (Assembling Panoramic Scenes)
Optera™ Operations Manual To set or change the Optera compatibility mode: 1. Go to the System page. 2. Select your Optera Compatibility Mode. 3. Click Save Tiled Mode (Assembling Panoramic Scenes) Tiled Mode produces multiple “flat” streams, each representing a fraction of the camera’s panoramic view. Each stream appears as a video source or “camera”... -
Page 11: Adjusting The Image Angle
Optera™ Operations Manual products; use the following guidelines to determine how many tiled streams you can display simultaneously. Note: Attempting to exceed the limitations of your hardware may cause poor performance or dropped streams. Table 2: Tiled Stream Hardware Requirements 1 tile (1x1 layout - WS5070) 4 tiles (2x2/3x3 layout - WS5080) Processor... -
Page 12: Restarting The Camera
Optera™ Operations Manual 1981 (international). 1. Select General Settings from the System menu. 2. select Generate System Log. 3. Select the location in which to save the log file. 4. Click Save. Restarting the Camera If you are recording video from your camera, restarting the camera will cause a gap in video recording. It is important that you schedule maintenance before restarting the camera. -
Page 13: Configuring Osdi Overlays
Optera™ Operations Manual Configuring OSDi Overlays OSDi (Intelligent On Screen Display) feature allows the camera to show pertinent information as an overlay within the field of view. Depending on your camera and model, you may be able to define up to three overlay rules. -
Page 14: Using The Network & Security Menu
Optera™ Operations Manual Using the Network & Security Menu Network & Security menu contains Network configuration Settings and options for your camera; from this menu, you can set static IP addressing, create User & Security levels, enable TLS, add Traffic Shaping, configure 802.1x port security, point your camera to an SNMP manager, and configure Firewall settings. -
Page 15: Managing Network And Security
Optera™ Operations Manual IPv6 Settings (Optional): Your camera supports IPv6 configurations in conjunction with IPv4; the device does not support IPv6-only network deployments. The camera will accept up to sixteen IPv6 addresses, three IPv6 DNS servers, and three IPv6 gateways. There are two configuration modes for IPv6 address assignment: Auto: Enables automatic configuration using router advertisement. -
Page 16: Configuring Users
Optera™ Operations Manual Configuring Users 1. Go to Network & Security > Users & Security. 2. Select New User or select the user whose permissions and settings you want to edit. 3. Select an Access Level for the user. 4. Provide a user name between 2 and 32 alphanumeric characters for the user. User names are not case-sensitive and are saved in lowercase characters. -
Page 17: Enabling Ssh
Optera™ Operations Manual d. Enter information requested in the Certificate area. e. Cick Generate Certificate. 3. Select your TLS mode: Disabled: Disables HTTPS communications with the device. Optional: Requires that you install a signed TLS certificate and enables HTTPS access to the camera;... -
Page 18: Configuring 802.1X Security
Optera™ Operations Manual 1. Go to Network & Security > Traffic Shaping. 1. Enable Traffic Shaping with or without bursts, depending on your need. Disabled: Camera will send data at full network hardware link speed (For example: 100 Mbps or 1 Gbps). Enabled: Camera will limit the rate at which it sends data. -
Page 19: Configuring The Smtp Server
Optera™ Operations Manual Configuring the SMTP Server Providing the address of an SMTP server enables your camera to send email notifications when using the Send Email event handler. 1. Select SNMP from the Network and Security menu. 2. Type the address of your SMTP server in the SMTP Server box. 3. -
Page 20: Using The Imaging Menu
Optera™ Operations Manual Using the Imaging Menu Imaging menu contains 3D noise reduction, digital processing, exposure, flicker correction, day/night, white balance, window blanking, and alignment settings for your camera. Configuring General Imaging Settings General Imaging settings adjust the color and detail of captured video. The availability of settings might change based on your camera model. -
Page 21: Setting White Balance
Optera™ Operations Manual exposed to light. Decreasing the maximum exposure time reduces motion blurring; increasing the maximum exposure time could help capture more detailed still images in low light. 4. Set the Max Gain or the Gain, depending on the exposure mode you selected. Increasing the gain allows for better sensitivity in low-light scenes, but also increases video noise. -
Page 22: Realigning The Camera Sensors
Optera™ Operations Manual 1. Go to Imaging > Window Blanking. 2. Select to enable Window Blanking. 3. Click and drag the mouse across the video area that you want to blank. Select an existing blanking region to delete it, or edit its size and position. 4. - Page 23 Optera™ Operations Manual 3. Identify identical points in the unshaded area between the green and blue lenses. Click a point in the Green Lens thumbnail; the scene zooms in so that you can click the exact point for the pair. 4.
-
Page 24: Using The A/V Streams Menu
Optera™ Operations Manual Using the A/V Streams Menu A/V Streams menu contains settings for your camera’s video and audio streams as well as local recording, RTP settings, and Smart Compression. Configuring a Custom Video Configuration Video Configuration page contains settings for customizing your camera’s Mosaic and Full video streams. -
Page 25: Configuring Audio
Optera™ Operations Manual Note: This setting is only available for H.264 video streams. Increasing the I-frame interval can improve video compression rates and reduce the size of video data; however, higher values are recommended only for highly-reliable networks. Profile: Defines the subset of bit stream features in an H.264 stream, which includes color reproduction and additional video compression. -
Page 26: Managing Local Recording
Optera™ Operations Manual 4. Select your Audio Device. Native Line In: Enables audio from a microphone connected to the audio-in connector. Note: Only available for products with built-in audio support. Microphone: Enables audio from the internal microphone. Note: Only available for products with a built-in microphone. 5. -
Page 27: Setting Static Multicast Addresses
Optera™ Operations Manual Setting Static Multicast Addresses A multicast stream sends video data to multiple users from the same transmission. Each multicast user connecting to the camera consumes no additional processing power. You can set static multicast addresses and ports for all of your camera’s multicast streams (primary, secondary, tertiary, service, etc.). - Page 28 Optera™ Operations Manual will have a similar, minor effect on the image; he “medium” and “high” settings will have correspondingly more effect on the image and greater savings on storage. 3. (Optional) Enable Dynamic GoP Length. a. (Optional) Set the maximum GoP length for your streams if you want to limit the upper limit of the dynamic GoP setting.
-
Page 29: Using The Events Menu
Optera™ Operations Manual Using the Events Menu The Events menu contains settings for camera events and analytics pages. An event is a user-defined occurrence, consisting of a source and a handler. A source defines the trigger for an event; a handler defines the action your camera will take when the event source occurs. -
Page 30: Configuring An Analytic Event Source
Optera™ Operations Manual Configuring an Analytic Event Source An analytic event source triggers an event when a behavior defined by a video analytic occurs. 1. Select Sources from the Events menu. 2. Go to Events > Sources. 3. Click New, or select the existing source you want to edit. 4. -
Page 31: Configuring Handlers
Optera™ Operations Manual Configuring Handlers Event handlers are the actions that your camera takes when an event source occurs. The availability of handlers might change based on your camera model. Configuring an Event Handler: Send Email The Send Email event handler sends an email from your camera when a source event is triggered. Note: You must have provided your camera with the address of an SMTP mail server on the System >... -
Page 32: Configuring An Event Handler: Upload Jpeg To Ftp Server
Optera™ Operations Manual 7. Provide a size limit for the JPEG images, including the units available, from the pull-down menu. Do not select a size limit that exceeds the available memory on the micro SD card. 8. (Optional) Set time filters to determine the days and times during which the handler will be active. If you do not select any filters, the handler will remain active at all times. -
Page 33: Deleting An Event Handler
Optera™ Operations Manual 9. Set the Pulse Count for the relay. The pulse count is the number of relay pulses (number of on and off cycles). 10. (Optional) Set time filters to determine the days and times during which the handler will be active. If you do not select any filters, the handler will remain active at all times. -
Page 34: Applying Select Behaviors
Optera™ Operations Manual Applying Select Behaviors Behaviors analyze the camera’s field of view to detect and trigger events or alarms when specific activity occurs. You can configure multiple analytic behaviors per profile. However, each analytic behavior has its own settings; many analytic behaviors also require you to configure zones that the camera will monitor for activity. - Page 35 Optera™ Operations Manual 2 Camera Tracking The 2 Camera Tracking behavior is tied to Pelco Camera Link, a feature that provides the ability to couple the full hemispherical coverage of the Optera cameras to the 30x zoom capability of Pelco’s Enhanced Series PTZ cameras (e.g.
- Page 36 Optera™ Operations Manual Ideal Scene Setup for Adaptive Motion Install the camera in a ceiling or against a wall with the lens pointing at a slight downward angle, above regular motion activity. The ideal scene for Adaptive Motion behavior is one with light traffic and a clean background. If heavy traffic or a busy background is unavoidable, place zones in a relatively stable area.
- Page 37 Optera™ Operations Manual ATMs, stairwells, and school grounds. Ideal Scene Setup for Loitering Detection Install the camera in a ceiling or against a wall with the lens pointing at a slight downward angle, above regular motion activity. The ideal scene for Loitering Detection behavior is one with light traffic and a clean background. If heavy traffic or a busy background is unavoidable, place the user-defined zone in a relatively stable area.
-
Page 38: Configuring An Analytic Profile
Optera™ Operations Manual Zones Some analytic behaviors require you to configure zones. A zone is a defined boundary that your camera monitors for an analytic behavior. A zone can be defined by a polygon or line. Zones defined by polygons trigger analytics based on motion within the zone;... -
Page 39: Running Profiles
Optera™ Operations Manual 6. Configure advanced settings for the behavior. 7. Configure zones for the behavior. 8. Select Activate Behavior to ensure that the behavior and all zones are enabled when you run the profile. 9. Repeat the previous 4 steps to activate additional behaviors on the profile. 10. - Page 40 Optera™ Operations Manual up 2 Camera Tracking for the Optera. Third, calibrate the position of the Enhanced Series PTZ camera relative to the Optera. After setup, Pelco Camera Link provides controls to verify that the cameras are aligned correctly and that auto tracking is operating correctly.
- Page 41 Optera™ Operations Manual 1. Enter the IP address of the Optera that will provide analytic information to the Enhanced Series PTZ camera, enter username and password, and click Connect. If the connection is successful, the light turns green and the panoramic view from Optera appears at the top of the screen. You are now viewing both Optera and the Enhanced Series PTZ reduced resolution video on this web page.
- Page 42 Optera™ Operations Manual 4. For Pelco Camera Link, Sensitivity = 6 and Consistency = 2 are the recommended settings to start with, but may need to be adjusted depending on the scene. 5. Calibrate the scene. A Calibrate page appears. 6.
- Page 43 Optera™ Operations Manual 13. Return to the Enhanced Series PTZ tab. The stoplight next to Analytics Configuration should be green. (Refreshing this page may be required for some browsers.) Step #3 (Calibration): The final step for Pelco Camera Link setup is to calibrate the position of the Enhanced Series PTZ relative to Optera.
- Page 44 Optera™ Operations Manual Priority: Largest, Fastest, and Farthest Object let the user select the analytic detected object the Pelco PTZ will follow. Sticky Follow On and Off: Set to On, the PTZ camera will continue to follow the original object that was detected even if other objects are detected, even if other objects are larger, faster, etc.
- Page 45 Optera™ Operations Manual Pelco, Inc. 625 W. Alluvial Ave., Fresno, California 93711 United States (800) 289-9100 Tel (800) 289-9150 Fax +1 (559) 292-1981 International Tel +1 (559) 348-1120 International Fax www.pelco.com Pelco, the Pelco logo, and other trademarks associated with Pelco products referred to in this publication are trademarks of Pelco, Inc. or its affiliates.