Table of Contents
Advertisement
Available languages
Available languages
Quick Links
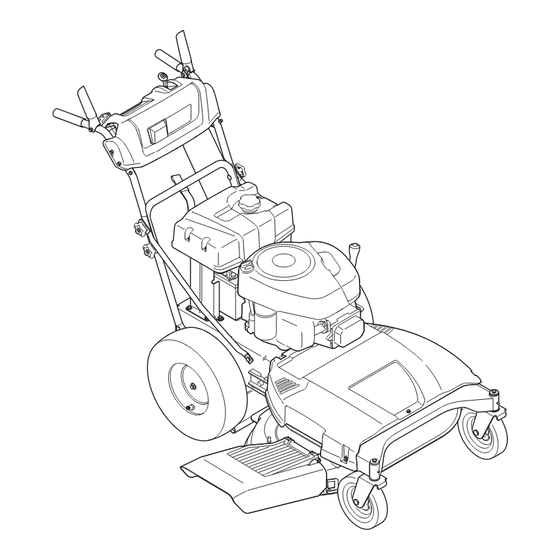
Operator's Manual
33-inch Wide Cut Mower
Model No. 247.88998
CAUTION: Before using this
product, read this manual and
follow all safety rules and operating
instructions.
Sears Brands Management Corporation, Hoffman Estates, IL 60179, U.S.A.
Visit our website: www.craftsman.com
•
SAFETY
•
ASSEMBLY
•
OPERATION
•
MAINTENANCE
•
PARTS LIST
•
ESPAÑOL P. 51
Form No. 769-06544A
(December 16, 2010)
Advertisement
Chapters
Table of Contents

Related Manuals for Craftsman 12AE764Y099


Summary of Contents for Craftsman 12AE764Y099
- Page 1 • MAINTENANCE product, read this manual and • PARTS LIST follow all safety rules and operating • ESPAÑOL P. 51 instructions. Sears Brands Management Corporation, Hoffman Estates, IL 60179, U.S.A. Visit our website: www.craftsman.com Form No. 769-06544A (December 16, 2010)
-
Page 2: Table Of Contents
For warranty coverage details to obtain repair or replacement, visit the web site: www.craftsman.com. This warranty covers ONLY defects in material and workmanship. Warranty coverage does NOT include: •... -
Page 3: Safety Instructions
SAFETY INSTRUCTIONS WARNING DANGER this machine was built to be operated according to the safe opera- this symbol points out important safety instructions which, if not tion practices in this manual. As with any type of power equipment, followed, could endanger the personal safety and/or property of carelessness or error on the part of the operator can result in serious yourself and others. - Page 4 SAFETY INSTRUCTIONS • the blade control handle is a safety device. Never attempt to bypass its operation. Doing so makes the safety device inopera- • Mow across the face of slopes; never up and down. Exercise tive and may result in personal injury through contact with the extreme caution when changing direction on slopes.
- Page 5 SAFETY INSTRUCTIONS • Extinguish all cigarettes, cigars, pipes and other sources • Do not change the engine’s governor setting or over-speed the of ignition. engine. the governor controls the maximum safe operating speed of the engine. • Never fuel machine indoors because flammable vapors will accumulate in the area.
- Page 6 SAFETY INSTRUCTIONS SAFETY SYMbOLS this page depicts and describes safety symbols that may appear on this product. Read, understand, and follow all instructions on the machine before attempting to assemble and operate. Symbol Description READ THE OPERATOR’S MANUAL(S) Read, understand, and follow all instructions in the manual(s) before attempting to assemble and operate DANGER —...
-
Page 7: Slope Guide
SLOPE GUIDE... -
Page 8: Safety Labels
SAFETY LABELS DO NOT OPERATE UNLESS AN UNDAMAGED D ISCHARGE COVER OR ENTIRE GRASS CATCHER IS IN PLACE . - Page 9 this page left intentionally blank.
-
Page 10: Assembly
ASSEMBLY IMPORTANT: this unit is shipped with oil in the engine. After Attaching the battery Cables assembly, see page 15 for fuel and oil details. NOTE: the positive battery terminal is marked Pos. (+). the negative IMPORTANT: Reference to right or left side of the mower is observed battery terminal is marked Neg. - Page 11 ASSEMBLY Unfolding the Handle Attaching the Shift Lever Remove the star knobs and carriage screws from the lower Remove the screw and the lock nut that secures the shift lever to handle. See Figure 3. the shift lever plate. See Figure 5. Figure 3 Figure 5 Pivot the upper handle into operating position.
- Page 12 KNOW YOUR MOWER Throttle/Choke Control blade Control Fuel Tank Cap Deck Height Ignition Switch Lever Systems Indicator Monitor Drive Control Gear Shift Lever Figure 7 Spark Plug Refer to the Maintenance section for instructions on spark plug replacement. Cleaner Oil Cap/ Oil Cap/Dipstick Handle Dipstick...
- Page 13 KNOW YOUR MOWER Deck Height Lever Drive Control Use this lever to adjust the mowing deck’s cutting height. to use, move the drive control is used to engage and the lever to the left, then place the lever in the notch best suited for disengage drive to the wheels.
- Page 14 KNOW YOUR MOWER GEAR SHIFT LEVER SYSTEMS INDICATOR MONITOR/HOUR METER Use this lever to select any of four forward ground speeds, neutral, or 42. 0 reverse. Forward Four forward speeds are available. Position one (1) is the slowest and position four (4) is the fastest. Reverse to select reverse, put the lever in the Reverse (R) position.
-
Page 15: Operation
OPERATION GAS AND OIL FILL-UP IMPORTANT: this unit is shipped without gasoline but with oil in the engine. Be certain to service engine with gasoline and check the oil as instructed in this section before starting or running your machine. Use 4-stroke motor oil that meets or exceeds the requirements for API service category SF, SG, SH, SJ or later. - Page 16 OPERATION STARTING THE ENGINE to travel in REVERSE, Check that the area behind is clear. Disengage all controls on the mower. Place the gear shift lever in Reverse (R). Move the gear shift lever into the neutral (N) position. Slowly squeeze the Drive Control against the left handle grip Insert the key into the ignition switch.
- Page 17 MULCHING gage the slot from the mower deck and then pry the left-side of the the Craftsman Pro wide Cut mower is equipped with a mulch kit (sup- baffle outward. plied with the mower), which uses special blades to recirculate grass clippings repeatedly beneath the cutting deck.
-
Page 18: Service And Maintenance
SERVICE AND MAINTENANCE MAINTENANCE SCHEDULE Interval Item Service Service Log 1st 5 hours Engine oil Change Every 8 hours or Daily Mower blades As required Loose or missing hardware tighten or replace Belts Check Engine oil level Check Controls Check for proper operation Mulch plug (if fitted) Check for proper plug installation 25 hours... - Page 19 SERVICE AND MAINTENANCE MAINTENANCE to gain access to the oil drain valve on the engine, pivot the right handle brace tube forward. WARNING Remove the upper star knob and carriage screw on the right Before performing any maintenance or repairs, disengage blades, side of the handle, Figure 13.
- Page 20 SERVICE AND MAINTENANCE Servicing the Air Filter Release the valve by pressing the two tabs inward while pulling the valve out. the oil will begin to drain out of the engine. WARNING After the oil has finished draining, press the two tabs inward and If filters, or covers are not installed correctly serious injury or death push the oil drain valve back in to lock the valve closed.
- Page 21 SERVICE AND MAINTENANCE bATTERY Position the mower on a level, clear spot on your lawn, near enough for your garden hose to reach. WARNING CAUTION Battery posts, terminals, and related accessories contain lead and Make certain the mower’s discharge chute is directed AwAY from lead compounds, chemicals known to the State of California to cause your house, garage, parked cars, etc.
- Page 22 SERVICE AND MAINTENANCE bLADE TIMING bELT Pivot Points & Linkage Lubricate all the pivot points on the drive system and lift linkage at the cutting deck spindles are driven by a timing (cogged) belt, least once a season with light oil. assuring that the deck blades are always perpendicular to each other.
- Page 23 SERVICE AND MAINTENANCE CUTTING DECk REMOVAL If the arrows on the surface of each spindle pulley are not perpendicular (at a 90˚ angle) to each other, see your Sears or WARNING other qualified service dealer to have the timing belt reset. Before performing any maintenance or repairs, disengage blades, WARNING stop engine and remove key to prevent unintended starting.
- Page 24 SERVICE AND MAINTENANCE Remove the screw and flange nut which secures the belt keeper Carefully unhook the mower’s lift assembly from the rear deck rod to the left side of the mower’s frame. See Figure 23. supports. Use the deck height lever to raise the lift assembly to its highest position.
- Page 25 SERVICE AND MAINTENANCE CUTTING bLADES to properly sharpen the cutting blades, remove equal amounts of metal from both ends of the blades along the cutting edges, WARNING parallel to the trailing edge, at a 25°- to 30° angle. Always grind each cutting blade edge equally to maintain proper blade balance.
- Page 26 SERVICE AND MAINTENANCE TRAIL SHIELD Jump Starting WARNING WARNING Never jump start a damaged or frozen battery. Be certain the vehicles Never operate the mower without the trail shield in place and working. do not touch, and ignitions are off. Do not allow cable clamps to Failure to do so can result in personal injury.
- Page 27 SERVICE AND MAINTENANCE CHANGING THE DECk ENGAGEMENT bELT CHANGING THE DECk TIMING bELT WARNING Several components must be removed and special tools used in order to change the mower deck’s timing belt. See your Sears or Shut the engine off and remove ignition key before removing the other qualified service dealer to have the deck timing belt replaced.
-
Page 28: Off-Season Storage
OFF-SEASON STORAGE WARNING Never store lawn mower with fuel in tank indoors or in poorly ventilated areas where fuel fumes may reach an open flame, spark, or pilot light as on a furnace, water heater, clothes dryer, or gas appliance. PREPARING THE ENGINE PREPARING THE LAWN MOWER For engines stored over 30 days:... -
Page 29: Troubleshooting
TROUBLESHOOTING WARNING Before performing any type of maintenance/service, disengage all controls and stop the engine. wait until all moving parts have come to a complete stop. Disconnect spark plug wire and ground it against the engine to prevent unintended starting. Always wear safety glasses during operation or while performing any adjustments or repairs. -
Page 30: Parts List
PARTS LIST Craftsman 33-inch Wide Cut Mower — Model No. 247.88998... - Page 31 PARTS LIST Craftsman 33-inch Wide Cut Mower — Model No. 247.88998 Ref. No. Part No. Description Ref. No. Part No. Description 738-04216A Bolt, Shoulder, .625 x 2.515 x 3/8-16 687-02427 Lever Assembly - LH 741-0660A Flange Bearing, .760 x .941 x 1.0...
- Page 32 PARTS LIST Craftsman 33-inch Wide Cut Mower — Model No. 247.88998...
- Page 33 PARTS LIST Craftsman 33-inch Wide Cut Mower — Model No. 247.88998 Ref. No. Part No. Description Ref. No. Part No. Description 918-04438C Drive Spindle Assembly 17840-0637 Transaxle Bracket Mount 918-04439C Spacer Spindle Assembly 918-04639 Transmission 4-Speed 631-04252 Mulch Plug 710-0176 Screw, HH Cap, 5/16-18 x 2.75”...
- Page 34 PARTS LIST Craftsman 33-inch Wide Cut Mower — Model No. 247.88998 MODEL and SERIAL NUMBERS HERE...
- Page 35 PARTS LIST Craftsman 33-inch Wide Cut Mower — Model No. 247.88998 Ref. No. Part No. Description Ref. No. Part No. Description tC-772147 transaxle Cover tC-790075 Brake Disk tC-790007 Brake Pad Plate tC-780086A Needle Bearing (¹/₂” long) tC-799021A Brake Pad (pkg. of 2)
- Page 36 PARTS LIST Craftsman Engine Model No. 219807-3712-G1 For Craftsman Mower Model No. 247.88998 48 SHORT BLOCK 1058 OPERATOR’S MANUAL 1329 REPLACEMENT ENGINE 1330 REPAIR MANUAL 1264 1263 1044...
- Page 37 PARTS LIST Craftsman Engine Model No. 219807-3712-G1 For Craftsman Mower Model No. 247.88998 1022 1034 1029 1023 1022 1026 1091 1266 1127...
- Page 38 PARTS LIST Craftsman Engine Model No. 219807-3712-G1 For Craftsman Mower Model No. 247.88998 613A 1059 1119...
- Page 39 PARTS LIST Craftsman Engine Model No. 219807-3712-G1 For Craftsman Mower Model No. 247.88998 1040 1036 EMISSIONS LABEL 305A 305B 305C 1051 1044 1005 1090...
- Page 40 PARTS LIST Craftsman Engine Model No. 219807-3712-G1 For Craftsman Mower Model No. 247.88998 121 CARBURETOR OVERHAUL KIT 1266 358 ENGINE GASKET SET 1022 1266 1266A 1095 VALVE GASKET SET 1022...
- Page 41 PARTS LIST Craftsman Engine Model No. 219807-3712-G1 For Craftsman Mower Model No. 247.88998 Ref. Ref. Part No. Part No. 697377 Cylinder Assembly 697352 Guard-Flywheel 399265 Kit-Bushing/Seal (Magneto Side) 499586 Keeper-Valve 391086s Seal-Oil (Magneto Side) 691968 Slinger-Governor/Oil 697106 Sump-Engine 690564 tappet-Valve...
- Page 42 PARTS LIST Craftsman Engine Model No. 219807-3712-G1 For Craftsman Mower Model No. 247.88998 Ref. Ref. Part No. Part No. 698778 Kit-Choke Shaft 795315 Armature-Magneto 691639 Key-timing 691061 Screw (Magneto Armature) 794873 Connector-Hose (Intake Manifold) 491055s Plug-Spark 791805 Line-Fuel (Formed) (Cut to Required Length)
- Page 43 PARTS LIST Craftsman Engine Model No. 219807-3712-G1 For Craftsman Mower Model No. 247.88998 Ref. Ref. Part No. Part No. 698779 Spring/Seal Assembly (Choke Shaft) 698777 Seal-throttle Shaft 691909 Boot-Spark Plug 1005 796082 Fan-Flywheel 690958 Nut (Carburetor) 1022 272475s Gasket-Rocker Cover...
- Page 44 LABELS 777S30145 777D15546 777I22793 D15546 777I22808 777D15613 777S30117 777D15612 777I22759 777I22760 777I22814 777I22815 777I22809 777X43688...
- Page 45 NOTES...
- Page 46 FEDERAL and/or CALIFORNIA EMISSION CONTROL WARRANTY STATEMENT YOUR WARRANTY RIGHTS AND ObLIGATIONS MtD Consumer Group Inc, the United States Environmental Protection Agency (EPA), and, for those products certified for sale in the state of California, the California Air Resources Board (CARB) are pleased to explain the emission (evaporative and/or exhaust) control system (ECS) warranty on your outdoor 2006 and later small off-road spark-ignited engine and equipment (outdoor equipment engine) In California, new outdoor equipment engines must be designed, built and equipped to meet the State’s stringent anti-smog standards (in other states, 1997 and later model year equipment must be designed, built, and equipped to meet the U.S.
- Page 47 WARRANTED PARTS: the repair or replacement of any warranted part otherwise eligible for warranty coverage may be excluded from such warranty coverage if MtD Consumer Group Inc demonstrates that the outdoor equipment engine has been abused, neglected, or improperly maintained, and that such abuse, neglect, or improper mainte- nance was the direct cause of the need for repair or replacement of the part.
- Page 48 (this page applicable in the U.S.A. and Canada only.) Sears brands Management Corporation (Sears), the California Air Resources board (CARb) and the United States Environmental Protection Agency (U.S. EPA) Emission Control System Warranty Statement (Owner’s Defect Warranty Rights and Obligations) EMISSION CONtROL wARRANtY COVERAGE IS APPLICABLE tO CERtI- YEAR 1997 AND LAtER ENGINES wHICH ARE PURCHASED AND USED FIED ENGINES PURCHASED IN CALIFORNIA IN 1995 AND tHEREAF-...
- Page 49 Look For Relevant Emissions Durability Period and Air Index Information On Your Engine Emissions Label Engines that are certified to meet the California Air Resources Board (CARB) Tier 2 Emission Standards must display information regarding the Emissions Durability Period and the Air Index. Sears Brands Management Corporation makes this information available to the consumer on our emission labels.
- Page 50 REPAIR PROTECTION AGREEMENT Congratulations on making a smart purchase. Your new Craftsman® Once you purchase the Agreement, a simple phone call is all that it product is designed and manufactured for years of dependable opera- takes for you to schedule service. You can call anytime day or night, or tion.
-
Page 51: Español
Para obtener información sobre el alcance de la garantía y solicitar la reparación o el reemplazo, visite el sitio Web: www.craftsman.com. Esta garantía cubre ÚNICAMENTE los defectos en los materiales y en la mano de obra. Esta garantía NO cubre: •... -
Page 52: Instrucciones Sobre Seguridad
INSTRUCCIONES DE SEGURIDAD ADVERTENCIA PELIGRO Esta máquina fue construida para ser operada de acuerdo con La presencia de este símbolo indica que se trata de instrucciones las reglas de seguridad contenidas en este manual. Al igual que importantes de seguridad que se deben respetar para evitar con cualquier tipo de equipo motorizado, un descuido o error por poner en peligro su seguridad personal y/o material y la de otras parte del operador puede producir lesiones graves. - Page 53 INSTRUCCIONES DE SEGURIDAD • Una cubierta de descarga faltante o dañada puede provocar el • Nunca opere la cortadora sin las guardas apropiadas, cubierta de contacto con la cuchilla o lesiones por objetos arrojados. descarga, guarda para recorte, manija de control de la cuchilla y otros dispositivos de seguridad y protección en su lugar y •...
- Page 54 INSTRUCCIONES DE SEGURIDAD NIÑOS • Nunca saque la tapa del gas ni agregue combustible mientras el motor está caliente o en marcha. Deje que el motor se enfríe por Pueden ocurrir accidentes trágicos si el operador no está atento a la lo menos dos minutos antes de volver a cargar combustible.
- Page 55 INSTRUCCIONES DE SEGURIDAD NO MODIFIqUE EL MOTOR • Después de golpear con algún objeto extraño, detenga el motor, desconecte el cable de la bujía y conecte el motor a masa. Para evitar lesiones graves o la muerte, no modifique el motor bajo Inspeccione minuciosamente la máquina para determinar si está...
- Page 56 INSTRUCCIONES DE SEGURIDAD SÍMbOLOS DE SEGURIDAD Esta página representa y describe la seguridad los símbolos que pueden parecer en este producto. Lea, comprenda, y siga todas instrucciones en la máquina antes procurar para reunir y operar. Símbolo Descripción LEA EL MANUAL(S) DEL OPERADOR Lea, comprenda, y siga todas instrucciones en el manual (manuales) antes procurar para reunir y operar.
-
Page 57: Guía Para Pendientes
INSTRUCCIONES DE SEGURIDAD... -
Page 58: Montaje
MONTAJE MONTAJE IMPORTANTE: Esta unidad se envía sin aceite en el motor. Después ADVERTENCIA del montaje, consulte la página 62 para los detalles del combustible y el aceite. La traba de seguridad se usa únicamente para el embalaje. Retire y deseche la traba antes de operar la cortadora de césped. - Page 59 MONTAJE MONTAJE NOTA: Si la batería se pone en funcionamiento después de la fecha de cambios a la placa de la palanca de cambios. Vea la Figura 5. indicada en la parte superior o al costado de la misma, cárguela siguiendo las instrucciones de la sección Mantenimiento de este manual antes de hacer funcionar la cortadora.
- Page 60 CONOZCA SU CORTADORA DE CÉSPED CONOZCA SU CORTADORA DE CÉSPED Throttle/Choke Control blade Control Fuel Tank Cap Deck Height Ignition Switch Lever Systems Indicator Monitor Drive Control Gear Shift Lever Figure 7 CONTROLES DEL MOTOR Tapón de aceite/varilla de medición del nivel de aceite Consulte la Figura 8 para ver la ubicación de los controles del motor.
- Page 61 CONOZCA SU CORTADORA DE CÉSPED CONOZCA SU CORTADORA DE CÉSPED PALANCA DE ALTURA DE LA PLATAFORMA CONTROL DE LA TRANSMISIóN Use esta palanca para ajustar la altura de corte. Para utilizarla, mueva la palanca hacia la izquierda, luego colóquela en la muesca que mejor El control de la transmisión se usa para se adapte a la aplicación deseada.
-
Page 62: Funcionamiento
CONOZCA SU CORTADORA DE CÉSPED INTERRUPTOR DE ENCENDIDO MONITOR INDICADOR DE SISTEMAS/ MEDI- DOR HORARIO ADVERTENCIA Nunca deje la máquina en funcionamiento sin vigilancia. Siempre desenganche las cuchillas, apague el motor y retire la llave, para evitar el encendido accidental del motor. El interruptor de cautro posiciones se usa para encender y apagar el motor de los modelos con arranque eléctrico. - Page 63 OPERACIÓN LLENADO DE GASOLINA Y ACEITE IMPORTANTE: Esta unidad se envía sin gasolina, pero con aceite en el motor. Asegúrese de que el motor con gasolina y revisar el aceite como se indica en esta sección antes de comenzar o el funciona- miento de su máquina.
- Page 64 OPERACIÓN Para conducir hacia ADELANtE: ENCENDIDO DEL MOTOR Coloque la palanca de cambios en cualquiera de las cuatro Suelte todos los controles de la cortadora. velocidades de avance. Seleccione una velocidad adecuada Mueva la palanca de cambios a la posición neutral (N). a las condiciones y con la cual se sienta cómodo.
- Page 65 OPERACIÓN • Siempre esté seguro de su equilibrio. Si tropieza y cae puede despedidos hacia atrás para que se depositen en el césped y actúen lesionarse gravemente. Si siente que pierde el equilibrio, suelte como fertilizante natural. Observe los siguientes puntos para obtener los mejores resultados al realizar el abono.
-
Page 66: Servicio Y Mantenimiento
SERVICIO Y MANTENIMIENTO PROGRAMA DE MANTENIMIENTO Intervalo Artículo Servicio Registro de servicio 1ras 5 horas Aceite del motor Cambiar Cada 8 horas o por días Cuchillas de la cortadora Según necesidad Piezas sueltas o faltantes Ajustar o reemplazar Correas Verificar Nivel de aceite del motor Verificar Controles... - Page 67 SERVICIO Y MANTENIMIENTO PRECAUCIÕN Varilla /tapón del aceite No lo llene en exceso. El llenado excesivo de aceite puede hacer que el motor no arranque o lo haga con dificultad. Si se supera la marca FULL (lleno) de la varilla de medición, drene aceite para reducir el nivel hasta que quede en la marca FULL.
- Page 68 SERVICIO Y MANTENIMIENTO Mantenimiento del filtro de aire. • Siempre mantenga limpios y libres de acumulación de elementos corrosivos los cables y los bornes de la batería. ADVERTENCIA • Después de limpiar la batería y los bornes, aplique una capa Si se instalan incorrectamente los filtros o las cubiertas, se pueden delgada de vaselina o grasa a ambos bornes.
- Page 69 SERVICIO Y MANTENIMIENTO LUbRICACIóN Una el acople de la manguera al puerto de agua que se encuen- tra en la superficie de la plataforma. Vea la Figura 17. ADVERTENCIA Antes de lubricar, reparar o inspeccionar, desconecte la potencia de arranque (PtO), coloque el freno de mano, apague el motor y retire la llave, para evitar el encendido accidental del motor.
- Page 70 SERVICIO Y MANTENIMIENTO Para sacar la cubierta de la correa saque los tres tornillos y Si las flechas en la superficie de cada polea de husillo no están arandelas que la sujetan al bastidor. Vea la Figura 19. perpendiculares (a un ángulo de 90˚ grados) entre sí, consulte a su distribuidor Sears u otro distribuidor para volver a colocar la ADVERTENCIA correa de sincronización de la plataforma.
- Page 71 SERVICIO Y MANTENIMIENTO ExTRACCIóN DE LA PLATAFORMA DE CORTE ADVERTENCIA Antes de realizar cualquier mantenimiento o reparación, desconecte las cuchillas, apague el motor y retire la llave para evitar el encen- dido accidental del motor. Para extraer la plataforma de corte, proceda de la siguiente manera: Para sacar la cubierta de la correa saque los tres tornillos y arandelas que la sujetan al bastidor.
- Page 72 SERVICIO Y MANTENIMIENTO Desenganche el cable resorte de la transmisión del montaje del brazo secundario libre. Vea la Figura 25. Figure 26 Para afilar las cuchillas de corte de forma adecuada, extraiga cantidades iguales de metal de ambos extremos de las cuchillas a Figure 25 lo largo de los bordes cortantes, paralelo al borde de caída y a un Deslice lentamente la plataforma hacia la derecha, sacándola de...
- Page 73 SERVICIO Y MANTENIMIENTO bATERÍA Pruebe el equilibrio de la cuchilla usando un compensador de cuchillas. Afile el metal del lado pesado hasta que quede bien ADVERTENCIA equilibrada. Los bornes de la batería y los accesorios afines contienen plomo y compuestos de plomo, sustancias químicas que según lo establecido NOTA: Cuando reemplace la cuchilla, asegúrese de instalarla con el por el Estado de California causan cáncer y daños en el sistema lado marcado “Bottom”...
- Page 74 SERVICIO Y MANTENIMIENTO Carga de la batería Afloje, pero no saque, la tuerca y el perno que fijan cada polea loca de la plataforma. Vea la Figura 29. ADVERTENCIA Al cargarse, las baterías emiten un gas que puede causar explo- siones.
-
Page 75: Almacenamiento Fuera De Temporada
ALMACENAMIENTO FUERA DE TEMPORADA ALMACENAMIENTO FUERA DE TEMPORADA ADVERTENCIA Nunca almacene la cortadora de césped con combustible en el tanque en un espacio cerrado o en áreas con poca ventilación, donde los gases del combustible puedan alcanzar el fuego, chispas o una luz piloto como la que tienen algunos hornos, calentadores de agua, secadores de ropa o algún otro dispositivo a gas. -
Page 76: Solución De Problemas
SOLUCIÓN DE PROBLEMAS SOLUCIÓN DE PROBLEMAS ADVERTENCIA Antes de realizar cualquier tipo de mantenimiento o servicio, desenganche todos los controles y detenga el motor. Espere a que se detengan completamente todas las piezas móviles. Desconecte el cable de la bujía y póngalo haciendo masa contra el motor para evitar que se encienda accidentalmente. Utilice siempre anteojos de seguridad durante la operación o mientras realiza ajustes o reparaciones. - Page 77 NOTAS...
- Page 78 DECLARACIóN FEDERAL y/o DE CALIFORNIA SObRE GARANTÍAS EN EL CONTROL DE EMISIONES SUS DERECHOS Y ObLIGACIONES EN CUANTO A LA GARANTÍA MtD Consumer Group Inc, la Agencia de Protección Medioambiental de los Estados Unidos (EPA), y para aquellos productos certificados para su venta en el es- tado de California, el Departamento de los Recursos del Aire de California (CARB) se complacen en explicar la garantía que cubre al sistema de control (ECS) de emisiones (evaporativas y/o de escape) de su equipo y motor (motor de equipos de exteriores) de encendido por chispa para todo terreno, pequeño, de exteriores del año 2006 y años posteriores En California, los nuevos motores de equipos de exteriores deben estar diseñados, construidos y equipados para cumplir con las...
- Page 79 Durante la totalidad del período de garantía del motor y equipo para todo terreno arriba mencionado, MtD Consumer Group Inc mantendrá un suministro de piezas bajo garantía suficiente para satisfacer la demanda esperada de tales piezas. Cualquier pieza de reemplazo se podrá usar para el cumplimiento del mantenimiento o las reparaciones bajo garantía y se suministrarán sin cargo para el propietario.
- Page 80 (Esta página se aplica sólo en EE.UU. y Canadá). Sears brands Management Corporation, el Consejo de Recursos Ambientales de California (CARb) y la Agencia de Protección Ambiental de los Estados Unidos (EPA) Declaración de garantía del sistema de control de emisiones (derechos y obligaciones de la garantía de defectos del propi- etario) LA COBERtURA DE LA GARANtÍA DE CONtROL DE EMISIONES ES Y PARA LOS MODELOS CERtIFICADOS DEL AÑO 1997 Y POStERIORES,...
- Page 81 busque el período de duración de emisiones importantes yla información de clasificación de aire en la etiqueta de emisiones de su motor Los motores cuyo cumplimiento con los estándares de emisión Tier 2 de la Comisión de Recursos Ambientales de California (CARB) esté...
- Page 82 Felicitaciones por haber realizado una adquisición inteligente. El Una vez adquirido el Acuerdo, puede programar el servicio con producto Craftsman® que ha adquirido está diseñado y fabricado tan sólo realizar una llamada telefónica. Puede llamar en cualquier para brindar muchos años de funcionamiento confiable. Pero como momento del día o de la noche o programar un servicio en línea.
- Page 83 Esta página se marchó intencionadamente en blanco.
- Page 84 Get it fixed, at your home or ours! Your Home For troubleshooting, product manuals and expert advice: www.managemylife.com For repair – in your home – of all major brand appliances, lawn and garden equipment, or heating and cooling systems, no matter who made it, no matter who sold it! For the replacement parts, accessories and owner’s manuals that you need to do-it-yourself.