Table of Contents
Advertisement
Quick Links
Downloaded from:
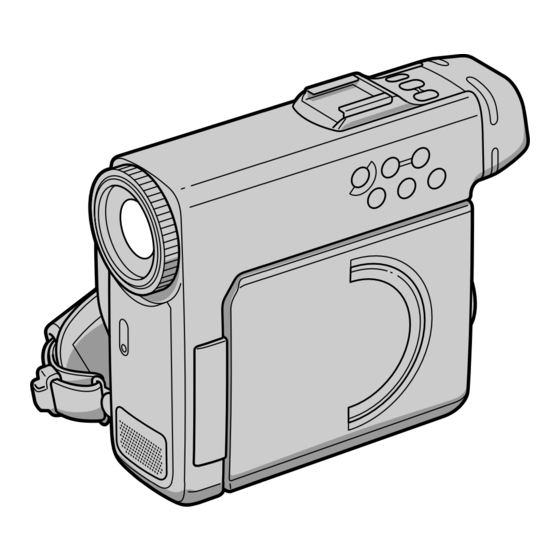
M iniDisc
AV Recorder
Operat ing Inst ruct ions
Before operating the unit, please read this manual thoroughly,
and retain it for future reference.
Ow ner's Record
This recorder's model number is located on the bottom of the unit
and serial number is located on the inside the disc lid. The AC
power adaptor/charger's model and serial numbers are located on
the bottom. Record the serial number in the space provided below.
Refer to these numbers whenever you call upon your Sony dealer
regarding this product.
Model No. DCM -M 1
Serial No.
DCM -M 1
©2000 Sony Corporation
https://www.usersmanualguide.com/
3-866-152-12 (2)
Model No. AC-VQ800
Serial No.
Advertisement
Table of Contents

Related Manuals for Sony DCM -M 1


Summary of Contents for Sony DCM -M 1
- Page 1 The AC power adaptor/charger’s model and serial numbers are located on the bottom. Record the serial number in the space provided below. Refer to these numbers whenever you call upon your Sony dealer regarding this product. Model No. DCM -M 1 Model No.
- Page 2 Welcom e! Congratulations on your purchase of this Sony MiniDisc AV Recorder. With your MiniDisc AV Recorder, you can capture life’s precious moments with superior picture and sound quality. Your MiniDisc AV Recorder is loaded with advanced features, but at the same time it is very easy to use. You will soon be producing home video that you can enjoy for years to come.
- Page 3 If you have any questions about this product, For Service and Technical Assistance on you may call: MD Discam™ Call To Free 1-888-449-SONY Sony Direct Response Center 1-(800)-222-7669 (United States only). or write to: Sony Direct Response Center 12451 Gateway CAUTION Blvd.
-
Page 4: Table Of Contents
Table of cont ent s What you can do with your Edit ing camcorder ........5 Checking the disc information ..58 Checking supplied accessories ..7 Checking the track information ..59 Changing the index image ....62 Get t ing St art ed Moving tracks ........ -
Page 5: What You Can Do With Your Camcorder
What you can do w it h your cam corder Your camcorder can record in the MD DATA2 disc: •Moving pictures (movies) as long as 10 minutes in SP mode or 20 minutes in LP mode •Still pictures (photos) of up to 4,500 shots •Audio of up to 260 minutes. - Page 6 What you can do w it h your cam corder Various f unct ions available w it h M iniDisc Digital video edit functions (p. 58) Check the picture just after recording (p. 47) Draw on the picture (p. 78). Easy to move or erase the picture (p.
-
Page 7: Checking Supplied Accessories
Checking supplied accessories Make sure that the following accessories are supplied with your camcorder. 1 AC-VQ800 AC adaptor/ charger (1) 7 Size AA (R6) battery for Remote (p. 10, 15) Commander (2) (p. 125) 2 AC pow er cord (1) (p. 10, 15) 8 Input pen (1) (p. -
Page 8: Get T Ing St Art Ed
— Get t ing St art ed — Using t his m anual As you read through this manual, the buttons and settings on your camcorder are shown in capital letters. For example, “set the POWER switch to CAMERA.” When you carry out an operation, you will hear a beep to indicate that the operation is being carried out. - Page 9 When using on the AC adaptor/charger, disconnect the AC adaptor/charger from a wall outlet. Then contact your nearest Sony dealer. Contents of the recording cannot be compensated if recording or playback is not made due to a malfunction of the camcorder, MiniDisc, etc.
-
Page 10: Step 1 Preparing The Power Supply
St ep 1 Preparing t he pow er supply Charging t he bat t ery pack Use the battery pack after charging it for your camcorder. Your camcorder operates only with the “InfoLITHIUM” battery pack (L series). If you want to use the camcorder right away indoors, use on the AC adaptor/charger (p. 15). (1) Set the mode change switch to “CHARGE.”... - Page 11 St ep 1 Preparing t he pow er supply Notes •When the mode change switch is set to VTR/CAMERA during charging, charging stops. •If the CHARGE lamp does not light or flash, check that the battery pack is correctly attached to the AC adaptor/charger. If it is not attached it will not be charged. •When you install the battery pack, be sure to not hit it to the terminal of the AC adaptor/charger.
- Page 12 St ep 1 Preparing t he pow er supply Playing t im e M D DATA2 disc Playing time Playing time Battery pack on LCD screen w ith LCD closed NP-F550 (supplied) 80 (75) 100 (95) Audio M D Playing time Playing time Battery pack on LCD screen...
- Page 13 St ep 1 Preparing t he pow er supply What is ”InfoLITHIUM ?” The “InfoLITHIUM” is a lithium ion battery pack which can exchange data with compatible electronic equipment about its battery consumption. Sony recommends that you use the “InfoLITHIUM” battery pack with electronic equipment having the mark.
- Page 14 St ep 1 Preparing t he pow er supply Inst alling t he bat t ery pack Install the battery pack to use your camcorder outdoors. (1) Slide OPEN (BATT) down to open the battery compartment lid. (2) With the V mark pointing down, insert the battery pack until it clicks. (3) Shut the lid.
- Page 15 AC adaptor/charger itself has been turned off. Using a car battery Use Sony DC adaptor/charger DC-VQ800 (not supplied) or car battery adaptor DCC-L50 (not supplied). Downloaded from:...
-
Page 16: Step 2 Inserting An Md Data2 Disc
St ep 2 Insert ing an M D DATA2 disc Use an MD DATA2 disc. You cannot record on other types of MDs. Lift the bOPEN protrusion and open the LCD panel until it stops. (2) Slide DISC EJECT on the bottom in the direction of the arrow and open the lid manually. - Page 17 St ep 2 Insert ing an M D DATA2 disc To prevent accidental erasure Slide open the tab at the side of the disc (so the tab is concealed). Rear of the disc Downloaded from: https://www.usersmanualguide.com/...
-
Page 18: Step 3 Using The Touch Panel
St ep 3 Using t he t ouch panel You operate your camcorder by selecting the items on the index display or menu on the LCD screen. Select the tracks or menu items by touching with the input pen or a finger, or using the control dial. - Page 19 St ep 3 Using t he t ouch panel (3) Set the POWER switch to PLAY/EDIT while pressing the small green button. The index display appears. If nothing is recorded in the disc, no index image will be displayed. (4) Touch SET UP on the left of the screen.
- Page 20 St ep 3 Using t he t ouch panel If the LCD screen is dirty •Do not use the input pen when the LCD screen is dirty or dusty. Doing so may damage the LCD screen. •If the LCD screen is dirty, turn the POWER switch to “OFF” first and then wipe the LCD screen lightly with a soft dry cloth.
- Page 21 St ep 3 Using t he t ouch panel Using t he cont rol dial Turn the control dial up or down to select an item, and press it to confirm. The control dial rotates up or down endlessly. Example: turning on the digital zoom function (1) Set the POWER switch to CAMERA while pressing the small green button.
-
Page 22: Recording - Basics
— Recording – Basics — Recording a pict ure Your camcorder automatically focuses for you. (1) Install the power source and insert a disc. See “Step 1” and “Step 2” for more information (p. 10 to p. 17). (2) Fasten the grip strap firmly. (3) Remove the lens cap and pull the lens cap string to fix it. - Page 23 Recording a pict ure Note on the date and time The clock is set to New York or Panama time at the factory. You can reset the clock (p. 89). If you w ant to record longer Select the LP (long play) recording mode in the menu (p. 26). The available recording time becomes twice the SP (standard play) mode;...
- Page 24 Recording a pict ure Af t er recording (1) Set the POWER switch to OFF. (2) Eject the disc. (3) Remove the battery pack. If you remove the battery before ejecting the disc Since the disc lid is locked in the CAMERA and INTERVIEW mode, you cannot open the disc lid without the battery.
- Page 25 Recording a pict ure Adjust ing t he LCD screen (1) Pull the bOPEN protrusion and open the LCD panel. (2) Adjust the angle. 180° 90° 90° To close the LCD panel, set it vertically and swing it into the camcorder body. Note When using the LCD screen except in the mirror mode, the viewfinder automatically turns off.
- Page 26 Recording a pict ure Adjust ing t he view f inder When you record pictures with the LCD panel closed, check the picture with the viewfinder. Adjust the viewfinder lens to your eyesight so that the indicators in the viewfinder come into sharp focus. (1) Move the viewfinder lens adjustment lever.
- Page 27 Recording a pict ure Using t he zoom f eat ure (1) Move the power zoom lever a little for a slower zoom. Move it further for a faster zoom. Using the zoom function sparingly results in better-looking recordings. “T” side:for telephoto (subject appears closer) “W”...
- Page 28 Recording a pict ure Recording w hile show ing t he pict ure on t he LCD screen You can record a person while showing himself/herself on the LCD screen. You can also record yourself if you place your camcorder in a stable position. The supplied Remote Commander will make it easy to record yourself.
-
Page 29: Checking The Recorded Picture
Checking t he recorded pict ure You can view the picture just after you have recorded with the POWER switch kept to CAMERA. You can erase the track or unnecessary portion of the track. AUDIO REC ERASE View ing t he last recorded t rack (1) During recording standby, press u. -
Page 30: Playback - Basics
— Playback – Basics — Playing t he disc You can monitor the playback picture on the LCD screen. If you close the LCD panel, you can monitor the playback picture in the viewfinder. When you monitor the picture on the LCD screen, tilt your camcorder to its stable position. - Page 31 Playing a disc When you open/ close the LCD panel Make sure that the LCD panel is set vertically. Note on playback It may take a few seconds to start playback depending on the track. To change the playing time of a photo Set STILL PLAYBACK TIME in the menu (p.
- Page 32 Playing a disc To cont rol using t he but t ons on t he cam corder or Rem ot e Com m ander When the name of the buttons of the camcorder differs from the buttons of the Remote Commander, those of the Remote Commander are shown in parenthesis.
- Page 33 Playing a disc Adjust ing t he volum e (1) Press either of the two buttons on VOL. Speaker To set AVLS Set AVLS to ON in the menu (p. 93). To listen using headphones Connect the headphones (not supplied) to the i jack on the front. Adjust the volume using the VOL buttons.
- Page 34 Playing a disc Turning on or of f t he inf orm at ion display (1) Press DSPL when the index display is on. The track type icons disappear from the LCD screen. DSPL To make the track data appear, press DSPL again. If you press DSPL during playback The track data appears.
-
Page 35: Viewing The Recording On Tv
View ing t he recording on TV Connect your camcorder to your TV or VCR with the A/V connecting cable supplied with your camcorder to watch the playback picture on the TV screen. You can operate the video control buttons in the same way as when you monitor playback pictures on the LCD screen. -
Page 36: Advanced Recording Operat Ions
— Advanced Recording Operat ions — Recording audio including photo - Int erview recording While you are recording mainly audio in an MD DATA2 disc, you can record up to three photos. Those photos make one track together with the audio. Interview recording is possible only with the MD DATA2 discs. - Page 37 Recording audio including phot o - Int erview recording If you record from audio equipment such as a CD player Connect the audio equipment to the LINE IN jack of the connecting cord installed in your camcorder using an audio connecting cable (not supplied). Playback and erasing You cannot play back or erase in the INTERVIEW mode.
-
Page 38: Self-Timer Recording
Self -t im er recording You can make a recording with the self-timer. This mode is useful when you want to record yourself. The Remote Commander will make recording easier. (1) Press MENU in the standby mode. (2) Turn the control dial to select CAMERA, and press the dial. - Page 39 Self -t im er recording To set t he w ait ing and recording t im e You can select the waiting time from 5, 10, and 15 seconds. You can select the recording time of movie from 5, 10, 20, 30 and 60 seconds. (1) On the self-timer screen, turn the control dial to select DETAIL, and press the dial.
-
Page 40: Shooting Backlit Subjects (Back Light)
Shoot ing backlit subject s (BACK LIGHT) When you shoot a subject with the light source behind the subject or a subject with a light background, use the backlight function. (1) Press BACK LIGHT in the recording or standby mode. The . -
Page 41: Using The Program Ae Function
Using t he PROGRAM AE f unct ion You can select PROGRAM AE (Auto Exposure) mode to suit your specific shooting requirements. Spotlight mode This mode prevents people’s faces, for example, from appearing excessively white when shooting subjects lit by strong light in the theater. Soft portrait mode This mode brings out the subject while creating a soft background for subjects such as people or flowers. - Page 42 Using t he PROGRAM AE f unct ion (1) Press MENU in the recording or standby mode. (2) Turn the control dial to select CAMERA, and press the dial. (3) Turn the control dial to select PROGRAM AE, and press the dial. STBY STBY CAMERA...
-
Page 43: Focusing Manually
Focusing m anually You can gain better results by manually adjusting the focus in the following cases: •The autofocus mode is not effective when shooting – subjects through glass coated with water droplets – horizontal stripes – subjects with little contrast with backgrounds such as walls and sky •When you want to change the focus from a subject in the foreground to a subject in the background •Shooting a stationary subject when using a tripod... -
Page 44: Adjusting The Exposure Manually
Adjust ing t he exposure m anually You can manually adjust and set the exposure. Adjust the exposure manually in the following cases: •The subject is backlit •Bright subject and dark background •To record dark pictures (e.g. night scenes) faithfully (1) In the standby or recording mode, press EXPOSURE. -
Page 45: Releasing The Steadyshot Function
Releasing t he STEADYSHOT f unct ion The STEADYSHOT function compensates for camera-shake. You can release the STEADYSHOT function when you do not need it. Do not use the STEADYSHOT function when shooting a stationary object using a tripod to obtain more natural picture. -
Page 46: Adjusting The White Balance Manually
Adjust ing t he w hit e balance m anually You can manually adjust and set the white balance. This adjustment makes white subjects look white and allows more natural color balance. Normally white balance is automatically adjusted. (1) Press MENU in the recording or standby mode. (2) Turn the control dial to select CAMERA, and press the dial. -
Page 47: Advanced Playback Operat Ions
— Advanced Playback Operat ions — Displaying t w o pict ures – Pict ure-in-pict ure A desired scene can be displayed in a small picture-in-picture screen during playback. You can display the image in picture-in-picture screen with the playback picture side by side in the same size. - Page 48 Displaying t w o pict ures – Pict ure-in-pict ure Com paring t w o pict ures – 2-pict ure display You can display the picture-in-picture image together with another image not only from the same disc but also from other discs. (1) Play back the track you want to compare with the picture-in-picture image.
-
Page 49: Displaying Nine Consecutive Scenes - 9 Frame Sequence
Displaying nine consecut ive scenes – 9 FRAM E SEQUENCE You can view a part of a movie as nine still pictures on the screen. This function is useful when you want to look at a fast-moving subject, such as a golf swing, in detail. 9 FRAME SEQUENCE function displays consecutive scenes of every 0.2 second. - Page 50 Displaying nine consecut ive scenes – 9 FRAM E SEQUENCE To enlarge one of t he pict ures t o ent ire screen (1) Touch the desired picture. If you press BACK, the previous frame appears. If you touch FORWARD, the next frame appears.
-
Page 51: Playing Back Repeatedly
Playing back repeat edly You can play one track, all tracks in a disc or a portion of a movie (A-B repeat) repeatedly. Repeat ing a t rack (1) On the index display, touch PLAYBACK and then PLAY MODE. (2) Touch SINGLE REPEAT. PLAYBACK RETURN PICTURE IN PICTURE... - Page 52 Playing back repeat edly (4) Play the track to be repeated. A of AB flashes. (5) Press the control dial at the point to start repeating. Starting point (A) is set and B flashes. (6) Press the control dial at the point to finish repeating. Finishing point (B) is set.
-
Page 53: Playing Back In Random Order - Shuffle
Playing back in random order – SHUFFLE You can play the tracks in random order. (1) On the index display, touch PLAYBACK and then PLAY MODE. (2) Touch SHUFFLE. PLAYBACK RETURN PICTURE IN PICTURE 9 FRAME SEQUENCE NORMAL PLAY MODE ALL REPEAT SORT SINGLE REPEAT... -
Page 54: Scanning The Top Of Tracks - Intro Scan
Scanning t he t op of t racks – INTRO SCAN You can play the first 3 seconds of all tracks. Photo, memo and title tracks are also played for 3 seconds. Movies shorter than 3 seconds are played for the recorded time. (1) On the index display, touch PLAYBACK and then PLAY MODE. -
Page 55: Sorting The Tracks
Sort ing t he t racks You can sort the tracks so that you can locate or play the desired tracks first. (1) On the index display, touch PLAYBACK and then SORT. PLAYBACK PLAYBACK RETURN RETURN PICTURE IN PICTURE PICTURE IN PICTURE 9 FRAME SEQUENCE 9 FRAME SEQUENCE PLAY MODE... -
Page 56: Jumping To The Desired Track
Jum ping t o t he desired t rack You can jump to the tracks directly by the title or track name. This function is useful to locate a track when many tracks are recorded in the disc. (1) On the index display, touch PLAYBACK and then JUMP. -
Page 57: Setting The Playing Time Of Still Picture Tracks
Set t ing t he playing t im e of st ill pict ure t racks You can select the playing time of still picture tracks such as photo, memo and title from about 1, 3, 5 and 10 seconds. The playing time is set to about 3 seconds as the default setting. -
Page 58: Edit Ing
— Edit ing — Checking t he disc inf orm at ion You can check the track numbers, remaining time, etc. Contents display Remain display DISC INFORMATION DISC INFORMATION NAME NAME 12.24.1999 12.24.1999 1ST REC 1ST REC CONTENTS REMAIN CONTENTS REMAIN 4:26 8:12:42 TRACKS... -
Page 59: Checking The Track Information
Checking t he t rack inf orm at ion You can check the type, recorded date, data rate, etc., of each track. Track information display TRACK INFORMATION 0000 01:23 12.24.1999 1:30 Track name box MARK 8.00 PROTECT DATA RATE Mbps CLOSE Displaying t he t rack inf orm at ion (1) Touch... - Page 60 Checking t he t rack inf orm at ion Labelling t he t rack You can label a track using up to 100 characters. (1) Touch the track name box on the track information display. (2) Input characters (p. 80). Note You can record up to 100 characters in one track, and 5000 characters in one disc.
- Page 61 Checking t he t rack inf orm at ion Prot ect ing a t rack Protect important tracks to prevent them from being erased by mistake. (1) Touch the PROTECT box in the track information display to indicate - icon will be displayed on the protected tracks. TRACK INFORMATION 0002 01:23...
-
Page 62: Changing The Index Image
Changing t he index im age The first scene becomes the index image for movie tracks. You can change the index image to a desired scene from the movie. (1) Touch EDIT. Scroll the menu by touching v or V, or by turning the control dial. (2) Touch INDEX IMAGE CHANGE. - Page 63 Changing t he index im age To change t he index im age during playback or playback pause (1) Press INDEX CHANGE on the Remote Commander at the scene you want to make into the index image. The confirmation message appears. (2) Select YES using B /b , then press ENTER.
-
Page 64: Moving Tracks
M oving t racks You can move one track at a time, or several tracks together to the desired position in the disc. (1) Touch EDIT. (2) Touch MOVE. TRACK MOVE appears at the top of the screen. TRACK MOVE EDIT RETURN MOVE... -
Page 65: Erasing Tracks
Erasing t racks You can erase one track at a time, or several tracks together. Since the erased tracks cannot be restored, make sure that you can really erase the track. Erasing one t rack (1) Touch EDIT. (2) Touch ERASE, then SINGLE. TRACK ERASE appears at the top of the screen. - Page 66 Erasing t racks You can use the ERASE button Select the track to be erased and press ERASE. To cancel erasing Touch CANCEL. To erase other tracks Touch CONTINUE in step 5. Note on the remaining disc capacity The remaining disc capacity may not increase even if you erase tracks. Erasing several t racks t oget her (1) Touch EDIT.
- Page 67 Erasing t racks Erasing all t racks in t he disc All tracks except the protected tracks will be erased. (1) Touch EDIT. (2) Touch ERASE, then ALL . The confirmation message appears. EDIT RETURN MOVE CONFIRM TO ERASE ALL COPY TRIM RETURN...
-
Page 68: Copying Tracks
Copying t racks You can copy one track at a time, or several tracks together in the same disc. (1) Touch EDIT. (2) Touch COPY. TRACK COPY appears at the top of the screen. TRACK COPY EDIT RETURN MOVE COPY TRIM ERASE DIVIDE... - Page 69 Copying t racks To not erase a track by mistake Copy the track and use the copy for editing. To cancel copying Touch CANCEL. To copy other tracks Touch CONTINUE in step 5. Downloaded from: https://www.usersmanualguide.com/...
-
Page 70: Dividing Tracks
Dividing t racks You can divide movie tracks at the desired position. Track 1 Track 2 Track 3 Divide Track Track 1 Track 3 Track 4 (1) Touch EDIT. (2) Touch DIVIDE, then DIVIDE. TRACK DIVIDE appears at the top of the screen. TRACK DIVIDE EDIT RETURN... - Page 71 Dividing t racks You cannot divide the track if: •the track is shorter than about 2 seconds. •the disc is protected. •the track is protected. Note on the dividing position The dividing position is automatically adjusted so that both tracks become at least 0.5 second long.
-
Page 72: Trimming Unnecessary Scenes
Trim m ing unnecessary scenes You can trim the unnecessary scenes at the beginning and the end of a movie. Since the trimmed scenes cannot be restored, make sure that you really do not w ant the scenes. Trim Trim Track 1 Track 2 Track 3... - Page 73 Trim m ing unnecessary scenes To operate the menu You can use the control dial. To cancel trimming Touch CANCEL. You cannot trim the track if: •the track is shorter than about 2 seconds. •the disc is protected. •the track is protected. Note on the trimming position The trimming position is automatically adjusted so that trimmed track becomes at least 0.5 second long.
-
Page 74: Grouping The Tracks
Grouping t he t racks You can group the tracks lined up in succession on the index display. Only the first track of the group appears on the index display. This is convenient to move or copy tracks quickly, or to save the index display space when there are many tracks. icon appears on the group track on the index display. - Page 75 Grouping t he t racks A group track can be included in the group You can include a group track when making another group. If you release grouping of the tracks, all tracks are released and become individual tracks. To group other tracks Touch CONTINUE in step 5.
-
Page 76: Making A Photo Track From A Movie
M aking a phot o t rack f rom a m ovie You can make a new photo track of a desired scene in a movie. M ovie Photo (1) Touch EDIT. Scroll the menu by touching v or V, or by turning the control dial. (2) Touch STILL FRAME CAPTURE. - Page 77 M aking a phot o t rack f rom a m ovie Note on effects Drawing, scene transition and picture effects which have been set on the original movie are not applied to this photo track. To adjust the scene position You can use the control dial.
-
Page 78: Drawing/Effect
— Draw ing/Ef f ect — Draw ing on t he pict ure You can draw directly on the movie or photo tracks (ADD LAYER), or on a black screen which makes a new memo track (INSERT TRACK). The drawing can be erased (ERASE). - Page 79 Draw ing on t he pict ure To continue draw ing on other tracks Touch CONTINUE in step 5. Draw ing on a black screen (m em o t rack) You can write up to 24 characters. (1) Touch DRAWING/EFFECT. (2) Touch DRAWING, then INSERT TRACK.
- Page 80 Draw ing on t he pict ure Using t he illust rat ion t ool Illust rat ion t ool Touch the desired tool and draw on the LCD screen using the input pen. To change the size of the illustration tool To draw a line To draw a straight line...
- Page 81 Draw ing on t he pict ure Erasing t he draw ings Note that the drawings and paintings cannot be restored after being erased. The pictures are not erased by erasing the drawings. (1) Touch DRAWING/EFFECT. (2) Touch DRAWING, then ERASE. PAINT REMOVE appears at the top of the screen.
-
Page 82: Inserting A Title Track
Insert ing a t it le t rack You can use the title track to locate the tracks, or to categorize the tracks. A title track made on the TITLE INSERT display can be quickly located by sorting or jumping for playback. A title track makes one track. The title track has the icon on the index display. -
Page 83: Switching The Tracks With Special Effects
Sw it ching t he t racks w it h special eff ect s You can switch the tracks with special effects such as fading in/out. These effects can be applied to the movie and photo tracks only, and are recorded in the disc. Effects to be applied to the beginning and end of a track •Fade (in/out) The picture fades in from black, and fades out to black. - Page 84 Sw it ching t he t racks w it h special ef f ect s (6) Touch PREVIEW. The last 5 seconds of the track before the selected track, the selected track itself and the first 5 seconds of the next track will be played back with the selected effects.
- Page 85 Sw it ching t he t racks w it h special ef f ect s Playing back all t he t racks w it h f ade or hold ef f ect If you set the PRESET TRANSITION to FADE or HOLD, your camcorder always plays back discs with fade or hold effect.
-
Page 86: Applying The Picture Effect To The Tracks
Applying t he pict ure eff ect t o t he t racks You can make movie and photo tracks into sepia, black-and-white, mosaic, or slow- motion play by digital processing. You can also set the slow-motion play to a track in addition to other effects. -
Page 87: Cust Om Izing Your Cam Corder
— Cust om izing Your Cam corder — Adjusting the brightness and color of the LCD screen (1) In the CAMERA, PLAY/EDIT or INTERVIEW mode, press MENU. (2) Touch SET UP. Camera/ Interview mode Play/ Edit mode SET UP STBY SET UP RETURN RETURN... -
Page 88: Adjusting The Brightness Of The Viewfinder
Adjust ing t he bright ness of t he view f inder (1) In the CAMERA, PLAY/EDIT or INTERVIEW mode, press MENU. (2) Turn the control dial to select SET UP and press the dial. Camera/ Interview mode Play/ Edit mode STBY SET UP SET UP... -
Page 89: Resetting The Date And Time
Reset t ing t he dat e and t im e The default clock setting is set to New York or Panama time. If you do not use your camcorder for about four months, the date and time settings may be released (bars may appear) because the vanadium-lithium battery installed in your camcorder will have been discharged. - Page 90 Reset t ing t he dat e and t im e The year changes as follow s: 1999 ˜ 2000 N · · · · n 2098 If you do not set the date and time “--.--.-- --:--” is recorded in the disc. Note on the time indicator The internal clock of your camcorder operates on a 12-hour cycle.
-
Page 91: Changing The Menu Settings
Changing t he m enu set t ings To change the settings in the menu, touch the desired item on the LCD screen. The default settings can be partially changed. First, display the main menu, select the icon, the menu item and then the mode. (1) In the CAMERA, PLAY/EDIT or INTERVIEW mode, press MENU. - Page 92 Changing t he m enu set t ings M enu in t he CAM ERA and INTERVIEW m ode z is the default setting. Icon/ item M ode M eaning SELF TIM ER* – To start recording automatically when the preset waiting time has passed, and stop recording automatically when the preset recording time has passed (p.
- Page 93 Changing t he m enu set t ings Icon/ item M ode M eaning AVLS z OFF The sound volume is as adjusted. To activate the Automatic Volume Limiter System when the volume is turned up. This works on the headphones and speaker.
- Page 94 Changing t he m enu set t ings M enu in t he PLAY/EDIT m ode z is the default setting. Icon/ item M ode M eaning z OFF PICTURE IN To not display the picture-in-picture screen. To display a scene in the picture-in-picture screen (p. 47). PICTURE –...
- Page 95 Changing t he m enu set t ings Icon/ item M ode M eaning BEEP To cancel the beep sound. z ON To output the beep when you start/stop recording or press other operation button. COM M ANDER To deactivate the Remote Commander to avoid remote control misoperation caused by other VCR’s remote control.
-
Page 96: Using W It H Ot Her Equipm Ent
— Using w it h Ot her Equipm ent — Dubbing on a t ape Connect your camcorder to the VCR using the A/V connecting cable supplied with your camcorder. Set the input selector on the VCR to LINE, if available. ( 1 ) Insert a blank tape (or a tape you want to record over) into the VCR, and insert the recorded disc into your camcorder. -
Page 97: Printing The Still Picture
Print ing t he st ill pict ure You can print a photo by using the video printer (not supplied). Connect the video printer using the A/V connecting cable supplied with your camcorder. Connect it to the AUDIO/VIDEO jack and connect the yellow plug of the cable to the video input of the video printer. -
Page 98: Listening To An Audio Md
List ening t o an audio M D Your camcorder can play an audio MD. You can enjoy better sound if you use headphones (not supplied). (1) Insert the audio MD. (2) Set the POWER switch to PLAY/EDIT. The operation screen for audio MDs appears. (3) Touch the desired title or track. - Page 99 List ening t o an audio M D Various w ays of playback Do this pause playback Press u. Press again to release pause. go to the next track Press > briefly. go back to the top of the current track Press .
-
Page 100: Viewing On The Computer Display
View ing on t he com put er display Your camcorder is capable of sending the movies or photos recorded in the MD DATA2 disc to a World Wide Web (WWW) homepage. You can view the pictures using the browser software such as Internet Explorer or Netscape Navigator by connecting the 10BASE-T terminal of the connecting cord to a computer. - Page 101 View ing on t he com put er display St ep 1 Set t ing t he address f or your cam corder Set the camcorder’s address so that you can access your camcorder from the computer. You do not need to reset the address as long as the computer is used under same environment.
- Page 102 View ing on t he com put er display Net mask Changes in the order of 255 - 254 - 252 - 248 - 240 - 224 - 192 - 128 - 0 - 255. Using the DHCP server of the netw ork You can set the address automatically.
- Page 103 View ing on t he com put er display View ing t he pict ures A browser software such as Internet Explorer or Netscape Navigator is required to view the pictures on the computer. (1) Turn on the computer. (2) Insert the recorded MD DATA2 disc in the camcorder. (3) Set the POWER switch to PLAY/EDIT.
- Page 104 View ing on t he com put er display Hom epage of your cam corder 1 You can customize the index image of the movie on the index display. Picture size: 624 x 380, 304 x 240, 144 x 120 Number of frames per second: 30 , 15, 5, 2, 1 2 Track number 3 Title track...
-
Page 105: Addit Ional Inf Orm At Ion
Handling •If any solid object or liquid gets inside the casing, unplug your camcorder and have it checked by a Sony dealer before operating it any further. •Avoid rough handling or mechanical shock. Be particularly careful of the lens. •Do not touch the lens in the disc compartment. If the lens becomes dirty, playback may not be performed or pictures may dropout. - Page 106 Precaut ions and m aint enance inf orm at ion Note on moisture condensation Moisture may condense when you bring your camcorder from a cold place into a warm place (or vice versa) or when you use your camcorder in a hot place as follows: •You bring your camcorder from a ski slope into a warm place.
- Page 107 The supplied Remote Commander operates only this camcorder and cannot operate other model. It is not possible to operate this camcorder with a Remote Commander supplied with other model. If any problem occurs, unplug your camcorder and contact your nearest Sony dealer. Downloaded from: https://www.usersmanualguide.com/...
- Page 108 Precaut ions and m aint enance inf orm at ion M aint enance Cam corder Clean the camcorder body with a dry soft cloth, or a soft cloth lightly moistened with a mild detergent solution. Do not use any type of solvent which may damage the finish. Lens Clean the lens with a commercially available blower.
-
Page 109: Usable Minidiscs
Premastered MDs are played like regular CDs. “MD DATA” and “MD DATA2” are registered trademarks of Sony Corporation. MD VIEW is a registered trademark of Sony Corporation for MD DATA2 discs. Usable M Ds w it h your cam corder •For recording and playing audio and picture: MD DATA2... - Page 110 Usable M iniDiscs Syst em lim it at ions of t he M D The recording system in your camcorder is radically different from those used in cassette and DAT decks and the system has limitations as described below. Note, however, that these limitations are due to the inherent nature of the MD recording system itself and not to mechanical causes.
-
Page 111: Troubleshooting
Troubleshoot ing If you run into any problem using your camcorder, use the following table to troubleshoot the problem. If the problem persists, disconnect the power source and contact your Sony dealer. Cam corder Recording Symptom Cause and/ or Corrective Actions Recording or interview recording •... - Page 112 Troubleshoot ing Symptom Cause and/ or Corrective Actions Picture appears too bright, and the • EXPOSURE is set to manual adjustment mode. subject does not appear on the c Set it back to automatic adjustment (p. 44). LCD screen or in the viewfinder. •...
- Page 113 Troubleshoot ing Recording/playback/edit ing Symptom Cause and/ or Corrective Actions • The battery pack is not installed, or is dead or nearly dead. The camcorder does not operate when the POWER switch is set to c Install a charged battery pack (p. 10). CAMERA, PLAY/EDIT, or •...
- Page 114 Troubleshoot ing Ot hers Symptom Cause and/ or Corrective Actions The Remote Commander supplied • COMMANDER is set to OFF . with the camcorder does not work. c Set it to ON (p. 93). • Something is blocking the infrared rays. c Remove the obstacle.
- Page 115 •If the CHARGE lamp flashes again, the AC adaptor/charger seems to be malfunctioning. •If the CHARGE lamp lights up, no longer flashes, and turns off when charging time has passed, the first battery pack seems to be malfunctioning. Consult your nearest Sony dealer. Downloaded from: https://www.usersmanualguide.com/...
-
Page 116: Warning Indicators And Messages
Warning indicat ors and m essages If indicators and messages appear on the LCD screen or in the viewfinder, check the following: See the page in parentheses for more information. Warning indicat ors The battery is dead or nearly Warning indicator as to disc dead Slow flashing: Flashing:... - Page 117 Warning indicat ors and m essages Warning m essages Warning messages appear on the LCD screen with the respective warning indicators. Main warning messages are listed below. •CHANGE THE BATTERY (p. 10) •THIS BATTERY IS OLD PLEASE CHANGE •FOR “InfoLITHIUM” BATTERY ONLY (p. 10) •DISC IS FULL •INSERT A DISC (p.
-
Page 118: Specifications
Specif icat ions Recording system M IC jack Cam corder Laser strobing magnetic Stereo minijack (ø 3.5 mm) (1) modulation system 0.388 mV low impedance with 2.4 Syst em Reading system V DC, input impedance 6.8 Non-contact optical reading kilohms System (semiconductor laser used) REM OTE jack... - Page 119 Specif icat ions AC adapt or/ Recom m ended charger AC-VQ800 accessories Pow er requirements Battery pack 100 - 240 V AC, 50/60 Hz NP-F550 Pow er consumption DC adaptor/ charger (car battery 25 W adaptor) Charge mode: 35 VA (100 V AC), DC-VQ800 50 VA (240 V AC) DCC-L50...
-
Page 120: Using Your Camcorder Abroad
Using your cam corder abroad You can use your camcorder in any country or area with the AC adaptor/charger supplied with your camcorder within 100 V to 240 V AC, 50/60 Hz. Use a commercially available AC plug adaptor [ a ] , if necessary, depending on the design of the wall outlet [ b ] . -
Page 121: Quick Ref Erence
4 LCD screen/ touch panel (p. 18, 25) qd M ENU button (p. 21) 5 Input pen (p. 18) This mark indicates that this product is a genuine accessory for Sony video products. When purchasing Sony video products, Sony recommends that you purchase accessories with this “GENUINE VIDEO ACCESSORIES”... - Page 122 Ident if ying t he part s and cont rols qf Pow er zoom lever (p. 27) wa Focus ring (p. 43) qg PHOTO button (p. 22, 36) ws BACK LIGHT button (p. 40) qh Eyecup wd FOCUS button (p. 43) qj POWER sw itch (p.
- Page 123 Ident if ying t he part s and cont rols wk REM OTE jack ed AUDIO/ VIDEO output jack (p. 35) Connects the remote control cable of a ef S VIDEO output jack (p. 35) tripod or video flash (not supplied). eg M IC jack (PLUG IN POWER) wl i (headphones) jack Connect an external microphone...
- Page 124 Ident if ying t he part s and cont rols How t o af f ix t he f errit e cores The camcorder is supplied with ferrite cores. Use them to cables as shown in the diagrams below. You must affix the ferrite cores to comply with Part 15 of the FCC Rules.
- Page 125 Ident if ying t he part s and cont rols Rem ot e Com m ander The buttons that have the same name on the Remote Commander as on your camcorder function identically to the buttons on your camcorder. 1 ERASE button (p. 29, 33) 8 DISPLAY button (p.
- Page 126 Ident if ying t he part s and cont rols Operat ion indicat ors CAM ERA/INTERVIEW m ode STBY 10:00 REMAIN 0000 00:00 1 Standby/ Recording indicator (p. 22)/ qa PROGRAM AE indicator (p. 41) Recording mode indicator (p. 26) qs Backlight indicator (p.
- Page 127 Ident if ying t he part s and cont rols PLAY/EDIT m ode SHUF 01:23 REMAIN 0001 7.4.1999 2:58 00:07 1 Protect icon (p. 61) 9 M emo icon (p. 78) 2 Picture-in-picture indicator (p. 47) q; Title icon (p. 82) 3 M ark icon (p.
- Page 128 Ident if ying t he part s and cont rols AC adapt or/charger VTR/CAMERA WARNING BATTERY LIFE TIME TO CHG NORMAL FULL 9 TIM E TO CHG (charge) indicator 1 Terminal shutter (p. 10) (p. 13) 2 DC OUT connector (p. 15) 0 Time indicator (p.
- Page 129 Ident if ying t he part s and cont rols Connect ing cord 1 10BASE-T connecting jack (p. 102) 2 LINE IN jack (p. 23) Downloaded from: https://www.usersmanualguide.com/...
-
Page 130: Quick Function Guide
Quick Funct ion Guide Funct ions t o adjust exposure (in t he recording m ode) •In dark environments such as sunset, Sunset & moon mode (p. 41) fireworks, or general night views •Shooting backlit subjects BACK LIGHT (p. 40) •In spotlight, such as at the theater or a formal Spotlight mode (p. -
Page 131: Index
Index AC adaptor/charger ..10, 15 Illustration tool ....... 80 Recording Adjusting viewfinder ..... 26 Index display ......31 Interview ....... 36 Anti Ground recording ..93 ”InfoLITHIUM” battery ..13 Movie ........22 Auto date ......... 93 Initializing a disc ..... 67 Photo ........ - Page 132 MD DISCAM Homepage http://www.sony.com/mddiscam Sony Corporation Printed in Japan Downloaded from: https://www.usersmanualguide.com/...
- Page 133 This file has been downloaded from: www.UsersManualGuide.com User Manual and User Guide for many equipments like mobile phones, photo cameras, monther board, monitors, software, tv, dvd, and othes.. Manual users, user manuals, user guide manual, owners manual, instruction manual, manual owner, manual owner's, manual guide, manual operation, operating manual, user's manual, operating instructions, manual operators, manual operator, manual product, documentation manual, user maintenance, brochure, user reference, pdf manual Downloaded from:...