Table of Contents
Advertisement
Advertisement
Table of Contents
Troubleshooting

Related Manuals for Samsung ML-1710P


Summary of Contents for Samsung ML-1710P
- Page 1 SAMSUNG LASER PRINTER User’s Guide...
- Page 2 This manual is provided for information purposes only. All information included herein is subject to change without notice. Samsung Electronics is not responsible for any damages, direct or indirect, arising from or related to use of this manual. © 2003 Samsung Electronics Co., Ltd. All rights reserved.
-
Page 3: Table Of Contents
On Line/Error and Toner Save LEDs ... 1.6 Cancel button ... 1.7 ETTING Selecting a Location ... 2.3 Changing the Paper Size in the Tray ... 2.8 Printer Driver Features ... 2.14 Installing Printer software in Windows ... 2.15 RINTER... - Page 4 Using a Page Overlay ... 4.24 Deleting a Page Overlay ... 4.25 Using the Status Monitor ... 4.26 Opening the Status Monitor ... 4.26 Setting Up Locally Shared Printer ... 4.28 Windows 9x/Me ... 4.28 Windows NT/2000/XP ... 4.29 RINT...
- Page 5 Chapter 5: Maintaining the Toner Cartridge ... 5.2 Cleaning the Printer ... 5.5 Consumables and Replacement Parts ... 5.8 OLVING Chapter 6: Troubleshooting Checklist ... 6.2 Solving General Printing Problems ... 6.3 Clearing Paper Jams ... 6.7 Solving Print Quality Problems ... 6.12 Troubleshooting Error Messages ...
- Page 6 PPENDIX Chapter 7: Using Your Printer with a Macintosh ... 7.2 Installing Software for Macintosh ... 7.2 Printing a Document ... 7.4 Using Advanced Printing Features ... 7.6 Using Your Printer in Linux ... 7.10 Installing the Printer Driver ... 7.10 Changing the Printer Connection Method ...
- Page 7 Environmental and Safety Consideration Laser Safety Statement The printer is certified in the U.S. to conform to the requirements of DHHS 21 CFR, chapter 1 Subchapter J for Class I(1) laser products, and elsewhere, is certified as a Class I laser product conforming to the requirements of IEC 825.
-
Page 8: Ozone Safety
This printer contains advanced energy conservation technology that reduces power consumption when it is not in active use. When the printer does not receive data for an extended period of time, power consumption is automatically lowered. The energy star emblem does not represent EPA... -
Page 9: Radio Frequency Emissions
Radio Frequency Emissions FCC regulations This device has been tested and found to comply with the limits for a Class B digital device, pursuant to Part 15 of the FCC rules. These limits are designed to provide reasonable protection against harmful interference in a residential installation. This equipment generates, uses and can radiate radio frequency energy and, if not installed and used in accordance with the instructions, may cause harmful interference to radio communications. - Page 10 Directive 1999/5/EC. The product has been designed to work with the national PSTNs and compatible PBXs of the European countries: In the event of problems, you should contact the Euro QA Lab of Samsung Electronics Co., Ltd. in the first instance.
- Page 11 WARNING • Do not disassemble the printer. Doing so may give you an electric shock. • If you continuously print many pages, the surface of the output tray may become hot. Be careful not to touch the surface, especially for children.
- Page 12 NTRODUCTION Congratulations on the purchase of your Printer! This chapter includes: • Special Features • Printer Components • Understanding the Control Panel...
-
Page 13: Introduction
Special Features Your new printer is equipped with special features that improve the print quality, giving you a competitive edge. You can: Print with excellent quality and high speed • You can print at 600 dots per inch (dpi). See page 4.16. - Page 14 • This printer meets Energy Star guidelines for energy efficiency. Print in various environments • You can print in Windows 95/98/Me/NT 4.0/2000/XP. • Your printer is compatible with Linux and Macintosh. • Your printer comes with both the Parallel and the USB interface. NTRODUCTION...
-
Page 15: Printer Components
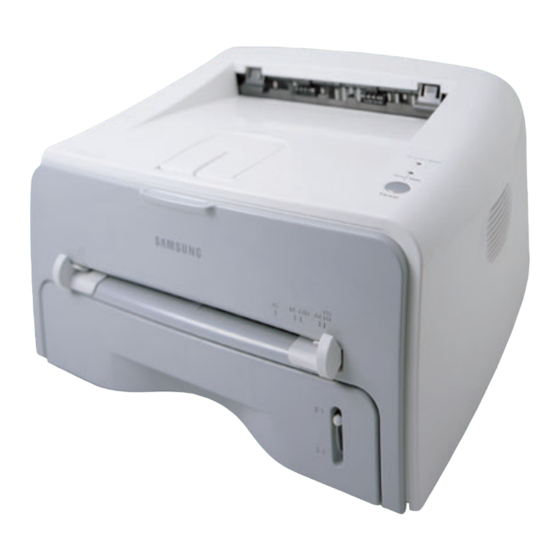
Printer Components Front View Cover Manual Feeder guide NTRODUCTION Output Support Front Tray Manual Feeder Top output tray (Face down) Control Panel Power switch Paper level indicator... -
Page 16: Inside View
Inside View Toner cartridge Front Cover Rear View Rear output tray (Face up) Parallel port Power receptacle Parallel port USB port NTRODUCTION... -
Page 17: Understanding The Control Panel
Understanding the Control Panel On Line/Error and Toner Save LEDs If the On Line/Error lights green, the printer is ready to print. If the On Line/Error lights red, the printer is experiencing an error, such as jammed paper, the open cover or the empty toner cartridge. -
Page 18: Cancel Button
Canceling print job Press this button during printing. The On Line/Error LED blinks while the print job is cleared from both the printer and the computer, and then return to Ready mode. This may take some time depending on the size of the print job. - Page 19 NTRODUCTION...
-
Page 20: Setting Up Your Printer
This chapter provides step by step information on setting up your printer. This chapter includes: • Unpacking • Installing the Toner Cartridge • Loading Paper • Connecting a Printer Cable • Turning the Printer on • Printing a Demo Page • Installing Printer Software... -
Page 21: Unpacking
Unpacking Remove the Printer and all accessories from the packing carton. Make sure that the printer has been packed with the following items: Notes: • If any items are missing or damaged, notify your dealer immediately. • Components may differ from one country to another. -
Page 22: Selecting A Location
Allow extra space for opening covers and tray. The area should be well-ventilated and away from direct sunlight or sources of heat, cold, and humidity. See the image below for clearance space. Do not place the printer close to the edge of your desk or table! Clearance Space •Front: 482.6 mm (enough space so that tray can be... -
Page 23: Installing The Toner Cartridge
Installing the Toner Cartridge Grasp the front cover and pull it toward you to open. Note: Because the printer is very light, it may be moved when you use it; for example, when opening/closing the tray or installing/ removing the toner cartridge. Be careful not to move the printer. - Page 24 Locate the cartridge slots inside the printer, one on each side. Grasp the handle and insert the cartridge in the printer until it snaps into place. Close the front cover. Make sure that the cover is securely closed. If the cover is not firmly closed, printing errors may occur when you print.
-
Page 25: Loading Paper
You can load approximately 250 sheets of paper in the tray. Pull the tray out of the printer. Note: Because the printer is very light, it may be moved when you use it; for example, when opening/closing the tray or installing/ removing the toner cartridge. - Page 26 Paper overloading may cause paper jams. Note: If you want to change the paper size in the tray, see “Changing the Paper Size in the Tray” on page 2.8. Slide the tray back into the printer. ETTING RINTER...
-
Page 27: Changing The Paper Size In The Tray
Changing the Paper Size in the Tray Pinch the rear guide as shown below to adjust for the paper length. Pinch the side guide as shown and slide it to the left flush against the paper. Notes: • Do not push the width guide far enough to cause the material to warp. -
Page 28: Connecting A Printer Cable
If you are a Macintosh user, you can use only a USB cable. Using a Parallel Cable Note: To connect the printer to the parallel port of the computer requires a certified parallel cable. You will need to buy a IEEE1284 compliant cable. - Page 29 3m in length. Make sure that both the printer and the computer are turned off. Plug the USB printer cable into the connector on the back of the printer. Connect the other end of the cable to the USB port on your computer.
-
Page 30: Turning The Printer On
To the AC outlet CAUTION: • The fusing area at the rear portion of the inside of your printer is hot when powered. Be careful not to be burned when accessing this area. -
Page 31: Printing A Demo Page
Printing a Demo Page Print a demo page to make sure that the printer is operating correctly. Hold down the Cancel button for about 2 seconds to print a demo page. The Demo page shows the printer’s current configuration. 2.12... -
Page 32: Installing Printer Software
• Status Monitor allows you to see the printing status of the printer. See page 4.26. If you are printing from Macintosh Go to “Using Your Printer with a Macintosh” on page 7.2, for information about installing the print software and printing from a Macintosh. -
Page 33: Printer Driver Features
Printer Driver Features Your printer drivers will support the following standard features: • Paper source selection • Paper size, orientation and media type • number of copies Table below lists a general overview of features supported by your printer drivers. -
Page 34: Installing Printer Software In Windows
Cancel. When the following window opens, connect your printer to the computer and turn the printer on. Then click Next. If the printer is already connected and turned on, this screen does not appear. Skip to the next step. - Page 35 After selecting the language and the component(s), click Next. •View User’s Guide: Opens Samsung ML-1710 Series User’s Guide. If your computer doesn’t have Adobe Acrobat, click on this option and it will automatically install Adobe Acrobat Reader for you.
- Page 36 When the test page prints out correctly, click Yes. If not, click No to reprint it. To register yourself as a user of Samsung Printers, select the checkbox and click Finish. You are now accessed to the Samsung web site.
- Page 37 Select Samsung ML-1710 Series and then Printer Maintenance. Select Repair and then click Next. Connect Samsung ML-1710 Series window opens. After connecting the printer, click Next. Select the components you want to reinstall and click Next. If you select Printer, follow steps 4 and 5 on page 2.16.
- Page 38 Removing the Printer software From the Start menu, select Programs. Select Samsung ML-1710 Series and then Printer Driver Maintenence . Select Remove and then click Next. Select the components you want to remove and click Next. When you are asked to confirm your selection, click OK.
-
Page 39: Viewing The User's Guide
After installing the printer software, you can view User’s Guide in PDF format at any time from your Windows desktop. From the Start menu, select Programs. Select Samsung ML-1710 Series and View User’s Guide. Adobe Acrobat automatically runs and then the User’s Guide opens. -
Page 40: Using Print Materials
Using Print Materials This chapter will help you understand types of paper you can use with this printer and how to properly load paper in the tray for the best print quality. This chapter includes: • Choosing Paper and Other Materials •... -
Page 41: Choosing Paper And Other Materials
• Size: You can use any size paper that fits easily within the paper adjusters of the paper feeder. • Weight: Your printer supports paper weight as follows: • 16~24 lbs (60~90 g/m • 16~43 lbs (60~163 g/m •... -
Page 42: Sizes And Capacities
Sizes and Capacities Size Plain Paper Letter (8.5 x 11 in.) Legal (8.5 x 14 in.) Executive (7.25 x 10.5 in.) Folio (8.5 x 13 in.) A4 (210 x 297 mm) B5 (182 x 257 mm) A5 (148 x 210 mm) A6 (105 x 148 mm) Envelopes No. -
Page 43: Guidelines For Paper And Special Materials
• Colored paper should be of the same high quality as white photocopy paper. The pigments must withstand the printer’s fusing temperature of 400°F (205°C) for 0.1 second without deterioration. Do not use paper with a colored coating that was added after the paper was produced. -
Page 44: Selecting The Output Location
Selecting the Output Location The printer has two output locations: the rear output tray and the top output tray. ƒ Top output tray To use the top output tray, be sure the rear output tray is closed. To use the rear output tray, open it. -
Page 45: Printing To The Rear Output Tray (Face Up)
Printing to the Rear Output Tray The printer always prints to the rear output tray if it is open. Paper comes out of the printer face-up, and each time a sheet of paper comes out, it falls down from the printer. -
Page 46: Loading Paper
If you do not want to print to the rear output tray then close the tray. The pages will stack on the top output tray. Loading Paper Proper paper loading helps prevent paper jams and ensure trouble-free printing. Do not remove the tray while a job is printing. -
Page 47: Using The Manual Feeder
Source from the software application, and then select the correct paper size and type. For details, see page 4.6. Press the Cancel button on the printer to start feeding. Printing is started. If you are printing multiple pages, load the next sheet after the first page prints out, and press the Cancel button. - Page 48 Select a job you want to cancel. For Windows 9x/Me, select Cancel Printing from Document menu. For Windows NT/2000/XP, select Cancel from Document menu. When the jobs are removed from the list. Turn the printer SING RINT ATERIALS...
-
Page 49: Printing On Envelopes
• Do not feed stamped envelopes. • Never use envelopes with clasps, snaps, windows, coated lining, or self-stick adhesives. These envelopes may severely damage the printer. Open the rear output tray. Load the envelopes into the manual feeder with the flap side down. - Page 50 4.6. Press the Cancel button to start feeding. Note: Please be careful when you open the rear cover. The inside of the printer maybe hot. Printing is started. Close the rear output tray after the printing is completed. 3.11...
-
Page 51: Printing On Labels
Exposed adhesive can also cause damage to printer components. • Do not feed a sheet of label through the printer more than once. The adhesive backing is designed for one pass through the printer. -
Page 52: Printing On Transparencies
For details, see page 4.6. Note: Please be careful when you open the rear cover. The inside of the printer maybe hot. Press the Cancel button to start feeding. Printing is started. Close the rear output tray after the printing is completed. - Page 53 For details, see page 4.6. Note: Please be careful when you open the rear cover. The inside of the printer maybe hot. Press the Cancel button to start feeding. Printing is started. Close the rear output tray after the printing is completed.
-
Page 54: Printing On Card Stock Or Custom-Sized Materials
Printing on Card Stock or Custom-sized Materials Postcards, 3.5 by 5.83 in.(index) cards and other custom-sized materials can be printed with this printer. The minimum size is 76 by 127mm(3.0 by 5.0 in.) and the maximum size is 216 by 356mm(8.5 by 14 in.). -
Page 55: Printing On Preprinted Paper
Printing on Preprinted Paper Preprinted paper is paper that has some type of printing placed on it before it is sent through the printer (paper that has a preprinted logo at the top of the page, for example). Guidelines •... - Page 56 Adjust the guides to fit the width of the paper stack. Load with the design face down, bottom edge towards the printer. Load with the design face up, top edge towards the printer. When you print, configure the paper source, type and size properly in the software application.
- Page 57 3.18 SING RINT ATERIALS...
-
Page 58: Printing Tasks
• Printing Multiple Pages on One Sheet of Paper (N- Up Printing) • Scaling Your Document • Fitting Your Document to a Selected Paper Size • Printing Posters • Setting Graphic Properties • Printing Watermarks • Printing Overlays • Using the Status Monitor • Setting Up Locally Shared Printer... -
Page 59: Printing A Document
The basic print settings are selected within the Print window. These settings include the number of copies and print range. To take advantage of the printer features provided by your printer, click Properties in the application’s print window and go to step 4. - Page 60 œ Landscape From the Paper tab, select the paper source, size and type. For further details, see page 4.6. Click other tabs on the top of the Samsung ML-1710 series Properties window to access other features, if needed. œ Portrait...
-
Page 61: Canceling A Print Job
For Windows 9x/Me/2000/NT, select Settings, and then Printers. For Windows XP, select Printers and Faxes. Select the Samsung ML-1710 Series printer. Click the right mouse button on the printer icon and: • In Windows 9x/Me, select Properties. • In Windows 2000/XP, select Printing Preferences. -
Page 62: Using A Favorite Setting
The printer will finish printing the page that is moving through the printer and delete the rest of the print job. Pressing Cancel cancels only the current job in the printer. If more than one print job is in the printer memory, Cancel must be pressed once for each job. -
Page 63: Setting Paper Properties
Setting Paper Properties Use the following options to set the basic paper handling needs when you access the printer properties. See page 4.2 for more information on accessing printer properties. Click the Paper tab to access various paper properties. ➀... - Page 64 Manual Feed source is used when you use the Manual Feeder to print using special materials. You have to load one sheet at a time into the the printer. see page 3.8. If the paper source is set to Auto Select, the printer automatically selects paper from the Manual Feeder first and then from the Tray.
-
Page 65: Using The Toner Save Mode
Using the Toner Save Mode Toner Save mode allows the printer to use less toner on each page. Selecting this option will extend the life of your toner cartridge and reduce your cost per page, but will reduce print quality. - Page 66 •On: Select this option to allow the printer to use less toner on each page. •Off: If you don’t need to save toner to print a document, select this option.
-
Page 67: Printing Multiple Pages On One Sheet Of Paper (N-Up Printing)
You can print up to 16 pages on one sheet. To change the print settings from your software application, access the printer properties. See page 4.2. From the Layout tab, choose Multiple Pages per Side in the Type drop-down list. - Page 68 Select the page order, if necessary. Right then Down then Down Right Click the Paper tab, select the paper source, size and type. Click OK and print the document. Left then Down then Down Left 4.11 RINTING ASKS...
-
Page 69: Scaling Your Document
Scaling Your Document You can scale your print job on a page. To change the print settings from your software application, access the printer properties. See page 4.2. From the Layout tab, select Reduce/Enlarge in the Type drop-down list. Enter the desired scaling rate in the Percentage input box. -
Page 70: Fitting Your Document To A Selected Paper Size
Fitting Your Document to a Selected Paper Size This printer feature allows you to scale your print job to any selected paper size regardless of the digital document size. This can be useful when you want to check fine details on a small document. -
Page 71: Printing Posters
9, or 16 sheets of paper, for the purpose of pasting the sheets together to form one poster-size document. To change the print settings from your software application, access the printer properties. See page 4.2. Click the Layout tab, select Poster in the Type drop-down list. - Page 72 Specify an overlap in millimeter or inch to make it easier to reconstruct the resulting poster. Click the Paper tab, select the paper source, size and type. Click OK and print the document. You can complete the poster by reconstructing the results. 4.15 RINTING ASKS...
-
Page 73: Setting Graphic Properties
Setting Graphic Properties Use the following Graphic options to adjust the print quality for your specific printing needs. See page 4.2 for more information on accessing printer properties. Click the Graphics tab to display the properties shown below. ➀ ➁... - Page 74 Property You can set advanced settings by clicking the ➂ Advanced Options button. Advanced Options Darkness Use this option to lighten or darken the image appearance in your print. • Normal: This setting is for normal documents. • Light: This setting is for bolder line widths or darker gray-scale images.
- Page 75 Description True-Type Options This option determines what the driver tells the printer about how to image the text in your document. Select the appropriate setting according to the status of your document. • Download as Bit Image: When this option is selected, the driver will download the font data as bitmap images.
-
Page 76: Printing Watermarks
“DRAFT” or “CONFIDENTIAL” printed diagonally across the first page or all pages of a document. There are several predefined watermarks that come with the printer, and they can be modified or you can add new ones to the list. Using an existing Watermark To change the print settings from your software application, access the printer properties. -
Page 77: Creating A Watermark
Creating a Watermark To change the print settings from your software application, access the printer properties. See page 4.2. Click the Extras tab, and click the Edit button in the Watermark section. The Watermarks window appears. You can enter the desired text message in the Watermark Message box. -
Page 78: Editing A Watermark
Editing a Watermark To change the print settings from your software application, access the printer properties. See page 4.2. Click the Extras tab, and click the Edit button in the Watermark section. The Watermarks window appears. Select the watermark you want to edit in the Current Watermarks list, and change the watermark message and the options. -
Page 79: Printing Overlays
To print a letter with your company’s letterhead, you do not need to load preprinted letterhead paper in the printer. You need only Regards tell the printer to print the letterhead overlay on your document. - Page 80 In the Overlays window, click Create Overlay. In the Create Overlay window, type a name of up to eight characters in the File name box. Select the destination path, if necessary. (The default is C:\Formover). Click Save. You will see the name in the Overlay List. Click OK or Yes until you complete creating.
-
Page 81: Using A Page Overlay
To print an overlay with a document: Create or open the document you want to print. To change the print settings from your software application, access the printer properties. See page 4.2. Click the Extras tab. Select the desired overlay from the Overlay drop-down list box. -
Page 82: Deleting A Page Overlay
Deleting a Page Overlay You can delete page overlays that are no longer used. In the printer properties window, click the Extras tab. Click Edit in the Overlay section. Select the overlay you want to delete from the Overlay List box. -
Page 83: Using The Status Monitor
Opening the Status Monitor Double click the Status monitor icon on the Windows task bar. Or, select Programs from Start, Samsung ML-1710 Series , and Samsung Printer Status Monitor. The Samsung ML-1710 Series Status monitor window appears. - Page 84 • Enable Error Indicator with Tray icon shows the blinking tray icon which indicates an error occurs in your printer. Note: When the Status monitor window appears to indicate an error, you can see the corresponding solution.
-
Page 85: Setting Up Locally Shared Printer
Setting Up Locally Shared Printer You can connect the printer directly to a selected computer, which is called “host computer”, on the network. The printer can be shared by other users on the network through a Windows 9x, Me, 2000, XP or NT 4.0 network printer connection. -
Page 86: Windows Nt/2000/Xp
From the Printer menu, select Sharing. Check the Shared box. (Windows NT) Check the Shared As box. (Windows 2000) Check the Share this printer box. (Windows XP) Fill in the Share Name field, and than click OK. (Windows NT) Fill in the Shared Name field, and then click OK. - Page 87 Select Local Port, and click New Port. Fill in the Enter a port name field, and enter the shared name. Click OK, and click Close. Click OK. (Windows NT) Click Apply, and click OK. (Windows 2000/XP) 4.30 RINTING ASKS...
-
Page 88: Maintaining Your Printer
Maintaining Your Printer This chapter provides suggestions for maintaining the toner cartridge and the printer. This chapter includes: • Maintaining the Toner Cartridge • Cleaning the Printer • Consumables and Replacement Parts... -
Page 89: Maintaining The Toner Cartridge
• Do not remove the toner cartridge from its package until ready for use. • Do not refill the toner cartridge. The printer warranty does not cover damage caused by using a refilled cartridge. • Store toner cartridges in the same environment as the printer. -
Page 90: Redistributing Toner
Push the toner cartridge down and remove it from the printer. Cautions: • Avoid reaching too far into the printer. The fusing area may be hot. • To prevent damage to the toner cartridge, do not expose it to light for more than a few minutes. -
Page 91: Replacing The Toner Cartridge
Note: If the toner gets on your clothing, wipe it off with a dry cloth and wash clothing in cold water. Hot water sets toner into fabric. Reinsert the toner cartridge into the printer. Ensure that the toner cartridge snaps into place. Close the front cover. Make sure that the cover is securely closed. -
Page 92: Cleaning The Printer
Note: While cleaning the inside of the printer, be careful not to touch the transfer roller (located underneath the toner cartridge). Oil from your fingers can cause print quality problems. - Page 93 Reinsert the toner cartridge and close the cover. Make sure that the cover is securely closed. If it is not firmly closed, printing errors may occur when you print. Plug in the power cord, and turn the printer on. AINTAINING RINTER...
- Page 94 This process will produce a page with toner debris, which should be discarded. Ensure that the printer is turned on and in the Ready mode with paper loaded in the tray. Press and hold down the Cancel button on the control panel for about 10 seconds.
-
Page 95: Consumables And Replacement Parts
Paper Feeding Roller Transfer Roller Pick-up roller Fuser Unit To purchase the consumables and replacement parts, contact Samsung dealer or the place where you bought your product. We strongly recommend that items be installed by a trained service personnel. AINTAINING RINTER... -
Page 96: Solving Problems
Solving Problems This chapter provides helpful information for what to do if you encounter an error while using your printer. This chapter includes: • Troubleshooting Checklist • Solving General Printing Problems • Clearing Paper Jams • Solving Print Quality Problems •... -
Page 97: Troubleshooting Checklist
• If a demo page does not print, check the paper supply in the input tray. • If the paper jams in the printer, go to “Clearing Paper Jams” on page 6.7. If there is a print quality problem, go to “Solving Print Quality Problems”... -
Page 98: Solving General Printing Problems
Solving General Printing Problems For problems with the operation of your printer, refer to the table for suggested solutions. Problem Possible Cause The Printer The printer is not does not print receiving power. The printer is not selected as the default printer. - Page 99 The maximum print speed of the printer is 16(A4) or 17(Letter) pages per minute. From the Start menu, choose Settings and Printers. Right-click the Samsung ML-1710 Serise printer icon, choose Properties, click the Details tab, and then choose the Spool Settings button.
- Page 100 The software application is malfunctioning. The operating system is malfunctioning. (ML-1710P Only) Solution Remove excess paper from the tray. If printing on special materials, use the manual feeder. Use only paper that meets the specifications required by the printer.
- Page 101 Adobe Illustrator. ATTENTION: If you have any printing problem after your printer prints about 60,000 pages, you must contact the customer service to replace the transfer roller. OLVING ROBLEMS Solution Redistribute the toner, if necessary. See page 5.3.
-
Page 102: Clearing Paper Jams
If a paper jam occurs, the On Line/Error LED on the control panel lights red. Find and remove the jammed paper. If it is invisible, look inside the printer. In the Paper Exit Area Note: Paper jams in this area may result in loose toner on the page. - Page 103 Loosen the paper if it is caught in the feed rollers. Then pull the paper gently out. Note: Please be careful when you open the rear cover. The inside of the printer is still hot. Close the rear output tray. Open and close the front cover. Printing can be resumed.
-
Page 104: In The Paper Feed Area
Remove any missfeed paper by pulling it out by the visible edge from the tray. Make sure that all of the paper is properly aligned in the tray. Slide the tray back into the printer. Open and close the front cover. Printing can be resumed. OLVING... -
Page 105: Around The Toner Cartridge
Push the toner cartridge down and remove it from the printer. Gently pull the paper toward you. Check that there is no other paper in the printer. Reinstall the toner cartridge, and then close the cover. Printing can be resumed. -
Page 106: Tips For Avoiding Paper Jams When Printing On The A5-Sized Paper
Open the input tray and load paper into the tray as shown below. Open the Samsung ML-1710 Series Properties window, set the paper size to A5(5.8x8.3 in.) from the Paper tab. From the Orientation option of the Layout tab, set the Rotate option to 90º. -
Page 107: Tips For Avoiding Paper Jams
Print quality problems can be resolved by following the checklist below. • Redistribute toner in the toner cartridge (see page 5.3). • Clean the inside of the printer (see page 5.5). • Adjust the print resolution from the printer properties (see page 4.16). -
Page 108: Solving Print Quality Problems
• If the entire page is light, the print resolution setting is too light or Toner Save Mode is on. Adjust the print resolution and Toner Save Mode in the printer properties. See page 4.16 and 4.8 respectively. • A combination of faded or smeared defects may indicate that the toner cartridge needs cleaning. - Page 109 See “Installing the Toner Cartridge” on page 2.4. • Parts of the printer may have toner on them. If the defects occur on the back of the page, the problem will likely correct itself after a few more pages.
- Page 110 • If characters are improperly formed and producing a wavy effect, the scanner unit may need service. Verify that it also occurs on a demo page by pressing the Cancel button on the control panel when the printer is ready. For service, contact a service representative. Page skew •...
- Page 111 180° in the feeder. • The transfer roller may be dirty. See “Cleaning the Inside” on page 5.5. • Check for leaking toner. Clean the inside of the printer. • The toner cartridge may not be installed properly. Remove the cartridge and reinsert.
- Page 112 • The toner cartridge may be defective. Install a new toner cartridge. See “Installing the Toner Cartridge” on page 2.4. • If the problem persists, the printer may require repair. Contact a service representative. Curl If the printed paper is curl or paper does not feed into the printer: •...
-
Page 113: Troubleshooting Error Messages
Troubleshooting Error Messages When the printer experiences an error, the control panel will indicate an error message with the indicator lights. Find the light pattern below that matches the printer light pattern and follow the solutions to clear the error. -
Page 114: Common Windows Problems
StartUp Group, then restart Windows. Reinstall the printer software. • Ensure that the cables are connected correctly and the printer is on. • If bi-directional communication is not turned on in the driver, it will also cause this message. -
Page 115: Common Macintosh Problems
Macintosh OS CD. • Make sure that you are using a high-quality cable. • Make sure that the printer is on the correct network. Select Network or AppleTalk Control Panel from Control Panels in the Apple menu and then choose the correct network. -
Page 116: Common Linux Problems
LPRng is defined as the first queue in /etc/printcap, therefore it is not possible for the Samsung Printer Package to change the default when some queues have otherwise been defined using printtool. - Page 117 CUPS (1.1.10 and before) have a bug preventing them from being processed correctly. When going through LLPR to print, the Printer Package will work around this issue by converting the data to regular PostScript. However, if your application bypasses LLPR and feeds EPS data to CUPS, the document may not print correctly.
- Page 118 Problem How do I specify the IP It can be specified in the “Add Printer” dialog of the address of my SMB configuration tool, if you don’t use the CUPS printing server? system. Unfortunately, CUPS currently doesn’t allow to specify the IP address of SMB printers, so you will have to be able to browse the resource with Samba in order to be able to print.
- Page 119 6.24 OLVING ROBLEMS...
-
Page 120: Appendix
PPENDIX This chapter includes: • Using Your Printer with a Macintosh • Using Your Printer in Linux • Printer Specifications • Paper Specifications... -
Page 121: Using Your Printer With A Macintosh
Using Your Printer with a Macintosh Your printer supports Macintosh systems with a built-in USB interface. When you print a file from a Macintosh computer, you can use the SPL driver to support your printer’s major printing features. Installing Software for Macintosh... - Page 122 USB connector. For more details, see page 2.10. Note: If you are using a USB hub, connect the printer’s cable to the first tier of the hub, or the printer may malfunction. If the printer doesn’t work with the hub, connect it directly to the USB port.
-
Page 123: Printing A Document
Click ML-1710, and close the Chooser window. The message window indicating that you have changed your current printer appears. Click OK. An SAMSUNG SPL II printer icon will be created on your desktop. Printing a Document When you print with a Macintosh, you need to check the printer software setting in each application you use. - Page 124 For details on the watermark options, see page 4.19. Note: Mac OS 9.1 doesn’t support the Watermark feature. Open the File menu and click Print. You will see the SAMSUNG SPL II Printer window. PPENDIX...
-
Page 125: Using Advanced Printing Features
Click Print when you finish setting the options. Using Advanced Printing Features The SAMSUNG SPL II Printer window contains five categories of advanced properties. Listed below is the name of each property. - Darkness/Quality - Layout... - Page 126 Darkness/Quality Layout Select the number of pages you want to print on one sheet of paper. The pages will appear decreased in size and arranged on the sheet. Select the print darkness. Select the print resolution. To print the border of each page, check this box.
-
Page 127: Background Printing
Color Background Printing Select a priority for your print job in the queue of jobs waiting to print, click one of the following: • Urgent: to print before any Normal priority job. • Normal: to print in the order the job is received. •... -
Page 128: Paper Source
Paper Source Select the corresponding paper source. If Auto Select is set, the printer automatically selects the print material from the paper feeder, according to the following order: Manual Feeder, Tray. PPENDIX... -
Page 129: Using Your Printer In Linux
When the Administrator Login window appears, type in “root” in the Login field and enter the system password. Note: You must log in as a super user (root) to install the printer software. If you are not, ask your system administrator. - Page 130 Note: If the CD-ROM does not automatically run, click the at the bottom of the window. When the Terminal screen appears, type in: cd /mnt/cdrom (the CD-ROM directory) [root@local /root]# ./setup.sh [root@local cdrom]# Select the installation type, either Recommended or Expert, and then click Continue.
- Page 131 Start. The Linux Printer Configuration window opens. Click the Add Printer icon on the toolbar at the top of the window. Note: Depending on the printing system in use, the Administrator Login window may appear. Type in “root” in the Login field and enter the system password.
- Page 132 If necessary, you can change the settings. Note: The options may differ depending on the printer in use. The Description and the Location field in the Queue screen may not appear depending on the printing system in use.
-
Page 133: Changing The Printer Connection Method
“linux-config” from the Terminal screen. When the Linux Printer Configuration window appears, click the Add Printer icon on the toolbar at the top of the window. Click the Connection tab at the top of the Add a Printer window. - Page 134 Proceed. Note: You must log in as a super user (root) to uninstall the printer software. If you are not, ask your system administrator. The message window which is asking your confirmation to proceed with the uninstallation appears. Click Yes.
-
Page 135: Using The Configuration Tool
Using the Configuration Tool The configuration tool allows the administrative tasks, including adding and removing new printer, and changing their global settings. Regular users can also run it to easily inspect job queues, examine the printer properties and changing their local preference. - Page 136 The Info tab shows general information about the printer. If you are an Internet user, you can click Go to the Web page for this printer to access the Samsung web page. Click the Job tab to inspect and manage the job queue for the selected printer.
-
Page 137: Changing Llpr Properties
Changing LLPR Properties You can fine tune the printer’s properties by opening the LLPR Properties window. To open the LLPR Properties window: From the application you are using, select the Print command. When the Linux LPR window opens, click Properties. - Page 138 HP-GL/2 format, which is used by some plotters. • Advanced - allows you to override the default settings for the printer. If you click the Save button at the bottom of the window, the options will be kept between LLPR session.
-
Page 139: Printer Specifications
Printer Specifications Print Speed Resolution First Printing Time Warmup Time Power Rating Power Consumption Acoustic Noise Toner Supply Toner Cartridge Life Duty Cycle Weight Package Weight External Dimensions (W x D x H) Operating Environment Emulation Random Access Memory (RAM) -
Page 140: Paper Specifications
This may be the result of improper handling, unacceptable temperature and humidity levels, or other variables over which Samsung has no control. • Before purchasing large quantities of paper, ensure the paper meets the requirements specified in this User’s Guide. -
Page 141: Supported Sizes Of Paper
(custom) Transparency Labels Envelopes a.The printer supports a wide range of media sizes. See “Printing on Card Stock or Custom-sized Materials” on page 3.15. b.Capacity may vary depending on media weight and thickness, and environ- mental conditions. Note: You may experience jams when using print materials with a length of less than 127 mm (5 in.). -
Page 142: Guidelines For Using Paper
• Do not use raised or embossed letterhead. • The printer uses heat and pressure to fuse toner to the paper. Ensure that any colored paper or preprinted forms use inks that are compatible with this fusing temperature (200 °C or 392 °F... -
Page 143: Paper Specifications
Paper Specifications Acid Content Caliper Curl in Ream Cut Edge Conditions Fusing Compatibility Grain Moisture Content Smoothness Paper Output Capacity Face-down output tray Face-up output slot 7.24 PPENDIX Category 5.5 ~ 8.0 pH 0.094 ~ 0.18 mm (3.0 ~ 7.0 mils) Flat within 5 mm (0.02 in.) Cut with sharp blades with no visible fray. -
Page 144: Printer And Paper Storage Environment
Paper storage environmental conditions directly affect the feed operation. Ideally, the printer and paper storage environment should be at or near room temperature, and not too dry or humid. Remember that paper is hygroscopic; it absorbs and loses moisture rapidly. - Page 145 7.26 PPENDIX...
- Page 146 5.7 demo page 2.12 document 4.2 fit to page 4.13 N-up 4.10 overlay 4.22 poster 4.14 scale 4.12 watermark 4.19 printer cable, connect 2.9 printer, clean 5.5 printer, sharing 4.28 problem Linux 6.21 Macintosh 6.20 windows 6.19 setting darkness 4.16 favorite 4.5...
- Page 147 4.16 software install 2.15 Linux 7.10 Macintosh 7.2 overview 2.13 system requirements 2.15 uninstall 2.19 specification paper 7.21 printer 7.20 status monitor, use 4.26 toner install 2.4 life 5.2 recycle 5.2 redistribute 5.3 replace 5.4 toner save 4.8 watermark create 4.20...
- Page 148 Visit us at: www.samsungprinter.com Home Rev.1.00...