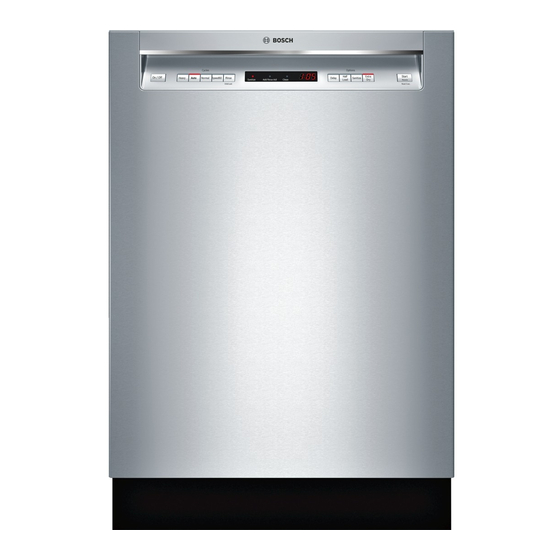
Bosch SHEM63W55N Repair Manual
Hide thumbs
Also See for SHEM63W55N:
- Installation instructions manual (88 pages) ,
- Operating instructions manual (88 pages) ,
- Quick start and safety manual (7 pages)
Table of Contents
Advertisement
Quick Links
Repair manual - Dishwasher
Concerning this document................................................................ 5
1.1 Important information ....................................................................................... 5
1.1.1
Purpose.............................................................................................. 5
1.1.2
Target group ....................................................................................... 5
1.1.3
Other applicable documents ................................................................ 5
1.2 Explanation of symbols .................................................................................... 5
1.2.1
Danger levels...................................................................................... 5
1.2.2
Hazard symbols .................................................................................. 5
1.2.3
Structure of the warnings..................................................................... 6
1.2.4
General symbols ................................................................................. 6
Safety......................................................................................................... 7
2.1 Qualification .................................................................................................... 7
2.2 General safety instructions ............................................................................... 7
2.2.1
All domestic appliances ....................................................................... 7
2.3 Measures after each repair .............................................................................. 8
Design and function............................................................................. 9
3.1 Operating and power modules.......................................................................... 9
3.1.1
Operating modules.............................................................................. 9
3.1.2
Power modules ................................................................................... 9
3.1.3
Adding PTC to power module pc boards............................................... 9
3.2 Dispensers.................................................................................................... 10
3.2.1
Dispenser operation .......................................................................... 10
3.2.2
Rinse aid sensor ............................................................................... 11
3.3 Heat pump .................................................................................................... 12
3.3.1
Heat pump basics ............................................................................. 12
3.3.2
Heat pump operation......................................................................... 13
3.3.3
Heat pump heater terminal cover ....................................................... 13
3.4 Drain pump ................................................................................................... 14
3.4.1
Drain pump basics ............................................................................ 14
3.4.2
Drain pump operation........................................................................ 14
3.4.3
Solving installation issues .................................................................. 14
3.5 Door latches.................................................................................................. 16
3.5.1
General information........................................................................... 16
3.5.2
Hall effect door sensor....................................................................... 16
3.5.3
Unintentional operation...................................................................... 16
2020-04-24_58300000218396_ara_en_c
3.6 Door springs .............................................................................................. . .... 17
3.6.1
3.6.2
3.6.3
3.7 Water inlet - condensation system............................................................... . .... 19
3.7.1
3.7.2
3.7.3
3.7.4
3.8 Sump ........................................................................................................ . .... 22
3.8.1
3.8.2
3.8.3
3.8.4
3.8.5
3.9 Water switch .............................................................................................. . .... 24
3.10 Safety systems .......................................................................................... . .... 25
3.10.1 Float ............................................................................................. . .... 25
3.10.2 Overflow channel........................................................................... . .... 25
3.10.3 Water inlet valve............................................................................ . .... 25
3.11 Aqua sensor .............................................................................................. . .... 26
3.12 Drain hose................................................................................................. . .... 27
3.13 Toe panels ................................................................................................ . .... 28
3.13.1 1-piece slotted toe panels .............................................................. . .... 28
3.13.2 1-piece toe panels with brackets..................................................... . .... 28
3.13.3 Using wrong toe panel screws ........................................................ . .... 29
3.14 Base ......................................................................................................... . .... 30
3.15 Tub ........................................................................................................... . .... 31
3.16 Water spray system ................................................................................... . .... 32
3.17 Serial label location and information ............................................................ . .... 33
3.17.1 Locating and using serial labels...................................................... . .... 33
3.17.2 Understanding the 18-digit factory serial # ...................................... . .... 33
3.17.3 Using rear labels when door labels are missing ............................... . .... 33
Fault Diagnosis .................................................................................... 35
Error code / fault display / signal ................................................................. . .... 35
E:01 error code .......................................................................................... . .... 35
Copyright by BSH Hausgeräte GmbH
Door spring operation .................................................................... . .... 17
Door spring changes for Push to Open / Auto Door Open ................ . .... 17
Using wrong toe panel screws ........................................................ . .... 18
Water inlet system ......................................................................... . .... 19
Water valve ................................................................................... . .... 19
Valve holder .................................................................................. . .... 20
Water valve installation issues........................................................ . .... 20
Sump basics ................................................................................. . .... 22
Suction cap ................................................................................... . .... 22
Drain pump cover .......................................................................... . .... 22
Drain check valve .......................................................................... . .... 22
Sump filters ................................................................................... . .... 23
Page 1 of 126
Advertisement
Table of Contents

Related Manuals for Bosch SHEM63W55N


Summary of Contents for Bosch SHEM63W55N
-
Page 1: Table Of Contents
Repair manual - Dishwasher 3.6 Door springs .................... 17 Concerning this document.............. 5 3.6.1 Door spring operation ................. 17 1.1 Important information .................. 5 3.6.2 Door spring changes for Push to Open / Auto Door Open ..... 17 1.1.1 Purpose.................... 5 3.6.3... - Page 2 Repair manual - Dishwasher E:02 error code ..................... 35 Wash cycle completed prematurely .............. 44 E:03 error code ..................... 35 Dishwasher doesn’t rinse or dry properly ............ 47 E:04 error code ..................... 35 Dishwasher shuts off .................. 48 E:05 error code ..................... 35 Can't select wash cycle ................
- Page 3 Repair manual - Dishwasher 5.2.1 6.3 Flipping dishwashers.................. 77 Clarifying LED positions .............. 62 5.2.2 6.4 Replacing outer doors .................. 79 Flashing Add Rinse Aid (far right) LED .......... 62 5.2.3 6.5 Replacing fascia panels................... 80 Flashing Clean (middle) LED ............. 62 5.2.4 6.6 Replacing operating modules..............
- Page 4 Repair manual - Dishwasher 6.22 Replacing water inlet valves ................. 106 6.22.1 Removing water inlet valves ............ 106 6.22.2 Installing water inlet valves .............. 107 6.22.3 Water valve connection issues............ 107 6.23 Replacing water inlet controls............... 109 6.24 Replacing floats (safety systems) .............. 111 6.25 Replacing sump parts (inside tub).............. 112 6.26 Replacing sumps .................. 114 6.26.1 Removing sumps ................ 114 6.26.2 Installing sumps ................ 115...
-
Page 5: Concerning This Document
Concerning this document Concerning this document 1.1 Important information 1.2 Explanation of symbols Read and observe chapter 2 "Safety" before performing any work! 1.2.1 Danger levels The warning levels consist of a symbol and a signal word. The signal word indicates 1.1.1 Purpose the severity of the danger. -
Page 6: Structure Of The Warnings
Concerning this document Hazard symbol Meaning Gen. symbol Meaning Danger of crushing Identification of a special tip (text and/or graphic) Identification of a simple tip (only text) Danger from hot surfaces Identification of a link to a video tutorial Identification of required tools Identification of required preconditions Danger from strong magnetic field Identification of a condition (if ..., then ...) -
Page 7: Safety
Safety Safety 2.1 Qualification 2.2 General safety instructions In Germany, only qualified electricians trained by BSH or an authorised body may per- 2.2.1 All domestic appliances form any repair work. Risk of electric shock due to live parts! In other countries, only similarly trained qualified personnel is permitted to perform the ¡... -
Page 8: Measures After Each Repair
Safety 2.3 Measures after each repair If the appliance is functional: ¡ Check according to VDE 0701 or country-specific regulations. ¡ Check external appearance, function and tightness. ¡ Document repair work, measured values and functional reliability. If the appliance is not functional: ¡... -
Page 9: Design And Function
Design and function Design and function 3.1.3 Adding PTC to power module pc boards 3.1 Operating and power modules Dishwashers have two control modules, an operating module in the fascia (control) panel and a power module in the base on the right side. 3.1.1 Operating modules Operating modules provide a user interface with displays, lights and buttons / touch pads. -
Page 10: Dispensers
Design and function ¡ The actuator is reset when the detergent door is opened so the detergent cover 3.2 Dispensers opens first the next time the coil is activated. The dispenser, located in the middle of the inner door, reliably dispenses detergent and ¡... -
Page 11: Rinse Aid Sensor
Design and function ¡ The rinse aid chamber holds around 90 ml of rinse aid, depending on how it's filled, and triggers the "Add rinse aid" LED when 45 ml is left. ¡ Without rinse aid, whether rinse aid has run out or the setting had been set to "0"... -
Page 12: Heat Pump
Design and function The heat pump (7), attached to the sump to the right of the drain pump (1), is access- 3.3 Heat pump ible from the right side of the dishwasher. 3.3.1 Heat pump basics The heat pump contains the heating element, motor speed sensor, two temperature sensors (NTC’s), motor and pump (head). -
Page 13: Heat Pump Operation
Design and function ¡ 3-pin motor terminal at the end of the motor. Impeller Guide wheel Inlet from sump Pump housing While water is being circulated, the BLDC (Brushless DC) motor senses the pump status based on the current (amp) draw of the motor windings: ¡... -
Page 14: Drain Pump
Design and function ¡ No pressure build-up (missing pump cover) 3.4 Drain pump ¡ Pump blockage ¡ Blocked or kinked drain hose 3.4.1 Drain pump basics Drain pump diagnostics: The BLDC (Brushless DC) 9-vane drain pump has variable speed and direction. The ¡... - Page 15 Design and function 3.4.3.2 Siphoning Siphoning may occur in any type of drain pump when low water flow allows a siphon (suction) to develop, pulling waste water back into the pump. Fig. 17: Siphoning Drain check valves along with air gaps / high loops prevent siphons from being created. 3.4.3.3 Johnson Tee applications For installations with a Johnson Tee, the Johnson Tee must be installed in the wall behind the dishwasher, no more than 50”...
-
Page 16: Door Latches
Design and function 3.5 Door latches Hall Effect sensor Door latches consist of two parts - a door latch and a Hall Effect sensor. The latch se- 3.5.2 Hall effect door sensor curely holds doors closed and the sensor senses when doors are open or closed. The Hall Effect sensor is a proximity sensor. -
Page 17: Door Springs
Design and function 3.6 Door springs 3.6.1 Door spring operation Fig. 23: Changes to door springs for Push to Open Spring clip Longer door spring Fig. 22: Door spring system New spring guide The door spring mechanism uses a “sliding” pulley and cord to provide proper tension Longer hinge cord and enable self-closing. -
Page 18: Using Wrong Toe Panel Screws
Design and function Fig. 25: New hinge lever 3.6.3 Using wrong toe panel screws Some installers have used long wood or drywall screws instead of the supplied toe panel screws. ¡ Long, sharp screws cut hinge cords (see below). ¡ Use the supplied toe panel screws. Fig. 26: Consequences of not using supplied toe panel screws ¡... -
Page 19: Water Inlet - Condensation System
Design and function 3.7 Water inlet - condensation system 3.7.1 Water inlet system The water inlet system lies next to the left side of the tub, filling water into the bottom left side of the tub. A vent above the water inlet aids water flow and allows condensa- tion to exit during drying. -
Page 20: Valve Holder
Design and function 3.7.4.1 Cross-threaded or stripped threads Spring Water inlet valves use a double inlet filter to help prevent clogging. Fig. 32: NPT threads (wrong, left) compared with hose threads (correct, right) Some installers / customers have cross-threaded / stripped valve threads or used wrong connectors (e.g. - Page 21 Design and function 3.7.4.3 Substituting inlet hose gaskets Rigid plastic gaskets / washers / seals in many (braided) inlet hoses are meant for metal water inlet valves, not plastic valves. ¡ Some installers / customers have overtightened hoses, causing leaking by crack- ing water valves.
-
Page 22: Sump
Design and function 3.8 Sump 3.8.1 Sump basics Filtered water drains into the sump, where it is pumped through the water switch into the spray arms or drained out. The sump provides mounts for the heat pump, drain pump, water switch, aqua sensor and drain check valve. Fig. 38: Sump interior with drain pump cover and suction cap Aqua sensor Drain pump cover... -
Page 23: Sump Filters
Design and function Fig. 39: Drain check valve detail Sump Drain check valve Flap 3.8.5 Sump filters The sump has several filter types: a fine filter screen, coarse filter and micro filter. Fig. 40: Sump filters Coarse filter Micro filter Fine filter screen 2020-04-24_58300000218396_ara_en_c Copyright by BSH Hausgeräte GmbH Page 23 of 126... -
Page 24: Water Switch
Design and function 3.9 Water switch Mounted to sumps, water switches consist of a motor-operated disk with seven holes, which rotates under three sump ports (upper / lower spray arms, top sprinkler) to provide precise water control. Fig. 42: Water directed to both spray arms / top sprinkler To upper spray arm To lower spray arm To top sprinkler... -
Page 25: Safety Systems
Design and function 3.10 Safety systems Several safety systems in dishwashers guard against leaking. Leaking water is directed into the base where it’s detected by the float switch, which stops the wash cycle, turns off the water valve (if it’s on) and turns on the drain pump. Even when the dishwasher is off, the float switch detects water, turning on the drain pump and generating an error code (e.g. -
Page 26: Aqua Sensor
Design and function The circuit board has an LED and sensor. The LED sends light across to the sensor - 3.11 Aqua sensor dirty water blocks the light and clean water allows the light to pass through. The sensor The aqua sensor, located above the drain pump, senses water cleanliness, allowing signal varies depending on how clean the water is and the power module adjusts wash the power module to shorten wash / rinse cycles to save energy. -
Page 27: Drain Hose
Design and function 3.12 Drain hose The drain hose is connected to the water level control, exiting the rear of the dish- washer near the water inlet valve. Fig. 50: Drain hose exiting rear of dishwasher base The drain hose connects directly to the customer drain without an adapter. Fig. 51: Drain hose end detail Straps in the rear corners of the base hold drain and inlet hoses in place so dishwasher racks can be deeper, while still allowing dishwashers to mount against walls and dish-... -
Page 28: Toe Panels
Design and function 3.13 Toe panels Depending on the model, dishwashers can come with 1-piece or 2-piece toe panels with holes or slots, with or without mounting brackets. The panel for your model is shown below. 3.13.1 1-piece slotted toe panels 1-piece slotted toe panels were used until around FD 9906, depending on the model, replaced by 1-piece toe panels with brackets. -
Page 29: Using Wrong Toe Panel Screws
Design and function ¡ Models without rubber aprons used 1-piece slotted toe panels. Fig. 55: 1-piece toe panels with brackets 3.13.3 Using wrong toe panel screws Some installers have used long wood or drywall screws instead of the supplied toe panel screws. ¡... -
Page 30: Base
Design and function 3.14 Base The plastic base assembly is cast into one piece and contains mounting provisions for all parts mounted to it. Fig. 57: Base detail 2020-04-24_58300000218396_ara_en_c Copyright by BSH Hausgeräte GmbH Page 30 of 126... -
Page 31: Tub
Design and function 3.15 Tub The ss tub isn’t available as a service part. The top, bottom and sides are made from 304 ss alloy and the back is made from 430 ss alloy. Fig. 58: Tub detail 2020-04-24_58300000218396_ara_en_c Copyright by BSH Hausgeräte GmbH Page 31 of 126... -
Page 32: Water Spray System
Design and function 3-level water spray system: 3.16 Water spray system ¡ It consists of lower / upper spray arms and a top sprinkler. Water is supplied to the upper spray arm and top sprinkler by a fill tube at the rear of the tub. ¡... -
Page 33: Serial Label Location And Information
Design and function ¡ The next 2 digits represent the month: 12 = December. 3.17 Serial label location and information ¡ The next 7 digits represent the model: 0293731 = SHP865WD6N. ¡ The next 5 digits represent the unit made that month: 00361 = 361st dishwasher 3.17.1 Locating and using serial labels made that month. - Page 34 Design and function When you determine the model, KI and FD #'s, record them for future repairs: ¡ Instruct customers to write their model and serial #’s in their Use & Care manuals. ¡ Order blank service replacement serial label [00618453], legibly write the model / serial #’s and ratings on it using permanent ink and affix it to the inner door (on the right side where production labels are affixed).
-
Page 35: Fault Diagnosis
Fault Diagnosis Fault Diagnosis Error code / fault display / signal Fault Possible cause Troubleshooting E:01 error code Faulty relay to heat pump heater ▶ Run test program - if E:01 error code reoccurs, replace power mod- ¡ Wash cycle completed prematurely ule. -
Page 36: E:07 Error Code
Fault Diagnosis Fault Possible cause Troubleshooting Door latch Hall sensor not detected ▶ Align door latch above Hall sensor. Faulty door latch Hall sensor 1. Check connections between door switch and power module. 2. Close door and measure voltage across door latch sensor. 1. - Page 37 Fault Diagnosis Fault Possible cause Troubleshooting E:15 error code Water in base activated float switch 1. Remove debris / obstructions from drain pump / drain hose. ¡ Far right LED flashes and E:15 shows on display 2. Make sure float and float switch aren't stuck. If float switch is faulty, ¡...
-
Page 38: E:21 Error Code
Fault Diagnosis Fault Possible cause Troubleshooting Pumps disconnected or harnesses are faulty ▶ Check wire harnesses and connectors between power module and heat / drain pumps - if any harness or connector is faulty, replace Far right LED flashes and E:01, E:20 (heat pump har- main wire harness. -
Page 39: E:27 Error Code
Fault Diagnosis Fault Possible cause Troubleshooting Faulty water switch or water switch motor 1. Run test program to check error codes for an E:26 error code. 2. - Measure your water switch resistance - if it's not correct, replace water switch or motor. 3. -
Page 40: Condensation / Humidity / Leakage
Fault Diagnosis Condensation / Humidity / Leakage Fault Possible cause Troubleshooting Suds Wrong detergent used ▶ Advise customer: Use only dishwasher detergent, not liquid dish detergent. (i.e. liquid dish detergent) Water leaks from top or sides of door Door seal misaligned or pulled from tub track Reposition door seal. - Page 41 Fault Diagnosis Fault Possible cause Troubleshooting Dishwasher issues Supply voltage drops due to bad connections 1. When the supplied power cord was used, make sure it's securely ¡ Far right LED flashes and E:01 shows on display plugged in at both ends. If it's faulty, replace it. ¡...
- Page 42 Fault Diagnosis Fault Possible cause Troubleshooting Faulty door latch Hall sensor 1. Check continuity / connections between door switch and power mod- ule. Replace any faulty harnesses. Far right LED flashes and E:06 shows on display 2. Hold a magnet over the Hall sensor (with the door open), just to the left of the left sensor screw.
- Page 43 Fault Diagnosis Fault Possible cause Troubleshooting Faulty pump relay ▶ Replace power module. Far right LED flashes and E:01 shows on display Pumps disconnected or faulty harnesses 1. Check continuity / condition of wire harnesses and connectors between power module and heat / drain pumps. Far right LED flashes and E:01, E:20 (heat pump har-...
-
Page 44: Wash Cycle Completed Prematurely
Fault Diagnosis Fault Possible cause Troubleshooting Faulty door latch Hall sensor 1. Check continuity / connections between door switch and power mod- ule. Replace any faulty harnesses. Far right LED flashes and E:06 shows on display 2. Hold a magnet over the Hall sensor (with the door open), just to the left of the left sensor screw. - Page 45 Fault Diagnosis Fault Possible cause Troubleshooting Pumps disconnected or faulty harnesses 1. Check continuity / condition of wire harnesses and connectors between power module and heat / drain pumps. Far right LED flashes and E:01, E:20 (heat pump har- ness) or E:23 (drain pump harness) shows on display A harness or terminal connector is faulty, replace main wire har-...
- Page 46 Fault Diagnosis Fault Possible cause Troubleshooting Installation issues Low voltage / excessive voltage drop ▶ Check house wiring connections. Make sure supply voltage is 98 - 120 VAC (L to N, not L to ╧) to Far right LED flashes and E:01 shows on display power module.
-
Page 47: Dishwasher Doesn't Rinse Or Dry Properly
Fault Diagnosis Fault Possible cause Troubleshooting Maintenance issues Heat pump is blocked / clogged ▶ Remove debris / obstructions from heat pump. Far right LED flashes and E:21 shows on display Water in sump 1. Drain water from sump. Far right LED is lit and E:22 shows on display 2. -
Page 48: Dishwasher Shuts Off
Fault Diagnosis Fault Possible cause Troubleshooting Dishwasher shuts off Supply voltage drops due to bad connections 1. When the supplied power cord was used, make sure it's securely ¡ Far right LED flashes and E:01 shows on display plugged in at both ends. If it's faulty, replace it. ¡... - Page 49 Fault Diagnosis Fault Possible cause Troubleshooting Installation issues Incorrect drain installation ▶ Remove garbage disposal plug. ¡ Garbage disposal plug wasn't removed ¡ Wash cycle completed prematurely ¡ Far right LED is lit and E:24 shows on display Incorrect drain hose installation 1.
-
Page 50: Dishwasher Drains Intermittently
Fault Diagnosis Fault Possible cause Troubleshooting Dishwasher drains intermittently Water in base activated float switch 1. Remove debris / obstructions from drain pump / drain hose. ¡ Dishwasher can’t be shut off 2. Make sure float and float switch aren't stuck. If float switch is faulty, ¡... -
Page 51: Dishwasher Won't Fill With Water
Fault Diagnosis Fault Possible cause Troubleshooting Inlet water flow rate too low ▶ Check water supply. Incoming pressure must be between 15 - 145 ¡ Dishwasher waits for water filling, then wash cycle psi (1 - 10 bar). abruptly stops ¡... -
Page 52: Water Switch Runs Continually
Fault Diagnosis Fault Possible cause Troubleshooting Power module or heat pump issues Faulty heater circuit 1. Check continuity between heat pump heating element and power ¡ Open - circuited module. If harness is faulty, replace it. ¡ Far right LED flashes and E:09 shows on display 2. -
Page 53: Aqua Sensor Doesn't Run During Wash Cycle
Fault Diagnosis Fault Possible cause Troubleshooting Faulty water switch or water switch motor Run test program to check error codes for an E:26 error code. E:26 error code won't show during wash cycle 2. With power off, measure water switch motor resistance (between ter- minals 1 –... -
Page 54: Rinse Aid Led Is Lit
Fault Diagnosis Fault Possible cause Troubleshooting Faulty dispenser actuator ▶ Wire harnesses are OK, check dispenser actuator operation: Far left / far right LED's flash and E:19 shows on dis- 1. If actuator operates, but doesn't open detergent dispenser cover, play replace dispenser. -
Page 55: Mechanical Damage
Fault Diagnosis Mechanical damage Fault Possible cause Troubleshooting Fascia panel is discolored or scratched Bleach based wipes, abrasive pad or harsh cleanser ▶ Advise customer: used to clean panel To use mild detergents with a soft damp cloth. Includes missing or smeared printing Rust spots on stainless steel (ss) Bleach or bleach based wipes used to clean door 1. -
Page 56: Standing Water In Bottom Of Dishwasher
Fault Diagnosis Fault Possible cause Troubleshooting Food debris near door seal 1. Clean food debris from door seal. 2. Advise customer: Door seals need to be cleaned. Standing water in bottom of dishwasher Previous wash cycle stopped before it finished 1. -
Page 57: Dishes Still Dirty
Fault Diagnosis Fault Possible cause Troubleshooting Dishwasher is connected to cold water supply ▶ Advise customer: To connect dishwasher to hot water supply. Low supply voltage 1. Run test program to check error codes for an E:29 error code. ¡ <... -
Page 58: Plastic Items Aren't Dry Or Have Water Stains
Fault Diagnosis Fault Possible cause Troubleshooting Plastic items aren't dry or have water stains Plastics don’t dry as well as cutlery or dishes 1. Advise customer: Plastics don't dry as well as metals, china or glass. Water is left on items or evaporates slowly, leaving –... -
Page 59: Cloudy Glasses
Fault Diagnosis Fault Possible cause Troubleshooting Cloudy glasses Glasses not dishwasher safe ▶ Advise customer: To reduce causes of glassware demineralization: Soft water replaces minerals in glasses 1. Use only dishwasher-safe glasses. ¡ Process is irreversible - cloudiness can't be re- 2. - Page 60 Fault Diagnosis Fault Possible cause Troubleshooting Residue in upper / top (cutlery) rack rails / slides Mixture of food and mineral deposits not flushed out with dishwasher use. Remove and clean rack rails / slides. ▶ White residue on tub Mineral (lime) film due to government mandated removal of phosphates from dishwasher detergents.
-
Page 61: Test
Test Test 5.1 Testing components 4. Check component operation by running the first 8 to 9 tests (depending on the model) of the CS test program below: These 8 to 9 tests (depending on the model) turn components on to test them. Test Display Duration... -
Page 62: Identifying Flashing Led Error Codes
Test 5.2.3 Flashing Clean (middle) LED 5.2 Identifying flashing LED error codes This can help you quickly identify flashing error codes LED's found in published error code lists. (Hall) door latch sensor Flashing LED's differ when occurring during wash cycles or gener- ated by CS test programs! ¡... -
Page 63: Flashing Sanitized & Clean Led's
Test Dispenser or heat pump (pump, not heater) 5.2.10 Flashing Rinse Aid and Add Salt displays ¡ Customers see flashing Add Rinse Aid (far right) LED , but CS test program shows flashing Sanitized Add Rinse Aid LED's. ¡ Faulty dispenser actuator or harness, faulty water inlet control, faulty heat pump motor winding or harness or heat pump blocked. -
Page 64: Customer Diagnosing Information
Test 5.3 Customer diagnosing information Display Symbol Description Cycle time remaining Sometimes customers will mention tones they've heard or error codes they've seen. 5.3.1 Reasons for end of cycle tone (“beep”) Rinse aid level is low The end of cycle tone (‘beep”) doesn’t only sound at the end of wash cycles. It can mean an error has occurred, but doesn’t have to –... -
Page 65: Dishwasher Won't Run Or Stops With Far Right (Sanitized) Light On
Test 5.4 Dishwasher won’t run or stops with far right (Sanitized) Dishwashers check heat and drain pumps before operating - problems with either prevents dishwashers from operating (i.e. power module light on couldn't communicate with the heat or drain pump): ¡... -
Page 66: Drain Installation / Maintenance Issues
Test Dishwasher runs (after you checked the door latch sensor with a magnet), the door latch is the issue: 1. Clean any debris from around the door seal. 2. Realign door, door latch or door seal. 3. Replace door latch, if faulty. 3. -
Page 67: Clearing Error Code E24 Drain Obstructions
Test 5.5.2 Correcting overly high drain connections 5.5 Clearing error code drain obstructions ¡ Error code can occur for drain connections > 50” (1.27 m). If a dishwasher doesn’t drain properly and / or shows an error code, the problem is ¡... -
Page 68: Loosening Tight Heat Pump Impellers
Test 1. Prepare dishwasher. 3. If the water drains out completely, the drain check valve may be faulty. 1. Drain water from the dishwasher base. 1. Release the safety float (2). If water flows back into the sump, the drain check 2. -
Page 69: Error Code E25 For Loose Drain Pump Covers
Test 5.6 Error code for loose drain pump covers If a dishwasher doesn’t drain properly and / or shows an E:25 error code, the problem could be the drain pump cover (4) wasn’t replaced properly (i.e. not completely seated and locked into position). ¡... -
Page 70: Heat Pump Terminal Measurements
Test 5.7 Heat pump terminal measurements 1. To check the 1200 W heater, measure the resistance between terminals 2 – 3. The resistance should be 9.3 Ω (at 77 ºF). If the resistance = ∞, replace the Required tools: faulty heat pump since the heater has failed. Multimeter Digital multimeter VC 850K [15000062]... -
Page 71: Protection Of Heater If There's No Water
Test 3. To check the motor, measure the resistances between terminals 1 - 2, 2 - 3 and 3 - 1. If resistances don't match 14.7 Ω (at 68 ºF), replace heat pump. Fig. 73: Heat pump motor wiring diagram – Motor 1 –... -
Page 72: Drain Pump Terminal Measurements
Test 5.8 Drain pump terminal measurements Required tools: Multimeter Digital multimeter VC 850K [15000062] There is a single 3-pin connector, connecting to the 3-pole BLDC pump motor. Prerequisite: Customer service error code program has been run. Error codes have been recorded. Power supply to dishwasher disconnected. -
Page 73: Water Switch Terminal Measurements
Test 5.9 Water switch terminal measurements Required tools: Multimeter Digital multimeter VC 850K [15000062] The 2-pin terminals connect to the single pole synchronous (exact speed) motor. Water switch 1 – 2: ~ 1400 Ω (@ 68 ºF) Prerequisite: Customer service error code program has been run. Error codes have been recorded. -
Page 74: Repair Access Chart
Repair Repair 6.1 Repair access chart Base cover removed→ Page 88 Access door latch Hall Effect sensors (1), dispensers (2), operating modules (3) ▶ Check here to find how to access the part you wish to test or replace. and fascia panels (4) from the front of dishwashers. Part Serviced Front Serviceable Side / Front / Rear... -
Page 75: Bottom Front Access
Repair 6.1.3 Bottom front access Required tools: Torx T20 screwdriver [00341279] Phillips screwdriver PH2 Pliers 160 mm [00341142] To provide better access for parts removed from the bottom front of dishwashers: ¡ Remove base cover to eliminate disconnecting and reconnecting all wire har- nesses. -
Page 76: Disconnecting And Pulling Out Dishwashers
Repair 6.2 Disconnecting and pulling out dishwashers 4. Turn off electricity and disconnect electric supply. ▶ Follow these instructions to pull out dishwashers for side or bottom front access. 6.2.1 Disconnecting and pulling out dishwashers Required tools: Phillips screwdriver PH2 Pliers 160 mm [00341142]... -
Page 77: Flipping Dishwashers
Repair 6.3 Flipping dishwashers 2. Remove the two (2) rear base screws. Required tools: Torx T20 screwdriver [00341279] Phillips screwdriver PH2 Long screwdriver Gloves Protective gloves Follow these instructions to flip dishwashers onto their backs for bottom access. Prerequisite: Dishwasher disconnected and pulled out→ Page 76 3. - Page 78 Repair 4. Unlatch front base latches from both hinge plates and slide the base off of the Caution hinge plates. Sharp edges on the sump! Cut injuries ▶ Wear protective gloves. Once the base is removed, all bottom accessible parts are accessible. Caution Sharp edges on the retaining tabs! Cut injuries...
-
Page 79: Replacing Outer Doors
Repair 6.4 Replacing outer doors Notice Required tools: Cutting wire harnesses while removing / installing outer doors.! Causing short circuits that can damage controls or cause electric Torx T20 screwdriver [00341279] shock. ▶ Remove / install outer doors carefully to insure harness wires Removing the outer door is needed for front access and for bottom access / flipping dishwashers on their backs. -
Page 80: Replacing Fascia Panels
Repair 6.5 Replacing fascia panels 2. Lift fascia panel out from door. Be careful to not damage wire harnesses. The slightly longer six (6) fascia screws are different than the shorter six (6) outer door Required tools: screws, so don’t mix screws when removing both fascia panel and outer door. Torx T20 screwdriver [00341279] Fascia panels and outer doors are both removed by removing inner door screws. -
Page 81: Replacing Operating Modules
Repair 6.6 Replacing operating modules 2. Remove handle trays before removing modules. To remove handle trays, carefully pry in plastic clips. Required tools: Torx T20 screwdriver [00341279] Slotted screwdriver Blade 4 mm x 0.8 mm x 100 mm, only [00342443] China Before replacing operating modules: ¡... -
Page 82: Replacing Door Latches And Sensors
Repair 6.7 Replacing door latches and sensors 1. Disconnect wire harness from sensor. Required tools: Magnet Permanent magnet The door latch is mounted on top of the tank and contains a magnet, not a microswitch. A Hall effect sensor in the door senses the magnet when the door is closed. Before replacing the latch or sensor, check if the latch is misaligned and cannot be read by the sensor by checking the sensor with a magnet. - Page 83 Repair 1. Lift off upper door seal. 2. Carefully pry tub clamp ears away from door latch. 3. To remove door latch, carefully unlatch front tab with a small screwdriver, lift latch up and forward (until rear tab clears) and lift latch up from dishwasher tub. 4.
-
Page 84: Replacing Dispensers
Repair 6.8 Replacing dispensers 3. Remove dispenser cable guide (1). If not done previously, peel back tape far enough (to provide slack) to free Required tools: cable guide. Torx T20 screwdriver [00341279] Slotted screwdriver Blade 4 mm x 0.8 mm x 100 mm, only [00342443] China Gloves... -
Page 85: Installing Dispensers
Repair 4. Carefully pry inner door flanges (1) away from the 8 locking tabs on the top, sides Caution & bottom of the dispenser (2). Sharp edges on the retaining tabs! Cut injuries ▶ Wear protective gloves. Carefully push faulty dispenser through the inner door (i.e. toward the dishwasher tub). - Page 86 Repair 2. Carefully push replacement dispenser through the inner door (i.e. from the dish- washer tub toward the front of the dishwasher). Snap inner door flanges into dispenser tabs until all are locked in. To aid installation, coat dispenser seal with rinse-aid. 3.
-
Page 87: Replacing Toe Panels
Repair 6.9 Replacing toe panels 2. Remove two Phillips #2 screws (1) and tilt bottom of 1-piece steel toe panel out and up from dishwasher (2). Save screws for reuse. Required tools: Phillips screwdriver PH2 Torx T20 screwdriver [00341279] ¡ Depending on the model, there is a 1-piece steel toe panel with or without the need for brackets. -
Page 88: Replacing Base Covers
Repair 6.10 Replacing base covers Required tools: Torx T20 screwdriver [00341279] Phillips screwdriver PH2 Pliers 160 mm [00341142] Prerequisite: Toe panel removed→ Page 87 Outer door removed→ Page 79 6.10.1 Removing base covers 1. Remove base insulation (on models with insulation). 2. Remove two (2) base cover screws. 3. -
Page 89: Replacing Door Springs
Repair 6.11.1 Removing door springs 6.11 Replacing door springs 1. Disconnect hinge cords from hinge levers. Required tools: 1. Release spring tension by opening door and moving both hinge cords from Torx T20 screwdriver [00341279] hinge levers to the base, parking cord notches onto base flanges. 2. -
Page 90: Door Spring Chart
Repair 3. Using needle nose pliers, pull onto spring brackets to slide door springs out from Spring Color Spring Force / Part # Wooden Panel Application the base. Length Weight Blue Fairly weak [00611337] 5.5 - 7 lbs. (2.5 Evolution / In- - 3.2 kg) tegra Weak... - Page 91 Repair 5. Insert cord ends into ends of both springs, making sure they’re seated properly. 6. Thread cords through pulleys. Using the parking position, slide cord holders onto hinge levers. Make sure cords are not damaged during installation. Fig. 85: Reconnecting hinge cord and hinge lever 7.
-
Page 92: Replacing Inner Doors
Repair 6.12 Replacing inner doors 2. Disconnect hinge cords from hinge levers. 1. Release spring tension by opening door and moving both hinge cords from Required tools: hinge levers to the base, parking cord notches onto base flanges. 2. Close the door to slide hinge levers out from hinge cords. Torx T20 screwdriver [00341279] Phillips screwdriver PH2... -
Page 93: Replacing Serial Label Onto Replacement Inner Door
Repair 6.12.2 Replacing serial label onto replacement inner door Caution When inner doors are replaced, dishwashers cannot be identified since their serial la- Sharp edges! bels are attached to the inner doors being replaced. Cut injuries 1. Instruct customers to write their model and serial #’s in their Use & Care manuals. ▶... -
Page 94: Replacing Overflow Troughs (Channels)
Repair 6.13 Replacing overflow troughs (channels) 3. Carefully lift trough up and away from dishwasher. Required tools: Phillips screwdriver PH2 Slotted screwdriver Blade 4 mm x 0.8 mm x 100 mm, only [00342443] China Only pull out dishwashers enough to clear hinges. Prerequisite: Dishwasher disconnected and pulled out→ Page 76 Toe panel removed→ Page 87 Outer door removed→ Page 79... -
Page 95: Replacing Lower Door Seals
Repair 6.14 Replacing lower door seals Prerequisite: Dishwasher disconnected and pulled out→ Page 76 Video tutorial Outer door removed→ Page 79 Required tools: Fascia panel removed→ Page 80 Torx T20 screwdriver [00341279] Wire harnesses disconnected from dispenser (after noting connections) and un- taped from inner door. Phillips screwdriver PH2 Toe panel removed→ Page 87 Pliers... - Page 96 Repair 2. Remove lower door seal. – Use care removing the inner door as the bottom of it is sharp. – The bottom screws (closest to the hinge) also hold the lower door seal. 3. Install in reverse order. 2020-04-24_58300000218396_ara_en_c Copyright by BSH Hausgeräte GmbH Page 96 of 126...
-
Page 97: Replacing Door Hinge Levers
Repair 6.15 Replacing door hinge levers 2. Pry open hinge bushing latches and lift hinge levers from hinge plates. Replace hinge bushings as they shouldn't be reused. Required tools: Torx T20 screwdriver [00341279] Phillips screwdriver PH2 Pliers 160 mm [00341142] 3. -
Page 98: Replacing Power Modules
Repair 6.16 Replacing power modules 3. While pushing down on left side of power module cover, lift up right side of cover to remove cover from power module. Required tools: Phillips screwdriver PH2 Slotted screwdriver Blade 4 mm x 0.8 mm x 100 mm, only [00342443] China The power module can be accessed from the right side of the dishwasher after pulling... - Page 99 Repair 6. Save cable guides - don't remove them from wire harnesses. Replacement cable guides are included with main wire harnesses and are not available separately. 7. Install in reverse order. 2020-04-24_58300000218396_ara_en_c Copyright by BSH Hausgeräte GmbH Page 99 of 126...
-
Page 100: Replacing Heat Pumps
Repair 6.17 Replacing heat pumps 1. Cut or twist off hose clamp to separate pump from adapter. Video tutorial Required tools: Hose clamp inner diameter 28 mm - 39 mm [00172272] Torx T20 screwdriver [00341279] Phillips screwdriver PH2 Slotted screwdriver Blade 4 mm x 0.8 mm x 100 mm, only [00342443] China... - Page 101 Repair 3. To remove the heat pump, rotate it clockwise (cw) to clear the pump adapter (1), 6. If necessary, remove the adapter by removing four screws. then slide it off of the sump (2). 7. Install in reverse order. 8.
-
Page 102: Replacing Drain Pumps
Repair 6.18 Replacing drain pumps Video tutorial Required tools: Phillips screwdriver PH2 Pliers 160 mm [00341142] Torx T20 screwdriver [00341279] ¡ Access the drain pump from the front of the dishwasher base by removing the toe panel and base cover. ¡... -
Page 103: Replacing Water Switches
Repair 6.19 Replacing water switches 2. To remove the water switch, unlatch the water switch housing from the sump us- ing a small flat blade screwdriver, rotate the housing counter-clockwise and lift it out from the sump. Video tutorial Required tools: Hose clamp inner diameter 28 mm - 39 mm [00172272]... -
Page 104: Replacing Drain Check Valves
Repair 6.20.2 Installing drain check valves 6.20 Replacing drain check valves ▶ Align the notch of the replacement drain check valve with the top of the sump, Required tools: then carefully slide the valve into the sump outlet until it clicks. Torx T20 screwdriver [00341279] Slotted screwdriver... -
Page 105: Replacing Aqua Sensors
Repair 6.21.2 Installing aqua sensors 6.21 Replacing aqua sensors ▶ Insert aqua sensor into the sump with its pc board vertical (1), then rotate it clock- Required tools: wise (cw) until it locks into place (2). Torx T20 screwdriver [00341279] Phillips screwdriver PH2 Pliers 160 mm... -
Page 106: Replacing Water Inlet Valves
Repair 6.22 Replacing water inlet valves 2. Unscrew supply hose (1) and adapter (2) from water valve. Required tools: Slotted screwdriver Blade 4 mm x 0.8 mm x 100 mm, only [00342443] China Pliers 160 mm [00341142] 6.22.1 Removing water inlet valves Access the water valve from the rear of the dishwasher base by pulling out the dish- 3. -
Page 107: Installing Water Inlet Valves
Repair 6. Loosen hose clamp and disconnect water inlet hose from rear of valve. Reconnection hints: ¡ Water connection: ¾” garden hose female. Inlet water pressure range: 5 - 120 psi (0.3 – 8.27 bars). ¡ When reconnecting the water supply hose to the water valve, don’t overtighten the elbow fitting. - Page 108 Repair Some installers / customers have removed water valve filters, thinking they were removable plugs / caps, dislodging or losing water flow restrictors, generating E:17 error codes from excessive inlet water pressure. ¡ Plastic filters hold flow restrictors in place - when filters are removed, flow restrict- ors come loose.
-
Page 109: Replacing Water Inlet Controls
Repair 6.23 Replacing water inlet controls 2. Unscrew water inlet ccw (counterclockwise) from inside of tub. Required tools: Torx T20 screwdriver [00341279] Phillips screwdriver PH2 Pliers 160 mm [00341142] The water inlet control is easily accessed from the left side of the dishwasher. It in- cludes a condensation vent, so there’s no separate condensation tube. - Page 110 Repair 6. Pull out drain (4) and sump (5) hoses from water inlet control (above). 7. Pull out water inlet control from tub. 8. Install in reverse order. 2020-04-24_58300000218396_ara_en_c Copyright by BSH Hausgeräte GmbH Page 110 of 126...
-
Page 111: Replacing Floats (Safety Systems)
Repair 6.24 Replacing floats (safety systems) Required tools: Torx T20 screwdriver [00341279] Phillips screwdriver PH2 Slotted screwdriver Blade 4 mm x 0.8 mm x 100 mm, only [00342443] China The float is easily accessed from the front of the dishwasher once the outer door and base cover are removed. -
Page 112: Replacing Sump Parts (Inside Tub)
Repair 6.25 Replacing sump parts (inside tub) 2. Unscrew microfilter counterclockwise (ccw) and lift out microfilter and fine filter screen. Required tools: Slotted screwdriver Blade 4 mm x 0.8 mm x 100 mm, only [00342443] China The inside of the sump is easily accessed for maintenance, for removing the drain pump cover and suction cap (“heat pump cover”) for cleaning drain / heat pump im- pellers. - Page 113 Repair 6. Reinstall parts in reverse order. When installing drain pump covers: – Snap in drain pump covers tightly to insure proper draining and to avoid drain pump cavitating. Drain pumps can't get adequate suction when drain pump covers aren't snapped in securely. –...
-
Page 114: Replacing Sumps
Repair 6.26 Replacing sumps Drain pump removed→ Page 102 Heat pump removed→ Page 100 Required tools: Aqua sensor removed→ Page 105 Torx T20 screwdriver [00341279] Water switch removed→ Page 103 Phillips screwdriver PH2 Drain check valve removed→ Page 104 Slotted screwdriver Blade 4 mm x 0.8 mm x 100 mm, only [00342443] Hose clamp [00172272] provided China... -
Page 115: Installing Sumps
Repair 3. Remove four (4) sump screws from inside of tub. 1. Install drain check valve. If replacement sump doesn't have one. 2. Install aqua sensor. For easier installation, coat aqua sensor o-ring with rinse-aid. 3. Install water switch. Installation hints: ¡... - Page 116 Repair 9. Use a gauge to check the clearance of the sump to the tub cutout. The clearance at all points around the sump must be 1mm or less. 10. Reinstall heat / drain pumps and sump drain hose. 11. Install parts into top of sump, including suction cap and drain pump cover. 12.
-
Page 117: Replacing Drain Hoses
Repair 6.27 Replacing drain hoses 1. Disconnect drain hose from customer drain line. The drain hose (1) and sump hose (2) enter the water inlet control at the left rear of the dishwasher. 2. Disconnect water inlet tube from water inlet control. Fig. 99: Drain hose connections at water inlet control 3. -
Page 118: Removing Sump Hoses
Repair 5. Slide the drain hose to the right to remove it from the base (below right). The hose 2. Slide sump drain hose up from the base and then out from the sump. The hose is is notched to be locked into the base and can’t be pulled straight out. notched to be locked into the base and can’t be pulled straight out from the sump. -
Page 119: Repairing Cutlery (Top) Drawers
Repair 6.28.2 Installing cutlery (top) drawers 6.28 Repairing cutlery (top) drawers 1. Open door and fully extend both rack slides. 6.28.1 Removing and disassembling cutlery (top) drawers 2. Lift front of drawer, carefully slide wheels over slide front endcaps until wheels clear them and lower front of drawer until wheels fully engage rack slides. -
Page 120: Assembling Rack Slides (Rails)
Repair 6.28.4 Assembling rack slides (rails) 1. Rotate bottom of rack slides in toward dishwasher (away from tub walls) and hook tops of rack slides over tub wheels. Line up round cutouts of rack slides with tub wheels and rotate bottoms of rack slides down. 2. -
Page 121: Replacing Trim Strips
Repair 6.29 Replacing trim strips 3. Attach replacement trim strips with two (2) screws per strip. Required tools: Phillips screwdriver PH2 Prerequisite: Dishwasher disconnected and pulled out→ Page 76 6.29.1 Removing side trim strips 1. Disconnect mounting brackets and pull out dishwashers, enough to clear side trim strips. -
Page 122: Removing Top Trim Strips
Repair 6.29.3 Removing top trim strips 1. Lift top trim strip up from tub flange. 2. Install in reverse order. 2020-04-24_58300000218396_ara_en_c Copyright by BSH Hausgeräte GmbH Page 122 of 126... -
Page 123: Leveling Dishwashers
Repair 6.30 Leveling dishwashers 2. Use a level to check if the dishwasher is level horizontally (side to side). If not, use a flat blade screwdriver to turn both front feet clockwise to raise them or counter- Required tools: clockwise to lower them until the dishwasher is level (1). Once the dishwasher is level, use screws to lock the front feet in position (2). -
Page 124: Electrical Connections
Repair 6.31 Electrical connections An optional junction box with cord, cord clip and strain relief is available to replace the power cord provided with the dishwasher - [SMZP- All electrical connections must be made according to national and local electrical CJB1UC]. -
Page 125: Stowing Supply Lines
Repair 6.32 Stowing supply lines 1. Route power cords, water inlet hoses and drain hoses in the recess behind dish- washer bases. 1. Stow cords and hoses in the cabinet next to the dishwasher (where connec- tions to customer supplies are made). 2. -
Page 126: Changing Customer Settings (Codings)
Repair 6.33 Changing customer settings (codings) 4. To change your setting, press button "C" repeatedly to scroll through setting choices. Dishwasher settings can be changed on the fascia panel and stored in memory until 5. To choose other settings to change, press button "A" to scroll through available changed again.