Table of Contents
Advertisement
Available languages
Available languages
Quick Links
Installation
Instructions
Questions on Installation? Call: 1-800-GECARES (US)
BEFORE YOU BEGIN
Read these instructions completely and
carefully.
IMPORTANT-
•
Save these instructions for
local inspector's use.
IMPORTANT-
•
Observe all governing codes
and ordinances.
• Note to Installer -
instructions with the customer.
• Note to Customer - Keep these instructions with
your Owner's Manual for future reference.
discarded, remove the washer and dryer doors.
• Inspect the dryer exhaust outlet and straighten
the outlet walls if they are bent.
• Service information and the wiring diagram are
located at the access panel.
• Do not allow children on or in the appliance.
Close supervision of children is necessary when
the appliance is used near children.
• Install the appliance where the temperature is
above 50°F
for satisfactory operation of
the control system.
•
Product failure due to improper installation is not
covered under the Warranty.
MATERIALS YOU WILL NEED
4" DIA. METAL DUCT
(RECOMMENDED)
4" DIA. FLEXIBLE METAL (SEMI-RIGID)
UL LISTED TRANSITION DUCT
(IF NEEDED)
KIT WX08X10077 (INCLUDES 2 ELBOWS)
4" DIA. FLEXIBLE METAL (FOIL TYPE)
UL LISTED TRANSITION DUCT
(IF NEEDED.)
4" COVER PLATE (IF NEEDED)
(KIT WE1M454)
2 Washer Hoses
In Canada, call 800.561.3344 or visit www.GEAppliances.ca
NOTE: Installation and service of this appliance requires basic
mechanical and electrical skills. It is your responsibility to
4" DUCT
4" DIA. METAL
EXHAUST
CLAMPS (2)
ELBOW
HOOD
OR
4" SPRING
CLAMPS (2)
GLOVES
DUCT TAPE
PARTS SUPPLIED
2 Rubber
Washers
WARNING:
• To reduce the risk of severe injury or death, follow all installation
instructions.
• Install the appliance according to these instructions and in accordance
with local codes.
• This appliance must be exhausted to the outdoors.
• Use only 4" rigid metal ducting for exhausting the clothes dryer to the
outdoors.
• DO NOT
UL listed and installed in accordance with the instructions found
in "Connecting The Dryer To House Vent" on page 8 of this manual.
Flexible venting materials are known to collapse, be easily crushed,
• Do not install or store this appliance in any location where it could be
exposed to water and or weather.
SAFETY
APPLIANCE POWER
CORD KIT
GLASSES
(NOT PROVIDED)
UL RATED
120/240V,30A
WITH 3 OR 4 PRONGS.
3/4" STRAIN
IDENTIFY THE PLUG
TYPE AS PER THE
RELIEF
HOUSE RECEPTACLE
UL RECOGNIZED
BEFORE PURCHASING
LINE CORD.
Rubber Washers
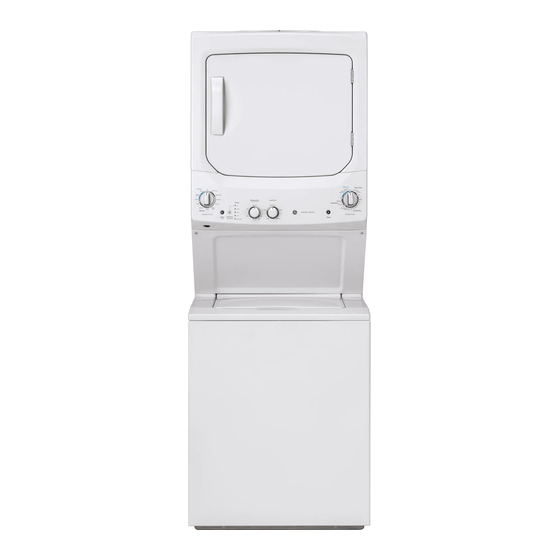
Unitized Electric
Washer/Dryer
www.GEAppliances.com (US).
RISK OF FIRE
TOOLS YOU WILL NEED
Slip Pliers
Phillips Screwdriver
233D1835P004
31-16728
Level
12-14 GE
Printed in Mexico
Advertisement
Table of Contents

Related Manuals for GE GUD27ESMMW


Summary of Contents for GE GUD27ESMMW
- Page 1 TYPE AS PER THE RELIEF GLOVES DUCT TAPE (IF NEEDED.) HOUSE RECEPTACLE 4" COVER PLATE (IF NEEDED) UL RECOGNIZED BEFORE PURCHASING (KIT WE1M454) LINE CORD. PARTS SUPPLIED Level 2 Rubber Rubber Washers Washers 233D1835P004 2 Washer Hoses 31-16728 12-14 GE Printed in Mexico...
-
Page 2: Installation Instructions
Installation Instructions INSTALLATION REQUIREMENTS LOCATION ELECTRICAL REQUIREMENTS CAUTION: electrical requirements. CAUTION: For personal safety, do not use an extension standards. This appliance should not be installed on rugs or cord or adapter plug with this appliance. Do not, under any exposed to weather. - Page 3 Installation Instructions 24” NOMINAL PRODUCT DIMENSIONS Gas Inlet 2.75” Water Inlets Vent 8.2” 74.5” 2” Drain outlet 4.2” * Dimension represents door closed including handle and knobs. NOTE: With feet set at mid position, feet can be adjusted ±.375”. 27” NOMINAL PRODUCT DIMENSIONS 47”...
-
Page 4: Electrical Requirements
Installation Instructions Minimum Clearance Other Than Alcove or Closet Installation must be given to provide adequate clearance for installation and service. PREPARING FOR INSTALLATION NEW HOME OR REMODELING FAUCETS/ OF NEW APPLIANCE DRAIN STANDPIPE/ELECTRICAL LOCATION Right side of REMOVING LINT FROM WALL EXHAUST Laundry Center. - Page 5 Installation Instructions GROUNDING INSTRUCTIONS (Cont.) A. Connect the 2 hot lines to the outer screws of the Do not modify the plug provided with the appliance. If it This appliance must be connected to a grounded, metal, terminal of block and to green ground screw on cabinet conductor must be run with the circuit conductors and 7.
-
Page 6: Exhaust Information
Installation Instructions EXHAUST INFORMATION (cont.) CONNECTING APPLIANCE USING 4-WIRE CONNECTION (MUST BE USED FOR 24” DRYER EXHAUST LENGTH MOBILE HOME INSTALLATION) (Cont.) RECOMMENDED MAXIMUM LENGTH Exhaust Hood Types Use only for short A. Connect the 2 hot lines to the outer screws of the Recommended run installations 4"... -
Page 7: Exhaust Connection
Installation Instructions STANDARD REAR EXHAUST EXHAUST CONNECTION WARNING - TO REDUCE THE RISK OF FIRE OR PERSONAL INJURY: • This appliance must be exhausted to the outdoors. • Use only 4” rigid metal ducting for the home exhaust duct. home exhaust duct. It must be installed in accordance with the instructions found in “Connecting The Dryer To House Vent”... - Page 8 Installation Instructions CONNECTING THE DRYER TO HOUSE VENT RIGID METAL TRANSITION DUCT • For best drying performance, a rigid metal transition duct is recommended. • Rigid metal transitions ducts reduce the risk of crushing and kinking. UL-LISTED FLEXIBLE METAL (SEMI-RIGID) TRANSITION DUCT enclosed spaces.
- Page 9 Installation Instructions • Apply duct tape as shown on the joint between the dryer 24” MODELS ONLY: internal duct and the straight duct pipe. DRYER EXHAUST TO RIGHT, LEFT OR WARNING- BOTTOM CABINET Internal duct joints must be WARNING - secured with tape, otherwise BEFORE PERFORMING they may separate and cause...
-
Page 10: Plumbing Information
Installation Instructions PLUMBING INFORMATION CONNECTING TO PLUMBING FACILITIES WATER SUPPLY REQUIREMENTS the appliance water inlet hose connections. The faucets connected. per square inch with a maximum unbalance pressure, selected. If not installed, install rubber washer in one end of hot water hose. Thread hot water hose onto connection labeled H at top rear DRAIN REQUIREMENTS If not installed, install rubber washer in one end of cold water... -
Page 11: Alcove Or Closet Installation
Installation Instructions MOBILE OR MANUFACTURED HOME DOOR VENTILATION OPENING (27” MODELS) INSTALLATION • Installation MUST conform to the MANUFACTURED HOME at top and bottom, is required. Air openings are required to CONSTRUCTION & SAFETY STANDARD, TITLE 24, PART be unobstructed when a door is installed. A louvered door 32-80 or, when such standard is not applicable, with with equivalent air openings for the full length of the door AMERICAN NATIONAL STANDARD FOR MOBILE HOME,... - Page 12 Installation Instructions SERVICING WARNING- LABEL ALL WIRES PRIOR TO DISCONNECTION WHEN SERVICING CONTROLS. WIRING ERRORS CAN CAUSE IMPROPER AND DANGEROUS OPERATION AFTER SERVICING/INSTALLATION. For replacement parts and other information, refer to Owner’s Manual for servicing phone numbers. Please go to www.GEAppliances.com or mail in your Product Registration Card.
-
Page 13: Instructions D'installation
Instructions Laveuse/Sécheuse D’Installation Question sur l’installation? Appelez au 800.561.3344 (Canada) Ou visitez notre site web: www.electromenagersge.ca AVANT DE COMMENCER AVERTISSEMENT - RIESQUE D’INCENDIE Lisez les instructions complètement et avec • Pour réduire les risques de blessures graves ou de mort, suivez les instructions attention. - Page 14 Instructions d’Installation CONDITIONS D’INSTALLATION DEL’EMPLACEMENT CONDITIONS ELECTRIQUES Cet appareil doit être installé sur un sol solide pour minimiser PRUDENCE: Avant de brancher la laveuse, lisez les les vibrations durant le cycle d’essorage. Le sol en béton est PRUDENCE: Pour votre propre sécurité, n’utilisez pas ne devrait pas être installé...
- Page 15 Instructions d’Installation DIMENSIONS NOMINALES DU PRODUIT 24” *23.75” 43” 17.9” Entrée du gaz Arrivée d’eau arrière 2.75” 8.2” 74.5” 2” 51” 37” 33.25” 32.7” arrière 4.2” 27.325” 19.1” 23.75” * Dimensions lorsque les portes sont fermées incluant les poignées et les boutons. NOTE: Dimensions en pieds, correspondant á...
-
Page 16: Avertissement - Pour
Instructions d’Installation Espace minimum pour une installation autre que dans un alcôve ou un placard considérations doivent être données pour fournir un espace adéquat pour l’installation et la réparation. SE PREPARER POUR L’INSTALLATION NOUVELLE MAISON ET ROBINETS REMODELES D’UN NOUVEL APPAREIL / LE TUYAU DE VIDANGE A L’EGOUT / EMPLACEMENT ELECTRIQUE ENLEVER LES PELUCHES DE L’OUVERTURE... - Page 17 Instructions d’Installation INSTRUCTIONS DE MASSE (suite) 5. Branchez le cordon électrique de la manière suivante: elle n’entre pas dans la prise, faites installer une prise terre doit être exécuté avec les conducteurs du circuit 7. Assurez la connexion du cordon électrique au 8.
- Page 18 Instructions d’Installation 24” LONGUEUR D’ECHAPPEMENT BRANCHER L’APPAREIL EN UTILISANT UNE CONNEXION TETRAPHASEE (DOIT Types de Capuchons d’echappement ETRE UTILISEE POUR L’INSTALLATION Utilise seulement pour les Installations de petites distances DANS LES MOBILES HOMES) (suite) 4” DIA 4” DIA 4” DIA 4”...
- Page 19 Instructions d’Installation ECHAPPEMENT ARRIERE STANDARD BRANCHEMENT DE L’ECHAPPEMENT (Ventilé au-dessous du niveau du sol) AVERTISSEMENT - POUR REDUIRE LES RISQUES D’INCENDIE OU DE BLESSURES PERSONNELLES: • Cet appareil doit avoir un système d’échappement vers l’extérieur. • Utilisez seulement de la tuyauterie rigide en métal de 4”...
- Page 20 Instructions d’Installation FAIRE BRANCHER LA SECHEUSE A L’AERATION DE LA MAISON TUYAU RIGIDE DE TRANSITION EN METAL • Pour les meilleures performances de séchage possibles, le tuyau de transition rigide en métal es trecommandé. • Les tuyaux de transition rigides en métal réduisent le risque d’écrasement et de noeuds.
- Page 21 Instructions d’Installation • Appliquez le rouleau adhésif comme il est montré sur UNIQUEMENT POUR MODELES DE 24 PO duit. ECHAPPEMENT DE LA SECHEUSE PAR AVERTISSEMENT- LA DROITE, PAR LA GAUCHE OU PAR Les joints du tuyau interne LE HAUT DE COFFRAGE doivent être bien attachés avec du scotch, sinon ils pourraient AVERTISSEMENT...
- Page 22 Instructions d’Installation INFORMATION SUR LA PLOMBERIE BRANCHER LA PLOMBERIE CONDITIONS DE L’APPROVISIONEMENT EN EAU puissent être branchés. avec un maximum de pression déséquilibrée, un sélectionnée. chaude et d’eau froide devraient être fournies. de l’arrivée d’eau chaude sur la machine. Introduisez le tuyau d’eau sur le branchement marqué...
- Page 23 Instructions d’Installation VENTILATION DE L’OUVERTURE INSTALLATION POUR LES MOBILES DEPORTE (MODELES 27”) HOMES • L’installation DOIT être conforme aux STANDARDS DE en bas, est requis. Les ouvertures d’air sont tenues d’être dégagées CONSTRUCTION ET DE SECURITE DU MOBILE HOME, TITRE lorsqu’une porte est installée.
- Page 24 Instructions d’Installation REPARATION AVERTISSEMENT – MARQUEZ TOUS LES FILS AVANT LE DEBRANCHEMENT LORSQUE VOUS EFFECTUEZ UN CONTROLE POUR REPARATION. LES ERREURS DE BRANCHEMENT PEUVENT CAUSEES DES PROBLEMES DE FONCTIONEMENT APRES REPARATION ET D’INSTALLATION. Pour les pièces de rechange et autres informations, veuillez reporter au Manuel de l’Utilisateur pour les numéros de téléphone du service après vente.