Table of Contents
Advertisement
Quick Links
Advertisement
Table of Contents

Related Manuals for Zanussi ZWF142F1G2


Summary of Contents for Zanussi ZWF142F1G2
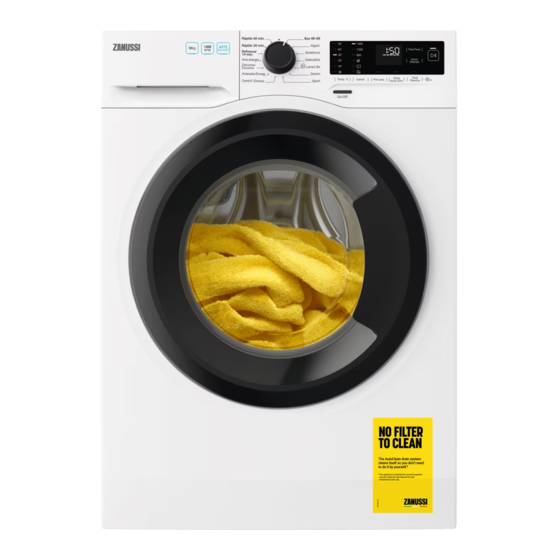
- Page 1 User Manual GETTING STARTED? EASY. ZWF142F1G2 EN User Manual Washing Machine...
-
Page 2: Safety Information
VISIT OUR WEBSITE TO: Get usage advice, brochures, trouble shooter, service and repair information: www.zanussi.com/support SAFETY INFORMATION Before beginning the installation and use of this appliance, carefully read the supplied instructions. The manufacturer is not responsible for any injuries or damage that are the result of incorrect installation or usage. -
Page 3: General Safety
GENERAL SAFETY This appliance is for washing domestic-type, machine-washable • laundry only. This appliance is designed for single household domestic use • in an indoor environment. This appliance may be used in, offices, hotel guest rooms, bed • & breakfast guest rooms, farm guest houses and other similar accommodation where such use does not exceed (average) domestic usage levels. -
Page 4: Safety Instructions
SAFETY INSTRUCTIONS INSTALLATION • Make sure not to cause damage to the mains plug and to the mains cable. Should the mains The installation must comply with cable need to be replaced, this must be carried relevant national regulations. out by our Authorised Service Centre. •... -
Page 5: Product Description
SERVICE are intended to withstand extreme physical conditions in household appliances, such as • To repair the appliance contact the Authorised temperature, vibration, humidity, or are intended Service Centre. Use original spare parts only. to signal information about the operational •... -
Page 6: Technical Data
Rating plate Mains cable Feet for levelling the appliance Transit bolts Drain hose Hose support Inlet hose connection The rating plate reports the model name (A) , product number (B), electrical ratings (C) and serial number (D). Mod. xxxxxxxxx Prod.No. 910000000 00 000V ~ 00Hz 0000 W 00000000... -
Page 7: Information For Installation
2. Put the packaging element on the floor behind 5. Put the plastic caps, that you find in the user the appliance and carefully put it down onto its manual bag, in the holes. rear side. Remove the polystyrene protection from the bottom. - Page 8 45º 45º 20º 20º Make sure that the plastic guide cannot move when the appliance drains and the drain hose end is not immersed in the water. There may be a 2. Position it toward left or right depending on the return of dirty water into the appliance.
- Page 9 OR FROM AUTHORISED DEALER If you install the appliance on a plinth that is not an Read carefully the instructions supplied with the accessory supplied by ZANUSSI, secure the accessory. appliance in the fixing plates. Read carefully the instructions supplied with the Only appropriate accessories accessory.
-
Page 10: Stacking Kit
STACKING KIT WARNING! Do not put the tumble The tumble dryer can be stacked on the top of the dryer under the washing machine. washing machine only by using the correct Verify the compatible stacking kit by stacking kit. checking the depth of your appliances. CONTROL PANEL SPECIAL FEATURES •... -
Page 11: Control Panel Description
CONTROL PANEL DESCRIPTION Programme dial Centrif. reduction options touch button Display • No Spin option Inicio Diferido touch button • Rinse Hold option Flexi Time touch button • Night option Temp. ºC touch button Inicio/Pausa touch button On/Off push button Fácil Plancha touch button Extra Aclar./Enx. -
Page 12: Dial And Buttons
Door locked indicator. Delay start indicator. The digital indicator can show: • Programme duration (e. g. • Delay time (e. g. • Cycle end ( • Warning code (e.g. Flexi Time bars level indicator. Drum clean indicator. Child safety lock indicator. Add garments indicator. - Page 13 regularly to reduce creasing. You must drain the The display shows the indicator and the water to unlock the door. selected delay time. After touching the Inicio/Pausa As the programme is very quiet, it is suitable for button, the appliance begins the countdown use at night time when cheaper electricity tariffs and the door is locked.
-
Page 14: Programme Chart
PROGRAMMES PROGRAMME CHART Reference spin Programme speed Programme description Default temperature Maximum load Spin speed (Type of load and level of soiling) Temperature range range Eco 40-60 1400 rpm 10 kg White cotton and fast-coloured cotton. (1400- 800 Normally soiled items. The energy consump- 40 °C rpm) tion decreases and the time of the washing... - Page 15 Reference spin Programme speed Programme description Default temperature Maximum load Spin speed (Type of load and level of soiling) Temperature range range 1400 rpm 10 kg White cotton items. This programme removes Anti-Alergia (1400- 800 micro-organisms thanks to a washing phase 60 °C rpm) with the temperature maintained above 60°C...
- Page 16 Programme options compatibility Programme ■ ■ ■ ■ ■ ■ ■ Eco 40-60 ■ ■ ■ ■ ■ ■ ■ ■ ■ Algod. ■ ■ ■ ■ ■ ■ ■ ■ ■ Sintéticos ■ ■ ■ ■ ■ ■ Delicados ■...
-
Page 17: Acoustic Signals
Liquid for col- Delicates Programme Liquid Universal Special Universal powder oureds woollens ▲ ▲ ▲ Sport ▲ ▲ ▲ Oscuros/Escuros ▲ ▲ ▲ Anti-Alergia Refrescar 14 min. ▲ ▲ ▲ ▲ Rápido 30 min. ▲ ▲ ▲ Rápido 60 min. 1) At temperature higher than 60 °C the use of powder detergent is recommended. -
Page 18: Daily Use
DAILY USE WARNING! Refer to Safety chapters. ACTIVATING THE APPLIANCE 1. Connect the mains plug to the mains socket. 2. Open the water tap. 3. Press the On/Off button for a few seconds to activate the appliance. A short tune sounds. LOADING THE LAUNDRY 1. -
Page 19: Setting A Programme
SETTING A PROGRAMME Always follow the instructions that you 1. Turn the programme dial to select the desired find on the packaging of the detergent washing programme. products, but we recommend that you do not exceed the maximum indicated The indicator of the Inicio/Pausa button level. - Page 20 Changing the delay start after the countdown 3. Touch the button Inicio/Pausa again. has started The washing programme continues. To change the delay start: CANCELLING A RUNNING PROGRAMME 1. Touch the Inicio/Pausa button to pause the appliance. The related indicator flashes. 1.
-
Page 21: Hints And Tips
The programme or the delay start continues. • The drum still turns at regular intervals to prevent creases in the laundry. • The door stays locked. • You must drain the water to open the door: 1. If necessary, touch the Centrif. button to decrease the spin speed proposed by the appliance. -
Page 22: Stubborn Stains
• Some coloured items can discolour with the first Special stain removers are available. Use the wash. We recommend that you wash them special stain remover that is applicable to the type separately for the first couple of times. of stain and fabric. •... -
Page 23: Care And Cleaning
water and time (the environment is protected drying your laundry in a tumble dryer. This too!). will save energy during drying! • Loading the appliance to the maximum WATER HARDNESS capacity indicated for each programmes helps to reduce energy and water If the water hardness in your area is high or consumption. - Page 24 MAINTENANCE WASH Always obey the instructions that you The repeated and prolonged use of low find on the packaging of the product. temperature programmes can cause detergent deposits, fluff residues, bacterial growth inside the DOOR SEAL WITH DOUBLE LIP TRAP drum and the tub.
-
Page 25: Cleaning The Inlet Hose And The Valve Filter
CLEANING THE INLET HOSE AND THE VALVE FILTER 45° 20° EMERGENCY DRAIN 3. Put the two ends of the inlet hose in a container and let the water flow out of the If the appliance cannot drain the water, carry out hose. -
Page 26: Troubleshooting
TROUBLESHOOTING WARNING! Refer to Safety chapters. ALARM CODES AND POSSIBLE FAILURES The appliance does not start or it stops during operation. First try to find a solution to the problem (refer to the tables). WARNING! Deactivate the appliance before carrying out any check. With some problems, the display shows an alarm code and the Inicio/ Pausa button may flash continuously:... - Page 27 If the display shows other alarm codes, deactivate and activate the appliance. If the problem continues, contact the Authorised Service Centre. In case of different problem with the washing machine check the table below for possible solutions. Problem Possible solution •...
-
Page 28: Consumption Values
Problem Possible solution Too much foam in the • Reduce the quantity of detergent. drum during the wash- ing cycle. After the washing cycle, • Make sure that the flap is in the correct position (UP for powder deter- there are some deter- gent - DOWN for liquid detergent). - Page 29 ACCORDING TO COMMISSION REGULATION EU 2019/2023 Eco 40-60 pro- Litres hh:mm °C gramme Full load 0.860 70.0 3:50 53.00 1351 Half load 0.465 55.0 2:55 53.00 1351 Quarter load 0.305 40.0 2:35 54.00 1351 1) Maximum spin speed. Power consumption in different modes Off (W) Stand-by (W) Delay start (W)
-
Page 30: Environmental Concerns
ENVIRONMENTAL CONCERNS with the symbol with the household waste. Recycle materials with the symbol . Put the Return the product to your local recycling facility or packaging in relevant containers to recycle it. Help contact your municipal office. protect the environment and human health by recycling waste of electrical and electronic appliances. - Page 32 WWW.ZANUSSI.COM/SHOP...