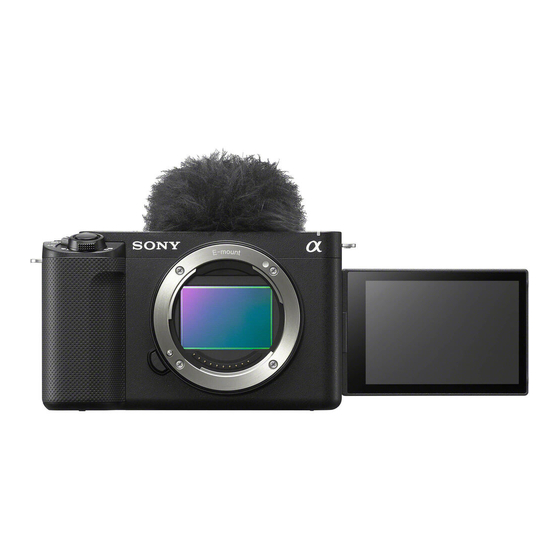
Sony ZV-E1 Startup Manual
Interchangeable lens digital camera
Hide thumbs
Also See for ZV-E1:
- Startup manual (147 pages) ,
- Help manual (526 pages) ,
- Quick start manual
Advertisement
Quick Links
Interchangeable Lens Digital Camera
E-mount
Startup Guide
ZV-E1
About the "Help Guide"
For detailed instructions on using the camera, refer
to the "Help Guide" (web manual).
https://rd1.sony.net/help/ilc/2310/h_zz/
ZV-E1 Help Guide
Preparations
Checking the supplied items
The number in parentheses indicates the number of pieces.
• Camera (1)
• Body cap (1) (attached to the
camera)
• Rechargeable battery pack
NP-FZ100 (1)
• Shoe cap (1) (attached to the
camera)
• Wind screen (1) (attached to the
wind screen adaptor)
• Startup Guide (this manual) (1)
• Wind screen adaptor (1)
• Reference Guide (1)
• Shoulder strap (1)
Inserting the battery pack (supplied)/memory card
(sold separately) into the camera
Open the battery cover and the memory card cover, insert the battery/
memory card, and close the covers.
Insert the battery pack while pressing
Ensure the notched corner
the lock lever.
faces correctly.
This camera is compatible with SD memory cards.
When you use a memory card with this camera for the first time,
format the card using the camera in order to stabilize the performance
of the memory card.
5-050-817-11(1)
Charging the battery pack
Charge lamp
To an external power
source
This camera is compatible with USB-PD (USB Power Delivery). When
a device compatible with USB-PD is connected to the camera, fast
charging is possible. We recommend using a USB-PD device that is
compatible with an output of 9 V/3 A or 9 V/2 A.
Attaching a lens
Mounting indexes
Performing initial setup for the camera
By establishing a Bluetooth connection (pairing) between the camera
and a smartphone, you can perform initial camera setup such as
date and time settings from the smartphone. Install the dedicated
application on your smartphone in advance, and then follow steps
to under "Procedures for initial camera setup."
Installing the dedicated smartphone application
Install the application from the following website. Also,
update to the latest version of the dedicated application.
The specifications of the dedicated application may
change without notice.
https://www.sony.net/ca/
Procedures for initial camera setup
ON/OFF (Power) switch
Control wheel/center
button
Connecting (pairing) the camera with your smartphone later
For details on the connection method, refer to the
following Help Guide URL:
https://rd1.sony.net/help/ilc/2310_pairing/h_zz/
Turn the power off.
• If the camera is turned on, the battery pack
will not be charged.
Using a commercially available
USB Type-C cable, connect the USB Type-C
terminal on the camera to an external
power source, such as a commercially
available USB AC adapter or mobile
battery.
• The charge lamp will light up when charging
starts. When the charge lamp turns off,
charging is completed.
Mount the lens by aligning the two white
index marks (mounting indexes) on the
lens and camera.
While pushing the lens lightly toward
the camera, turn the lens slowly in the
direction of the arrow until it clicks into
the locked position.
Set the ON/OFF (Power) switch to "ON" to
turn on the camera.
Select the desired language and then
press the center of the control wheel.
• The privacy notice screen will appear. Read
the privacy notice regarding biometrics by
opening the link using your smartphone, etc.
Press the center of the control wheel.
Follow the instructions on the camera
screen to connect the camera with your
smartphone and perform the initial
setup.
• You can also configure or change the initial
settings later from the MENU of the camera.
Shooting movies
Set the Still/Movie/S&Q switch to
Still/Movie/S&Q switch
MOVIE (Movie)
(Movie).
button
Press the MENU button and select
(Shooting) [Shooting Mode]
Shoot Mode] the desired
[
shooting mode.
Press the MOVIE (Movie) button to start
recording.
Press the MOVIE (Movie) button again to
MENU button
stop recording.
Using the wind screen (supplied)
Use the wind screen to reduce wind noise
Wind screen
picked up by the internal microphone when
recording a movie.
Attach the wind screen to the Multi Interface
Shoe.
Multi Interface Shoe
Notes on use
Refer to "Precautions" in the "Help Guide" as well.
Notes on handling the product
• Do not leave the lens exposed to a strong light source such as sunlight. Because of the
lens's condensing function, doing so may cause smoke, fire, or a malfunction inside the
camera body or the lens. If you have to leave the camera exposed to a light source such
as sunlight, attach the lens cap to the lens.
• If sunlight or other strong light enters the camera through the lens, it may focus inside
the camera and cause smoke or fire. Attach the lens cap when storing the camera. When
shooting with backlighting, keep the sun sufficiently far away from the angle of view.
Even if it is slightly away from the angle of view, smoke or fire may still occur.
• Do not look at sunlight or a strong light source through the lens when it is detached. This
may result in unrecoverable damage to the eyes or cause a malfunction.
• This camera (including accessories) has magnet(s) which may interfere with pacemakers,
programmable shunt valves for hydrocephalus treatment, or other medical devices.
Do not place this camera close to persons who use such medical devices. Consult your
doctor before using this camera if you use any such medical device.
• Increase the volume gradually. Sudden loud noises can damage your ears. Be especially
careful when listening to headphones.
• Do not leave the camera, the supplied accessories, or memory cards within the reach of
infants. They may be accidentally swallowed. If this occurs, consult a doctor immediately.
• If the monitor is damaged, stop using the camera immediately. The damaged parts may
harm your hands, face, etc.
• When shooting still images continuously, the monitor may flash between the shooting
screen and a black screen. If you keep watching the screen in this situation, you may
experience uncomfortable symptoms such as feeling of unwellness. If you experience
uncomfortable symptoms, stop using the camera, and consult your doctor as necessary.
• When recording or streaming for long periods of time or recording 4K movies, if the
same part of your skin touches the camera for a long period of time while using the
camera, even if the camera does not feel hot to you, it may cause symptoms of a low-
temperature burn such as redness or blistering. Pay special attention in the following
situations and use a tripod, etc.
- When using the camera in a high temperature environment
- When someone with poor circulation or impaired skin sensation uses the camera
- When using the camera with [Auto Power OFF Temp.] set to [High]
Sony lenses/accessories
Using this unit with products from other manufacturers may affect its performance,
leading to accidents or malfunction.
Note on the 5 GHz band for wireless LAN
When using the wireless LAN function outdoors, set the band to 2.4 GHz by following the
procedure below. (WW694956 only)
• MENU
(Network) [Wi-Fi] [Wi-Fi Frequency Band]
How to turn off wireless network functions (Wi-Fi, etc.) temporarily
When you board an airplane, etc., you can turn off all wireless network functions
temporarily using [Airplane Mode].
Advertisement

Related Manuals for Sony ZV-E1


Summary of Contents for Sony ZV-E1
- Page 1 While pushing the lens lightly toward Notes on use ZV-E1 Help Guide the camera, turn the lens slowly in the direction of the arrow until it clicks into Refer to “Precautions” in the “Help Guide” as well.
- Page 2 For Customers in the U.S.A. [Image sensor] Supported format: Image format: 35 mm full frame, IEEE 802.11 a/b/g/n/ac For question regarding your product or for the Sony Service Center nearest you, call 1-800- CMOS image sensor Frequency band: 2.4 GHz/5 GHz 222-SONY (7669) . Effective pixel number of camera: Supplier’s Declaration of Conformity...