Logitech PRO RACING WHEEL - For PC, PS, Xbox Manual
- Setup manual (95 pages) ,
- Setup manual (724 pages)
Advertisement
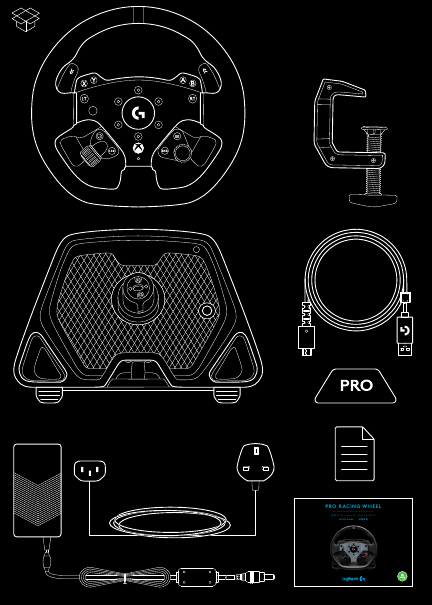
- 1 Package contents
- 2 CONNECTIVITY
- 3 INSTALLATION
- 4 POWER ON AND SOFTWARE
- 5 FEATURES
- 6 FORCE FEEDBACK
-
7
SETTINGS
- 7.1 Menu Navigation
- 7.2 Profile
- 7.3 Strength
- 7.4 TF Audio
- 7.5 Force Feedback Filter
- 7.6 Dampener
- 7.7 Angle
- 7.8 Brake Force
- 7.9 L Paddle / R Paddle Mode
- 7.10 Clutch Bite
- 7.11 RPM Mode
- 7.12 RPM Brightness
- 7.13 Home Screen
- 7.14 Dynamic
- 7.15 Test
- 7.16 Profile
- 7.17 Torque
- 7.18 Compatibility Mode
- 7.19 Platform
- 8 SETTING THE DUAL CLUTCH
- 9 USING THE DUAL CLUTCH
- 10 G HUB AND CUSTOM RPM PATTERNS
- 11 G HUB WHEEL SETTINGS
- 12 G HUB LIGHTSYNC/RPM LED SETTINGS
- 13 SETTING CUSTOM RPM PATTERN
- 14 MANAGING G HUB & ONBOARD PROFILES
- 15 RECOMMENDED MAINTENANCE
- 16 FIRMWARE UPDATES
- 17 Documents / Resources
Package contents
CONNECTIVITY

- USB connection to PC / console
- Peripheral ports*
- Power connector
*NOTE:
- Not a standard USB connection Only Logitech racing peripherals will function in these ports Other USB peripherals will not function and should not be connected
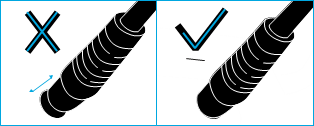
Please ensure that the power connector is fully inserted; otherwise, your PRO Wheel may not function correctly As you insert the connector, you might feel a small click, but you can push past this until the connector is fully inserted Do not use excessive force to insert the connector.
INSTALLATION
DESK
- Place the wheel base on your desk and ensure the feet at the bottom are aligned against the edge

Insert the clamp into the hole at the front.

Tighten the clamp by adjusting the screw handle Once the clamp has come into contact with the desk, you only need between a half and one full turn of the handle to achieve the correct level of clamping.


Do not overtighten
NOTE:
- Also be aware of the construction of your desk and its suitability for clamping a high-torque wheel to it Some desks use a hollow-core construction, for example, where you have a top piece of material and a bottom piece Those pieces are likely to be thin and are unlikely to stand up to the forces applied when the wheel is clamped in place Logitech recommends only clamping your PRO Wheel to a desk made from a solid material, such as MDF or wood.
RACING SEAT
- Use the three bolt holes on the underside of the PRO Racing wheel to attach it to most major racing seats.


- You will need 3 x M6X1 bolts (not included) with a maximum depth inside the wheel base of 15mm Remember to account for the thickness of the surface that you are attaching the wheel base to
- Using a longer bolt than this will damage the wheel unit, so use washers if needed to ensure that the bolts do not encroach too far inside the wheel base
- You only need to hand tighten Do not use power tools to tighten the bolts
- You can use the included cover to fill the clamp hole when attaching to a racing seat.


- Do not use the wheel rim as leverage to assist you when getting into or out of your racing seat as this will damage your PRO Racing Wheel
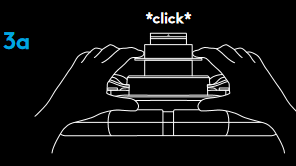
ATTACHING WHEEL RIM
- a Connect the wheel rim to the wheel base, ensuring that the shaft is aligned correctly.
![]()
b A ttach the wheel by locking the quick release ring in its "squeezed" position There's no need to hold it there while attaching the wheel rim.

c Push the wheel rim onto the shaft on the wheel base until you hear the quick release ring lock into position.


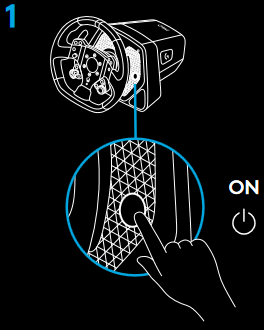
POWER ON AND SOFTWARE
- Power on the wheel by pressing the Power button on the front of the wheel base. The wheel rim will spin slightly to check its calibration and then centre itself.
![]()
- The settings display on the wheel base will then prompt you to choose which platform you wish to play on.

- Use either the left or the right dial on the steering wheel to select the platform and then push the dial in until it clicks to make your selection.


- To play on your console simply load the compatible game of your choice and start racing
- On PC you must first download and install the 3 latest version of the Logitech G HUB software at www.logitechG.com/GHUB. Once that is installed you can begin racing in the title of your choice. Remember that some titles will require that you first configure the wheel in the control settings of the game before it will function.
You may also wish to make use of the G923 compatibility mode for some titles which may be required to either make the wheel work, or to simplify set up Details of how to access this can be found in the section of the manual that covers the settings display
Once finished, to power off the wheel, press and hold the power button for 2 seconds.

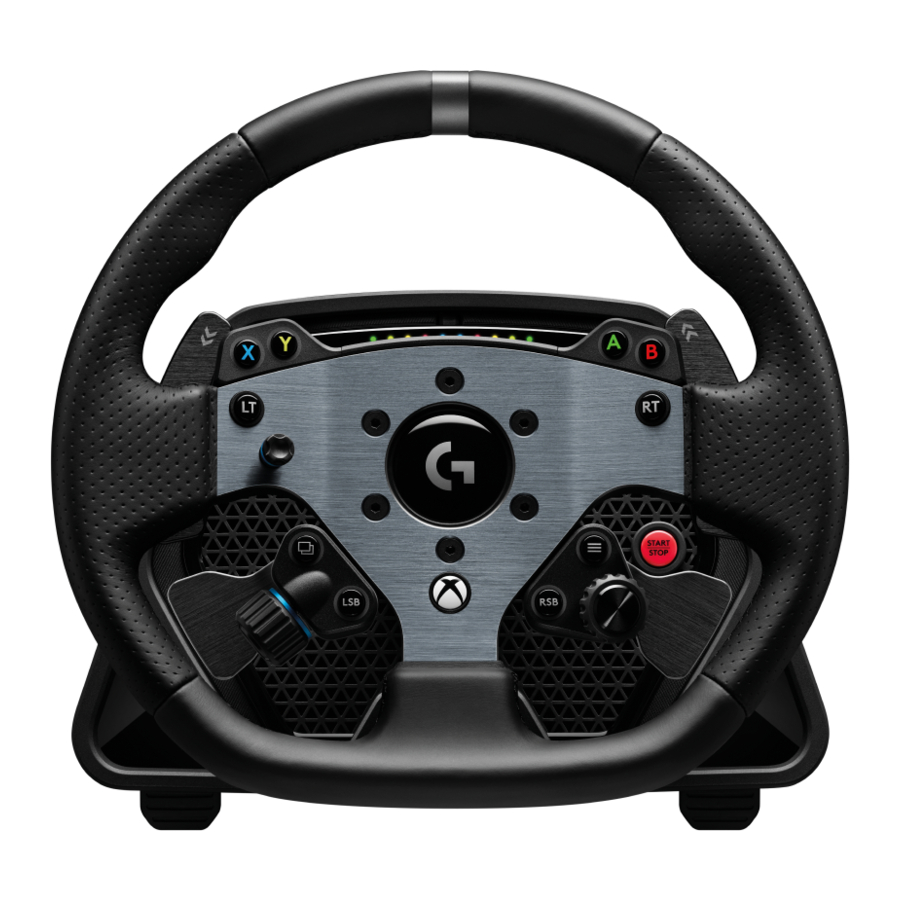
FEATURES

- Gear Down
- Y, X and LT buttons
- Directional Pad
- View and LSB buttons
- Left Dual Clutch Paddle
- Left Adjustment Dial and push button*
- Gear Up
- A, B and RT buttons
- Menu and RSB buttons
- Right Dual Clutch Paddle
- Right Adjustment Dial and push button*
- Xbox button

- OLED Settings display and RPM LEDs
- Settings button
- Power button
- Clamp recess cover
FORCE FEEDBACK
Your Logitech G PRO Racing Wheel features a direct drive motor that will provide force feedback with supported games and systems In supported titles, you will also experience our next generation approach to force feedback: TRUEFORCE
TRUEFORCE integrates directly with game physics and audio to unlock high-definition, real-time force feedback Tire grip, suspension, weight, horsepower — even unique engine sound resonance — are immediately and accurately felt through the wheel For a list of supported titles visit logitechG com/support/PRO_Wheel_xb
NOTE:
The direct drive motor in your wheel can produce very high levels of torque (up to 11 Nm). Please exercise caution when using the wheel and set the level of force feedback that is within the limits of the person using it. This product is not intended for use by small children.
If you crash a vehicle whilst racing in a simulation title, the wheel may pull itself out of your hands. Do not attempt to stop the wheel from moving as this may result in injury. You can usually stop the wheel by pausing the game. On PC, this can be done using your keyboard (often the Escape key, but other games may differ). On console, you may need to unplug the USB cable of your wheel from the console.
Under heavy use, you may notice a slight odor from the exhaust at the back of the wheel. This is normal and will fade over time. Additionally, if you run exceptionally long racing sessions with the wheel at maximum torque, certain parts of the wheel may become warm to the touch, especially the quick release collar on the steering wheel and the quick release adapter on the wheel base. In such circumstances, it is recommended that you allow your PRO wheel to cool down before removing the wheel rim and / or moving the wheel base from where it is mounted.
SETTINGS
Press the Settings button on the wheel base to access the Settings menu. In the settings menu you can configure different settings for your wheel (and pedals, if attached) in 5 different onboard profiles or, if connected to a PC, directly adjust the currently active profile in G HUB. You can then easily switch between profiles when you change game titles (or even when you change cars in the same game title). All settings are "live adjustable" and will take effect as soon as you finish adjusting. The 5 different onboard profiles can be renamed using G HUB. If you are racing on console, you can connect the PRO Wheel to your PC, rename the onboard profiles and those names will still be present when you connect back to your console.
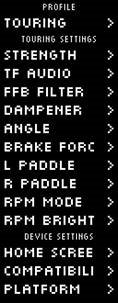
Menu Navigation
Use either of the adjustment dials on the wheel to scroll up/down menus or adjust a setting. Press the dial in to select or to confirm a selection.
Profile
Change the active profile for the wheel.
You have a choice of 5 onboard profiles On PC, you have an additional option called G HUB; if you select this, then the wheel will use the settings for the currently active profile in G HUB. If you make adjustments to any of the settings on the wheel using the settings display then those changes will also be reflected in the currently active profile in G HUB.
The names of the onboard profiles can be edited using G HUB

Strength
Allows you to set the overall peak strength of the force feedback felt through the wheel, between 1 and 11Nm of torque

TF Audio
Sets the strength of the Audio effects output for games that support TRUEFORCE The Audio effects will replicate different aspects of your racing title such as engine note, tire grip or road surface.

NOTE:
It is usually recommended that the Trueforce Audio setting is set at a low enough level to receive the additional information that it provides without overwhelming the overall experience. Think of the level of vibration that you get through the wheel of an actual car and aim for that. Some titles provide additional levels of control within their control options menus by allowing you to adjust individual elements of the audio; separating out the engine, tire and road audio, for example.
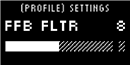
Force Feedback Filter
Each driving simulation will run the physics and force feedback at different speeds - some only at 60Hz, with others 300Hz or more. With a highly responsive direct drive wheel, it's desirable to filter out frequencies above which the simulation can't run at If you leave this at its default AUTO setting, then this will cover the vast majority of simulations and provide a smoother experience. If you wish, you can manually adjust this with settings from 1 (least filter) to 15 (maximum filter), allowing you to feel some more of the smaller effects that some titles produce, at the expense of introducing a bit more noise into the force feedback.
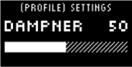
Dampener
This setting enables you to alter the feeling of the wheel in a manner that can make it feel more realistic. Direct Drive wheels are far more responsive than older force feedback wheels and this can result in some unusual behavior when running older titles that don't support TRUEFORCE, the most common of which is when driving down a straight part of a track. In some titles, you may experience a sensation where the wheel starts to move left and right rapidly around the centre. This is the wheel reacting to signals from the game telling it to stay centered, but over-reacting due to the responsiveness of the wheel. Setting a level of Dampening will help filter this out, but remember that any level of dampening will result in an increasingly less responsive wheel as you increase the percentage. We therefore recommend keeping the setting as low as possible to avoid impacting the performance of the wheel.
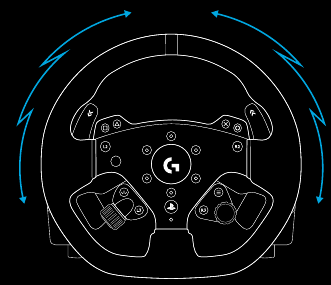
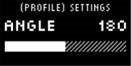
Angle
Change the overall operating angle range of the wheel.
For most game titles, titles you should leave this at 1080 degrees and the titles will handle matching the correct range of rotation for the car that you're driving. For those that don't or if you want to override what the game is doing, then this will enable you to do so.
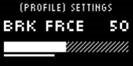
Brake Force
This setting is only available if a compatible set of pedals are attached to the PRO Wheel. It allows you to set the level of force required to achieve 100% braking. As you adjust the level, you can press the brake pedal to see the axis output, making it easy to tune to your preference.
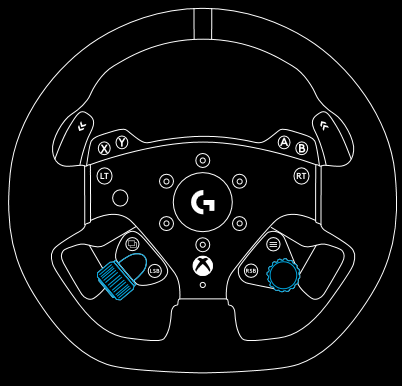
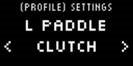
L Paddle / R Paddle Mode
The Dual Clutch Paddles can be assigned to one of several different axes:
Clutch
Gas
Brake
Handbrake
Axis A
Axis B
Axis A/B are a pair of additional non-specific axes that can be assigned to other functionalities outside of the normal sim racing scenarios e g look left / right. Support for these in console titles will depend on the developer Gas and Brake enable differently-abled gamers to still participate in sim racing with the essential analog control over those functions that's needed for better control Handbrake control is a key requirement for drifting and rally racing.
Clutch opens up the possibility of enabling dual clutch functionality on the wheel Dual clutch can be better thought of as a launch assist feature that will enable maximum traction and launch speed from grid starts in races.
NOTE:
In order for the Dual Clutch functionality to operate, both paddles need to be assigned to the Clutch function On console titles, the Handbrake, Axis A and Axis B functions may not respond as support for these needs to be added by the game developer.
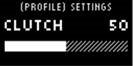
Clutch Bite
Use this setting to tune the Dual Clutch paddles axis value to the game/car you are using and achieve perfect standing starts. See the next section of the manual for more details.
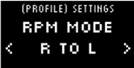
RPM Mode
The RPM LEDs have several preset patterns from which you can choose. In addition, you can create your own custom patterns with G HUB and save them to the onboard memory of the wheel.
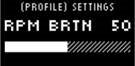
RPM Brightness
Adjusts the overall level of brightness of the RPM LEDs.
Home Screen
You can use the options here to change what is shown on the Settings display when not adjusting the settings of the wheel or pedals. The Settings display on your PRO Wheel has four modes of display
- Dynamic
- Test
- Profile
- Torque
Dynamic
Supports potential future updates to the screen functionality. Defaults to the Test function.
Test
By default when you turn your wheel on and there is no racing game title running, the display will be showing the Test screen. On this screen, you can move the wheel, the dual clutch paddles and press the pedals of a compatible pedal set (if attached) to see the axis response.
Profile
Displays which profile you currently have the wheel set to
Torque
Displays the live and average torque output of the wheel
Compatibility Mode
On PC especially, some racing titles won't recognize the PRO Wheel automatically. When this occurs, you can usually reconfigure the controls of the game and assign the PRO Wheel so that it works, but in some titles, you may find it easier to enable the G923 compatibility mode. When you choose the G923 option in the compatibility mode, the wheel will restart and appear to the PC/console as if it is the G923 wheel. Those games which have native support for the G923 will therefore automatically set the wheel up so that it works (it's also essential that you have a compatible set of pedals attached to the wheel as well).
In the G923 mode, many of the settings mentioned above are not available. You will be able to adjust Strength, FFB Filter, Dampener and Brake Force, but your only other option is the Compatibility Mode, which you can use to switch the wheel back to its original PRO Wheel mode. The Dual Clutch paddles will only function as Gas and Brake in this mode. It is therefore recommended that you remain in PRO Wheel mode whenever possible in order to always have access to the full feature set of the wheel.
Platform
By default, your PRO Wheel will always prompt you to choose which platform you wish to use when you power it on. If you wish to stop this from happening, then you can force the wheel to always start in one mode (for example, you only play on PC). The Platform setting has a number of options:
- On Startup (default)
- Consoles (these will change, depending on which version of the PRO Wheel you have)
- PC
Simply select the choice that you wish and the next time the wheel is powered on, it will choose that option for you automatically.
SETTING THE DUAL CLUTCH
- In the game title that you want to use, start a practice or time trial session in the car of your choice
- Navigate to the D Clutch Bite setting on the Settings display of your PRO Wheel
- Fully press the left Dual Clutch Paddle, select 1st gear using the gear paddle and engage full gas / throttle
- Whilst keeping the Dual Clutch Paddle fully pressed, use the right adjustment dial on the wheel to adjust the value on the display until you see the car beginning to move onscreen
- Now experiment with standing starts using the directions below and adjust the value until you're happy with the traction that you're getting in-game
USING THE DUAL CLUTCH
Using a dual clutch system from a grid start in a race enables you to achieve maximum traction without the need to find the bite point of your clutch pedal - this can give you a significant advantage at the start of a race. To use the dual clutch system in-game:
- At race start, fully depress both of the Dual Clutch Paddles
- Select first gear using the Gear Up Paddle and fully depress the gas pedal
- As soon as you get the green light for race start, immediately release the right Dual Clutch Paddle The car should start moving as the bite point of the clutch is engaged
- Smoothly release the left Dual Clutch Paddle in order to achieve maximum traction
It's worth practicing this last step and modifying the bite point setting several times to find a method that works for you. Once you have it perfected, this feature can help make up several places on the grid.
NOTE:
Support for the dual clutch function is not possible in some games A list of games that support the dual clutch feature can be found at logitechG.com/support/pro-wheel-xb
G HUB AND CUSTOM RPM PATTERNS
Logitech G HUB enables the following features on the PRO Wheel:
- Button programming with profiles that can be linked to games
- Adjustment of wheel settings, such as Rotation Angle and TRUEFORCE strength
- Creation of custom RPM LED patterns
- Edit game profiles and custom RPM LED patterns in onboard memory
- Testing of the wheel's various axes
G HUB WHEEL SETTINGS
Sensitivity
Alters the output response of the wheel to be more or less sensitive Leaving this slider at 50% will provide a linear 1:1 output. Between 51% and 100% will make the wheel increasingly more sensitive around the centre movement of the wheel. Between 0% and 49% will make the wheel increasingly less sensitive around the center movement of the wheel. All other settings match those present in the Settings display on the wheel base and are described earlier in the manual.
G HUB LIGHTSYNC/RPM LED SETTINGS
The PRO Racing Wheel has a number of default RPM lighting patterns already set in its memory and available to choose within G HUB. Game developers can also directly address the RPM LEDs if they wish to, recreating the exact behavior of the car that they are simulating. However, you can also edit custom lighting patterns that are present in the memory on the wheel. This enables console users to also take advantage of this feature - set everything up on your Windows PC, save to the wheel's memory and then connect it to your console.
Any effect, including your own custom effects can be copied using the copy icon that appears to the right of any effect when you select it.
Overall brightness of the RPM LEDs can be changed using the slider underneath the drop down menu of effects.
SETTING CUSTOM RPM PATTERN
Click the drop down menu and choose one of the Effects On Device then click the Edit button:


On the left, you can see the color picker. In the main color section the shade of the colour changes from left to right and the brightness of the color changes from top to bottom of the rectangle You can save a color by clicking the circle with the + sign in it below the rectangle. To assign a color to one of the LEDs, just select the color and then click on the LED in the image on the right (the mouse icon will change to a paint bucket to show you that you can "paint" that colour on the LED).
Below that is a drop down menu containing the preset patterns that the PRO Racing Wheel already ships with - just choose the one that you prefer To finish, rename the pattern by selecting the RPM LEDs text at the top, typing your own name and then click Save at the bottom.

MANAGING G HUB & ONBOARD PROFILES

At the top of G HUB, you have two available drop down menus: Configuration and Profile Configuration allows you to choose whether you are adjusting software profiles for games within G HUB, just as you can for other Logitech G products or it allows you to edit the settings in the onboard memory.
With Games & Applications selected in the Configuration menu, the drop-down menu for Profile will contain all of the profiles that are present in G HUB, those included as part of G HUB updates or custom profiles that you have created yourself and linked to a program's exe file With Onboard Memory selected in Configuration, the Profile drop-down menu will contain just the 5 onboard memory slots:

Any changes you make to the settings here in G HUB will be automatically saved in the memory of the PRO Wheel for that chosen profile. You can also choose to edit the name of the profile When you have selected a profile, click the edit icon next to Profile at the top of the screen. You may then type the name of the profile that you wish to change it to and this will then be saved to the PRO Wheel. This will persist in the memory so that if you then use the PRO Wheel on a console, that profile name will still be present.
NOTE:
It is not possible to make changes to the settings on the PRO Wheel using G HUB if the settings menu on the wheel is open G HUB will present an error message asking you to close the settings menu on the wheel if it detects that the settings menu has been accessed
RECOMMENDED MAINTENANCE
Your PRO Racing Wheel has been engineered to continue to operate for many hundreds of hours and feel as good as it did when you first started using it As with your real car though, it is recommended to keep the wheel clean by performing some simple, semi-regular maintenance.
Regular maintenance (weekly)
- Vacuum the front grill of the wheel base to prevent build-up of dust
- Clean the body and wheel rim with a damp, lint-free cloth, ensuring that there is no excess water present in the cloth
Every 200 hours
Clean the outside surface of the quick release adapter on the wheel base using an isopropyl alcohol wipe.

FIRMWARE UPDATES
Firmware (also known as embedded software) is the code that controls all of the functions of your PRO Wheel. Periodically, Logitech may release updates to the firmware in order to improve functionality. These are made available through G HUB, which will inform you when an update is available.
QUESTIONS?
logitechG.com/support/pro-wheel-xb

Documents / Resources
References
Download manual
Here you can download full pdf version of manual, it may contain additional safety instructions, warranty information, FCC rules, etc.
Download Logitech PRO RACING WHEEL - For PC, PS, Xbox Manual
Advertisement
Thank you! Your question has been received!


Need Assistance?
Do you have a question about the PRO RACING WHEEL that isn't answered in the manual? Leave your question here.