Table of Contents
Advertisement
Quick Links
Advertisement
Table of Contents

Related Manuals for Siemens WG56B205NL


Summary of Contents for Siemens WG56B205NL
- Page 1 Translated from Dutch to English - www.onlinedoctranslator.com Washing machine WG56B205NL User manual and install ation instructions Register your product on My Siemens and discover ers. exclusive services and off at/welcome siemens-home.bsh-group.c The future moving in. Siemens Home Appliances...
-
Page 2: Table Of Contents
Refer to the Digital User's Guide for more information. Table of contents 1 Safety........4 6 Before first use ..... 21 1.1 General instructions ..... 4 6.1 Starting a wash cycle without 1.2 Destination of the laundry ..........21 device ..........4 7 Display ........ - Page 3 13.13 Taking out laundry ....36 20.2 Installing transport 13.14 Putting the device to sleep protections ..........56 20.3 Recommissioning the (standby mode) ..... 36 device ........56 14 Child Lock ........ 36 20.4 Disposal of your old 14.1 Switching on the child lock ..... 36 appliance ..........
-
Page 4: Safety
NLSafety 1 Safety Please observe the following safety instructions. 1.1 General instructions ¡Read this manual carefully. ¡Keep the operating instructions and product information for future reference for use or for subsequent owners. ¡Do not connect the device in case of transport damage. 1.2 Destination of the device Only use the device: ¡to wash machine washable textiles and woollens for hand washing... -
Page 5: Secure Installation
SafetyNL 1.4 Secure installation WARNING ‒ Risk of electric shock! Improper installations are dangerous. ▶ Only connect and operate the device in accordance with the information on the rating plate. ▶ Only connect the device to an alternating current mains via a properly installed socket with earthing contact. - Page 6 NLSafety ▶ If the power cord is too short and a longer power cord is not available, contact an electrical retailer to adjust the home installation. WARNING ‒ Risk of injury! The heavy weight of the device can cause injuries when lifting it. ▶...
-
Page 7: Safer Use
SafetyNL If the appliance is moved by protruding parts, such as the loading door, the parts may break off. ▶ Do not move the device by protruding parts. CAUTION ‒ Risk of cutting! Sharp edges on the device can lead to cuts when touched. ▶... - Page 8 NLSafety ▶ In the case of discarded appliances, unplug the mains cable, then cut the mains cable and damage the appliance door lock to such an extent that the appliance door no longer closes. WARNING ‒ Risk of suffocation! Children can inhale or swallow small parts and suffocate. ▶...
-
Page 9: Safe Cleaning And Maintenance
SafetyNL CAUTION ‒ Risk of burns! The suds become hot when washing at high temperatures. ▶ Do not touch the hot soapy water. CAUTION ‒ Risk of chemical burns! When opening the detergent drawer, detergent and care products may splash out of the appliance. - Page 10 NLSafety WARNING ‒ Risk of poisoning! Toxic fumes may be produced when using cleaning agents containing solvents. ▶ Do not use cleaning agents containing solvents.
-
Page 11: Avoiding Property Damage
Avoid material damageNL Make sure that the length of the ▶ 2 Material damage thread on the connection to the avoid water tap is at least 10 mm. A water pressure that is too low or too high can hinder the function of the device. An incorrect dosage of fabric ▶... -
Page 12: Environmental Protection And
NLEnvironmental protection and saving ▶ Reduce washing temperature for In case of contact with the device, lightly and normally soiled laundry. immediately remove all detergent residues, spray mist residues or residues. aAt low temperatures, it consumes device less energy. Lower temperatures than stated on the 3 Environmental protection and care label are also sufficient for... -
Page 13: Set Up And Connection
Set up and connectNL Remark:The device does not Replace accessories before using ▶ automatically go into standby when the device. → "Accessories", page 32 Wi-Fi is activated. Remark:The device has been checked at the factory for correct operation. 4 Set up and connect Water stains may remain in the device. - Page 14 NLSet up and connect If the device is tilted more than 40°, 4.4 Remove transport residual water can escape from the protection devices device and cause material damage. The device is secured for transport Carefully tilt the device. ▶ with transport locks on the back of the Transport the device upright.
-
Page 15: Connecting The Device
Set up and connectNL Slide the 4 cover caps downwards. Remove the mains connection cable from the holder. Remove the 4 sleeves. Remark:To install the transport protection devices in the device for transport, undo these steps in reverse order. 4.5 Connecting the device Connect water supply hose WARNING Risk of electric shock! -
Page 16: Adjusting The Appliance
NLSet up and connect Carefully open the tap and check 4.6 Adjusting the device that the connections are tight. To reduce noise and vibrations and avoid the device walking, set the Water outlet connection types device horizontally. The information will help you connect this Loosen the lock nuts with a SW17 appliance to the water outlet. -
Page 17: Connecting The Device Electrically
Set up and connectNL Tighten the lock nuts against the housing hand-tight using a SW17 open-end wrench. Hold the appliance foot firmly and do not adjust the height. 4.7 Connecting the device electrically Remark:Your domestic electrical installation for this appliance must comply with local legal and safety regulations and must include an earth leakage circuit breaker. -
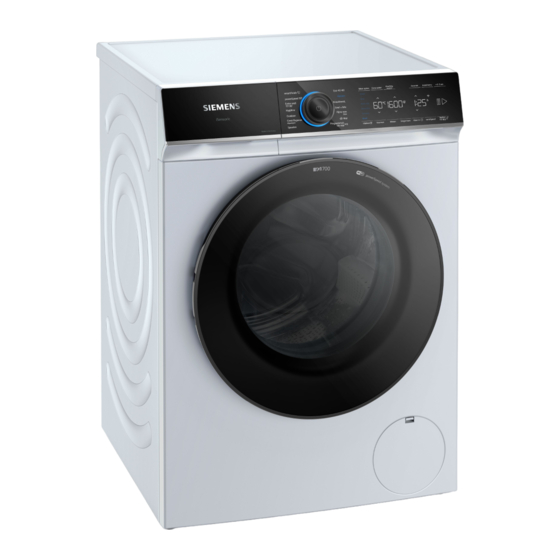
Page 18: Getting To Know Your Device
NLGet to know your device 5 Get to know your device 5.1 Device Here you will find an overview of the components of your device. Depending on the device type, details on the image may differ, e.g. the color and om. the V and pump Transport protections... -
Page 19: Control Panel
Get to know your deviceNL in the program descriptions. Dosing aid for liquid detergent → "Programs", page 28 → "Insert dosing aid for liquid detergent", Page 34 Detergent compartment II: detergent for the main wash Detergent dispenser : fabric softener Detergent compartment I: detergent for prewash and soaking 5.3 Control panel... - Page 20 NLGet to know your device to push; The activated settings are To hide the extra keys, short press highlighted in color on the display. againMore optionsto press. Display additional keys Violent impact on the display can to adjust cause damage. You can customize the additionally ▶...
-
Page 21: Before First Use
usageNL Fill powder detergent into Change setpoint compartment II. When you activate certain settings, the display shows selection buttons and you can change the set value. Press the selection buttons ▶ → Page 25 . The display shows the set value. 6 Before first use B prepare the appliance for use To avoid foaming, use only half the... -
Page 22: Display
NLdisplay 7 Display The display shows the current set values, selection options or information texts. Remark:Additional features may be available due to software updates. If a software update is available, you will find more information in the Home Connect app. Example display indication indication More information... - Page 23 displayNL indication More information Designation Vapor Program status Program on Save a program. → "Buttons", page 27 to beat Child lock ¡lights up: the childproof lock is activated. ¡ flashes: the childproof lock is activated and the device was operated. →...
- Page 24 NLdisplay indication More information Designation The appliance has detected too much Foam detection foam. Door ¡lights up: the door is locked. – To add laundry, the door can be unlocked. → "Adding laundry", page 35 – To be able to open the door, you can cancel the programme.
-
Page 25: Keys
TestsNL 8 Keys Some keys are hidden from a reduced Remark:Additional features may be display view. You can show these available due to software updates. additional keys on the display. If a software update is available, you → "Show or hide additional keys", will find more information in the page 20 Home Connect app. - Page 26 NLTests Knob Choice More information - 1600 Adjust the spin speed or (spin) (rinse hold). Set spin speed in rpm. With the selection, the water is not drained at the end of the wash cycle and the spin is deactivated. The laundry remains in the rinse water.
- Page 27 TestsNL Knob Choice More information Rinse vigorously ¡activate Activate or deactivate three additional ¡deactivate rinse cycles. Recommended for particularly sensitive skin or areas with very soft water. ¡activate Wash with more water. Recommended Extra water for particularly sensitive skin and for ¡deactivate more gentle treatment of laundry.
-
Page 28: Programs
NLPrograms 9 Programs Comments ¡The care labels of the laundry give you additional instructions for the program selection. ¡Additional features may be available due to software updates. If a software update is available, you will find more information in the Home Connect app. - Page 29 ProgramsNL max. Program Description bela- thing (kg) Wash textiles made of synthetic and blended fabrics. Crease Resistant. Program setting: ¡max. 60 °C ¡max. 1400 rpm Wash textiles made of cotton, linen, synthetic Quick + Mix material and blended fabrics. Suitable for lightly soiled laundry. Program setting: ¡max.
- Page 30 NLPrograms max. Program Description bela- thing (kg) – Centrifuge/ Centrifuge and drain water. Drain If you only want to drain the water, activate 0. The laundry is not spun. Program setting: max. 1600 rpm – Programs Select other programs directly via the Home Connect via app app.
- Page 31 ProgramsNL max. Program Description bela- thing (kg) Comments ¡Hang the warm and moist textiles immediately at the end of the program or iron the fabric. ¡The textiles are not washed or cleaned. Ge- do not use detergents or care products. ¡The water vapor is hot and can damage certain types of fabric or textile.
-
Page 32: Accessories
NLaccessories 10 Accessories Only use original accessories. These are matched to the device. Remark:Some accessories are available in other colours. Contact the → "After-sales service", page 57 . Usage Order number Cold water or Aquastop WZ10131 water supply extension water supply hose feed hose lengths (2.50 m). -
Page 33: Detergent And Fabric Care
Detergent and fabric care productNL 13.2 Set program 12 Detergent and fabric means of care Turn the program selector and set it to the desired programme. → "Programs", page 28 Information from the manufacturer about use and dosage can be found on the Adjust the program settings if packaging. -
Page 34: Save Program Settings
NLService Remark:The program settings are not 13.6 Insert dosing aid for liquid permanently saved for the program. detergent When you order the dosing aid as an 13.4 Save program settings accessory, you must fit the dosing aid. Pull out the detergent drawer. You can save your individual program Press the insert down and remove settings as a favourite. -
Page 35: Dosing Detergent And Fabric Care Product
ServiceNL Slide the dosing aid forward. Slide the detergent drawer into the appliance. 13.9 Starting the program Required:A program is set. → "Set program", page 33 Press. ▶ aThe drum spins and finds one load recognition takes place, which can take up to 2 minutes, after which the water flows into the Fold down the dosing aid and click device. -
Page 36: Resuming Program At Rinse Hold
NLChild lock Wipe the rubber sleeve dry and – At a high temperature, start the remove any foreign objects. programmeTo rinse. – Start the program at a high water levelCentrifuge or select a suitable program for draining. → "Programs", page 28 Remove the laundry. -
Page 37: Home Connect
HomeConnectNL 15.1 Set up the Home 1 5 HomeConnect Connect app This device is network-enabled. Install the Home Connect app on Connect your appliance to a mobile the mobile device. end device in order to operate functions via the Home Connect app, adjust basic settings or monitor the current operating status. -
Page 38: Activating Wi-Fi On The Device
NLHomeConnect Navigate Home Connect Menu 15.6 Resetting the device's network settings to press Short upControl via app ▶ until the display shows the desired setting. Requirements ¡The Home Connect menu is open Home Connect Exit menu call. → "Call up the Home Connect On for at least 3 secondsControl ▶... -
Page 39: Remote Diagnosis
HomeConnectNL the moment you want to use the 15.8 Remote Diagnosis Home Connect functionalities for the Customer service can access your first time. appliance via remote diagnosis if you Remark:Please note that the Home contact customer service with your Connect functionalities can only be request, your appliance is connected used in combination with the Home to the Home Connect server and... -
Page 40: Basic Settings
NLBasic settings 16 Basic Settings You can set the basic settings of your device according to your wishes. 16.1 Overview of the basic settings Remark:Additional features may be available due to software updates. If a software update is available, you will find more information in the Home Connect app. -
Page 41: Change Basic Settings
Program counterNL 16.2 Change basic settings 18 Cleaning and maintenance loves Required:The display shows all additional Carefully clean and maintain your buttons. → "Show or hide additional keys", device to ensure that it continues to page 20 function well for a long time. PressSetup menuto call up the basic 18.1 Cleaning drum settings. -
Page 42: Cleaning The Drain Pump
NLCleaning and maintenance Press the insert down and remove Place the insert and click into place. the detergent drawer. Pull out the insert from bottom to Clean the opening for the detergent top. drawer. Clean and dry the detergent drawer Slide the detergent drawer into the and insert with water and a brush. - Page 43 Cleaning and maintenanceNL Open and remove the service CAUTION - Risk of burns!The cover. suds become hot when washing at high temperatures. ▶ Do not touch the hot soapy water. Remove the plug to allow the washing solution to flow into the collection container.
- Page 44 NLCleaning and maintenance Clean drain pump Ensure that both wing wheels can be turned. Required:The drain pump is empty. → Page 42 Since there may still be residual water in the pump, carefully unscrew the cover. Large impurities can cause the ‒...
-
Page 45: Cleaning The Inlet Opening In The Rubber Sleeve
Cleaning and maintenanceNL Insert and close the service cover. Clear the blockages from the inlet opening. 18.4 Cleaning the inlet opening Remark:Do not use pointed or sharp in the rubber sleeve objects. Regularly check the inlet opening in the rubber sleeve for blockages and clean the inlet opening. -
Page 46: Troubleshooting
NLTroubleshooting 19 Troubleshooting You can rectify minor faults on the device yourself. Before contacting customer service, please refer to the troubleshooting information. This way you avoid unnecessary costs. WARNING Risk of electric shock! Improper repairs are dangerous. Only trained specialist personnel may carry out repairs on the device. ▶... - Page 47 TroubleshootingNL Cause and Troubleshooting Malfunction "E:30 / -80" Detergent dosage is too high. ▶ Immediate measure: mix a tablespoon of fabric softener with 0.5 l of water and pour this mixture into the left compartment (not for outdoor, sportswear and down textiles).
- Page 48 NLTroubleshooting Cause and Troubleshooting Malfunction If the error message appears again, please contact "E:30 / -10" and/or the service. → "After-sales service", page 57 "E:35 / -10" Water in the bottom tray. Close the tap. ▶ Please contact customer service. ▶...
- Page 49 TroubleshootingNL Cause and Troubleshooting Malfunction Door is not closed. Program does not start. ▶ Close the door. Child lock is activated. Deactivate child lock. ▶ → "Deactivate childproof lock", page 36 Ready inis activated. Check ifReady inis activated. ▶ → "Buttons", page 25 Laundry is jammed in the door.
- Page 50 NLTroubleshooting Cause and Troubleshooting Malfunction Pump cover not assembled correctly. Washing water is not pumped out. Assemble the pump cover correctly. ▶ Detergent dosage is too high. ▶ Immediate measure: mix a tablespoon of fabric softener with 0.5 l of water and pour this mixture into the left compartment (not for outdoor, sportswear and down textiles).
- Page 51 TroubleshootingNL Cause and Troubleshooting Malfunction No error - no action required. ▶ The program duration changes during the wash Remark:When loading, if possible, place large and cycle. small items of laundry together in the drum. Laundry of different sizes is distributed better during the spin cycle.
- Page 52 NLTroubleshooting Cause and Troubleshooting Malfunction High centrifuge Redistribute the laundry in the drum. ▶ rental is not Remark:If possible, place large and small items of reached. laundry together in the drum. Laundry of different sizes is distributed better during the spin cycle. Launch the programCentrifuge.
- Page 53 TroubleshootingNL Cause and Troubleshooting Malfunction Creasing. Reduce the load amount for the next wash. ▶ Unsuitable program for the type of fabric set. Choose a suitable program for the type of fabric. ▶ Too much detergent/fabric softener in the detergent Detergent or fabric softener softer drips from drawer.
- Page 54 NLTroubleshooting Cause and Troubleshooting Malfunction Detergent residues Detergents may contain water-insoluble substances the dry laundry. that settle on the laundry. Brush the laundry after washing and drying. ▶ Home Connect func- Various causes are possible. Go to www.home-connect.com. doesn't dish properly. ▶...
- Page 55 TroubleshootingNL Cause and Troubleshooting Malfunction Water comes out Contamination on the door or seal causes leakage. under the door. Clean the door and the cuff. ▶...
-
Page 56: Emergency Release
NLTransport, storage and disposal Allow the suds to drain. 19.1 Emergency release → "Clean the drain pump", Unlock door page 42 Remove the hoses. Required:The drain pump is empty. → Page 42 20.2 Install transport protection 1. ATTENTION!Running water can devices lead to material damage. -
Page 57: Disposal Of Your Old Appliance
Service departmentNL 20.4 Disposal of your old chemical equipment (waste electrical and electronic appliance equipment - WEEE). Valuable raw materials can be reused The directive sets out the through environmentally friendly framework for take-back disposal. valid in the EU and disposal of old appliances. -
Page 58: Product Number (E-Nr.), Production Number (Fd) And Serial Number (Z-Nr.)
NLService department Check for defective supply lines or 21.1 Product number (E-Nr.), fittings up to the AquaStop production number (FD) connection on the tap. and serial number (Z-Nr.) ¡While using a device In principle, with AquaStop you do The product number (E-Nr.), the not have to keep up or turn off the production number (FD) and the serial tap after use for safety reasons. -
Page 59: Consumption Values
Consumption valuesNL 22 Consumption values The following information is provided in accordance with the EU Ecodesign Regulation. The specified values for other programs asEco 40-60are only guide values and were determined in accordance with the applicable standard EN60456. Pro- maxi Program Bela- Ener-... -
Page 60: Open Source Software
NLTechnical data You can find more information about Maximum load 10.0 kg your model on the Internet at https:// thing eprel.ec.europa.eu/ . This web address 220-240V, Mains voltage refers to the official EU product database 50-60 Hz EPREL. Then follow the instructions when 10 A searching for the model. -
Page 61: Declaration Of Conformity
A detailed RED Declaration of Conformity least during the period during which can be found on the Internet at siemens- we provide support and spare parts home.bsh-group.com on the product for the relevant device. - Page 64 BSH Hausgerate GmbH Carl-Wery-Strasse 34 81739 Munich, GERMANY siemens-home.bsh-group.com Manufactured by BSH Hausgeräte GmbH under trademark license from Siemens AG *9001806154* 9001806154 (030112)