Table of Contents
Advertisement
Available languages
Available languages
Quick Links
WORK
01
7
6
5
4
3
2
Ryan
Soowon
1
Corrected Title Page's page count to 116
EHBMB00013
11/3/2022
Park
Parker
REV. NO.
REVISION DESCRIPTION
REF. NO.
DATE
PREPARED
APPROVED
기호
변경 사항
시방 번호
년/월/일
시방자
SEC.
BRAND
MODEL
DLE7000W
DLE7150W
MFL71950801
LG
257
182
182
승인자
PRINTING DEGREE
MATERIAL AND PRINTING DESCRIPTION
RV13C5AMQZU
RV13C5AMAZU
1
1. Material, printing and exterier size are refer to work tables.
2.
3. Exterier size on the drawing is cutting line.
4. Before product controlled by criteria sample.
JM INFORMATION INC
SUFFIX
LANGUAGE
PAGE
REMARK
TD Dryer
ENGLISH+
116
SPANISH+
Ryan
Thomas
Soowon
Soowon
Parker
Kenney
Park
Park
22.10.26
22.10.26
22.10.26
22.10.26
Manual, Owners
Living Appliance
MFL71950801
Advertisement
Table of Contents

Related Manuals for LG DLEX7 0 E Series


Summary of Contents for LG DLEX7 0 E Series
- Page 1 SEC. PRINTING DEGREE MATERIAL AND PRINTING DESCRIPTION SUFFIX LANGUAGE PAGE REMARK WORK BRAND MODEL DLE7000W RV13C5AMQZU TD Dryer DLE7150W RV13C5AMAZU ENGLISH+ MFL71950801 SPANISH+ 1. Material, printing and exterier size are refer to work tables. 3. Exterier size on the drawing is cutting line. 4.
- Page 2 1. Online manual: Visit the LG website at: http://gscs-manual.lge.com/ Total/HQ/GatewayPage/main.html or scan the QR code above; or 2. Printable PDF manual: Visit lg.com and search for your model number; or 3. Call or write to customer service as provided in your Limited Warranty.
-
Page 3: Table Of Contents
Connecting the Water Inlet Hose (Steam models) Final Installation Check 35 OPERATION Before Use Loading the Dryer Options and Extra Functions 38 SMART FUNCTIONS LG ThinQ Application Smart Diagnosis Function 42 MAINTENANCE Regular Cleaning 44 TROUBLESHOOTING FAQs Before Calling for Service... -
Page 4: Important Safety Instructions
us_main.book.book Page 3 Thursday, October 13, 2022 8:55 AM IMPORTANT SAFETY INSTRUCTIONS IMPORTANT SAFETY INSTRUCTIONS READ ALL INSTRUCTIONS BEFORE USE Safety for a Dryer WARNING Fire Hazard Failure to follow safety warnings exactly could result in serious injury, death or property damage. Do not install a booster fan in the exhaust duct. -
Page 5: Warning Statements
us_main.book.book Page 4 Thursday, October 13, 2022 8:55 AM IMPORTANT SAFETY INSTRUCTIONS WARNING Risk of Fire Install the clothes dryer according to the manufacturer’s instructions and local codes. Clothes dryer installation must be performed by a qualified installer. • Do not install a clothes dryer with flexible plastic venting materials. If •... - Page 6 us_main.book.book Page 5 Thursday, October 13, 2022 8:55 AM IMPORTANT SAFETY INSTRUCTIONS • The appliance must be installed and electrically grounded by qualified service personnel in accordance with local codes. • Disconnect the power cord, house fuse or circuit breaker before installing or servicing the appliance. •...
- Page 7 • Do not grasp the power cord or touch the appliance controls with wet hands. • Do not modify or extend the power cord. • If the appliance has been submerged, contact an LG Electronics customer information center for instructions before resuming use.
- Page 8 us_main.book.book Page 7 Thursday, October 13, 2022 8:55 AM IMPORTANT SAFETY INSTRUCTIONS • Do not put living animals such as pets inside the appliance. • Do not put any part of your body, such as your hands or feet, or metal objects under the appliance. •...
-
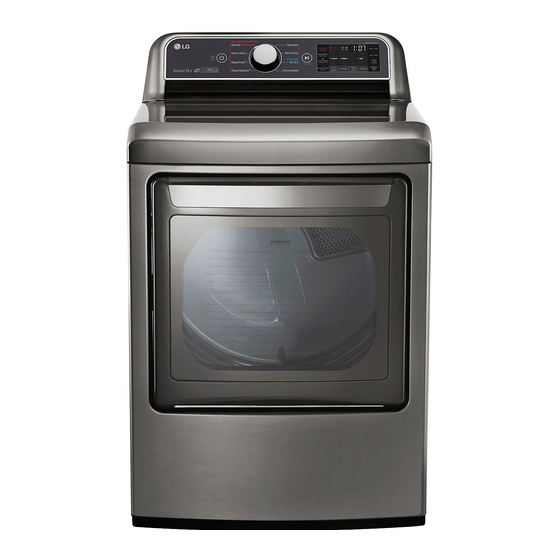
Page 9: Product Overview
us_main.book.book Page 8 Thursday, October 13, 2022 8:55 AM PRODUCT OVERVIEW PRODUCT OVERVIEW Product Features The images in this guide may be different from the actual components and accessories, which are subject to change by the manufacturer without prior notice for product improvement purposes. Front View Control Panel Lint filters... - Page 10 us_main.book.book Page 9 Thursday, October 13, 2022 8:55 AM PRODUCT OVERVIEW Water Inlet Hose Connection (for Steam Models) Exhaust Duct Oulet Product Specifications DLEX7**0*E / DLEX7600*E / Model DLGX7**1*E DLGX7601*E Description Steam Dryer Please refer to the rating label for detailed Electrical Requirements information.
- Page 11 us_main.book.book Page 10 Thursday, October 13, 2022 8:55 AM 10 PRODUCT OVERVIEW Accessories Included Accessories Inlet Hose-Short (on some models) Inlet Hose-Long (on some models) Safety Tether Kit (on some models) Optional Accessories (sold separately) Drying Rack (No. 3750EL001C) Side vent kit (Kit No. 383EEL9001B) NOTE •...
-
Page 12: Installation
us_main.book.book Page 11 Thursday, October 13, 2022 8:55 AM INSTALLATION INSTALLATION Before Installing Installation Overview Please read the following installation instructions first after purchasing this dryer or transporting it to another location. Choose the proper location. Level the appliance. Vent the appliance. Connect the Gas / Electric dryer. -
Page 13: Choosing The Proper Location
us_main.book.book Page 12 Thursday, October 13, 2022 8:55 AM 12 INSTALLATION Choosing the Proper • For garage installation, you will need to place the appliance at least 18 inches (45.7 cm) above the Location floor. The standard pedestal height is 15 inches (38 cm). - Page 14 us_main.book.book Page 13 Thursday, October 13, 2022 8:55 AM INSTALLATION Dimensions and Clearances The following clearances are recommended for the appliance. • Additional clearances should be considered for ease of installation and servicing. • Additional clearances should be considered on all sides of the dryer to reduce noise transfer. Installation Spacing for Recessed Area or Closet Installation Description Dimension/Clearance...
- Page 15 us_main.book.book Page 14 Thursday, October 13, 2022 8:55 AM 14 INSTALLATION NOTE • There should be at least a little space around the dryer (or any other appliance) to eliminate the transfer of vibration from one appliance to another. If there is enough vibration, it could cause appliances to make noise or come into contact, causing paint damage and further increasing noise.
-
Page 16: Leveling The Appliance
us_main.book.book Page 15 Thursday, October 13, 2022 8:55 AM INSTALLATION Leveling the Appliance NOTE • If you are installing the appliance on the optional WARNING pedestal, you must use the leveling feet on the • Use long-sleeved gloves and safety glasses. pedestal to level the appliance. - Page 17 us_main.book.book Page 16 Thursday, October 13, 2022 8:55 AM 16 INSTALLATION door aside face down on a protected Remove the 4 screws securing the hinges to surface to prevent damage to the door or the door frame. Remove the two plastic cover the work surface.
- Page 18 us_main.book.book Page 17 Thursday, October 13, 2022 8:55 AM INSTALLATION Open the door from the side so that the hinge Do NOT remove the upper screw behind screws are accessible. the hinge bracket. Set the parts aside. CAUTION • Do NOT remove any of the eight screws on the face of the cabinet (marked below).
- Page 19 us_main.book.book Page 18 Thursday, October 13, 2022 8:55 AM 18 INSTALLATION Reverse the components inside the door. • You will now be removing and reversing various components inside the door. See a few page later for a detailed diagram and identification of the inner structure and parts of the door.
- Page 20 us_main.book.book Page 19 Thursday, October 13, 2022 8:55 AM INSTALLATION 2) While sliding the lock rod right, lift the • Now rotate the hinge filler 180 degrees right end up and out of the guides. and install it on the upper left side of the door.
- Page 21 us_main.book.book Page 20 Thursday, October 13, 2022 8:55 AM 20 INSTALLATION assembly on the bottom left and lift the Install the side lock rod. hinge assembly out. • Flip the side lock rod over and install it on the opposite side. Insert the lower end into the left hinge and lower the rod into the guides on the door while compressing the spring inside the recess.
- Page 22 us_main.book.book Page 21 Thursday, October 13, 2022 8:55 AM INSTALLATION different screws on the bottom edge, in the Now, pick up the upper hinge pivot removed locations marked below. earlier and rotate it 180 degrees. Install the hinge on the top left side of the cabinet. ※...
-
Page 23: Installing The Vent Kit
• An adapter kit, part number 383EEL9001B, may back easily and lock the pivot in place. The be purchased from your LG retailer. This kit door is now ready to remount on the contains duct components necessary to change opposite side of the dryer. -
Page 24: Stacking The Appliance
us_main.book.book Page 23 Thursday, October 13, 2022 8:55 AM INSTALLATION duct onto the blower housing and secure Insert the 4" (10.2 cm) elbow through the to the base of the dryer as shown. rear opening and press it onto the adapter duct. -
Page 25: Venting The Dryer
us_main.book.book Page 24 Thursday, October 13, 2022 8:55 AM 24 INSTALLATION Make sure the surface of the washer is clean • To reduce the risk of fire, combustion, or and dry. Remove paper backing from the tape accumulation of combustible gases, DO NOT on one of the stacking kit side brackets. -
Page 26: Connecting Gas Dryers
us_main.book.book Page 25 Thursday, October 13, 2022 8:55 AM INSTALLATION Ductwork • Incorrect or inadequate exhaust systems are not covered by the dryer warranty. Dryer failures or service required because of such exhaust Maximum length No. of systems will not be covered by the dryer of 4-inch Wall Cap Type 90°... - Page 27 us_main.book.book Page 26 Thursday, October 13, 2022 8:55 AM 26 INSTALLATION Connecting the Gas Supply • This dryer must be plugged into a 120-VAC, 60- Hz. grounded outlet protected by a 15-ampere fuse or circuit breaker. NOTE • Where a standard 2-prong wall outlet is •...
-
Page 28: Connecting Electric Dryers
us_main.book.book Page 27 Thursday, October 13, 2022 8:55 AM INSTALLATION Check all pipe connections (both internal and equipment-grounding conductor must be run external) for gas leaks with a noncorrosive with the circuit conductors and connected to the leak-detection fluid. equipment-grounding terminal or lead on the appliance. - Page 29 us_main.book.book Page 28 Thursday, October 13, 2022 8:55 AM 28 INSTALLATION Four-Wire Power Cord Reinstall the terminal block access cover. • A UL-listed strain relief is required. • Use a 30-amp, 240-volt, 4-wire, UL-listed power cord with #10 AWG-minimum copper conductor and closed loop or forked terminals with upturned ends.
- Page 30 us_main.book.book Page 29 Thursday, October 13, 2022 8:55 AM INSTALLATION Install UL-listed strain relief into the power Power Cord Ground Wire cord through-hole. Ground Screw Thread the 4-wire #10 AWG minimum copper power cable prepared in step 1 through the Three-Wire Power Cord strain relief.
-
Page 31: Connecting The Water Inlet Hose (Steam Models)
us_main.book.book Page 30 Thursday, October 13, 2022 8:55 AM 30 INSTALLATION Reinstall the terminal block access cover. Terminal block UL-listed strain relief White Wire from Dryer Harness UL-listed 3-wire power cord Hot Leads of Power Cord (Black and Red) Attach the two hot leads (black and red) of the Neutral Wire (White) power cord to the outer terminal block External Ground Wire (if required by local... - Page 32 Old hoses could leak or burst causing flooding and property 1) Connect the straight end of the long damage. Contact an LG Customer Information hose to the cold water faucet. Center for assistance in buying hoses.
-
Page 33: Final Installation Check
us_main.book.book Page 32 Thursday, October 13, 2022 8:55 AM 32 INSTALLATION Final Installation Check NOTE Once you have completed the installation of the • Before connecting the water line to the dryer, dryer and it is in its final location, confirm proper flush several gallons of water into a drain or operation with the following tests. - Page 34 us_main.book.book Page 33 Thursday, October 13, 2022 8:55 AM INSTALLATION performed to alert you to any serious problems in the exhaust system of your home. • Your appliance features Flow Sense , an innovative sensing system that automatically detects blockages and restrictions in dryer ductwork.
- Page 35 us_main.book.book Page 34 Thursday, October 13, 2022 8:55 AM 34 INSTALLATION NOTE Excess or crushed Too many elbows or transition duct exhaust too long • Do not interrupt the test cycle, as this could result in inaccurate results. • Even if no bars are displayed during the test cycle, some restrictions may still be present in the exhaust system.
-
Page 36: Operation
us_main.book.book Page 35 Thursday, October 13, 2022 8:55 AM OPERATION OPERATION Before Use WARNING • To reduce the risk of fire, electric shock, or injury to persons, read the IMPORTANT SAFETY INSTRUCTIONS before operating this appliance. Operation Overview Adjust Settings Default settings for the selected cycle can now be changed, if desired, using the cycle Clean the Lint Filter... -
Page 37: Loading The Dryer
• Damp clothes will expand as they dry. Do not overload the dryer; clothes require room to tumble and dry properly. Additional Operation Information The complete owner’s manual can be found on the LG website at: http://gscs-manual.lge.com/ Total/DFZ/NA/DR/TD/main.html or by scanning the QR code. -
Page 38: Options And Extra Functions
us_main.book.book Page 37 Thursday, October 13, 2022 8:55 AM OPERATION Options and Extra Functions Your dryer includes several additional cycle options to customize cycles to meet your individual needs. Select the desired option after selecting the desired cycle and settings. NOTE •... -
Page 39: Smart Functions
• Remote Control - Control the appliance remotely or check to see how much time is left in the cycle from the LG ThinQ application. NOTE • Once the remote control feature is enabled, you can start a cycle from the LG ThinQ application. - Page 40 • The appliance supports 2.4 GHz Wi-Fi networks only. To check your network frequency, contact your Internet service provider or refer to your Start a cycle from the LG ThinQ application on wireless router manual. your smartphone. • LG ThinQ is not responsible for any network...
-
Page 41: Smart Diagnosis Tm Function
If this equipment does opensource.lge.com. cause harmful interference to radio or television LG Electronics will also provide open source code reception, which can be determined by turning the to you on CD-ROM for a charge covering the cost... - Page 42 Page 41 Thursday, October 13, 2022 8:55 AM SMART FUNCTIONS • Launch the LG ThinQ application and select the Smart Diagnosis feature in the menu. Follow the instructions provided in the LG ThinQ application. Using Audible Diagnosis to Diagnose Issues Follow the instructions below to use the audible diagnosis method.
-
Page 43: Maintenance
us_main.book.book Page 42 Thursday, October 13, 2022 8:55 AM 42 MAINTENANCE MAINTENANCE WARNING • Unplug the appliance before cleaning. • Never use harsh chemicals, abrasive cleaners, or solvents to clean the appliance. They will damage the finish. Regular Cleaning Cleaning the Lint Filter Always clean the lint from the filter after every Cleaning the Exterior cycle. - Page 44 us_main.book.book Page 43 Thursday, October 13, 2022 8:55 AM MAINTENANCE filter in warm, soapy water and allow it to dry thoroughly before reinstalling. NOTE • NEVER operate the appliance without the lint filter in place.
-
Page 45: Troubleshooting
Scan this QR code to quickly access the video search page on the offical LG website. On the lg.com/us home page, click on the Support menu tab to bring up the menu selections. Select Video Tutorials. Type Dryer in the search box on the new page and click the Search button. -
Page 46: Before Calling For Service
us_main.book.book Page 45 Thursday, October 13, 2022 8:55 AM TROUBLESHOOTING Before Calling for Service The dryer is equipped with an automatic error-monitoring system to detect and diagnose problems at an early stage. If the dryer does not function properly or does not function at all, check the following before you call for service. - Page 47 us_main.book.book Page 46 Thursday, October 13, 2022 8:55 AM 46 TROUBLESHOOTING Problem Possible Cause & Solution The Flow Sense ( After clearing the restrictions, the Flow Sense ( ) system requires multiple, indicator remains consecutive cycles to determine that the performance value has improved before the active after clearing Flow Sense ( ) indicator is reset.
- Page 48 us_main.book.book Page 47 Thursday, October 13, 2022 8:55 AM TROUBLESHOOTING Problem Possible Cause & Solution Appliance runs and This is how the Wrinkle Care option works. pauses by itself after • Make sure that the Wrinkle Care option has been set. The option is designed to prevent the drying cycle creases that are formed when the clothes are not unloaded promptly after the drying finishes.
- Page 49 us_main.book.book Page 48 Thursday, October 13, 2022 8:55 AM 48 TROUBLESHOOTING Problem Possible Cause & Solution Excess static in Fabric softener is not used or is used incorrectly. clothes after drying. • Use a fabric softener or the Reduce Static option, if available, to reduce static electricity. Be sure to follow the manufacturer’s instructions.
- Page 50 us_main.book.book Page 49 Thursday, October 13, 2022 8:55 AM TROUBLESHOOTING Problem Possible Cause & Solution Drum does not turn This is normal. during Steam Cycle. • The drum is turned off so that the steam vapor remains in the drum. The drum will normally turn for about 2 seconds once a minute.
- Page 51 During Wi-Fi setup, the app is requesting a password to connect to the product (on appliance and certain phones). smartphone to Wi-Fi • Locate the network name which starts with "LG" under Settings > Networks. Note the last network. part of the network name. - If the network name looks like LGE_Appliance_XX-XX-XX, enter lge12345.
-
Page 52: Warranty
Should your LG Dryer (“Product”) fail due to a defect in materials or workmanship under normal and proper use, during the warranty period set forth below, LG will, at its option, repair or replace the Product. This limited warranty is valid only to the original retail purchaser of the Product (“You”) and applies only when purchased lawfully and used within the United States including U.S. - Page 53 Notice of Dispute. In the event you intend to commence an arbitration proceeding, you must first notify LG in writing at least 30 days in advance of initiating the arbitration by sending a letter to LG at LG Electronics, USA, Inc. Attn: Legal Department-Arbitration 111 Sylvan Avenue, Englewood Cliffs, NJ 07632.
- Page 54 If you and LG are unable to resolve the dispute within 30 days, either party may proceed to file a claim for arbitration.
- Page 55 Page 54 Thursday, October 13, 2022 8:55 AM 54 WARRANTY www.lg.com/us/support/repair-service/schedule-repair-continued and clicking on “Find My Model & Serial Number”). You may only opt out of the dispute resolution procedure in the manner described above (that is, by e-mail or telephone);...
- Page 56 Para ver el manual del propietario completo, puede 1. Manual en línea: visite el sitio web de LG en: http://gscs-manual.lge. com/Total/HQ/GatewayPage/main.html o escanee el código QR que se encuentra en la parte superior; o 2.
- Page 57 Revisión final de la instalación 40 FUNCIONAMIENTO Antes de utilizarlo Carga de la secadora Opciones y funciones adicionales 43 FUNCIONES INTELIGENTES Aplicación LG ThinQ Función Smart Diagnosis 47 MANTENIMIENTO Limpieza regular 49 SOLUCIÓN DE PROBLEMAS Preguntas frecuentes Antes de llamar al servicio técnico 56 GARANTÍA...
- Page 58 ls_main.book.book Page 3 Thursday, October 13, 2022 8:59 AM INSTRUCCIONES IMPORTANTES DE SEGURIDAD INSTRUCCIONES IMPORTANTES DE SEGURIDAD LEA TODAS LAS INSTRUCCIONES ANTES DE UTILIZAR Medidas de seguridad para una Secadora ADVERTENCIA Peligro de incendio No seguir exactamente las advertencias de seguridad podría provocar lesiones graves, la muerte o daños a la propiedad.
- Page 59 ls_main.book.book Page 4 Thursday, October 13, 2022 8:59 AM INSTRUCCIONES IMPORTANTES DE SEGURIDAD ADVERTENCIA Riesgo de incendio Instale la secadora de ropa de acuerdo con las instrucciones del fabricante y los códigos locales. La instalación de la secadora de ropa debe ser realizada por un técnico •...
- Page 60 ls_main.book.book Page 5 Thursday, October 13, 2022 8:59 AM INSTRUCCIONES IMPORTANTES DE SEGURIDAD • Antes de ser utilizado, este artefacto debe ser correctamente instalado, conforme a lo descrito en este manual. • Debe conectarse a un circuito de alimentación de clasificación y tamaño adecuados y debidamente protegido para evitar la sobrecarga eléctrica.
- Page 61 • Si detecta un sonido extraño, olor a quemado o a químico, o humo provenientes del artefacto, desconéctelo de inmediato y contáctese con un Centro de Información al Cliente de LG Electronics. • Nunca desconecte el artefacto tirando del cable de alimentación. Sujete siempre con firmeza el enchufe y tire derecho para extraerlo del tomacorriente.
- Page 62 ls_main.book.book Page 7 Thursday, October 13, 2022 8:59 AM INSTRUCCIONES IMPORTANTES DE SEGURIDAD • No guarde plásticos, papel o ropa que puedan quemarse o derretirse sobre la secadora en funcionamiento. • Los aparatos de gas pueden causar una exposición leve a cuatro de estas sustancias, a saber, benceno, monóxido de carbono, formaldehído y hollín, generado principalmente por la combustión parcial del gas natural o combustibles licuados del petróleo.
- Page 63 ls_main.book.book Page 8 Thursday, October 13, 2022 8:59 AM INSTRUCCIONES IMPORTANTES DE SEGURIDAD • El artefacto debe estar conectado a tierra. En caso de funcionamiento defectuoso o avería, la conexión a tierra reduce el riesgo de choque eléctrico al establecer una ruta de menor resistencia para la corriente eléctrica.
- Page 64 ls_main.book.book Page 9 Thursday, October 13, 2022 8:59 AM DESCRIPCIÓN GENERAL DEL PRODUCTO DESCRIPCIÓN GENERAL DEL PRODUCTO Características del producto Las ilustraciones en esta guía pueden diferir de los componentes y accesorios reales, los cuales están sujetos a cambios sin previo aviso por parte del fabricante a fin de introducir mejoras en el producto. Vista frontal Panel de control Filtros de pelusa...
- Page 65 ls_main.book.book Page 10 Thursday, October 13, 2022 8:59 AM 10 DESCRIPCIÓN GENERAL DEL PRODUCTO Conexión de mangueras de entradas de agua (para modelos de vapor) Salida del conducto de escape Especificaciones del producto DLEX7**0*E / DLEX7600*E / Modelo DLGX7**1*E DLGX7601*E Descripción Secadora a vapor Consulte la etiqueta de datos de servicio para más...
- Page 66 ls_main.book.book Page 11 Thursday, October 13, 2022 8:59 AM DESCRIPCIÓN GENERAL DEL PRODUCTO DLE7300*E / DLE7**0* / DLG7301*E / DLE7200*E / Modelo DLG7**1* DLE7400*E / DLG7201*E DLG7401*E Descripción Secadora sin función de vapor Requisitos eléctricos Consulte la etiqueta de datos de servicio para más información. Dimensiones (Ancho x Profundidad x 27'' X 29 1/2'' X 44 1/2'' (68.6 cm X 75.0 cm X 113.0 cm) Altura)
- Page 67 ls_main.book.book Page 12 Thursday, October 13, 2022 8:59 AM 12 DESCRIPCIÓN GENERAL DEL PRODUCTO NOTA • Para su seguridad y con el fin de ampliar la vida útil del producto, utilice solo componentes autorizados. El fabricante no es responsable del mal funcionamiento del producto ni de accidentes causados por el uso de componentes o piezas no autorizados.
- Page 68 ls_main.book.book Page 13 Thursday, October 13, 2022 8:59 AM INSTALACIÓN INSTALACIÓN Antes de la instalación Descripción general de la instalación Lea las siguientes instrucciones de instalación inmediatamente después de adquirir esta secadora o transportarla a otra ubicación. Elección de la ubicación adecuada. Nivelación del artefacto.
- Page 69 ls_main.book.book Page 14 Thursday, October 13, 2022 8:59 AM 14 INSTALACIÓN Elección de la ubicación funcionar correctamente si el artefacto no está nivelado. adecuada • Para la instalación en un garaje, deberá colocar el artefacto un mínimo de 18 pulgadas (45.7 cm) ADVERTENCIA por encima del suelo.
- Page 70 ls_main.book.book Page 15 Thursday, October 13, 2022 8:59 AM INSTALACIÓN Dimensiones y espacios Se recomiendan los siguientes espacios libres para el artefacto. • Se debe considerar dejar espacios libres adicionales para facilitar las tareas de instalación y mantenimiento. • Se debe considerar dejar espacios libres adicionales en todos los lados de la secadora para reducir la transferencia de ruido.
- Page 71 ls_main.book.book Page 16 Thursday, October 13, 2022 8:59 AM 16 INSTALACIÓN NOTA • Se debe dejar al menos un pequeño espacio alrededor de la secadora (o de cualquier otro aparato) para eliminar la transferencia de vibración de un aparato a otro. Si hubiera bastante vibración, los aparatos podrían hacer ruido o tocarse, con el consecuente deterioro de la pintura y el incremento del ruido.
- Page 72 ls_main.book.book Page 17 Thursday, October 13, 2022 8:59 AM INSTALACIÓN Nivelación del cuatro patas niveladoras se encuentran haciendo contacto firme con el piso. electrodoméstico ADVERTENCIA • Use guantes con mangas largas y gafas de seguridad. • El electrodoméstico es pesado. Se necesitan dos NOTA o más personas para su instalación.
- Page 73 ls_main.book.book Page 18 Thursday, October 13, 2022 8:59 AM 18 INSTALACIÓN de no dañar la pintura. Rote la cubierta de ADVERTENCIA la bisagra en 180 grados e instálela en el lado contrario , donde se encontraba • Asegúrese de sostener el peso de la puerta antes adjunta la bisagra.
- Page 74 ls_main.book.book Page 19 Thursday, October 13, 2022 8:59 AM INSTALACIÓN 1) Utilice un destornillador Phillips para remover los dos tornillos y el mecanismo de cierre en el panel frontal del • Mientras sostiene la puerta, instale los cuatro tornillos de la bisagra removidos en gabinete.
- Page 75 ls_main.book.book Page 20 Thursday, October 13, 2022 8:59 AM 20 INSTALACIÓN PRECAUCIÓN ADVERTENCIA • NO remueva ninguno de los ocho tornillos de la • Los bordes de la cubierta de la puerta pueden superficie del gabinete (marcados debajo). De ser afilados. Tenga cuidado con su manejo, o hacerlo, podría dañar la secadora y requerir utilice guantes para evitar cualquier lesión.
- Page 76 ls_main.book.book Page 21 Thursday, October 13, 2022 8:59 AM INSTALACIÓN predeterminada para una oscilación sobre 2) Mientras desliza el eslabón hacia la la bisagra derecha. Luego de haber seguido derecha, levante el extremo derecho y estas instrucciones, su puerta debería verse retírelo de las guías.
- Page 77 ls_main.book.book Page 22 Thursday, October 13, 2022 8:59 AM 22 INSTALACIÓN Revierta el soporte de la bisagra inferior el ensamble de la bisagra 1) Remueva el tornillo del soporte de la bisagra inferior (a la derecha) y retire el soporte de la bisagra. Colóquelo a un lado.
- Page 78 ls_main.book.book Page 23 Thursday, October 13, 2022 8:59 AM INSTALACIÓN con el tornillo removido en el paso Asegúrese de que los tres botones de anterior. entrelazado grises se encuentren instalados correctamente y que los eslabones superiores y adjuntos estén correctamente alineados donde estos hagan contacto.
- Page 79 ls_main.book.book Page 24 Thursday, October 13, 2022 8:59 AM 24 INSTALACIÓN ※ Un diagrama detallado que le permitirá identificar la estructura interna y las partes de la puerta Botones de Relleno de la bisagra Eslabón adjunto Eslabón superior entrelazado inferior Soporte de la bisagra Ensamble de la Eslabones interiores...
- Page 80 NOTA secadora. • Puede adquirir un kit adaptador, número de pieza 383EEL9001B, de su distribuidor LG. Este kit contiene los componentes de conducto necesarios para cambiar la ubicación de la ventilación del artefacto.
- Page 81 ls_main.book.book Page 26 Thursday, October 13, 2022 8:59 AM 26 INSTALACIÓN macho del codo apunte hacia FUERA de la secadora. Inserte el ensamblaje del codo/ conducto a través de la abertura lateral e introdúzcalo a presión en el conducto adaptador. Asegúrelo en su lugar con cinta adhesiva para conductos.
- Page 82 ls_main.book.book Page 27 Thursday, October 13, 2022 8:59 AM INSTALACIÓN Ventilación de la secadora ADVERTENCIA • Las secadoras de gas DEBEN tener escape al exterior. • Para reducir el riesgo de incendio, combustión o acumulación de gases combustibles, NO dirija el escape de la secadora hacia un área cerrada o Ajuste el soporte lateral al lado de la no ventilada, como desvanes, muros, cielos...
- Page 83 ls_main.book.book Page 28 Thursday, October 13, 2022 8:59 AM 28 INSTALACIÓN necesarios en su localidad. La campana de • Use conductos metálicos rígidos, semirrígidos o ventilación deberá tener reguladores de tiro con flexibles de 4 pulgadas (10,2 cm) de diámetro. bisagras para prevenir una contracorriente de •...
- Page 84 ls_main.book.book Page 29 Thursday, October 13, 2022 8:59 AM INSTALACIÓN aparato, siga los requisitos de los siguientes suministro rígido de gas para su secadora. En los puntos: Estados Unidos, una válvula de cierre manual individual DEBE ser instalada a menos de 6 pies (1,8 m) de la secadora, de acuerdo con el Código Requisitos eléctricos para modelos de Gas de Combustión Nacional ANSI Z223.1 o el...
- Page 85 ls_main.book.book Page 30 Thursday, October 13, 2022 8:59 AM 30 INSTALACIÓN • Se debe instalar una válvula de corte de gas a una distancia máxima de 6 pies (1,8 m) de la secadora. • Si es necesario, un técnico calificado debe instalar la boquilla correcta y el cambio debe verse en la secadora.
- Page 86 ls_main.book.book Page 31 Thursday, October 13, 2022 8:59 AM INSTALACIÓN conexión a tierra o se debe tender un conductor cable de 4 conductores o si se prohíbe la para la conexión a tierra del equipo con los conexión a tierra a través del conductor neutro. conductores del circuito y se debe conectar al terminal o al cable de tierra del artefacto.
- Page 87 ls_main.book.book Page 32 Thursday, October 13, 2022 8:59 AM 32 INSTALACIÓN Conecte los dos conductores vivos (negro y aislamiento del cable de conexión a tierra. rojo) del cable de alimentación a los tornillos Corte aproximadamente 1.5 pulgadas exteriores del bloque de bornes. (3.8 cm) de los otros tres cables y quite 1 pulgada (2.5 cm) del material aislante de cada uno.
- Page 88 ls_main.book.book Page 33 Thursday, October 13, 2022 8:59 AM INSTALACIÓN Conecte el alambre de conexión a tierra del Pase un cable de alimentación de cable de alimentación al tornillo de conexión a 30 amperios, 240 voltios, de 3 hilos tierra de color verde. homologado por UL con un conductor de cobre N.°...
- Page 89 ls_main.book.book Page 34 Thursday, October 13, 2022 8:59 AM 34 INSTALACIÓN Conecte los dos conductores vivos (negro y Tornillo de conexión a tierra rojo) del cable de alimentación a los tornillos exteriores del bloque de bornes. Conexión directa de tres hilos Conecte el alambre neutro (blanco) al tornillo •...
- Page 90 Conecte todas las a la propiedad. Contacte al Centro de mangueras de suministro de agua Información al Cliente de LG para asistencia en manualmente y, luego, utilice unas pinzas la compra de mangueras. para ajustarlas otros 2/3 de vuelta.
- Page 91 ls_main.book.book Page 36 Thursday, October 13, 2022 8:59 AM 36 INSTALACIÓN Revisión final de la NOTA instalación • Antes de conectar la línea de agua a la secadora, descargue varios galones de agua en el drenaje Una vez que haya completado la instalación de la o en un balde.
- Page 92 ls_main.book.book Page 37 Thursday, October 13, 2022 8:59 AM INSTALACIÓN Revisión de nivelado de Arrugas) y luego presione el botón Encendido/Apagado. (DLE7**0* / DLG7**1*) Una vez que la secadora se encuentre en su • Esta secuencia de botones activa la prueba ubicación definitiva, vuelva a revisar que esté...
- Page 93 ls_main.book.book Page 38 Thursday, October 13, 2022 8:59 AM 38 INSTALACIÓN Verifique las condiciones del conducto Código Si el LED de Flow Sense está encendido, revise el Causas posibles y solución error sistema de escape para verificar que no haya restricciones ni daños.
- Page 94 ls_main.book.book Page 39 Thursday, October 13, 2022 8:59 AM INSTALACIÓN Compruebe la presencia de bloqueos y acumulación de pelusa. Asegúrese de que los conductos no estén aplastados ni restringidos.
- Page 95 ls_main.book.book Page 40 Thursday, October 13, 2022 8:59 AM 40 FUNCIONAMIENTO FUNCIONAMIENTO Antes de utilizarlo ADVERTENCIA • Para reducir el riesgo de incendios, descargas eléctricas o lesiones a las personas, lea las IMPORTANT SAFETY INSTRUCTIONS (IMPORTANTES INSTRUCCIONES DE SEGURIDAD) antes de operar este artefacto.
- Page 96 • Las prendas húmedas se expandirán cuando se sequen. No sobrecargue la secadora; las prendas necesitan espacio para girar y secarse adecuadamente. Información adicional de la operación El manual del propietario completo se puede encontrar en el sitio web de LG en: http://gscs-...
- Page 97 ls_main.book.book Page 42 Thursday, October 13, 2022 8:59 AM 42 FUNCIONAMIENTO Opciones y funciones adicionales Su secadora incluye varias opciones de ciclos adicionales para personalizarlos de modo que cumplan con sus necesidades. Seleccione la opción deseada después de elegir el ciclo y los ajustes que prefiere.
- Page 98 • Una vez que la función de control remoto esté habilitada, puede iniciar un ciclo desde la aplicación LG ThinQ. Si el ciclo no se inicia, el artefacto esperará a iniciarlo hasta que el producto se apague de forma remota o hasta 전기...
- Page 99 NOTA de nuevo. • Es posible que se le pida que proporcione una contraseña para conectarse a la red de LG (no a su red doméstica) durante la configuración de Wi-Fi. La contraseña son los últimos 4 caracteres Uso remoto del electrodoméstico del nombre de la red, repetido dos veces, sin espacios.
- Page 100 /opensource.lge.com. comunicaciones por radio. Sin embargo, no se LG Electronics también le proporcionará el código garantiza que dicha interferencia no pueda ocurrir abierto en un CD-ROM por un costo que cubra los en instalaciones particulares. Si este equipo causa gastos de dicha distribución (como el costo del...
- Page 101 LG ThinQ. • Inicie la aplicación LG ThinQ y seleccione la función Smart Diagnosis en el menú. Siga las instrucciones provistas en la aplicación LG ThinQ.
- Page 102 ls_main.book.book Page 47 Thursday, October 13, 2022 8:59 AM MANTENIMIENTO MANTENIMIENTO ADVERTENCIA • Desenchufe el electrodoméstico antes de limpiarlo. • Nunca utilice productos químicos agresivos, limpiadores abrasivos ni solventes para limpiar el electrodoméstico. Estos productos arruinarán el acabado. Limpieza regular del flujo de aire o desempeño de secado, revise los conductos de inmediato para verificar que no estén bloqueados ni tengan obstrucciones y llame...
- Page 103 ls_main.book.book Page 48 Thursday, October 13, 2022 8:59 AM 48 MANTENIMIENTO Si el filtro de pelusa se ha ensuciado mucho o se ha obstruido con suavizante de ropa, lávelo en agua tibia jabonosa y déjelo secar completamente antes de volver a colocarlo. NOTA •...
- Page 104 Escanee este código QR para acceder rápidamente a la página de búsqueda de videos en el sitio web de En la página de inicio de lg.com/us, haga clic en la pestaña del menú Soporte para ver las selecciones del menú. Seleccione Video Tutorials.
- Page 105 ls_main.book.book Page 50 Thursday, October 13, 2022 8:59 AM 50 SOLUCIÓN DE PROBLEMAS Antes de llamar al servicio técnico La secadora está equipada con un sistema de monitoreo de errores automático para la detección y el diagnóstico de problemas en una etapa temprana. Si la secadora no funciona correctamente o no funciona en absoluto, consulte la siguiente información antes de llamar al servicio técnico.
- Page 106 ls_main.book.book Page 51 Thursday, October 13, 2022 8:59 AM SOLUCIÓN DE PROBLEMAS Problemas Causas posibles y solución El indicador Flow El aparato ha detectado una obstrucción en la ventilación exterior de la secadora. Sense ( ) muestra • Si el sistema Flow Sense detecta restricciones en el escape, el indicador permanecerá cuatro barras encendido durante 2 horas después del fin del ciclo.
- Page 107 ls_main.book.book Page 52 Thursday, October 13, 2022 8:59 AM 52 SOLUCIÓN DE PROBLEMAS Problemas Causas posibles y solución La ropa tarda El artefacto está infracargado. demasiado tiempo • Si está secando una carga muy pequeña, añada algunas prendas adicionales para en secarse.
- Page 108 ls_main.book.book Page 53 Thursday, October 13, 2022 8:59 AM SOLUCIÓN DE PROBLEMAS Problemas Causas posibles y solución Pelusa en las La ropa no se clasificó correctamente. prendas. • Algunos tejidos producen pelusas (p. ej.: una toalla de algodón peluda blanca) y deben secarse separadas de prendas que atrapen pelusa (p.
- Page 109 ls_main.book.book Page 54 Thursday, October 13, 2022 8:59 AM 54 SOLUCIÓN DE PROBLEMAS Problemas Causas posibles y solución Las prendas aún Demasiadas prendas o diferentes tipos de prendas dentro de la secadora. están arrugadas • Las cargas pequeñas de 1 a 5 prendas funcionan mejor. Cargue menos prendas. Cargue después de la tipos de prendas similares.
- Page 110 Durante la configuración de Wi-Fi, la aplicación solicita una contraseña para conectarse al producto (en algunos teléfonos). • Ubique el nombre de la red que comienza con "LG" dentro de Ajustes > Redes. Anote la última parte del nombre de la red.
- Page 111 FAVOR, VEA A CONTINUACIÓN LA SECCIÓN TITULADA “PROCEDIMIENTO PARA RESOLVER CONFLICTOS”. Si su secadora LG (“Producto”) fallara debido a defectos de materiales o de fabricación en el uso doméstico normal y correcto, durante el período de garantía que se establece a continuación, LG tendrá la opción de reparar o reemplazar el Producto.
- Page 112 • Daños o fallos del producto causados por accidentes, pestes y alimañas, rayos, viento, incendio, inundaciones o hechos de fuerza mayor o cualquier otra causa ajena al control de LG. • Daños o fallos del Producto causados por modificaciones o alteraciones no autorizadas, o por utilizar el Producto para fines distintos de lo previsto, o pérdida de agua cuando el Producto no se instaló...
- Page 113 Aviso de disputa. En caso de que usted desee iniciar un procedimiento de arbitraje, primero debe notificar a LG por escrito al menos 30 días antes de iniciar el arbitraje enviando una carta a LG a LG Electronics, USA, Inc. Atención: Legal Department- Arbitration 111 Sylvan Avenue, Englewood Cliffs, NJ 07632.
- Page 114 LG pueden solicitar al otro que participe en un procedimiento de arbitraje. Para excluirse usted debe enviar una notificación a LG, en un lapso de hasta 30 días continuos, contados a partir de la fecha de la primera compra del consumidor del producto, ya sea por: (i) el envío de un correo electrónico a optout@lge.com con el siguiente Asunto: “Exclusión del arbitraje”...
- Page 115 ls_main.book.book Page 60 Thursday, October 13, 2022 8:59 AM 60 Memorándum...
- Page 116 ls_main.book.book Page 61 Thursday, October 13, 2022 8:59 AM Memorándum...
- Page 117 Page 62 Thursday, October 13, 2022 8:59 AM LG Customer Information Center For inquiries or comments, visit www.lg.com or call: U.S.A. 1-800-243-0000 1-888-542-2623 CANADA Register your product Online! www.lg.com...